2000 FORD F150 ABS
[x] Cancel search: ABSPage 228 of 280
²Avoid inhaling fuel vapors. Inhaling too much fuel vapor of any kind
can lead to eye and respiratory tract irritation. In severe cases,
excessive or prolonged breathing of fuel vapor can cause serious
illness and permanent injury.
²Avoid getting fuel liquid in your eyes. If fuel is splashed in the eyes,
remove contact lenses (if worn), flush with water for 15 minutes and
seek medical attention. Failure to seek proper medical attention could
lead to permanent injury.
²Fuels can also be harmful if absorbed through the skin. If fuel is
splashed on the skin and/or clothing, promptly remove contaminated
clothing and wash skin thoroughly with soap and water. Repeated or
prolonged skin contact with fuel liquid or vapor causes skin irritation.
²Be particularly careful if you are taking ªAntabuseº or other forms of
disulfiram for the treatment of alcoholism. Breathing gasoline vapors,
or skin contact could cause an adverse reaction. In sensitive
individuals, serious personal injury or sickness may result. If fuel is
splashed on the skin, promptly wash skin thoroughly with soap and
water. Consult a physician immediately if you experience an adverse
reaction.
When refueling always shut the engine off and never allow
sparks or open flames near the filler neck. Never smoke while
refueling. Fuel vapor is extremely hazardous under certain conditions.
Care should be taken to avoid inhaling excess fumes.
The flow of fuel through a fuel pump nozzle can produce static
electricity, which can cause a fire if fuel is pumped into an
ungrounded fuel container.
Use the following guidelines to avoid static build-up when filling an
ungrounded fuel container:
²Place approved fuel container on the ground.
²DO NOT fill a fuel container while it is in the vehicle.
²Keep the fuel pump nozzle in contact with the fuel container while
filling.
²DO NOT use a device that would hold the fuel pump handle in the fill
position.
Maintenance and care
228
Page 231 of 280
4. To install the cap, align the tabs on the cap with the notches on the
filler pipe.
5. Turn the filler cap clockwise 1/8 of a turn until it stops.
If the ªService Engine Soon/Check Engineº indicator comes on and stays
on after you start the engine, the fuel filler cap may not be properly
installed. Turn off the engine, remove the fuel filler cap, align the cap
properly and reinstall it.
If you must replace the fuel filler cap, replace it with a fuel filler
cap that is designed for your vehicle. The customer warranty may
be void for any damage to the fuel tank or fuel system if the
correct genuine Ford or Motorcraft fuel filler cap is not used.
The fuel system may be under pressure. If the fuel filler cap is
venting vapor or if you hear a hissing sound, wait until it stops
before completely removing the fuel filler cap. Otherwise, fuel may
spray out and injure you or others.
If you do not use the proper fuel filler cap, excessive pressure or
vacuum in the fuel tank may damage the fuel system or cause
the fuel cap to disengage in a collision, which may result in possible
personal injury.
Fuel Filter
For fuel filter replacement, see your dealer or a qualified service
technician. Refer to the scheduled maintenance guide for the appropriate
intervals for changing the fuel filter.
Replace the fuel filter with an authorized Motorcraft part. The
customer warranty may be void for any damage to the fuel system
if an authorized Motorcraft fuel filter is not used.
ESSENTIALS OF GOOD FUEL ECONOMY
Measuring techniques
Your best source of information about actual fuel economy is you, the
driver. You must gather information as accurately and consistently as
possible. Fuel expense, frequency of fillups or fuel gauge readings are
NOT accurate as a measure of fuel economy. We do not recommend
taking fuel economy measurements during the first 1 600 km (1 000
miles) of driving (engine break-in period). You will get a more accurate
measurement after 3 000 km±5 000 km (2 000 miles-3 000 miles).
Maintenance and care
231
Page 240 of 280
5. Pull bulb straight out of socket and press in the new bulb.
6. Carefully install the tail lamp assembly on tailgate pillar snapping the
two snap-in retainers into place. (Flare side tail lamps do not snap into
place but have two tabs which fit into slots.)
7. Secure the tail lamp on the vehicle with two bolts.
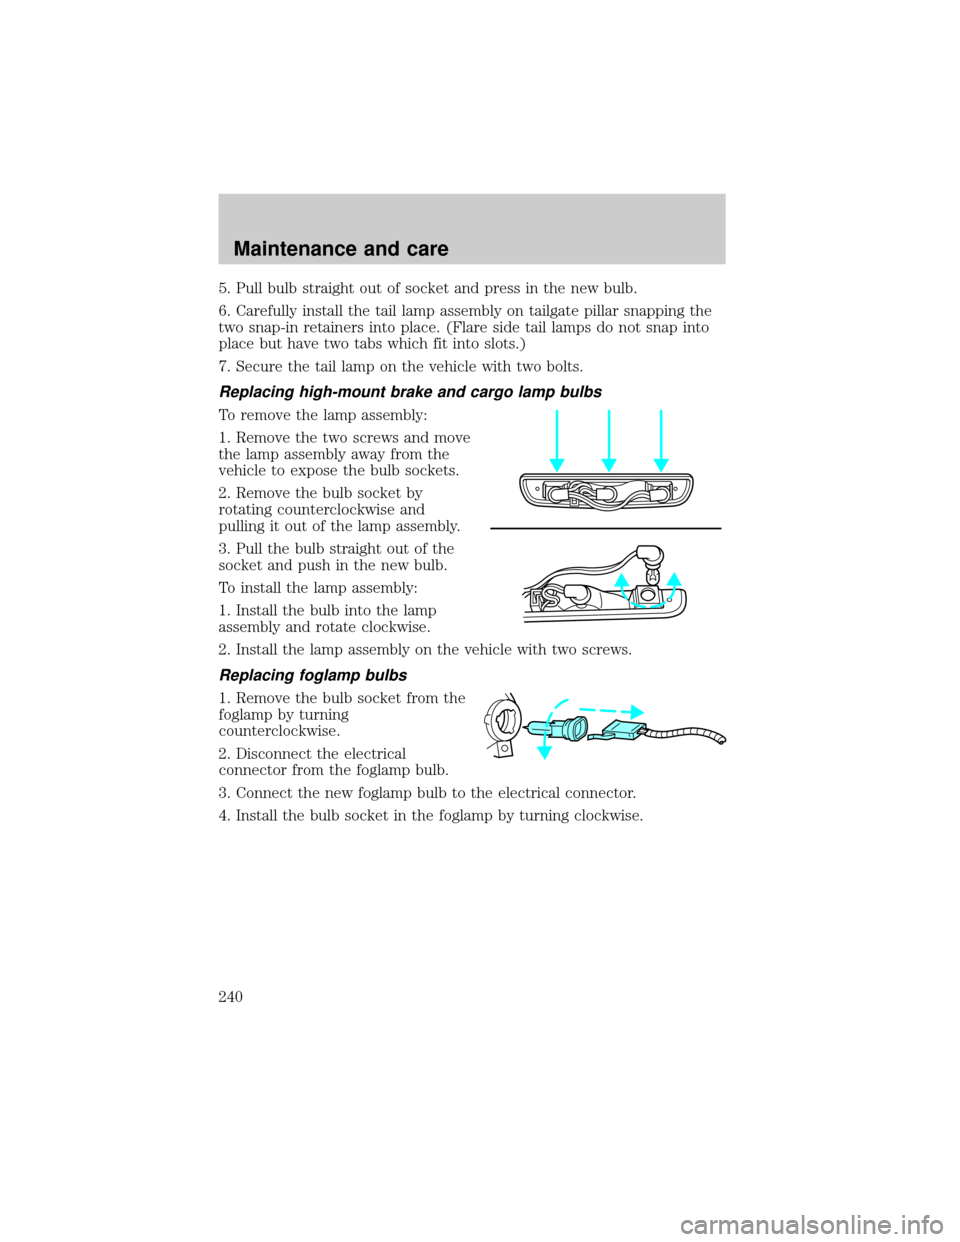
Replacing high-mount brake and cargo lamp bulbs
To remove the lamp assembly:
1. Remove the two screws and move
the lamp assembly away from the
vehicle to expose the bulb sockets.
2. Remove the bulb socket by
rotating counterclockwise and
pulling it out of the lamp assembly.
3. Pull the bulb straight out of the
socket and push in the new bulb.
To install the lamp assembly:
1. Install the bulb into the lamp
assembly and rotate clockwise.
2. Install the lamp assembly on the vehicle with two screws.
Replacing foglamp bulbs
1. Remove the bulb socket from the
foglamp by turning
counterclockwise.
2. Disconnect the electrical
connector from the foglamp bulb.
3. Connect the new foglamp bulb to the electrical connector.
4. Install the bulb socket in the foglamp by turning clockwise.
Maintenance and care
240
Page 273 of 280
A
Accessory delay ..........................79
Air bag supplemental
restraint system ........................113
and child safety seats ............114
description ..............................113
disposal ....................................117
driver air bag ..........................115
indicator light ...................12, 116
operation .................................115
passenger air bag ...................115
passenger
deactivation switch ...........65, 117
Air cleaner filter .......220±221, 247
Air conditioning ..........................60
Ambulance packages ....................3
Antifreeze
(see Engine coolant) ................206
Anti-lock brake system
(see Brakes) ......................139±140
Anti-theft system
warning light .............................13
Armrests ....................................102
Audio system (see Radio) .........24
Automatic transmission ............144
driving an automatic
overdrive .................................145
fluid, adding ............................213
fluid, checking ........................213
fluid, refill capacities ..............248
fluid, specification ..................253
Auxiliary power point .................23
Axle
lubricant specifications ..251, 253
refill capacities ........................248
traction lok ..............................142B
Battery .......................................218
acid, treating emergencies .....218
charging system
warning light .............................13
jumping a disabled battery ....190
maintenance-free ....................218
replacement, specifications ...247
servicing ..................................218
voltage gauge ............................18
Belt minder ...............................108
Brakes ........................................138
anti-lock ...........................138±140
anti-lock brake system (ABS)
warning light .....................13, 140
brake warning light ..................12
fluid, checking and adding ....204
fluid, refill capacities ..............248
fluid, specifications .........251, 253
lubricant specifications ..251, 253
parking ....................................141
pedals (see Power
adjustable foot pedals) ............22
shift interlock ..........................144
Break-in period .............................3
C
Capacities for refilling fluids ....248
Cassette tape player ...................36
CD changer .................................54
Certification Label ....................257
Child safety restraints ..............122
child safety belts ....................122
Child safety seats ......................123
attaching with tether straps ..128
in front seat ............................125
in rear seat ......................125, 127
Index
273
Page 277 of 280
anti-lock brakes (ABS) ....13, 140
anti-theft ...................................13
brake ..........................................12
charging system ........................13
check coolant ............................14
cruise indicator .........................15
door ajar ....................................15
engine oil pressure ...................14
high beam .................................13
low fuel ......................................10
safety belt .................................12
service engine soon ..................11
speed control ............................71
turn signal indicator .................13
Load limits .................................160
GAWR ......................................160
GVWR ......................................160
trailer towing ..........................160
Loading instructions .................161
Locks
autolock .....................................91
Lubricant specifications ...251, 253
Lumbar support, seats .....100±101
M
Manual transmission .................147
fluid capacities ........................248
lubricant specifications ..........253
reverse .....................................152
Mirrors
automatic dimming
rearview mirror .........................77
fold away ...................................81
side view mirrors (power) .......80
Motorcraft parts ................231, 247O
Octane rating ............................229
Odometer .....................................17
Oil (see Engine oil) ..................200
Overdrive .....................................72
P
Panic alarm feature,
remote entry system ..................91
Parking brake ............................141
Parts (see Motorcraft parts) ....247
Pedals (see Power
adjustable foot pedals) ...............22
Power adjustable foot pedals .....22
Power distribution box
(see Fuses) ...............................182
Power door locks ..................79, 91
Power steering ..........................142
fluid, checking and adding ....212
fluid, refill capacity ................248
fluid, specifications .........251, 253
Preparing to
drive your vehicle .....................143
R
Radio ............................................24
Relays ........................................177
Remote entry system ...........89, 91
illuminated entry ......................94
locking/unlocking doors ...........90
panic alarm ...............................91
replacement/additional
transmitters .........................93±94
replacing the batteries .............92
Index
277