Page 185 of 296

Safety chains
Always connect the trailer's safety chains to the frame or hook retainers
of the vehicle. To connect the trailer's safety chains, cross the chains
under the trailer tongue and allow slack for turning corners.
If you use a rental trailer, follow the instructions that the rental agency
gives to you.
Do not attach safety chains to the bumper.
Trailer brakes
Electric brakes and manual, automatic or surge-type trailer brakes are
safe if installed properly and adjusted to the manufacturer's
specifications. The trailer brakes must meet local and Federal
regulations.
Do not connect a trailer's hydraulic brake system directly to your
vehicle's brake system. Your vehicle may not have enough
braking power and your chances of having a collision greatly increase.
The braking system of the tow vehicle is rated for operation at the
GVWR not GCWR.
Trailer lamps
Trailer lamps are required on most towed vehicles. Make sure your
trailer lamps conform to local and Federal regulations. See your dealer or
trailer rental agency for proper instructions and equipment for hooking
up trailer lamps.
Never connect any trailer lighting to the vehicle's taillamp
circuits, because it may damage the electrical system resulting in
fire. Contact your local Ford dealership for assistance in proper trailer
tow wiring installation. Additional electrical equipment may be
required.
Using a step bumper
The rear bumper is equipped with an integral hitch and requires only a
ball with a 19 mm (3/4 inch) shank diameter. The bumper has a 1 590 kg
(3 500 lb.) trailer weight and 159 kg (350 lb.) tongue weight capability.
Use a frame-mounted weight distributing hitch for trailers over 1 590 kg
(3 500 lb).
Driving
185
Page 190 of 296

Roadside coverage beyond basic warranty
In the United States, you may purchase additional roadside assistance
coverage beyond this period through the Ford Auto Club by contacting
your Ford or Lincoln Mercury dealer.
Similarly in Canada, you may purchase additional coverage beyond the
basic coverage period by consulting the Ford Roadside Assistance Club
brochure or by calling 1±877±294±CLUB (1±877±894±2582).
HAZARD FLASHER
Use only in an emergency to warn traffic of vehicle breakdown,
approaching danger, etc. The hazard flashers can be operated when the
ignition is off.
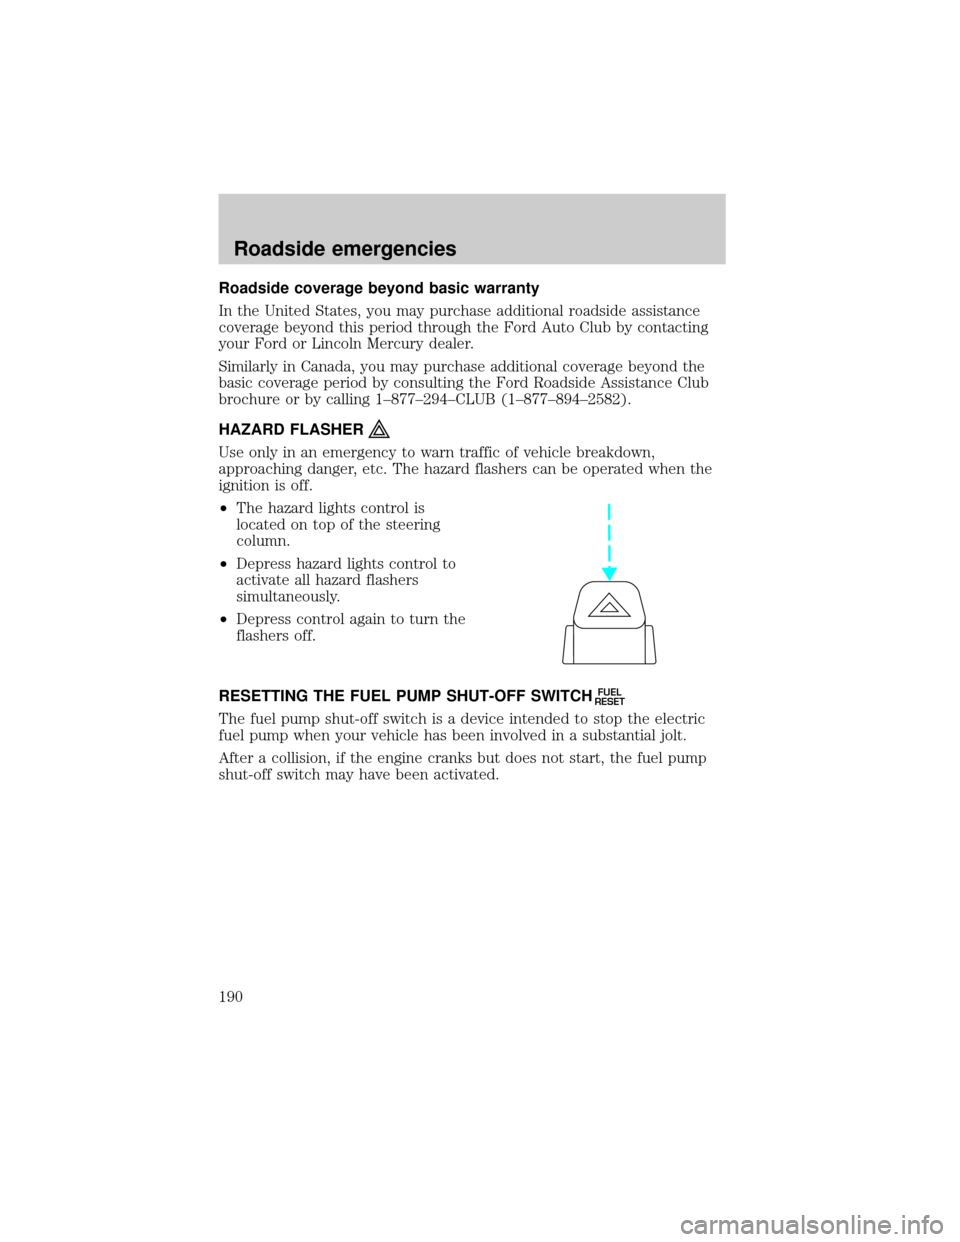
²The hazard lights control is
located on top of the steering
column.
²Depress hazard lights control to
activate all hazard flashers
simultaneously.
²Depress control again to turn the
flashers off.
RESETTING THE FUEL PUMP SHUT-OFF SWITCH
FUEL
RESET
The fuel pump shut-off switch is a device intended to stop the electric
fuel pump when your vehicle has been involved in a substantial jolt.
After a collision, if the engine cranks but does not start, the fuel pump
shut-off switch may have been activated.
Roadside emergencies
190
Page 195 of 296
Fuse/Relay
LocationFuse Amp
RatingPassenger Compartment Fuse
Panel Description
16 30A Windshield Wiper Motor, Wiper
Hi-Lo Relay, Wiper Run/Park
Relay
17 25A Cigar Lighter
18 25A Drivers Unlock Relay, All Unlock
Relay, All Lock Relay, Power Seats
19 25A PCM Power Diode
20 7.5A RAP Module, Generic Electronic
Module (GEM), Radio
21 15A Flasher (Hazard)
22 20A Auxiliary Power Socket
23 Ð Not Used
24 7.5A Clutch Pedal Position (CPP)
Switch, Starter Interrupt Relay,
Anti-Theft
25 7.5A Generic Electronic Module
(GEM), Instrument Cluster,
Securi-Lock
26 10A Battery Saver Relay, Electronic
Shift Relay, Interior Lamp Relay,
Electronic Shift Control Module
27 15A DRL, Backup Lamps Switch, DTR
Sensor, Electric Shift
28 7.5A Generic Electronic Module
(GEM), Radio, Memory Seat
29 25A Radio
30 15A Park Lamp/Trailer Tow Relay
31 Ð Not Used
32 10A Heated Mirror
33 15A Headlamps, Daytime Running
Lamps (DRL) Module, Instrument
Cluster
Roadside emergencies
195
Page 197 of 296
The high-current fuses are coded as follows:
Fuse/Relay
LocationFuse Amp
RatingPower Distribution Box
Description
1 60A** I/P Fuse Panel
2 40A** Blower Motor Relay
3 50A** 4 Wheel Anti-Lock Brake System
(4WABS) Module
4 30A** Power Windows, Power Moon
Roof, Power Seat
5 50A** Ignition Switch, Starter Relay
6 20A** Transfer Case Relay
7 Ð Not Used
8 20A** Air Suspension
9 40A** Air Suspension
10 30A** PCM Power Relay
1 10A* A/C Relay
2 30A* Heated Seats
3 30A* Heated Backlight
4 15A* Fog Lamps and Daytime Running
Lamps
5432110 9 8 7 612 11 10 9
876 5
432 1
14 15 13
211
9 6
10 87 5 41
2 3
175
MEGAFUSE
Roadside emergencies
197
Page 198 of 296
Fuse/Relay
LocationFuse Amp
RatingPower Distribution Box
Description
5 Ð Not Used
6 10A* Powertrain Control Module
7 30A* 4 Wheel Anti-Lock System
(4WABS) Module
8 15A* Rear Wiper Motor
9 20A* Fuel Pump Relay and RAP
Module
10 15A* Horn Relay
11 15A* Parklamps Relay and Mainlight
Switch
12 30A* Mainlight Switch and
Multifunction Switch
13 15A* Heated Oxygen Sensor, EGR
Vacuum Regulator, EVR Solenoid,
Camshaft Position (CMP) Sensor,
Canister Vent Solenoid
14 30A* Generator/Voltage Regulator
15 Ð Not Used
1 Ð Wiper Park Relay
2 Ð A/C Relay
3 Ð Wiper High/Low Relay
4 Ð PCM Power Relay
5 Ð Fuel Pump Relay
6 Ð Starter Relay
7 Ð Horn Relay
8 Ð Rear Wipe Down Relay
9 Ð Blower Motor Relay
10 Ð Rear Wipe Up Relay
1 Ð Not Used
1 Ð DRL Diode
2 Ð Electronic Engine Controls Diode
* Mini Fuses ** Maxi Fuses
Roadside emergencies
198
Page 200 of 296

Removing the spare tire
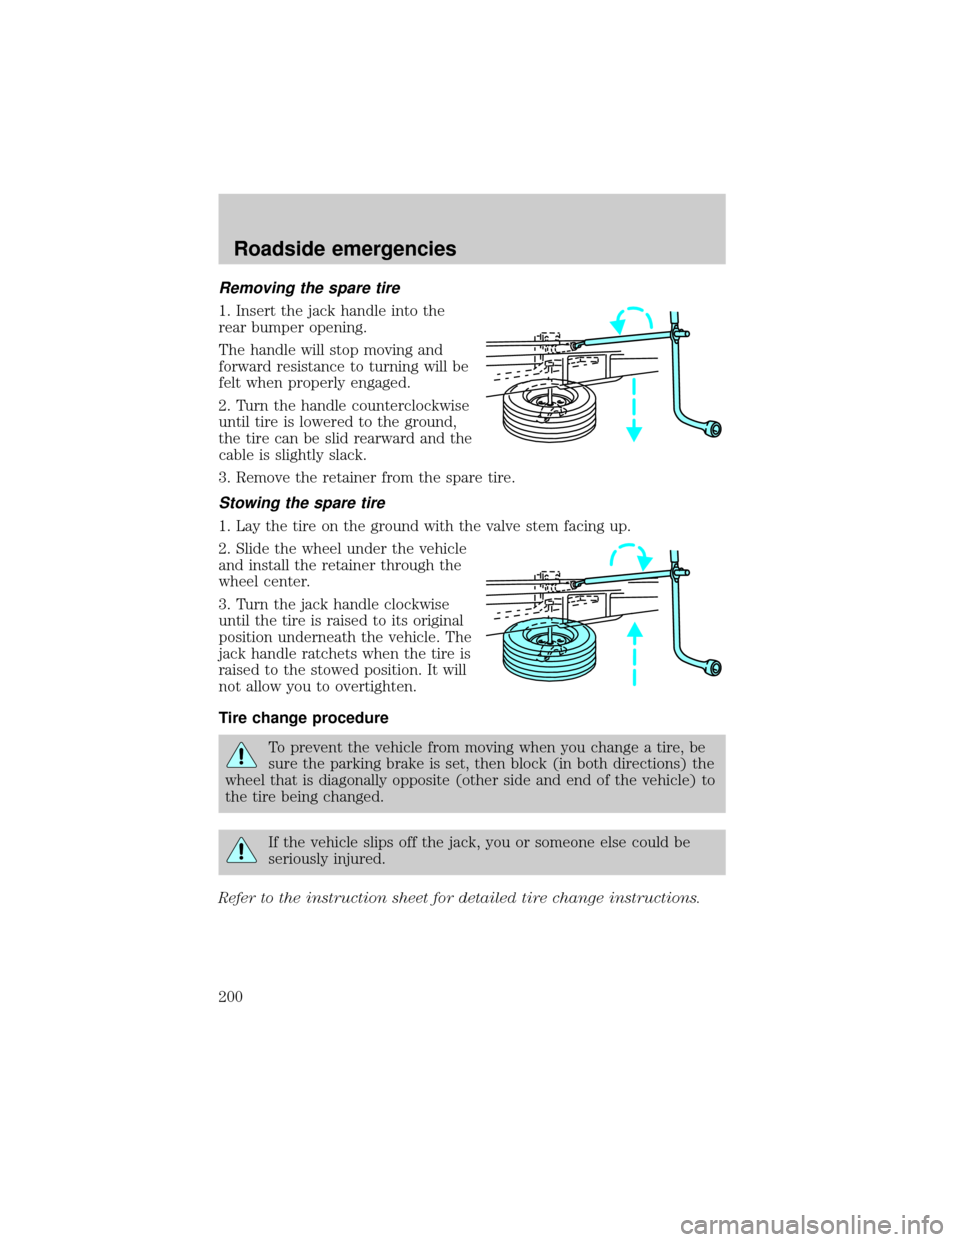
1. Insert the jack handle into the
rear bumper opening.
The handle will stop moving and
forward resistance to turning will be
felt when properly engaged.
2. Turn the handle counterclockwise
until tire is lowered to the ground,
the tire can be slid rearward and the
cable is slightly slack.
3. Remove the retainer from the spare tire.
Stowing the spare tire
1. Lay the tire on the ground with the valve stem facing up.
2. Slide the wheel under the vehicle
and install the retainer through the
wheel center.
3. Turn the jack handle clockwise
until the tire is raised to its original
position underneath the vehicle. The
jack handle ratchets when the tire is
raised to the stowed position. It will
not allow you to overtighten.
Tire change procedure
To prevent the vehicle from moving when you change a tire, be
sure the parking brake is set, then block (in both directions) the
wheel that is diagonally opposite (other side and end of the vehicle) to
the tire being changed.
If the vehicle slips off the jack, you or someone else could be
seriously injured.
Refer to the instruction sheet for detailed tire change instructions.
Roadside emergencies
200
Page 205 of 296
Connecting the jumper cables
1. Connect the positive (+) booster cable to the positive (+) terminal of
the discharged battery.
Note:In the illustrations,lightning boltsare used to designate the
assisting (boosting) battery.
2. Connect the other end of the positive (+) cable to the positive (+)
terminal of the assisting battery.
+–+–
+–+–
Roadside emergencies
205
Page 212 of 296

SERVICE RECOMMENDATIONS
To help you service your vehicle:
²We highlight do-it-yourself items in the engine compartment for easy
location.
²We provide a scheduled maintenance guide which makes tracking
routine service easy.
If your vehicle requires professional service, your dealership can provide
the necessary parts and service. Check your ªWarranty Guideº to find out
which parts and services are covered.
Use only recommended fuels, lubricants, fluids and service parts
conforming to specifications. Motorcraft parts are designed and built to
provide the best performance in your vehicle.
PRECAUTIONS WHEN SERVICING YOUR VEHICLE
Be especially careful when inspecting or servicing your vehicle.
²Do not work on a hot engine.
²When the engine is running, make sure that loose clothing, jewelry or
long hair does not get caught up in moving parts.
²Do not work on a vehicle with the engine running in an enclosed
space, unless you are sure you have enough ventilation.
²Keep all lit cigarettes, open flames and other lit material away from
the battery and all fuel related parts.
If you disconnect the battery, the engine must ªrelearnº its idle
conditions before your vehicle will drive properly, as explained inBattery
in this chapter.
Working with the engine off
²Automatic transmission:
1. Set the parking brake and ensure the gearshift is securely latched in P
(Park).
2. Turn off the engine and remove the key.
3. Block the wheels to prevent the vehicle from moving unexpectedly.
²Manual transmission:
1. Set the parking brake.
2. Depress the clutch and place the gearshift in 1 (First).
Maintenance and care
212