Page 4 of 256
These are some of the symbols you may see on your vehicle.
Vehicle Symbol Glossary
Safety Alert
See Owner's Guide
Fasten Safety BeltAir Bag-Front
Air Bag-SideChild Seat
Child Seat Installation
WarningChild Seat Tether
Anchorage
Brake SystemAnti-Lock Brake System
Brake Fluid -
Non-Petroleum BasedTraction Control
Master Lighting SwitchHazard Warning Flasher
Fog Lamps-FrontFuse Compartment
Fuel Pump ResetWindshield Wash/Wipe
Windshield
Defrost/DemistRear Window
Defrost/Demist
Power Windows
Front/RearPower Window Lockout
Introduction
4
Page 10 of 256

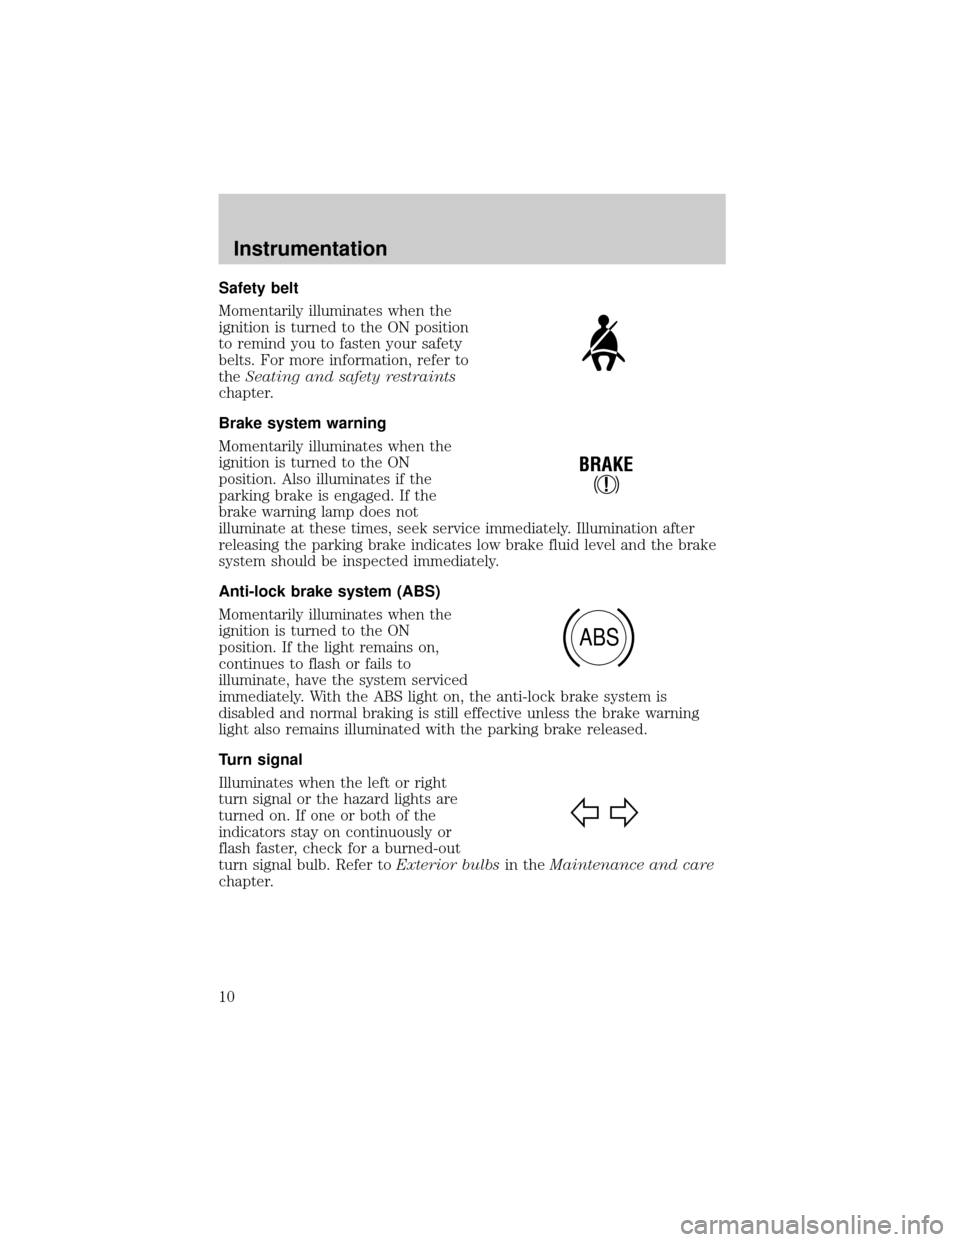
Safety belt
Momentarily illuminates when the
ignition is turned to the ON position
to remind you to fasten your safety
belts. For more information, refer to
theSeating and safety restraints
chapter.
Brake system warning
Momentarily illuminates when the
ignition is turned to the ON
position. Also illuminates if the
parking brake is engaged. If the
brake warning lamp does not
illuminate at these times, seek service immediately. Illumination after
releasing the parking brake indicates low brake fluid level and the brake
system should be inspected immediately.
Anti-lock brake system (ABS)
Momentarily illuminates when the
ignition is turned to the ON
position. If the light remains on,
continues to flash or fails to
illuminate, have the system serviced
immediately. With the ABS light on, the anti-lock brake system is
disabled and normal braking is still effective unless the brake warning
light also remains illuminated with the parking brake released.
Turn signal
Illuminates when the left or right
turn signal or the hazard lights are
turned on. If one or both of the
indicators stay on continuously or
flash faster, check for a burned-out
turn signal bulb. Refer toExterior bulbsin theMaintenance and care
chapter.
!
BRAKE
ABS
Instrumentation
10
Page 13 of 256

This light comes on when either the COAST/SET or RES/ACCEL controls
are pressed. It turns off when the cruise cancel control is pressed, the
brake is applied or the ignition is turned to the OFF position.
²Optional electronic instrument
cluster
The ªCRUISEº light comes on when
the ON control is pressed.
The ªSETº light comes on when either the COAST/SET or RES/ACCEL
controls are pressed. The ªSETº light turns off when the cruise cancel
control is pressed or the brake is applied. Both the ªCRUISEº and ªSETº
lights turn off when the OFF control is pressed or the ignition is turned
to the OFF position.
Safety belt warning chime
Sounds to remind you to fasten your safety belts.
For information on the safety belt warning chime, refer to theSeating
and safety restraintschapter.
Supplemental restraint system (SRS) warning chime
For information on the SRS warning chime, refer to theSeating and
safety restraintschapter.
Key-in-ignition warning chime
Sounds when the key is left in the ignition in the OFF/LOCK or ACC
position and the driver's door is opened.
Headlamps on warning chime
Sounds when the headlamps or parking lamps are on, the ignition is off
(and the key is not in the ignition) and the driver's door is opened.
CRUISE
Instrumentation
13
Page 93 of 256
Always drive and ride with your seatback upright and the lap
belt snug and low across the hips.
Reclining the seatback can reduce the effectiveness of the seat's
safety belt in the event of a collision.
Lift handle to move seat forward or
backward.
Pull lever up to adjust seatback.
Seating and safety restraints
93
Page 95 of 256
Always drive and ride with your seatback upright and the lap
belt snug and low across the hips.
Reclining the seatback can reduce the effectiveness of the seat's
safety belt in the event of a collision.
The control is located on the outboard side of the seat cushion.
Press front to raise or lower the
front portion of the seat cushion.
Press rear to raise or lower the rear
portion of the seat cushion.
Press the control to move the seat
forward, backward, up or down.
Seating and safety restraints
95
Page 99 of 256
Reclining the seatback
Locate the lever at the bottom of
the seatback that reads ªFOLD
FLAT OR RECLINEº. Pull the lever
upwards to recline the seatback.
Third row seat
The third row seat is equipped with combination lap and shoulder belts
in the outboard seating positions and a manual adjust tongue lap belt in
the center seating position. For information on the proper operation of
the safety restraints, refer toSafety Restraintsin this chapter.
The third row seat may be removed from the vehicle for additional cargo
space.
Accessing the third row seat
Your vehicle is equipped with an
easy entry second row seat feature
which allows ready access to the
third row seat. You may enter the
third row seat:
²through the passenger side rear
door if your vehicle has a second
row bench seat
²through either rear door if your
vehicle has second row bucket
seats
Seating and safety restraints
99
Page 100 of 256

Ensure that the second row seat is in the upright position in order to
achieve optimum access to the third row.
To minimize the risk of personal injury, the third row seat should not be
left in the forward, stowed position while the vehicle is in motion. Please
ensure that the seat is in the upright, fully latched position before
putting the vehicle in motion.
1. Locate and lift seat control ª3RD ROW ENTRYº to release seatback
and cushion to flip toward the front seat.
2. After entering the seat, reverse this procedure; ensure that the latch
tub and surrounding areas are clear.
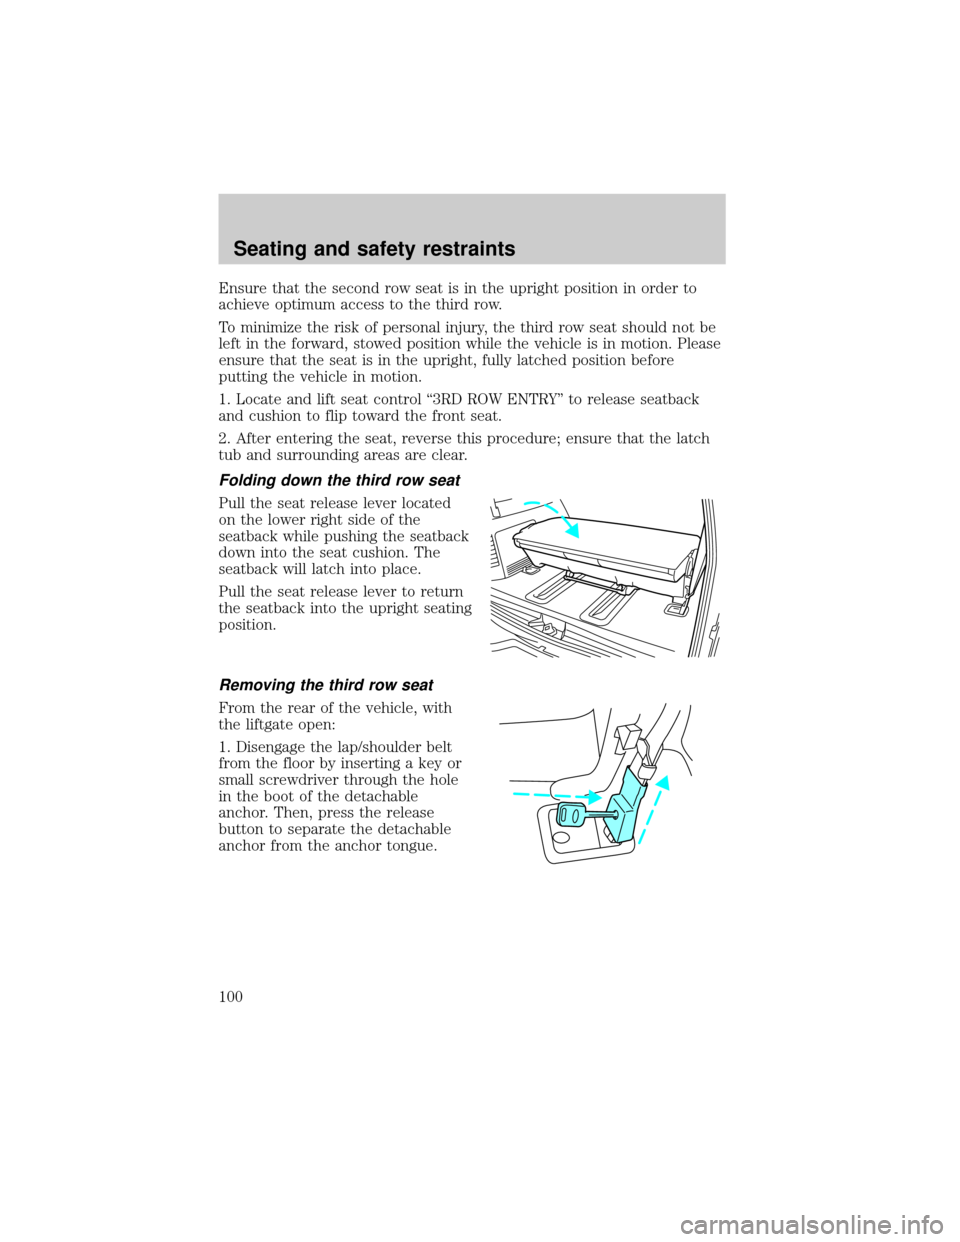
Folding down the third row seat
Pull the seat release lever located
on the lower right side of the
seatback while pushing the seatback
down into the seat cushion. The
seatback will latch into place.
Pull the seat release lever to return
the seatback into the upright seating
position.
Removing the third row seat
From the rear of the vehicle, with
the liftgate open:
1. Disengage the lap/shoulder belt
from the floor by inserting a key or
small screwdriver through the hole
in the boot of the detachable
anchor. Then, press the release
button to separate the detachable
anchor from the anchor tongue.
Seating and safety restraints
100
Page 101 of 256
2. Before removing the seat, be sure
that the detachable anchor tongue is
stowed flat into the vehicle floor.
3. Use the black plastic clip (located
just above the detachable anchor) to
stow the loose seat belt.
²Pull the seat release lever located
on the lower right side of the
seatback while pushing the
seatback down into the seat
cushion.
²The seatback will latch into place.
4. Lift the seat release bar located
at the center of the seat near the
floor to release the floor latches.
5. While pulling up on the release
bar, lift the seat up and out of the floor tubs and roll seat rearward.
6. With assistance, lift the seat out of the vehicle.
Seating and safety restraints
101