2000 FORD EXPEDITION light
[x] Cancel search: lightPage 58 of 256

²FLOOR-Allows for maximum heating by distributing outside air
through the floor ducts. However, the air cannot be cooled below the
outside temperature because the air conditioning does not operate this
mode.
²FLR²DEF-Distributes outside air through the windshield defroster
ducts and the floor ducts. Heating and air conditioning capabilities are
provided in this mode. The air will be heated or cooled based on the
temperature selection. For added customer comfort, the air
distributed through the floor ducts will be slightly warmer than the air
sent to the windshield defroster ducts. If the temperature is about
10ÉC (50ÉF) or higher, the air conditioner will automatically
dehumidify the air to reduce fogging.
²DEF
-Distributes outside air through the windshield defroster
ducts. It can be used to clear ice or fog from the windshield. If the
outside air temperature is about 10ÉC (50ÉF) or higher, the air
conditioner will automatically dehumidify the air to reduce fogging.
²OFF-Outside air is shut out and the fan will not operate. For short
periods of time only, use this mode to reduce undesirable odors from
entering the vehicle.
Displaying outside temperature
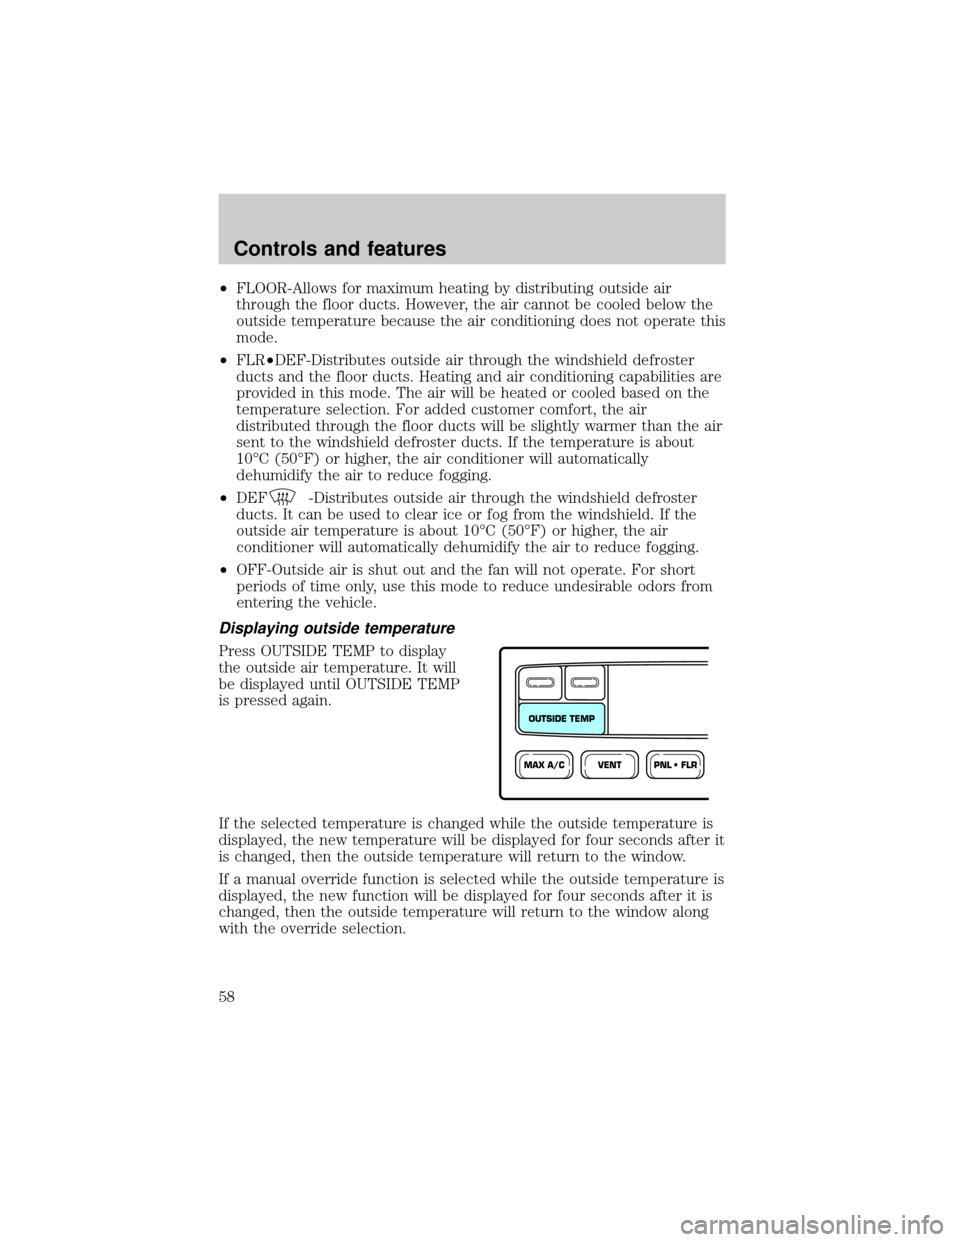
Press OUTSIDE TEMP to display
the outside air temperature. It will
be displayed until OUTSIDE TEMP
is pressed again.
If the selected temperature is changed while the outside temperature is
displayed, the new temperature will be displayed for four seconds after it
is changed, then the outside temperature will return to the window.
If a manual override function is selected while the outside temperature is
displayed, the new function will be displayed for four seconds after it is
changed, then the outside temperature will return to the window along
with the override selection.
VENTPNL • FLRMAX A/C
OUTSIDE TEMP
Controls and features
58
Page 62 of 256

Turn the temperature control to the
desired temperature.
You can get warm or cool air
through either the overhead
registers or floor vent by turning the
auxiliary mode selector:
²Far left for airflow to the overhead registers.
²Far right for airflow to the rear floor vent.
²Anywhere between PANEL and
FLOOR to vary airflow between
the outlets.
POSITIONS OF THE IGNITION
1. ACCESSORY, allows the electrical
accessories such as the radio to
operate while the engine is not
running.
2. LOCK, locks the steering wheel,
automatic transmission gearshift
lever and allows key removal.
3. OFF, shuts off the engine and all
accessories without locking the
steering wheel.
4. ON, all electrical circuits operational. Warning lights illuminated. Key
position when driving.
5. START, cranks the engine. Release the key as soon as the engine
starts.
WARM COOL
FLOOR PANEL
3
1
2
5
4
Controls and features
62
Page 69 of 256

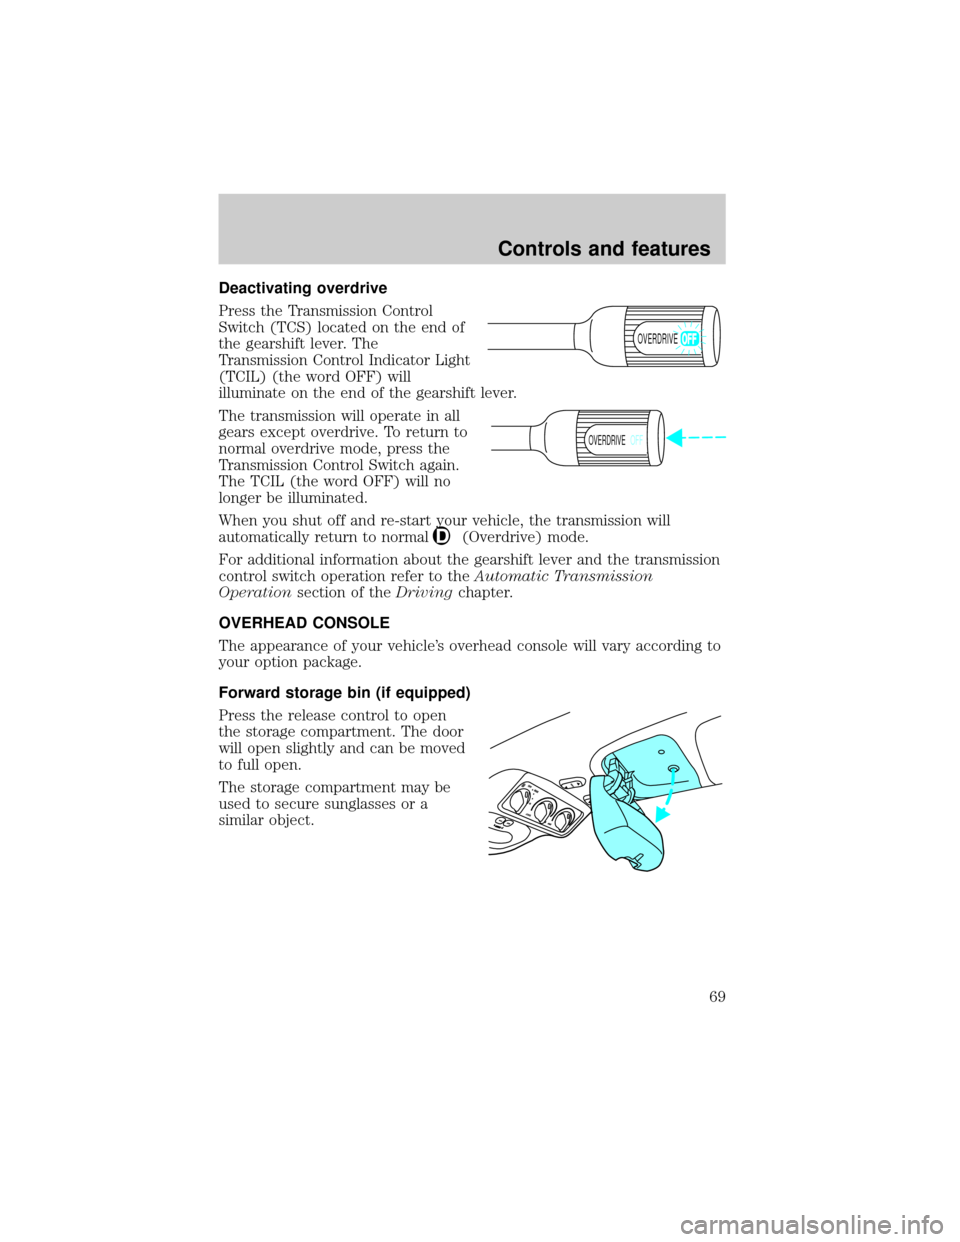
Deactivating overdrive
Press the Transmission Control
Switch (TCS) located on the end of
the gearshift lever. The
Transmission Control Indicator Light
(TCIL) (the word OFF) will
illuminate on the end of the gearshift lever.
The transmission will operate in all
gears except overdrive. To return to
normal overdrive mode, press the
Transmission Control Switch again.
The TCIL (the word OFF) will no
longer be illuminated.
When you shut off and re-start your vehicle, the transmission will
automatically return to normal
(Overdrive) mode.
For additional information about the gearshift lever and the transmission
control switch operation refer to theAutomatic Transmission
Operationsection of theDrivingchapter.
OVERHEAD CONSOLE
The appearance of your vehicle's overhead console will vary according to
your option package.
Forward storage bin (if equipped)
Press the release control to open
the storage compartment. The door
will open slightly and can be moved
to full open.
The storage compartment may be
used to secure sunglasses or a
similar object.
OVERDRIVE
OVERDRIVEOFF
Controls and features
69
Page 72 of 256

Most geographic areas (zones) have a magnetic north compass point that
varies slightly from the northerly direction on maps. This variation is four
degrees between adjacent zones and will become noticeable as the
vehicle crosses multiple zones. A correct zone setting will eliminate this
error. Refer toCompass zone adjustment.
Compass zone adjustment
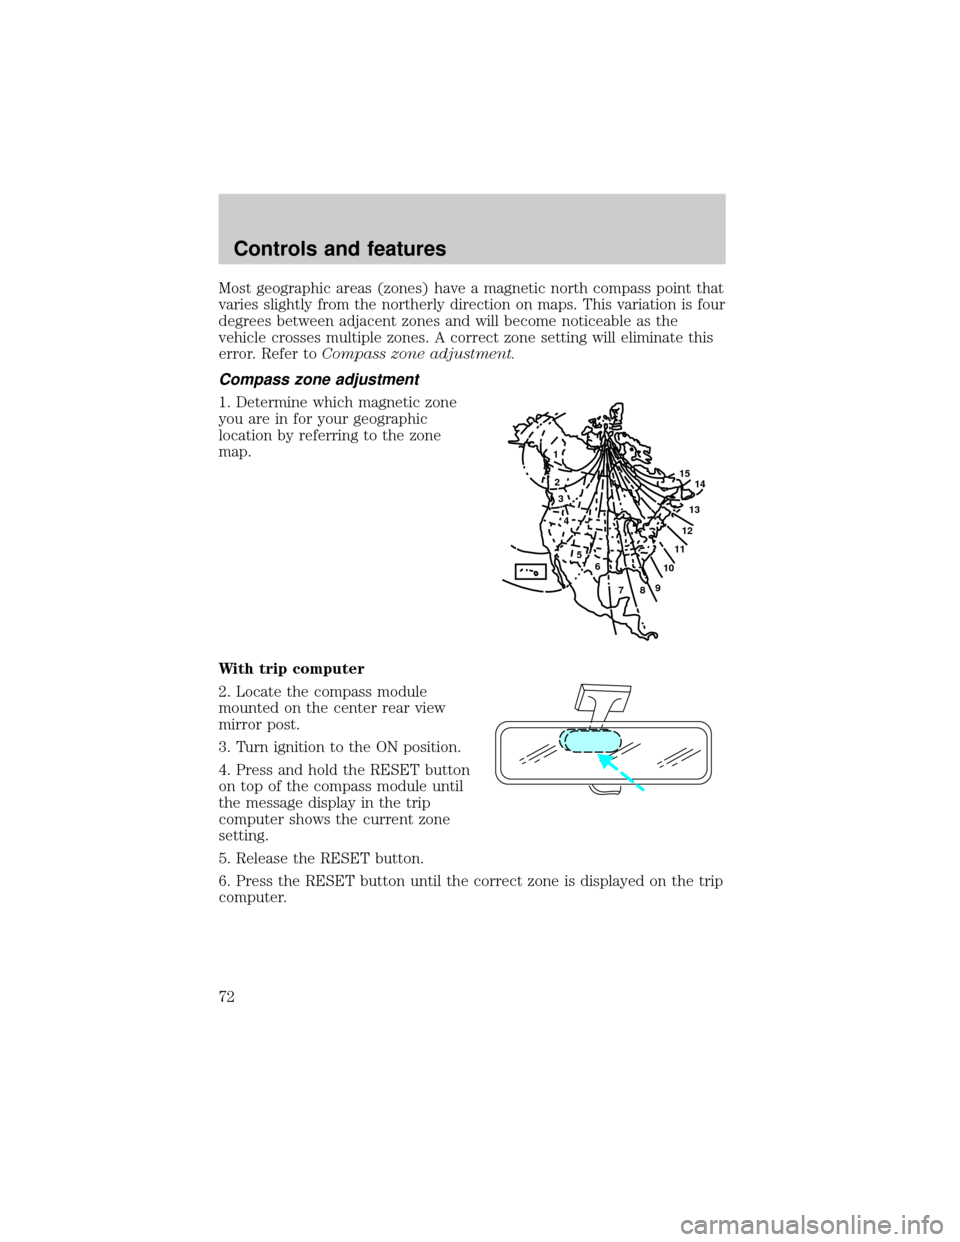
1. Determine which magnetic zone
you are in for your geographic
location by referring to the zone
map.
With trip computer
2. Locate the compass module
mounted on the center rear view
mirror post.
3. Turn ignition to the ON position.
4. Press and hold the RESET button
on top of the compass module until
the message display in the trip
computer shows the current zone
setting.
5. Release the RESET button.
6. Press the RESET button until the correct zone is displayed on the trip
computer.
1
2
3
4
5
6
7891011121314 15
Controls and features
72
Page 76 of 256

Rear dome lamp
The dome lamp lights when:
²any door is opened.
²the instrument panel dimmer
switch is held up until the
courtesy lamps come on.
²any of the remote entry controls
are pressed and the ignition is
OFF.
With the ignition key in the ACC or ON position, the rear dome lamp can
be turned ON or OFF by sliding the control.
AUTOMATIC DIMMING REAR VIEW MIRRORS (IF EQUIPPED)
Your vehicle is equipped with an inside rear view mirror with an
auto-dimming function. The electronic day/night mirror will change from
the normal state to the non-glare state when bright lights (glare) reach
the inside rear view mirror. When the inside rear view mirror detects
bright light from in front of or behind the vehicle, the inside rear view
mirror will automatically adjust (darken) to minimize glare.
Do not block the sensor on the backside of the inside rear view mirror
since this may impair proper system performance.
Press the control to turn the mirror
OFF or AUTO.
The mirror will automatically return
to the normal state whenever the
vehicle is placed in R
(Reverse)(when the mirror is on) to ensure a bright clear view when
backing up.
ILLUMINATED VISOR MIRROR (IF EQUIPPED)
To turn on the visor mirror lamps,
slide the mirror cover open. To turn
off the visor mirror lamps, slide the
mirror cover closed.
OFF AUTO
Controls and features
76
Page 83 of 256

Spare coded keys can be purchased from your dealership and
programmed to your anti-theft system. Refer toProgramming spare
SecuriLockykeysfor more information.
If one or both of your coded keys are lost or stolen and you want to
ensure the lost or stolen key will not operate your vehicle, bring your
vehicle and all available coded keys to your dealership for reinitialization.
Theft indicator
The theft indicator in the instrument cluster will operate as follows:
²When the ignition is OFF, the theft indicator will flash briefly every
two seconds to indicate the anti-theft system is protecting your
vehicle.
²When the ignition is turned to ON or START, the theft indicator will
light for three seconds and then go out. If the theft indicator stays on
for an extended period of time or flashes rapidly, have the system
serviced by your dealership or a qualified technician.
Programming spare SecuriLockYkeys
Spare coded keys can be purchased from your dealership and
programmed to your anti-theft system (up to a total of eight keys). Your
dealership can program your new coded key(s) to your vehicle or you
can do it yourself using the following simple procedure. To program a
new coded key yourself, you will need two previously programmed coded
keys (keys that already operate your vehicle's engine). If two previously
programmed coded keys are not available (one or both of your original
keys were lost or stolen), you must bring your vehicle to your dealership
to have the spare coded key(s) programmed.
Procedure to program spare SecuriLockYkeys to your vehicle
New coded keys must have the correct mechanical key cut for your
vehicle.
Conventional (non-coded) keyscannotbe programmed to your vehicle.
You will need to have two previously programmed coded keys and the
new unprogrammed SecuriLockykey readily accessible for timely
implementation of each step in the procedure. Please read and
understand the entire procedure before you begin.
1. Insert the first previously programmed coded key into the ignition and
turn the ignition from OFF to ON (maintain ignition in ON for at least
one second).
Controls and features
83
Page 84 of 256

2. Turn ignition to OFF and remove the first coded key from the ignition.
3. Within five seconds of turning the ignition to OFF, insert the second
previously programmed coded key into the ignition and turn the ignition
from OFF to ON (maintain ignition in ON for at least one second but no
more than five seconds).
4. Turn the ignition to OFF and remove the second coded key from the
ignition.
5. Within 10 seconds of turning the ignition to OFF, insert the new
unprogrammed key (new key/valet key) into the ignition and turn the
ignition from OFF to ON (maintain ignition in ON for at least one
second). This step will program your new key to a coded key.
6. To program additional new unprogrammed key(s), repeat this
procedure from step 1.
If the programming procedure was successful, the new coded key(s) will
start the vehicle's engine. The theft indicator (located on the instrument
panel) will light for three seconds and then go out.
If the programming procedure was not successful, the new coded key(s)
will not operate the vehicle's engine. The theft indicator will flash on and
off. Wait at least one minute and then repeat the procedure from step 1.
If failure repeats, bring your vehicle to your dealership to have the new
spare key(s) programmed.
REMOTE ENTRY SYSTEM
Your vehicle is equipped with a remote entry system which allows you to:
²unlock the vehicle doors without a key.
²lock all the vehicle doors without a key.
²activate the personal alarm.
The remote entry features only operate with the ignition in the OFF
position.
If there is any potential remote keyless entry problem with your vehicle,
ensureALL key fobs(remote entry transmitters) are brought to the
dealership, to aid in troubleshooting.
Controls and features
84
Page 88 of 256

Illuminated entry
The illuminated entry system will turn on the interior lights when the
remote transmitter unlock control is pressed.
The illuminated entry system will turn off the interior lights if the
ignition switch is turned to the ON position, or if the remote transmitter
lock control is pressed, or after 25 seconds of illumination.
The inside lights will not turn off if:
²they have been turned on with the dimmer control or
²any door is open.
The battery save feature will turn off the interior lights 45 minutes after
the last door is closed, even if the dimmer control is on.
Memory seat/mirrors/adjustable pedal feature (if equipped)
The memory feature allows automatic positioning of the driver seat, side
mirrors and adjustable pedals to three programmable positions.
²To program position one, move the driver seat, both side mirrors, and
adjustable pedals to the desired positions. Press the SET control. The
SET control indicator light will briefly illuminate. While the light is
illuminated, press control 1.
²To program position two, repeat the previous procedure using control
2.
²To program position three, repeat the previous procedure but press
controls 1 and 2 simultaneously.
The memory feature also allows you to recall previously stored positions
with your remote transmitter(s). Up to three remote transmitters can be
activated to utilize the memory recall positions.
Press the memory feature control to move to the previously stored
seat/mirror/adjustable pedal positions.
Activating/deactivating the memory feature on your remote
transmitter
The memory feature from the remote transmitter can be turned off/on,
however, the memory control buttons will continue to operate. Before
following the procedure, make sure that the ignition is OFF and all doors
and the liftgate window are closed. You must complete steps 1±7 within
30 seconds or the procedure will have to be repeated. If the procedure
needs to be repeated, you must wait 30 seconds.
Controls and features
88