Page 7 of 224
SCAN
BASS TREB BAL FADE
SIDE
EJ
REW FF1 - 2TAPE
AMSVOL - PUSH ON
SEEK
TUNE
AM
FMCLK
12 3456
FM1ST
L
NORM A/CVENT
FLOOR
FLR • DEF
DEF
HI
LO
MAX A/C
OUTSIDE TEMP
AUTOMATIC OFFFA
U
TO
HM
OILH
L
RSM
SET
ACC
COAST
Electronic sound system
(pg. 35)
Climate control systems
(pg. 26)
Clock
(pg. 34)Traction control switch*
(pg. 125) Gearshift
with O/D control
(pg. 129)
Instrumentation
7
Page 25 of 224
High beams
Push forward to activate.
Pull toward you to deactivate.
Flash to pass
Pull toward you to activate and
release to deactivate.
AUTOLAMP CONTROL (IF EQUIPPED)
The autolamp system provides light
sensitive automatic on-off control of
the exterior lights normally
controlled by the headlamp control.
The autolamp system also keeps the
lights on for a preselected period of
time after the ignition switch is
turned to OFF.
•To turn autolamps on, rotate the
control counterclockwise. The preselected time lapse is adjustable up
to approximately three minutes by continuing to rotate the control
counterclockwise.
•To turn autolamps off, rotate the control clockwise to OFF.
REAR WINDOW DEFROSTER
The rear defroster control is located
on the instrument panel.
HI
LO
F
S
OFF
HI
LO
F
S
OFF
OFF
AUTO
LAMPP
R.DEF.
Controls and features
25
Page 34 of 224
.
•If your vehicle has been parked with the windows closed during hot
weather, the air conditioner will do")
•Remove any snow, ice or leaves
from the air intake area (at the
bottom of the windshield).
•If your vehicle has been parked with the windows closed during hot
weather, the air conditioner will do a much faster job of cooling if you
drive for two or three minutes with the windows open. This will force
most of the hot, stale air out of the vehicle. Then operate the air
conditioner as you would normally.
•Do not place objects over the defroster outlets. These objects can
block airflow and reduce your ability to see through your windshield.
Also, avoid placing small objects on top of your instrument panel.
These objects can fall down into the defroster outlets and block
airflow and possibly damage your climate control system.
Do not place objects on top of the instrument panel, as these
objects may become projectiles in a collision or sudden stop.
CLOCK
Press H to set the hour.
Press M to set the minute.
The auxiliary power point is located under the instrument panel on the
left hand side of the front passenger foot well. This outlet should be
used in place of the cigarette lighter for optional electrical accessories.
HM
HM
Controls and features
34
Page 38 of 224
Speaker fade adjust (if equipped)
Speaker sound can be adjusted
between the front and rear
speakers.
Press the TONE control four times,
then use the volume knob to adjust
the desired level.
Setting the clock
Your vehicle is equipped with a separate instrument panel mounted
clock. Please refer toClockin this chapter for instructions on setting the
clock.
AM/FM stereo cassette
TONE
CLK
VOL
PUSH
ON
SCAN
BASS TREB BAL FADE
SIDE
EJ
REW FF1 - 2TAPE
AMS
VOL - PUSH ON
SEEK
TUNE
AM
FMCLK
12 3456
FM1ST
Controls and features
38
Page 44 of 224
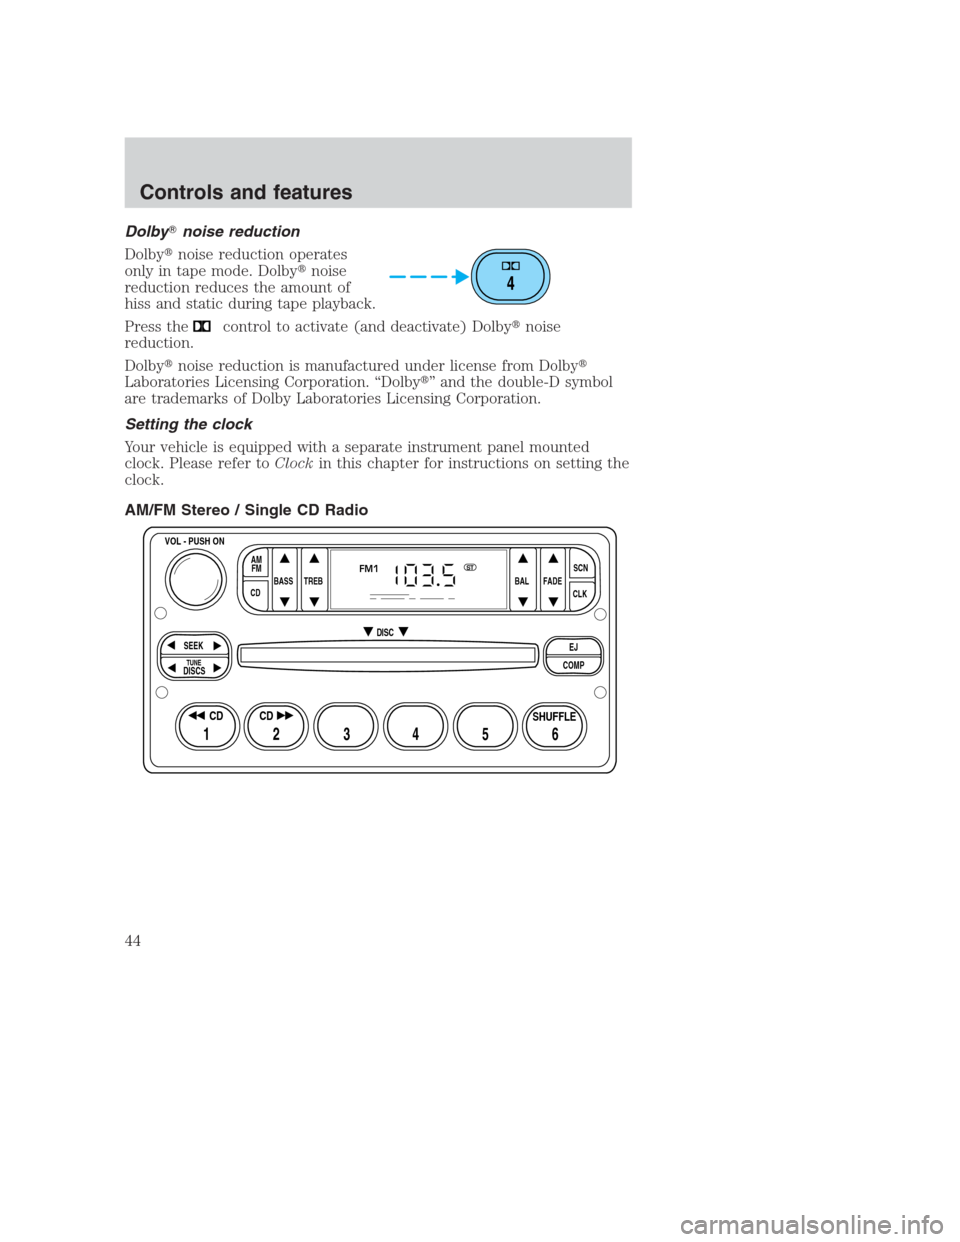
Dolby�noise reduction
Dolby�noise reduction operates
only in tape mode. Dolby�noise
reduction reduces the amount of
hiss and static during tape playback.
Press the
control to activate (and deactivate) Dolby�noise
reduction.
Dolby�noise reduction is manufactured under license from Dolby�
Laboratories Licensing Corporation. “Dolby�” and the double-D symbol
are trademarks of Dolby Laboratories Licensing Corporation.
Setting the clock
Your vehicle is equipped with a separate instrument panel mounted
clock. Please refer toClockin this chapter for instructions on setting the
clock.
AM/FM Stereo / Single CD Radio
4
BASS
CDTREB BAL FADESCN
CLK AM
FM
VOL - PUSH ON
SEEK
EJ
COMP DISC
DISCS
TUNE
12 3456
FM1ST
SHUFFLE CD CD
Controls and features
44
Page 59 of 224
Show
•With RDS activated, press the
RDS control until SHOW is
displayed.
•Use the SEL control to select
TYPE (the display shows the
program type), NAME (the
display shows the call letters of
the station) or NONE.
RDS clock feature
Refer toSetting the clockfor information.
Setting the clock
Your vehicle is equipped with a separate instrument panel mounted
clock. Please refer toClockin this chapter for instructions on setting the
clock.
CD changer (if equipped)
The CD changer is located in one of the following locations:
•in the trunk
•in the center console
•under the driver’s seat
1. Slide the door to access the CD
changer magazine.
RDS
SEL
Controls and features
59
Page 141 of 224
The fuses are coded as follows.
Fuse/Relay
LocationFuse Amp
RatingPassenger Compartment Fuse Panel
Description
1 15A Brake Pedal Position (BPP) Switch,
Multi-Function Switch, Speed Control
2 30A Wiper Control Module, Windshield Wiper
Motor
3 — Not Used
4 15A Lighting Control Module, Main Light Switch
5 15A Backup Lamps, Variable Assist Power
Steering (VAPS), Turn Signals, Air
Suspension, Daytime Running Lamps,
Electronic Day/Night Mirror, Shift Lock,
EATC, Speed Chime Warning
6 15A Speed Control, Main Light Switch, Lighting
Control Module, Clock, Police Power Relay
7 25A Powertrain Control Module (PCM) Power
Diode, Ignition Coils
18 17
15 16
8
412 7659 12 101114
13
3
Roadside emergencies
141
Page 142 of 224

Fuse/Relay
LocationFuse Amp
RatingPassenger Compartment Fuse Panel
Description
8 15A Lighting Control Module, Power Mirrors,
PATS Module, Keyless Entry, Clock
Memory, Electronic Automatic Temperature
Control (EATC), Power Windows, Police
Spot Light, SecuriLock
9 30A Blower Motor, A/C-Heater Mode Switch
10 10A Air Bag Module
11 5A Radio
12 18A CB Lighting Control Module, Flash-to-Pass,
Main Light Switch
13 15A Warning Lamps, Analog Cluster Gauges and
Indicators, Electronic Automatic
Transmission, Lighting Control Module
14 20A CB Window/Door Lock Control, Driver’s Door
Module, One Touch Down
15 10A Anti-Lock Brakes, Instrument Cluster,
Transmission Control Switch
16 20A Cigar Lighter, Auxiliary Power Point
17 10A Rear Defrost
18 10A Air Bag Module
Power distribution box
The power distribution box is located in the engine compartment. The
power distribution box contains high-current fuses that protect your
vehicle’s main electrical systems from overloads.
Always disconnect the battery before servicing high current
fuses.
Always replace the cover to the Power Distribution Box before
reconnecting the battery or refilling fluid reservoirs.
If the battery has been disconnected and reconnected, refer to the
Batterysection of theMaintenance and carechapter.
Roadside emergencies
142


The autolamp system provides lig")

Speaker sound can be adjusted
between the front and rear
speakers.
Press the TONE control four times,
then use the volume knob to adjust
the desired level.
Setting th")
, NAME (the
display shows the call letters of
the s")
 Switch,
Multi-Function Switch, Speed Control
2 30A Wiper")