Page 141 of 224
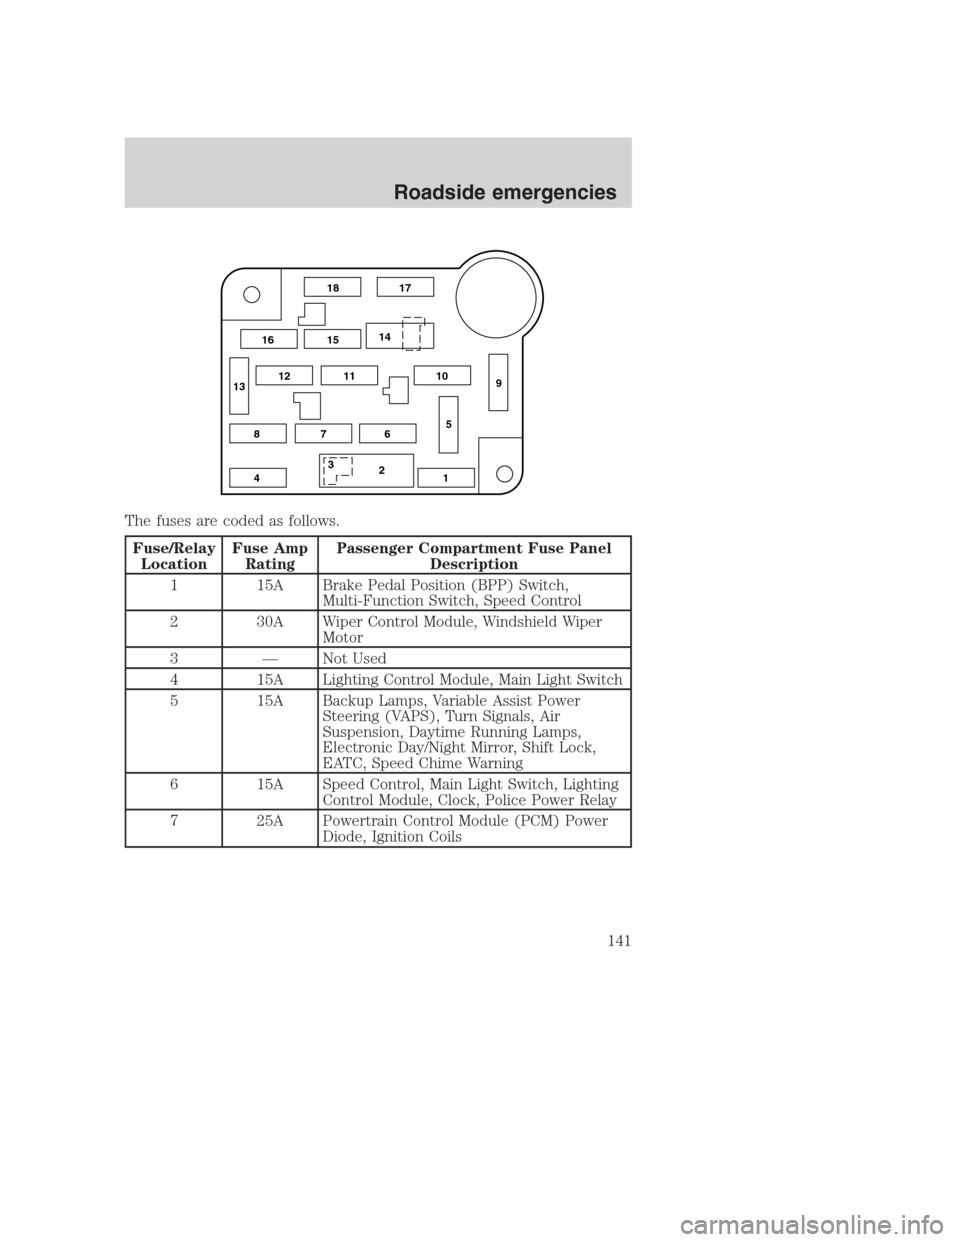
The fuses are coded as follows.
Fuse/Relay
LocationFuse Amp
RatingPassenger Compartment Fuse Panel
Description
1 15A Brake Pedal Position (BPP) Switch,
Multi-Function Switch, Speed Control
2 30A Wiper Control Module, Windshield Wiper
Motor
3 — Not Used
4 15A Lighting Control Module, Main Light Switch
5 15A Backup Lamps, Variable Assist Power
Steering (VAPS), Turn Signals, Air
Suspension, Daytime Running Lamps,
Electronic Day/Night Mirror, Shift Lock,
EATC, Speed Chime Warning
6 15A Speed Control, Main Light Switch, Lighting
Control Module, Clock, Police Power Relay
7 25A Powertrain Control Module (PCM) Power
Diode, Ignition Coils
18 17
15 16
8
412 7659 12 101114
13
3
Roadside emergencies
141
Page 156 of 224
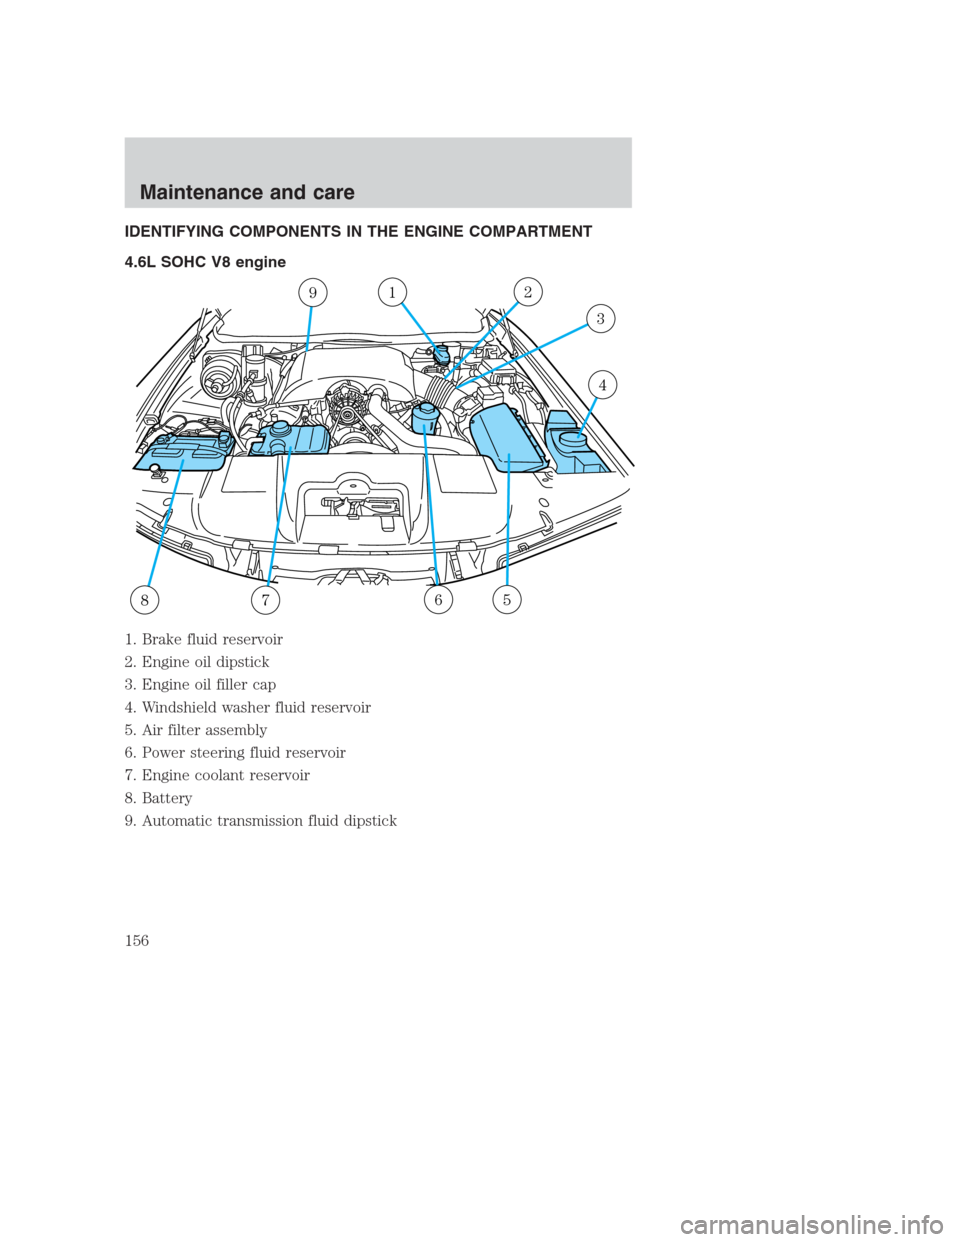
IDENTIFYING COMPONENTS IN THE ENGINE COMPARTMENT
4.6L SOHC V8 engine
1. Brake fluid reservoir
2. Engine oil dipstick
3. Engine oil filler cap
4. Windshield washer fluid reservoir
5. Air filter assembly
6. Power steering fluid reservoir
7. Engine coolant reservoir
8. Battery
9. Automatic transmission fluid dipstick
912
3
6578
4
Maintenance and care
156
Page 157 of 224
ENGINE OIL
Checking the engine oil
Refer to the Scheduled Maintenance Guide for the appropriate intervals
for checking the engine oil.
1. Make sure the vehicle is on level ground.
2. Turn the engine off and wait a few minutes for the oil to drain into the
oil pan.
3. Set the parking brake and ensure the gearshift is securely latched in P
(Park).
4. Open the hood. Protect yourself from engine heat.
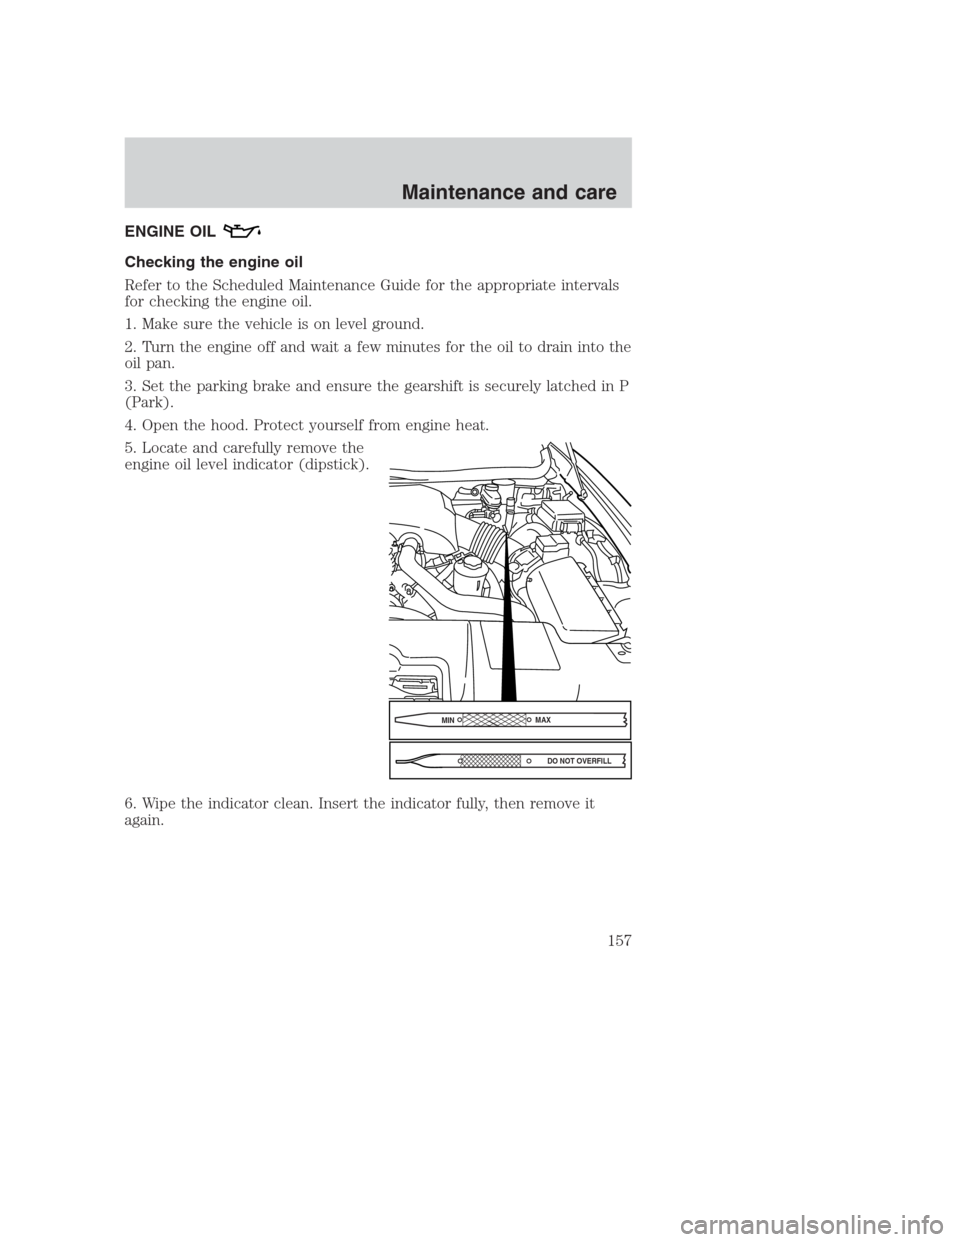
5. Locate and carefully remove the
engine oil level indicator (dipstick).
6. Wipe the indicator clean. Insert the indicator fully, then remove it
again.
DO NOT OVERFILL MIN
MAX
Maintenance and care
157
Page 158 of 224
•If the oil level iswithin this
range,the oil level is acceptable.
DO NOT ADD OIL.
•If the oil level isbelow this
mark,engineoil must be added
to raise the level within the
normal operating range.
•If required, add engine oil to the
engine. Refer toAdding engine
oilin this chapter.
•Do not overfill the engine
with oil. Oil levels above this
mark may cause engine
damage.If the engine is
overfilled, some oil must be
removed from the engine by a
qualified service technician.
7. Put the indicator back in and ensure it is fully seated.
Adding engine oil
1. Check the engine oil. For instructions, refer toChecking the engine
oilin this chapter.
2. If the engine oil level is not within the normal operating range, add
only certified engine oil of the recommended viscosity. Remove the
DO NOT OVERFILL
MINMAX
DO NOT OVERFILL
MINMAX
MINMAX
DO NOT OVERFILL
Maintenance and care
158
Page 159 of 224
engine oil filler cap and use a funnel to pour the engine oil into the
opening.
3. Recheck the engine oil level. Make sure the oil level is not above the
normal operating range on the engine oil level indicator (dipstick).
4. Install the indicator and ensure it is fully seated.
5. Fully install the engine oil filler cap by turning the filler cap clockwise
until three clicks can be heard.
To avoid possible oil loss, DO NOT operate the vehicle with the
engine oil level indicator and/or the engine oil filler cap removed.
Engine oil and filter recommendations
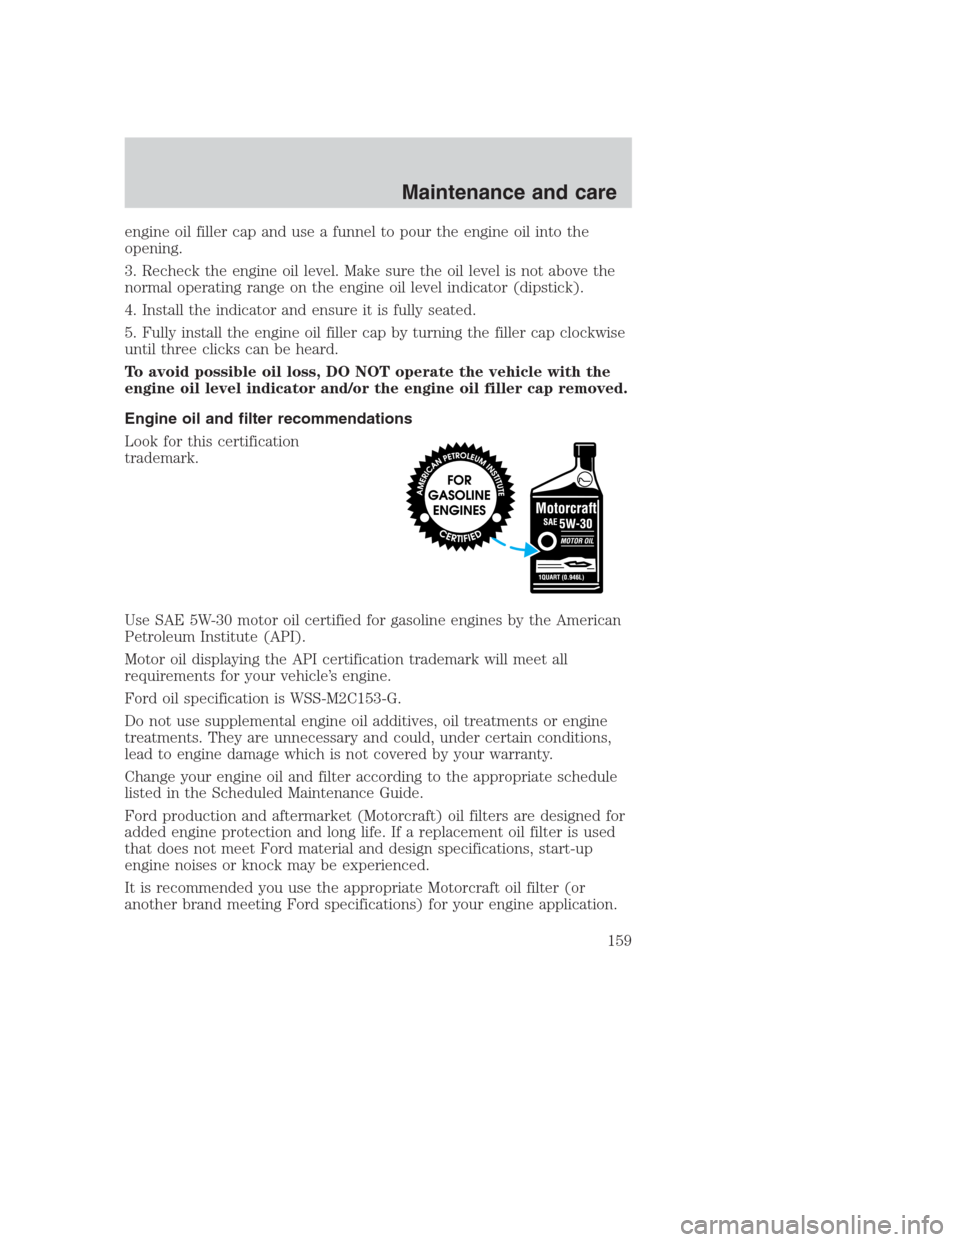
Look for this certification
trademark.
Use SAE 5W-30 motor oil certified for gasoline engines by the American
Petroleum Institute (API).
Motor oil displaying the API certification trademark will meet all
requirements for your vehicle’s engine.
Ford oil specification is WSS-M2C153-G.
Do not use supplemental engine oil additives, oil treatments or engine
treatments. They are unnecessary and could, under certain conditions,
lead to engine damage which is not covered by your warranty.
Change your engine oil and filter according to the appropriate schedule
listed in the Scheduled Maintenance Guide.
Ford production and aftermarket (Motorcraft) oil filters are designed for
added engine protection and long life. If a replacement oil filter is used
that does not meet Ford material and design specifications, start-up
engine noises or knock may be experienced.
It is recommended you use the appropriate Motorcraft oil filter (or
another brand meeting Ford specifications) for your engine application.
Maintenance and care
159
Page 161 of 224

WINDSHIELD WASHER FLUID
Checking and adding washer fluid
Check the washer fluid whenever
you stop for fuel. The reservoir is
highlighted with a
symbol.
If the level is low, add enough fluid
to fill the reservoir. In very cold
weather, do not fill the reservoir all
the way.
Only use a washer fluid that meets Ford specifications. Refer to
Lubricant specificationsin theCapacities and specificationschapter.
State or local regulations on volatile organic compounds may restrict the
use of methanol, a common windshield washer antifreeze additive.
Washer fluids containing non-methanol antifreeze agents should be used
only if they provide cold weather protection without damaging the
vehicle’s paint finish, wiper blades or washer system.
Do not put washer fluid in the engine coolant reservoir. Washer
fluid placed in the cooling system may harm engine and cooling
system components.
ENGINE COOLANT
Checking engine coolant
Your engine’s cooling system has been factory-filled with a 50/50 mixture
of distilled water and Ford Premium Engine Coolant E2FZ-19549-AA (in
Canada, Motorcraft CXC-8-B), or an equivalent premium engine coolant
that meets Ford specification ESE-M97B44-A.
A50/50 mixtureof distilled water and Ford Premium Engine Coolant
provides:
•maximum cooling system efficiency.
•freeze protection down to -36° C (-34° F).
•boiling protection up to 129° C (265° F).
•protection against rust and other forms of corrosion.
Maintenance and care
161
Page 186 of 224
Driving style — good driving and fuel economy habits
Give consideration to the lists that follow and you may be able to change
a number of variables and improve your fuel economy.
Habits
•Smooth, moderate operation can yield up to 10% savings in fuel.
•Steady speeds without stopping will usually give the best fuel
economy.
•Idling for long periods of time (greater than one minute) may waste
fuel.
•Anticipate stopping; slowing down may eliminate the need to stop.
•Sudden or hard accelerations may reduce fuel economy.
•Slow down gradually.
•Driving at reasonable speeds (traveling at 88 km/h [55 mph] uses 15%
less fuel than traveling at 105 km/h [65 mph]).
•Revving the engine before turning it off may reduce fuel economy.
•Using the air conditioner or defroster may reduce fuel economy.
•You may want to turn off the speed control in hilly terrain if
unnecessary shifting between third and fourth gear occurs.
Unnecessary shifting of this type could result in reduced fuel
economy.
•Warming up a vehicle on cold mornings is not required and may
reduce fuel economy.
•Resting your foot on the brake pedal while driving may reduce fuel
economy.
•Combine errands and minimize stop-and-go driving.
Maintenance
•Keep tires properly inflated and use only recommended size.
•Operating a vehicle with the wheels out of alignment will reduce fuel
economy.
•Use recommended engine oil. Refer toLubricant Specifications.
•Perform all regularly scheduled maintenance items. Follow the
recommended maintenance schedule and owner maintenance checks
found in your vehicle Scheduled Maintenance Guide.
Maintenance and care
186
Page 190 of 224
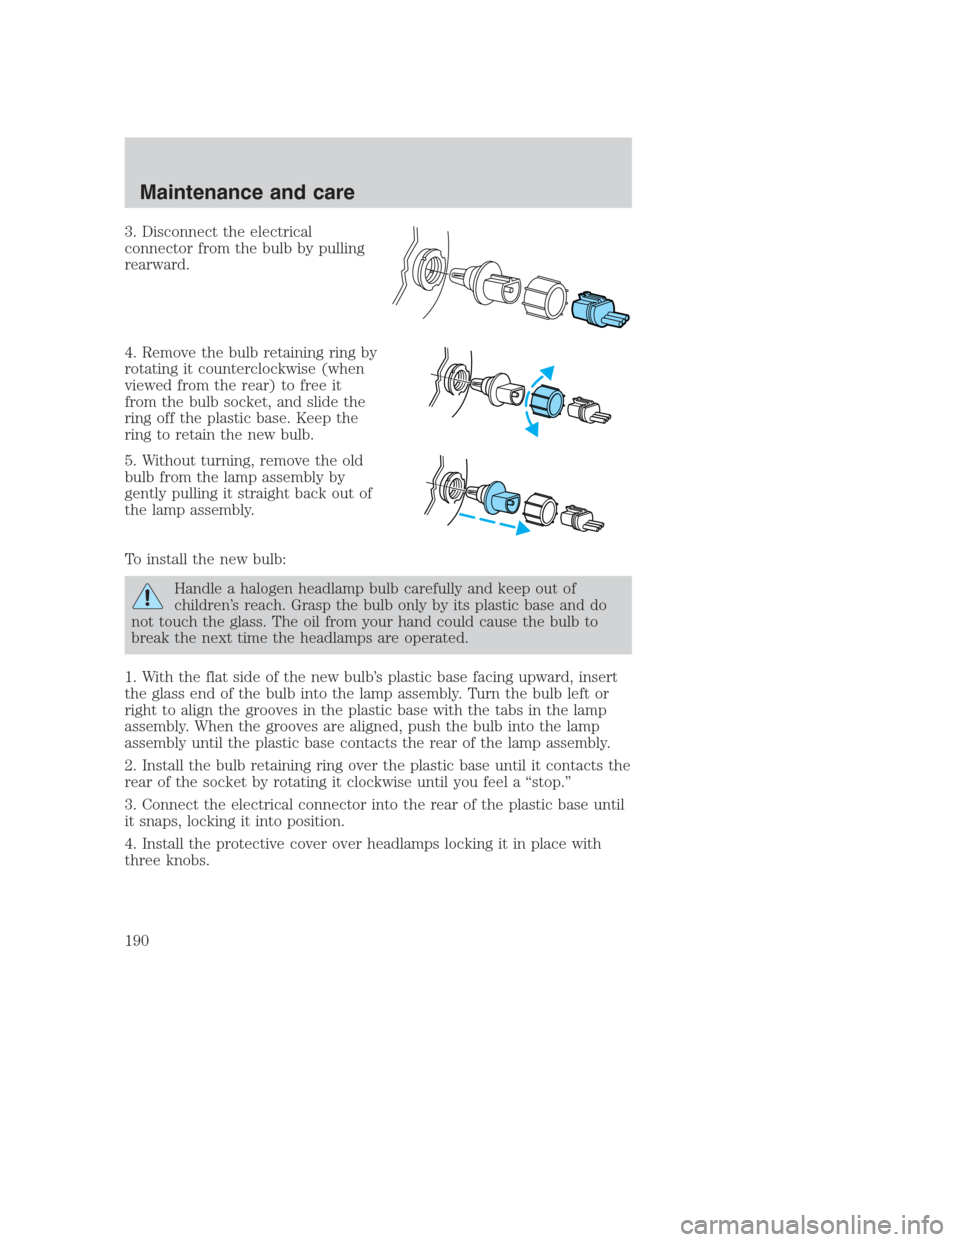
3. Disconnect the electrical
connector from the bulb by pulling
rearward.
4. Remove the bulb retaining ring by
rotating it counterclockwise (when
viewed from the rear) to free it
from the bulb socket, and slide the
ring off the plastic base. Keep the
ring to retain the new bulb.
5. Without turning, remove the old
bulb from the lamp assembly by
gently pulling it straight back out of
the lamp assembly.
To install the new bulb:
Handle a halogen headlamp bulb carefully and keep out of
children’s reach. Grasp the bulb only by its plastic base and do
not touch the glass. The oil from your hand could cause the bulb to
break the next time the headlamps are operated.
1. With the flat side of the new bulb’s plastic base facing upward, insert
the glass end of the bulb into the lamp assembly. Turn the bulb left or
right to align the grooves in the plastic base with the tabs in the lamp
assembly. When the grooves are aligned, push the bulb into the lamp
assembly until the plastic base contacts the rear of the lamp assembly.
2. Install the bulb retaining ring over the plastic base until it contacts the
rear of the socket by rotating it clockwise until you feel a “stop.”
3. Connect the electrical connector into the rear of the plastic base until
it snaps, locking it into position.
4. Install the protective cover over headlamps locking it in place with
three knobs.
Maintenance and care
190