Page 15 of 224
Headlamps on warning chime
Sounds when the headlamps or parking lamps are on, the ignition is off
(and the key is not in the ignition) and the driver’s door is opened.
GAUGES
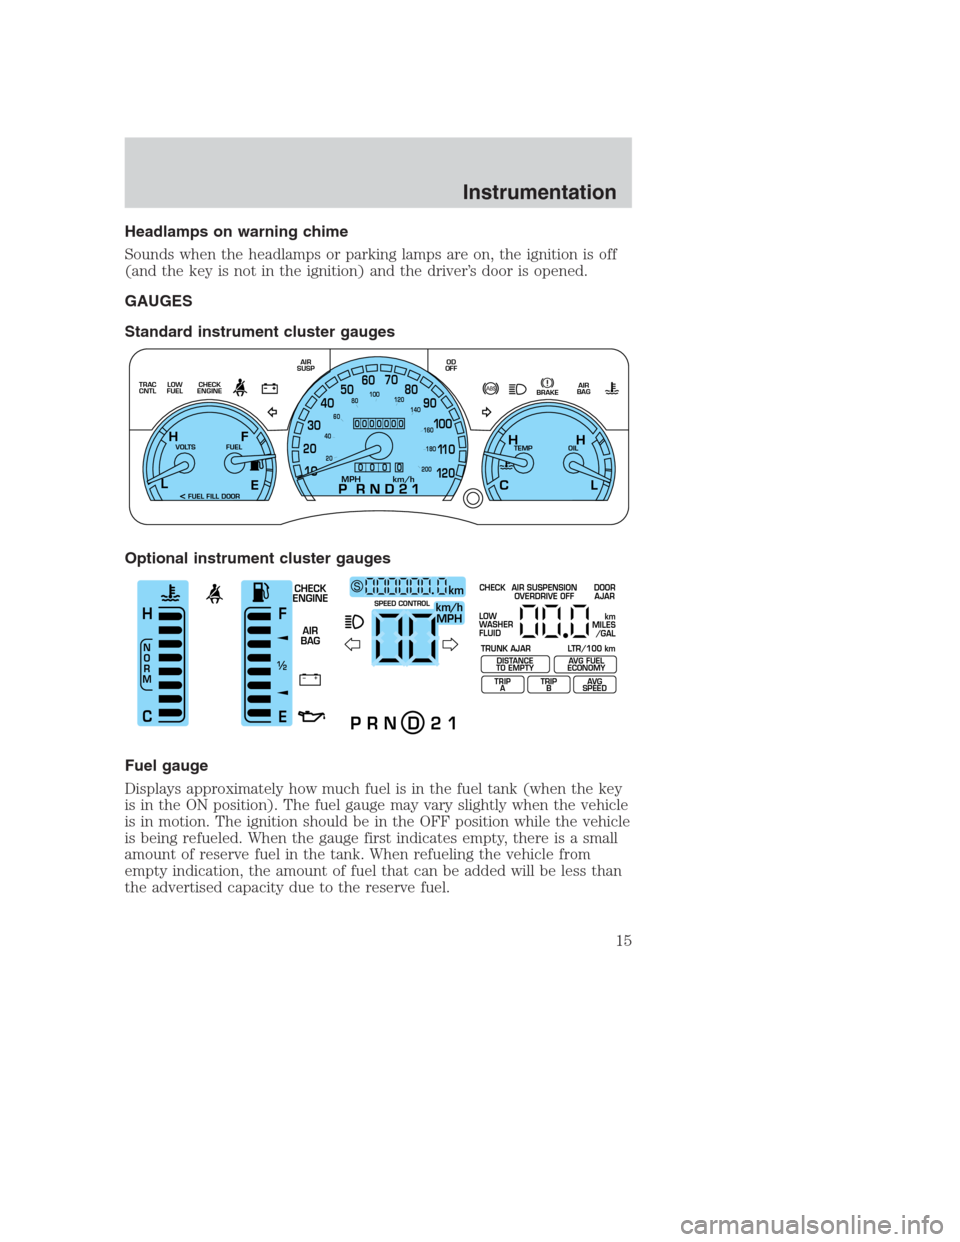
Standard instrument cluster gauges
Optional instrument cluster gauges
Fuel gauge
Displays approximately how much fuel is in the fuel tank (when the key
is in the ON position). The fuel gauge may vary slightly when the vehicle
is in motion. The ignition should be in the OFF position while the vehicle
is being refueled. When the gauge first indicates empty, there is a small
amount of reserve fuel in the tank. When refueling the vehicle from
empty indication, the amount of fuel that can be added will be less than
the advertised capacity due to the reserve fuel.
E
LOW
FUEL TRAC
CNTLCHECK
ENGINEAIR
SUSPOD
OFF
BRAKEAIR
BAG
TEMP OIL VOLTS FUEL
MPH km/h10 203040506070
80
90
10 0
11 0
12 020 406080100
120
140
160
180
200
H H
L C F H
L
< FUEL FILL DOOR
0000000
0
0 0 0
+ –
F
E
/2 1
N
O
R
M
H
Ckm/h
MPH
km SCHECK
ENGINE
AIR
BAGSPEED CONTROL
P R N D 2 1
CHECK
TRUNK AJAR LTR/100 kmAIR SUSPENSION
OVERDRIVE OFFDOOR
AJAR
LOW
WASHER
FLUID
TRIP
ATRIP
BAVG
SPEED
km
MILES
/GAL
DISTANCE
TO EMPTYAVG FUEL
ECONOMY
Instrumentation
15
Page 24 of 224
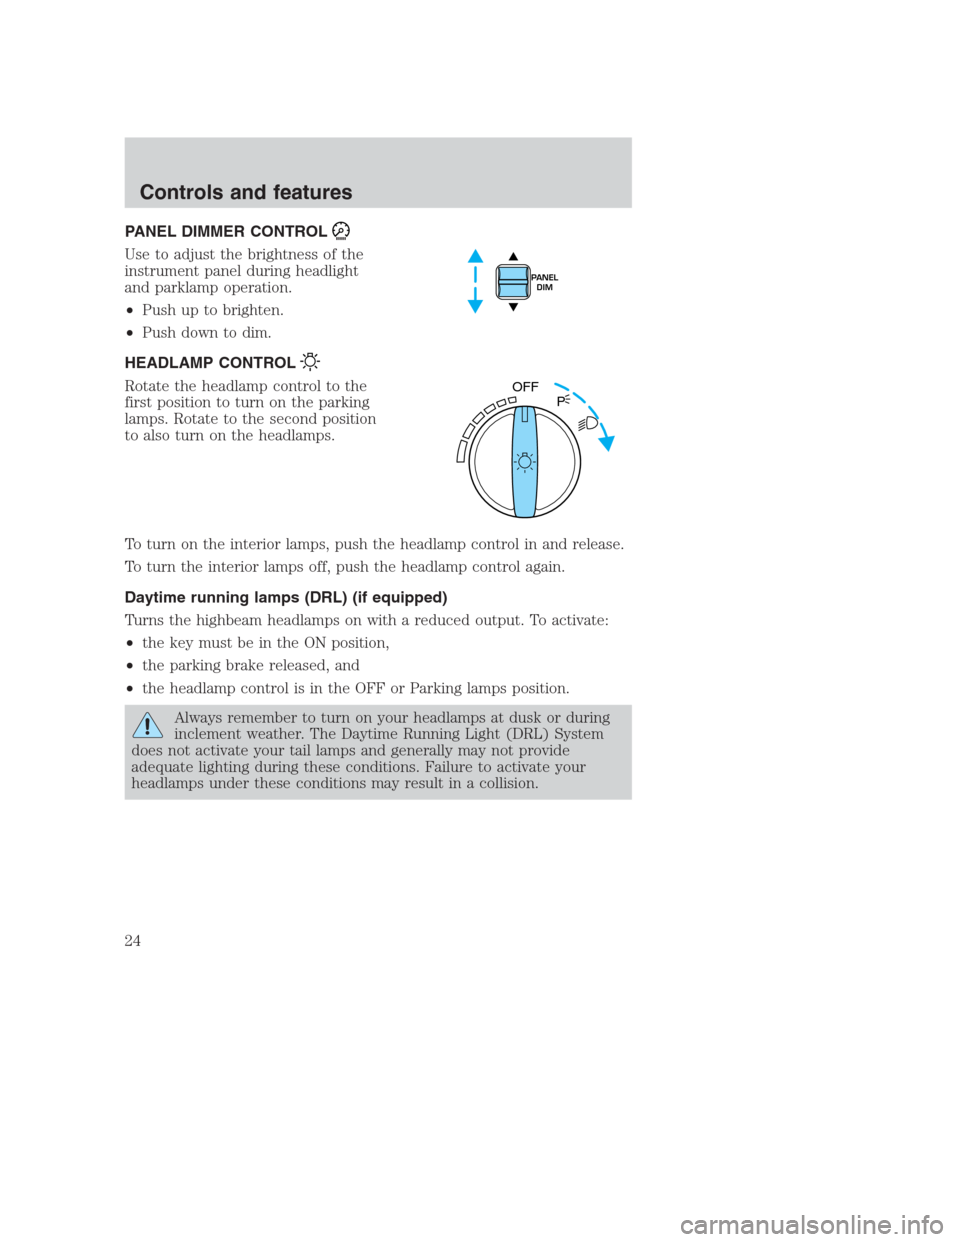
PANEL DIMMER CONTROL
Use to adjust the brightness of the
instrument panel during headlight
and parklamp operation.
•Push up to brighten.
•Push down to dim.
HEADLAMP CONTROL
Rotate the headlamp control to the
first position to turn on the parking
lamps. Rotate to the second position
to also turn on the headlamps.
To turn on the interior lamps, push the headlamp control in and release.
To turn the interior lamps off, push the headlamp control again.
Daytime running lamps (DRL) (if equipped)
Turns the highbeam headlamps on with a reduced output. To activate:
•the key must be in the ON position,
•the parking brake released, and
•the headlamp control is in the OFF or Parking lamps position.
Always remember to turn on your headlamps at dusk or during
inclement weather. The Daytime Running Light (DRL) System
does not activate your tail lamps and generally may not provide
adequate lighting during these conditions. Failure to activate your
headlamps under these conditions may result in a collision.
PANEL
DIM
OFF
P
Controls and features
24
Page 25 of 224
High beams
Push forward to activate.
Pull toward you to deactivate.
Flash to pass
Pull toward you to activate and
release to deactivate.
AUTOLAMP CONTROL (IF EQUIPPED)
The autolamp system provides light
sensitive automatic on-off control of
the exterior lights normally
controlled by the headlamp control.
The autolamp system also keeps the
lights on for a preselected period of
time after the ignition switch is
turned to OFF.
•To turn autolamps on, rotate the
control counterclockwise. The preselected time lapse is adjustable up
to approximately three minutes by continuing to rotate the control
counterclockwise.
•To turn autolamps off, rotate the control clockwise to OFF.
REAR WINDOW DEFROSTER
The rear defroster control is located
on the instrument panel.
HI
LO
F
S
OFF
HI
LO
F
S
OFF
OFF
AUTO
LAMPP
R.DEF.
Controls and features
25
Page 27 of 224
Since the air conditioner removes considerable moisture from the air
during operation, it is normal if clear water drips on the ground under
the air conditioner drain while the system is working and even after you
have stopped the vehicle.
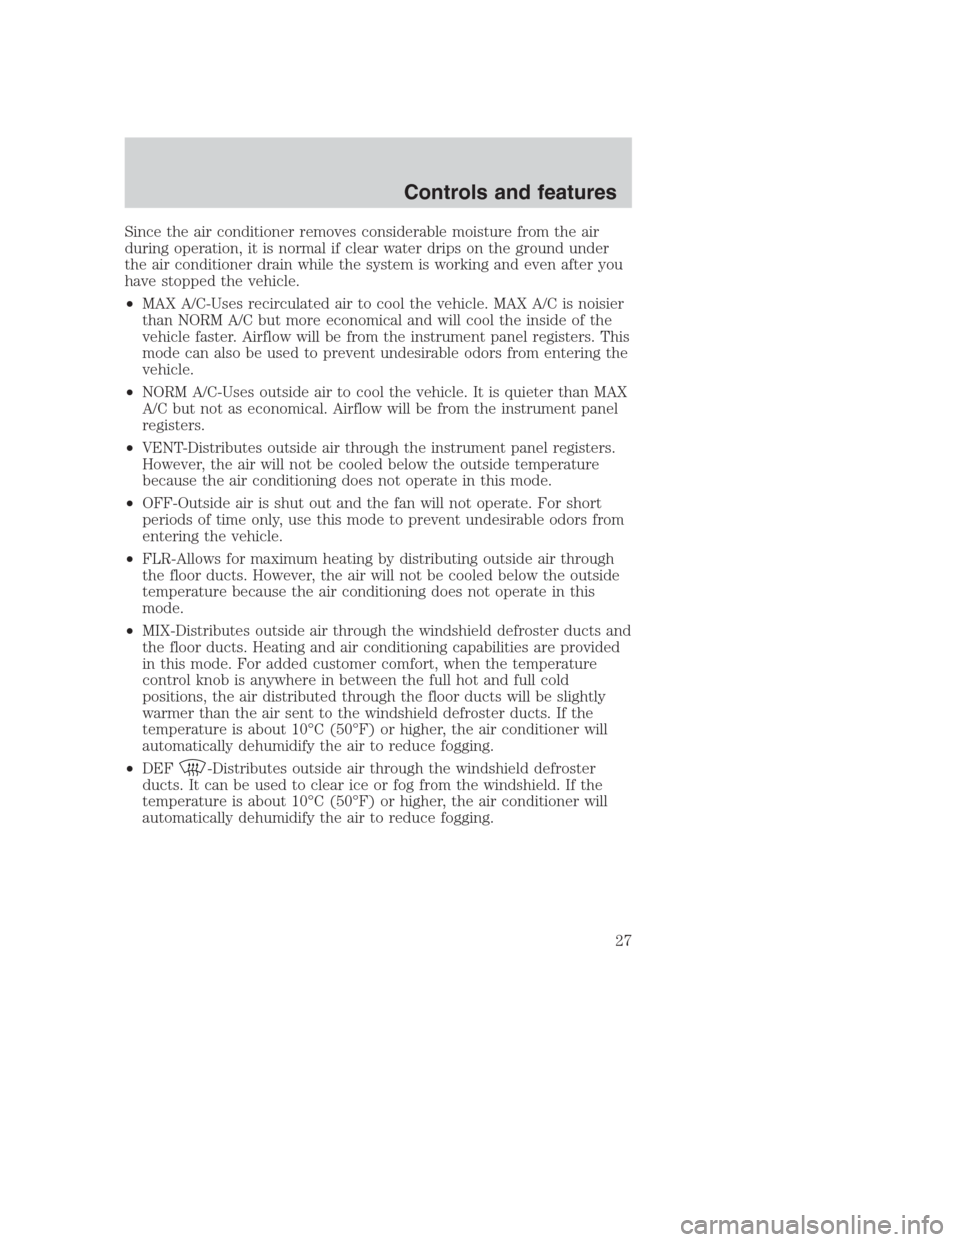
•MAX A/C-Uses recirculated air to cool the vehicle. MAX A/C is noisier
than NORM A/C but more economical and will cool the inside of the
vehicle faster. Airflow will be from the instrument panel registers. This
mode can also be used to prevent undesirable odors from entering the
vehicle.
•NORM A/C-Uses outside air to cool the vehicle. It is quieter than MAX
A/C but not as economical. Airflow will be from the instrument panel
registers.
•VENT-Distributes outside air through the instrument panel registers.
However, the air will not be cooled below the outside temperature
because the air conditioning does not operate in this mode.
•OFF-Outside air is shut out and the fan will not operate. For short
periods of time only, use this mode to prevent undesirable odors from
entering the vehicle.
•FLR-Allows for maximum heating by distributing outside air through
the floor ducts. However, the air will not be cooled below the outside
temperature because the air conditioning does not operate in this
mode.
•MIX-Distributes outside air through the windshield defroster ducts and
the floor ducts. Heating and air conditioning capabilities are provided
in this mode. For added customer comfort, when the temperature
control knob is anywhere in between the full hot and full cold
positions, the air distributed through the floor ducts will be slightly
warmer than the air sent to the windshield defroster ducts. If the
temperature is about 10°C (50°F) or higher, the air conditioner will
automatically dehumidify the air to reduce fogging.
•DEF
-Distributes outside air through the windshield defroster
ducts. It can be used to clear ice or fog from the windshield. If the
temperature is about 10°C (50°F) or higher, the air conditioner will
automatically dehumidify the air to reduce fogging.
Controls and features
27
Page 32 of 224
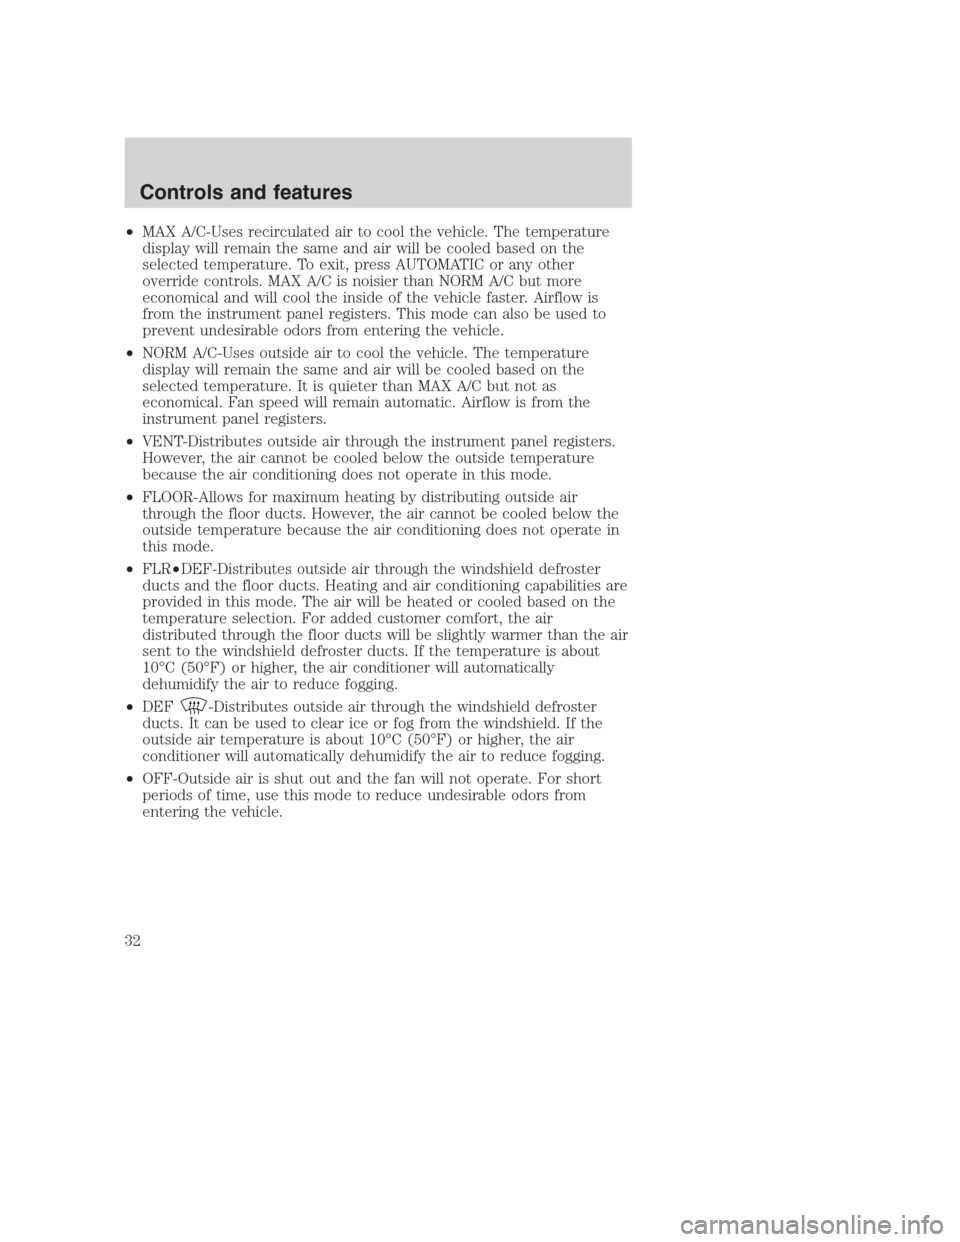
•MAX A/C-Uses recirculated air to cool the vehicle. The temperature
display will remain the same and air will be cooled based on the
selected temperature. To exit, press AUTOMATIC or any other
override controls. MAX A/C is noisier than NORM A/C but more
economical and will cool the inside of the vehicle faster. Airflow is
from the instrument panel registers. This mode can also be used to
prevent undesirable odors from entering the vehicle.
•NORM A/C-Uses outside air to cool the vehicle. The temperature
display will remain the same and air will be cooled based on the
selected temperature. It is quieter than MAX A/C but not as
economical. Fan speed will remain automatic. Airflow is from the
instrument panel registers.
•VENT-Distributes outside air through the instrument panel registers.
However, the air cannot be cooled below the outside temperature
because the air conditioning does not operate in this mode.
•FLOOR-Allows for maximum heating by distributing outside air
through the floor ducts. However, the air cannot be cooled below the
outside temperature because the air conditioning does not operate in
this mode.
•FLR•DEF-Distributes outside air through the windshield defroster
ducts and the floor ducts. Heating and air conditioning capabilities are
provided in this mode. The air will be heated or cooled based on the
temperature selection. For added customer comfort, the air
distributed through the floor ducts will be slightly warmer than the air
sent to the windshield defroster ducts. If the temperature is about
10°C (50°F) or higher, the air conditioner will automatically
dehumidify the air to reduce fogging.
•DEF
-Distributes outside air through the windshield defroster
ducts. It can be used to clear ice or fog from the windshield. If the
outside air temperature is about 10°C (50°F) or higher, the air
conditioner will automatically dehumidify the air to reduce fogging.
•OFF-Outside air is shut out and the fan will not operate. For short
periods of time, use this mode to reduce undesirable odors from
entering the vehicle.
Controls and features
32
Page 34 of 224
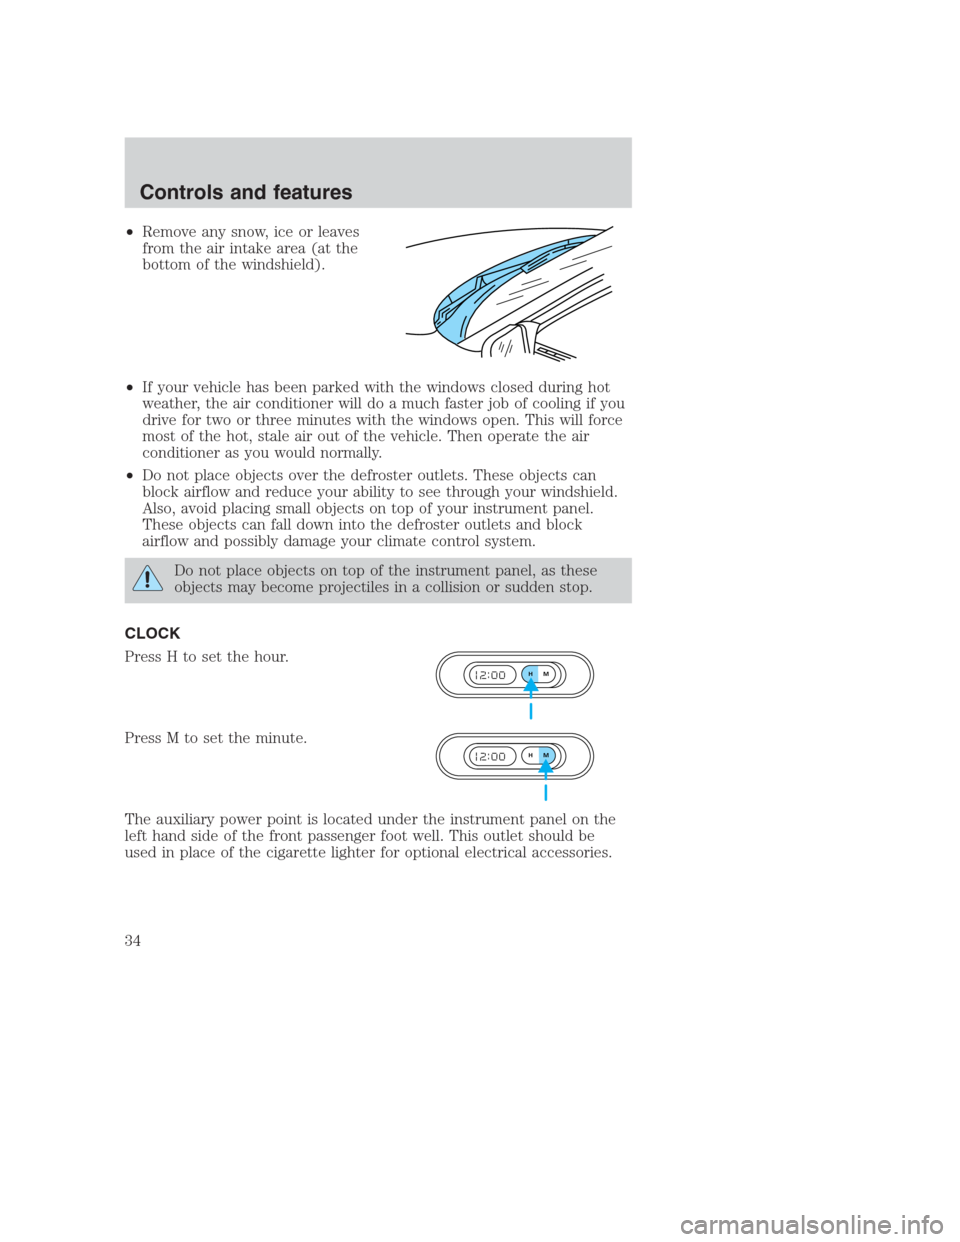
•Remove any snow, ice or leaves
from the air intake area (at the
bottom of the windshield).
•If your vehicle has been parked with the windows closed during hot
weather, the air conditioner will do a much faster job of cooling if you
drive for two or three minutes with the windows open. This will force
most of the hot, stale air out of the vehicle. Then operate the air
conditioner as you would normally.
•Do not place objects over the defroster outlets. These objects can
block airflow and reduce your ability to see through your windshield.
Also, avoid placing small objects on top of your instrument panel.
These objects can fall down into the defroster outlets and block
airflow and possibly damage your climate control system.
Do not place objects on top of the instrument panel, as these
objects may become projectiles in a collision or sudden stop.
CLOCK
Press H to set the hour.
Press M to set the minute.
The auxiliary power point is located under the instrument panel on the
left hand side of the front passenger foot well. This outlet should be
used in place of the cigarette lighter for optional electrical accessories.
HM
HM
Controls and features
34
Page 50 of 224
Premium AM/FM Stereo/Cassette (CD Changer Compatible)
Your audio system is equipped with selective lighting, a unique lighting
strategy. This lighting feature is operable when the headlamps are
illuminated. During the operation of any selected mode, lighting for the
individual function controls will either illuminate or turn off. Those
controls which have a function for the specific mode of operation
selected will be lit, while the controls which have no function for that
mode will be turned off.
Volume/power control
Press the control to turn the audio
system on or off.
SCAN
VOL
PUSH ON
REW
1
FF
2
SIDE 1.
2
34
COMP
5
SHUFF
6
AUTO TUNE
SEEK
SEL
BAL
FADE
MUTE
FM AM
EJ
BASS
TREB
CD TAPERDS
VOL
PUSH ON
Controls and features
50
Page 62 of 224
If your changer does not work, it may be that:
•A disc is already loaded where you want to insert a disc.
•The disc is inserted with the label surface downward.
•The disc is dusty or defective.
•The player’s internal temperature is above 60°C (140°F). Allow the
player to cool down before operating.
•A disc with format and dimensions not within industry standards is
inserted.
Cleaning compact discs
Inspect all discs for contamination before playing. If necessary, clean
discs only with an approved CD cleaner and wipe from the center out to
the edge. Do not use circular motion.
CD and CD changer care
•Handle discs by their edges only. Never touch the playing surface.
•Do not expose discs to direct sunlight or heat sources for extended
periods of time.
•Do not insert more than one disc into each slot of the CD changer
magazine.
Cleaning cassette player (if equipped)
Clean the tape player head with a cassette cleaning cartridge after 10 to
12 hours of play in order to maintain the best sound and operation.
Cassette and cassette player care
•Use only cassettes that are 90 minutes long or less.
•Do not expose tapes to direct sunlight, high humidity, extreme heat or
extreme cold. Allow tapes that may have been exposed to extreme
temperatures to reach a moderate temperature before playing.
•Tighten very loose tapes by inserting a finger or pencil into the hole
and turning the hub.
•Remove loose labels before inserting tapes.
•Do not leave tapes in the cassette player for a long time when not
being played.
Controls and features
62