Page 5 of 429
Table of Contents (cont'd)
Defensive Driving
Drunken Driving
Control of a Vehicle
Braking
SteeringDriving Tips for Various Road Conditions
Recreational Vehicle Towing
Loading Your Vehicle
Towing a Trailer Heating and Air Conditioning
Setting the Radio ClockRadio/Cassette Player/CD Player
Radio Theft-Deterrent Feature (If Equipped)
Hazard Warning Flashers
Jump Starting
Towing Your VehicleEngine Overheating
Changing a Flat Tire
If You're Stuck
Problems on the Road
Section
3
Section
4
Section
5
Your Driving and the Road Comfort Controls and Audio Systems
iii
Page 120 of 429

2-16
Mode 4: Both Features On (This combines Modes 2
and 3.)
Vehicles are delivered programmed in Mode 4.
To change the mode:
1. Follow the instructions for ªEntering Programming
Modeº listed previously.
2. Turn the interior lamps control all the way clockwise
and then back slightly counterclockwise.
3. Count the number of chimes you hear. The number
of chimes tells you which mode your vehicle is in.
You can change the mode by turning the interior
lamps control all the way clockwise and then back
slightly counterclockwise.
4. Repeat Step 2 until you hear the number of chimes
that matches the mode you want.
The mode you selected is now set. You can either exit
the programming mode by following the instructions
later in this section or program the next feature available
on your vehicle.Automatic Door Locks
With automatic door locks, all doors will automatically
lock when you shift out of PARK (P) and automatically
unlock when the ignition is turned to OFF.
To customize these features to your preference,
see ªProgrammable Modesº following.
Programmable Modes
Your vehicle can be programmed to one of the
following modes.
Mode 1: Both Features Off (Automatic door locking
and unlocking is disabled. You will always need to lock
your doors manually before driving to increase
occupant safety.)
Mode 2: Automatic Door Locking Only
�The automatic door unlock feature is turned off.
�Shift out of PARK (P) with the ignition on and the
driver's door closed; all doors will lock automatically.
Mode 3: Automatic Unlocking with the Ignition Off
�Turn off the ignition with the transaxle in PARK (P);
all doors will unlock automatically.
�Shift out of PARK (P) with the ignition on and the
driver's door closed; all doors will lock automatically.
Page 136 of 429

2-32
Liftgate
To unlock the liftgate from the outside, turn the key in
the cylinder clockwise. To lock the liftgate using the
key, turn the key counterclockwise.
Open the liftgate using the handle above the license
plate. Once slightly opened, the liftgate will rise by
itself. Lamps in the rear of the vehicle will come on,
illuminating the rear cargo area. See ªInterior Lampsº in
the Index.
NOTICE:
Be sure there are no overhead obstructions, such
as a garage door, before you open the liftgate.
You could slam the liftgate into something and
break the glass.
CAUTION:
It can be dangerous to drive with the liftgate
open because carbon monoxide (CO) gas can
come into your vehicle. You can't see or smell
CO. It can cause unconsciousness and even death.
If you must drive with the liftgate open or if
electrical wiring or other cable connections must
pass through the seal between the body and
the liftgate:
�Make sure all other windows are shut.
�Turn the fan on your heating or cooling
system to its highest speed with the setting
on bi
-level (outside air button is pressed).
That will force outside air into your vehicle.
See ªComfort Controlsº in the Index.
�If you have air outlets on or under the
instrument panel, open them all the way.
See ªEngine Exhaustº in the Index.
Page 167 of 429

2-63
A light sensor on top of the instrument panel makes the
DRL work, so be sure it isn't covered. The DRL system
will make front parking and turn signal lamps come on
in daylight when:
�The ignition is on,
�the headlamp switch is off, and
�the parking brake is released.
When the DRL are on, only your front parking and turn
signal lamps will be on. Your instrument panel won't be
lit up.
When it's dark enough outside, the exterior lamps will
come on automatically. When it's bright enough outside,
the exterior lamps will go out and the DRL will turn on.
Of course, you may still turn on the headlamps any time
you need to.
To idle your vehicle with the DRL off, set the parking
brake while the ignition is in OFF or LOCK. Then start
the vehicle. The DRL will stay off until you release the
parking brake.
As with any vehicle, you should turn on the regular
headlamp system when you need it.Interior Lamps
Instrument Panel Intensity Control
Turn the control, located below the headlamps switch,
clockwise to increase the brightness of the instrument
panel lights, and counterclockwise to decrease the
brightness. Turn the control all the way
counterclockwise to turn them off.
Interior Lamps Control
Turn the dial all the way clockwise to turn on the
interior lamps, if the interior lamps override switch is
off. Turn the dial counterclockwise to turn the lamps off.
Page 171 of 429

2-67
Battery Saver
Your vehicle has a feature to help prevent you from
draining the battery, in case you accidentally leave the
interior lamps on. If you leave any interior lamps on
while the ignition is in LOCK or OFF, they will
automatically turn off after 10 minutes. The lamps won't
come back on again until you:
�Turn the ignition to RUN or ACCESSORY,
�turn the interior lamps dial all the way clockwise,
then slightly back counterclockwise, or
�open (or close and reopen) a door that is closed.
If your vehicle has less than 15 miles (25 km) on the
odometer, the battery saver will turn off the lamps after
only three minutes.
Mirrors
Inside Day/Night Rearview Mirror
To reduce glare from lights behind you, pull the lever
toward you (to the night position). To return the mirror
to the day position, push the lever away from you.
Power Remote Control Mirrors
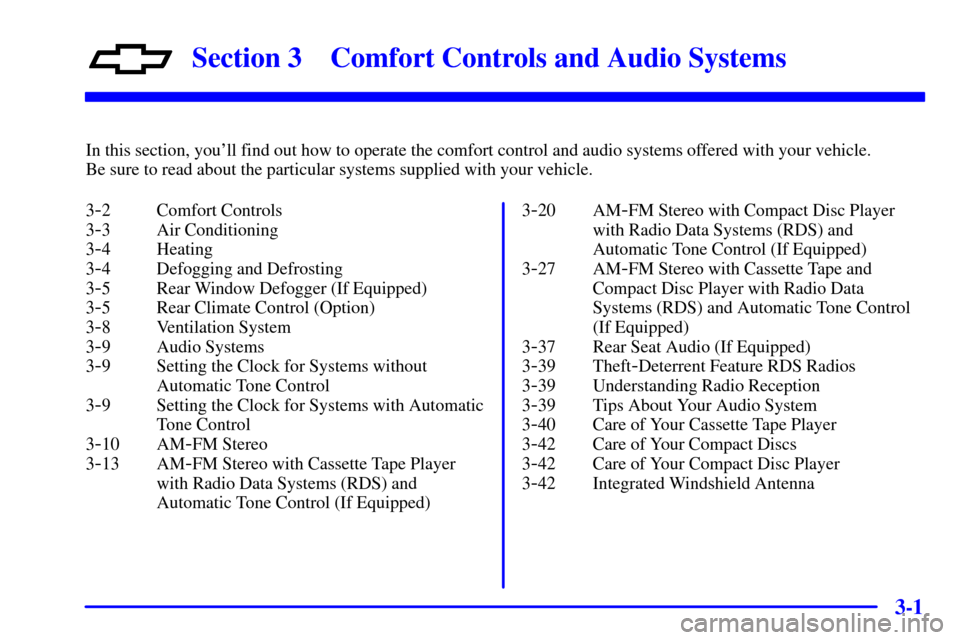
The control on the driver's
door operates both outside
rearview mirrors.
Turn the control counterclockwise to select the
driver's side rearview mirror, or clockwise to select the
passenger's side rearview mirror. Then use the control to
adjust each mirror so that you can see a little of the side
of your vehicle when you are sitting in a comfortable
driving position.
If you are not adjusting either mirror, leave the control
in the center off position. This prevents moving the
mirrors accidentally once you have them adjusted.
Page 182 of 429
2-78
Your luggage carrier has
release knobs set in the ends
of each crossrail.
Turn the release knobs counterclockwise to unlock the
crossrails. Slide the crossrails forward or back, as
needed, to accommodate loads of various sizes.
After repositioning the crossrails, be sure to tighten the
release knobs by turning them clockwise. This will lock
the crossrails in place.Use the tie-down loops on
the slider to help secure
large loads.
Ashtray and Cigarette Lighter
The ashtray and cigarette lighter are located below the
instrument panel switchbank in the instrument panel,
below the switchbank. Pull out the drawer to use
the ashtray.
To remove the ashtray for cleaning, grasp the edge of
the ashtray with your fingertips and pull up and out,
in a rocking motion.
To use the lighter, push it in all the way and let go.
When it's ready, it will pop back out by itself.
Page 209 of 429

3-
3-1
Section 3 Comfort Controls and Audio Systems
In this section, you'll find out how to operate the comfort control and audio systems offered with your vehicle.
Be sure to read about the particular systems supplied with your vehicle.
3
-2 Comfort Controls
3
-3 Air Conditioning
3
-4 Heating
3
-4 Defogging and Defrosting
3
-5 Rear Window Defogger (If Equipped)
3
-5 Rear Climate Control (Option)
3
-8 Ventilation System
3
-9 Audio Systems
3
-9 Setting the Clock for Systems without
Automatic Tone Control
3
-9 Setting the Clock for Systems with Automatic
Tone Control
3
-10 AM-FM Stereo
3
-13 AM-FM Stereo with Cassette Tape Player
with Radio Data Systems (RDS) and
Automatic Tone Control (If Equipped)3
-20 AM-FM Stereo with Compact Disc Player
with Radio Data Systems (RDS) and
Automatic Tone Control (If Equipped)
3
-27 AM-FM Stereo with Cassette Tape and
Compact Disc Player with Radio Data
Systems (RDS) and Automatic Tone Control
(If Equipped)
3
-37 Rear Seat Audio (If Equipped)
3
-39 Theft-Deterrent Feature RDS Radios
3
-39 Understanding Radio Reception
3
-39 Tips About Your Audio System
3
-40 Care of Your Cassette Tape Player
3
-42 Care of Your Compact Discs
3
-42 Care of Your Compact Disc Player
3
-42 Integrated Windshield Antenna
Page 210 of 429

3-2
Comfort Controls
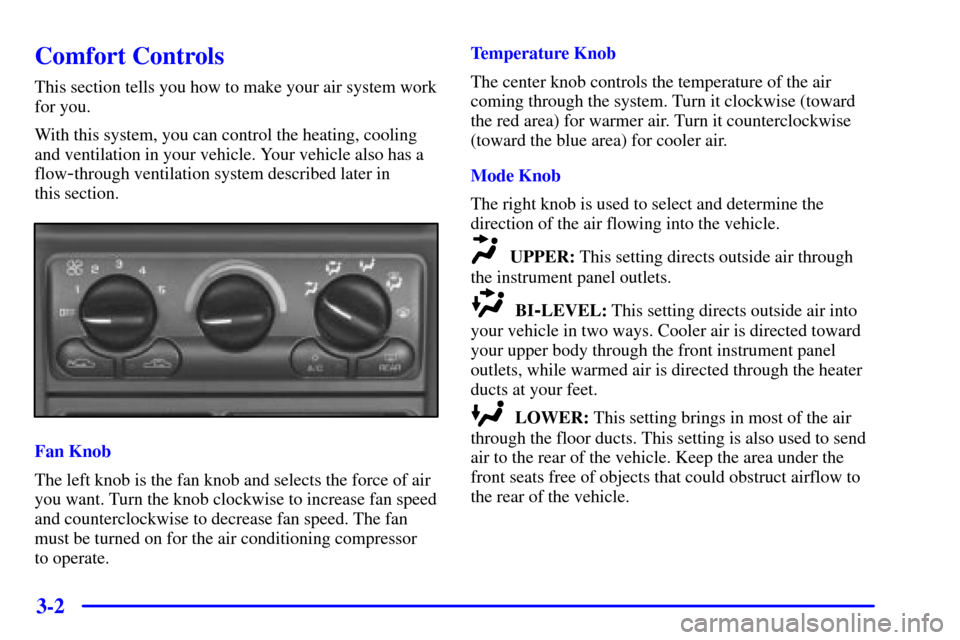
This section tells you how to make your air system work
for you.
With this system, you can control the heating, cooling
and ventilation in your vehicle. Your vehicle also has a
flow
-through ventilation system described later in
this section.
Fan Knob
The left knob is the fan knob and selects the force of air
you want. Turn the knob clockwise to increase fan speed
and counterclockwise to decrease fan speed. The fan
must be turned on for the air conditioning compressor
to operate.Temperature Knob
The center knob controls the temperature of the air
coming through the system. Turn it clockwise (toward
the red area) for warmer air. Turn it counterclockwise
(toward the blue area) for cooler air.
Mode Knob
The right knob is used to select and determine the
direction of the air flowing into the vehicle.
UPPER: This setting directs outside air through
the instrument panel outlets.
BI-LEVEL: This setting directs outside air into
your vehicle in two ways. Cooler air is directed toward
your upper body through the front instrument panel
outlets, while warmed air is directed through the heater
ducts at your feet.
LOWER: This setting brings in most of the air
through the floor ducts. This setting is also used to send
air to the rear of the vehicle. Keep the area under the
front seats free of objects that could obstruct airflow to
the rear of the vehicle.