Page 159 of 429
2-55
Tilt Wheel
A tilt steering wheel allows you to adjust the steering
wheel before you drive. You can also raise it to the
highest level to give your legs more room when you exit
and enter the vehicle.
To tilt the wheel, hold the
steering wheel and pull the
lever located on the left
side of the steering
wheel console.
Move the steering wheel to a comfortable level, then
release the lever to lock the wheel in place.
Turn Signal/Multifunction Lever
The lever on the left side of the steering column
includes your:
�Turn Signal and Lane Change Indicator
�Headlamp High/Low
-Beam Changer
�Windshield Wiper and Washer Control
�Cruise Control (Option)
�Flash
-to-Pass
Page 161 of 429

2-57
Flash-to-Pass
When the headlamps are off, pull the lever toward you
to momentarily switch on the high beams (to signal that
you are going to pass). When you release the lever,
they will turn off.
Windshield Wipers
You control the windshield wipers by turning the band
marked WIPER.
For a single wiping cycle, turn the band to MIST. Hold
it there until the wipers start, then let go. The wipers will
stop after one cycle. If you want more cycles, hold the
band on mist longer.
For a delayed wiping cycle, you can set the wiper speed
for a long or short delay between wipes. This can be
very useful in light rain or snow. Turn the band to
choose the delay time. The closer to LOW,
the shorter the delay time.
For steady wiping cycles, at low speed, turn the band
away from you to the LOW position. For high
-speed
wiping, turn the band further to HIGH. To stop the
wipers, turn the band to OFF.Remember that damaged wiper blades may prevent you
from seeing well enough to drive safely. To avoid
damage, be sure to clear ice and snow from the wiper
blades before using them. If they're frozen to the
windshield, carefully loosen or thaw them. If your blades
do become damaged, get new blades or blade inserts.
Heavy snow or ice can overload your wipers. A circuit
breaker will stop them until the motor cools. Clear away
snow or ice to prevent an overload.
Windshield Washer
To wash your windshield, press and hold the windshield
washer paddle. The washers and wipers will operate.
When you release the paddle, the washers will stop, and
the wipers will continue to operate for two cycles, unless
your wipers had already been on. In that case, the wipers
will resume the wiper speed you had selected earlier.
CAUTION:
In freezing weather, don't use your washer until
the windshield is warmed. Otherwise the washer
fluid can form ice on the windshield, blocking
your vision.
Page 166 of 429
2-62
Exterior Lamps
Turning the dial to this setting turns on:
�Parking Lamps
�Sidemarker Lamps
�Taillamps
�Instrument Panel Lights
Turning the dial to this setting turns on the
headlamps, together with:
�Parking Lamps
�Sidemarker Lamps
�Taillamps
�Instrument Panel Lights
Turning the dial to this setting turns off all the lamps
and lights.
Lamps on Reminder
If the driver's door is opened and you turn the ignition
to OFF or LOCK while leaving the lamps on,
you will hear a warning chime.
Daytime Running Lamps
Daytime Running Lamps (DRL) can make it easier for
others to see the front of your vehicle during the day.
DRL can be helpful in many different driving
conditions, but they can be especially helpful in the
short periods after dawn and before sunset.
Page 167 of 429

2-63
A light sensor on top of the instrument panel makes the
DRL work, so be sure it isn't covered. The DRL system
will make front parking and turn signal lamps come on
in daylight when:
�The ignition is on,
�the headlamp switch is off, and
�the parking brake is released.
When the DRL are on, only your front parking and turn
signal lamps will be on. Your instrument panel won't be
lit up.
When it's dark enough outside, the exterior lamps will
come on automatically. When it's bright enough outside,
the exterior lamps will go out and the DRL will turn on.
Of course, you may still turn on the headlamps any time
you need to.
To idle your vehicle with the DRL off, set the parking
brake while the ignition is in OFF or LOCK. Then start
the vehicle. The DRL will stay off until you release the
parking brake.
As with any vehicle, you should turn on the regular
headlamp system when you need it.Interior Lamps
Instrument Panel Intensity Control
Turn the control, located below the headlamps switch,
clockwise to increase the brightness of the instrument
panel lights, and counterclockwise to decrease the
brightness. Turn the control all the way
counterclockwise to turn them off.
Interior Lamps Control
Turn the dial all the way clockwise to turn on the
interior lamps, if the interior lamps override switch is
off. Turn the dial counterclockwise to turn the lamps off.
Page 168 of 429

2-64 Interior Lamps Override Switch
This switch is located
in the overhead
console switchbank.
Press the symbol on the bottom of the switch to override
control of the interior lamps and turn off power to the
courtesy lamps, reading lamps, visor vanity lamps
(if equipped) and glove box lamp. This feature allows
you to have the lamps off when any door is open.
Press the top of the interior lamps override switch to
turn power back on to the interior lamps. This will allow
the lamps to stay on when any door is open.
Illuminated Entry
With illuminated entry, the interior of your vehicle is
illuminated so you can see inside before you enter your
vehicle. The lamps will come on for 40 seconds if you
unlock your door using your key or the remote keyless
entry transmitter (if equipped) and the ignition is in
LOCK or OFF. After 40 seconds have passed,
the interior lamps will slowly fade out. The lamps will
turn off before the 40 seconds if you:
�Lock all the doors using the key,
�press LOCK on the power door lock switch, or
�press LOCK on the remote keyless entry transmitter
(if equipped).
When any door is opened, illuminated entry is cancelled.
The interior lamps will stay on while any door or the
liftgate is open, and slowly fade out when all doors and
the liftgate are closed.
The interior lamps may stay on for up to 25 seconds
after all doors have been closed if they have not been
locked. See ªDelayed Illuminationº later in this section.
To turn the exit lighting feature off or on, see
ªMultifunction Alarm Locks and Lighting Choicesº in
the Index.
Page 169 of 429

2-65
Delayed Illumination
The delayed illumination feature will continue to
illuminate the interior for 25 seconds after all doors have
been closed so that you can find your ignition and
buckle your safety belt at night. Delayed illumination
will not occur while the ignition is in RUN or
ACCESSORY. After 25 seconds have passed,
the interior lamps will slowly fade out. The lamps will
fade out before the 25 seconds have passed if you:
�Turn the ignition to RUN or ACCESSORY,
�lock all doors using the remote keyless entry
transmitter (if equipped), or
�lock all the doors using the power door lock switch
or the key.
To turn the delayed illumination feature off or on, see
ªMultifunction Alarm Locks and Lighting Choicesº in
the Index.
Exit Lighting
With exit lighting, the interior lamps will come on for
about 25 seconds whenever you remove the key from
the ignition. If you turn the ignition key to RUN or
ACCESSORY, the lamps will fade out. The lamps will
also fade out if you lock the doors with the power door
lock switch or the remote keyless entry transmitter
(if equipped).
When any door is opened, exit lighting is cancelled.
The interior lamps will stay on while any door or liftgate
is open, and slowly fade out when all doors and the
liftgate are closed.
The interior lamps may stay on for up to 25 seconds
after all doors have been closed if they have not been
locked. See ªDelayed Illuminationº earlier in
this section.
To turn the exit lighting feature off or on, see
ªMultifunction Alarm Locks and Lighting Choicesº in
the Index.
Page 171 of 429

2-67
Battery Saver
Your vehicle has a feature to help prevent you from
draining the battery, in case you accidentally leave the
interior lamps on. If you leave any interior lamps on
while the ignition is in LOCK or OFF, they will
automatically turn off after 10 minutes. The lamps won't
come back on again until you:
�Turn the ignition to RUN or ACCESSORY,
�turn the interior lamps dial all the way clockwise,
then slightly back counterclockwise, or
�open (or close and reopen) a door that is closed.
If your vehicle has less than 15 miles (25 km) on the
odometer, the battery saver will turn off the lamps after
only three minutes.
Mirrors
Inside Day/Night Rearview Mirror
To reduce glare from lights behind you, pull the lever
toward you (to the night position). To return the mirror
to the day position, push the lever away from you.
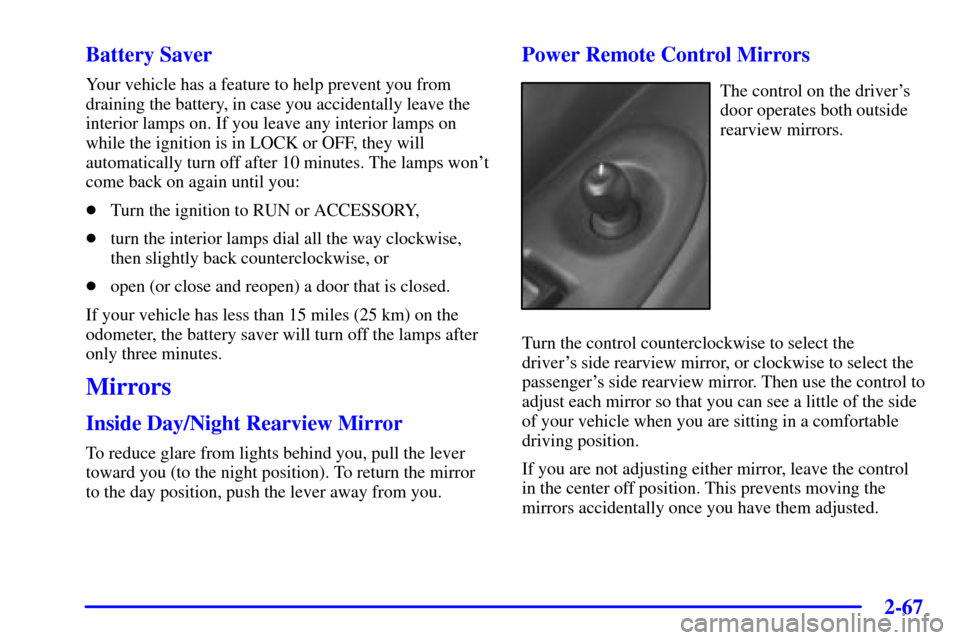
Power Remote Control Mirrors
The control on the driver's
door operates both outside
rearview mirrors.
Turn the control counterclockwise to select the
driver's side rearview mirror, or clockwise to select the
passenger's side rearview mirror. Then use the control to
adjust each mirror so that you can see a little of the side
of your vehicle when you are sitting in a comfortable
driving position.
If you are not adjusting either mirror, leave the control
in the center off position. This prevents moving the
mirrors accidentally once you have them adjusted.
Page 172 of 429

2-68
Both outside mirrors can be folded forward or rearward.
In the rearward position, they will fold almost flush with
the vehicle. This feature is particularly useful in
automatic car washes.
Your mirrors have a blue tint to reduce glare while
driving at night.
Convex Outside Mirror
Your passenger's side mirror is convex. A convex
mirror's surface is curved so you can see more from the
driver's seat.
CAUTION:
A convex mirror can make things (like other
vehicles) look farther away than they really are.
If you cut too sharply into the right lane, you
could hit a vehicle on your right. Check your
inside mirror or glance over your shoulder before
changing lanes.
Heated Outside Mirrors
The left and right outside mirrors are heated when you
activate the rear window defogger. See ªRear Window
Defoggerº in the Index.
Storage Compartments
Your vehicle's large carrying capacity can store many
items. If you have the extended wheelbase version, you
can carry things as large as a 4� x 8� piece of plywood.
You can also use the floor pins that are used to attach the
seats, to secure larger loads.
Glove Box
Your vehicle has a glove box below the instrument
panel. To open the glove box, lift the latch release.
Use the key to lock or unlock the glove box.
The glove box door has a detent to prevent the door
from lowering too far. Open the glove box until the door
is partway open, then pull the door down if you need it
fully open. To close the glove box, the door must be
pushed up past the detent.
In the door of the glove box, you will find a tissue pack
holder and clip for a pen or pencil.