Page 141 of 429

2-37
When trying to start the vehicle if the engine does not
start and the SECURITY message comes on, the key
may have a damaged transponder. Turn the ignition off
and try again.
If the engine still does not start, and the key appears to
be undamaged, try another ignition key. At this time,
you may also want to check the fuse (see ªFuses and
Circuit Breakersº in the Index). If the engine still does
not start with the other key, your vehicle needs service.
If your vehicle does start, the first key may be faulty.
See your dealer or a locksmith who can service the
PASS
-Key III to have a new key made.
It is possible for the Pass
-Key III decoder to learn the
transponder value of a new or replacement key. Up to
10 additional keys may be programmed for the vehicle.
This procedure is for learning additional keys only. If all
the currently programmed keys are lost or do not
operate, you must see your dealer or a locksmith who
can service PASS
-Key III to have keys made and
programmed to the system.
See your dealer or a locksmith who can service
PASS
-Key III to get a new key blank that is a cut
exactly as the ignition key that operates the system.To program the new key:
1. Insert the ignition key in the ignition and start the
engine. If the engine will not start see your dealer
for service.
2. After the engine has started, turn the key to OFF,
and remove the key.
3. Insert the key to be programmed and turn it to RUN
within 10 seconds of removing the previous key.
4. The SECURITY message will turn off once the key
has been programmed. It may not be apparent that
the SECURITY message went on due to how
quickly the key is programmed.
5. Repeat Steps 1 through 4 if additional keys are to
be programmed.
If you are ever driving and the SECURITY message
comes on and stays on, you will be able to restart your
engine if you turn it off. Your PASS
-Key III system,
however, is not working properly and must be serviced
by your dealer. Your vehicle is not protected by the
PASS
-Key III system at this time.
If you lose or damage a PASS
-Key III key, see your
dealer or a locksmith who can service PASS
-Key III to
have a new key made.
Page 157 of 429
2-53
Windows
Manual Windows
Use the manual crank to open and close the front windows.
Power Windows (Option)
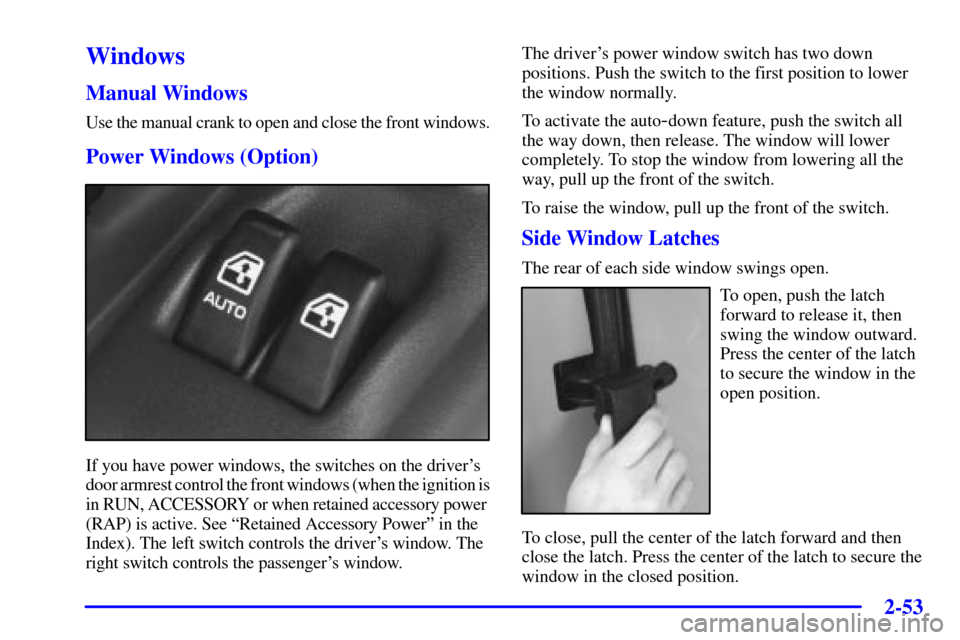
If you have power windows, the switches on the driver's
door armrest control the front windows (when the ignition is
in RUN, ACCESSORY or when retained accessory power
(RAP) is active. See ªRetained Accessory Powerº in the
Index). The left switch controls the driver's window. The
right switch controls the passenger's window.The driver's power window switch has two down
positions. Push the switch to the first position to lower
the window normally.
To activate the auto
-down feature, push the switch all
the way down, then release. The window will lower
completely. To stop the window from lowering all the
way, pull up the front of the switch.
To raise the window, pull up the front of the switch.
Side Window Latches
The rear of each side window swings open.
To open, push the latch
forward to release it, then
swing the window outward.
Press the center of the latch
to secure the window in the
open position.
To close, pull the center of the latch forward and then
close the latch. Press the center of the latch to secure the
window in the closed position.
Page 172 of 429
2-68
Both outside mirrors can be folded forward or rearward.
In the rearward position, they will fold almost flush with
the vehicle. This feature is particularly useful in
automatic car washes.
Your mirrors have a blue tint to reduce glare while
driving at night.
Convex Outside Mirror
Your passenger's side mirror is convex. A convex
mirror's surface is curved so you can see more from the
driver's seat.
CAUTION:
A convex mirror can make things (like other
vehicles) look farther away than they really are.
If you cut too sharply into the right lane, you
could hit a vehicle on your right. Check your
inside mirror or glance over your shoulder before
changing lanes.
Heated Outside Mirrors
The left and right outside mirrors are heated when you
activate the rear window defogger. See ªRear Window
Defoggerº in the Index.
Storage Compartments
Your vehicle's large carrying capacity can store many
items. If you have the extended wheelbase version, you
can carry things as large as a 4� x 8� piece of plywood.
You can also use the floor pins that are used to attach the
seats, to secure larger loads.
Glove Box
Your vehicle has a glove box below the instrument
panel. To open the glove box, lift the latch release.
Use the key to lock or unlock the glove box.
The glove box door has a detent to prevent the door
from lowering too far. Open the glove box until the door
is partway open, then pull the door down if you need it
fully open. To close the glove box, the door must be
pushed up past the detent.
In the door of the glove box, you will find a tissue pack
holder and clip for a pen or pencil.
Page 181 of 429
2-77
NOTICE:
Loading cargo that weighs more than 150 lbs.
(68 kg) on the luggage carrier may damage
your vehicle.
When you carry cargo on the luggage carrier of a
proper size and weight, put it on the slats, as far
forward as you can. Then slide the crossrail up
against the rear of the load, to help keep it from
moving. You can then tie it down.
Don't exceed the maximum vehicle capacity when
loading your vehicle. For more information on vehicle
capacity and loading, see ªLoading Your Vehicleº
in the Index.
To prevent damage or loss of cargo as you're driving,
check now and then to make sure the luggage carrier and
cargo are still securely fastened.
Page 182 of 429
2-78
Your luggage carrier has
release knobs set in the ends
of each crossrail.
Turn the release knobs counterclockwise to unlock the
crossrails. Slide the crossrails forward or back, as
needed, to accommodate loads of various sizes.
After repositioning the crossrails, be sure to tighten the
release knobs by turning them clockwise. This will lock
the crossrails in place.Use the tie-down loops on
the slider to help secure
large loads.
Ashtray and Cigarette Lighter
The ashtray and cigarette lighter are located below the
instrument panel switchbank in the instrument panel,
below the switchbank. Pull out the drawer to use
the ashtray.
To remove the ashtray for cleaning, grasp the edge of
the ashtray with your fingertips and pull up and out,
in a rocking motion.
To use the lighter, push it in all the way and let go.
When it's ready, it will pop back out by itself.
Page 185 of 429
2-81
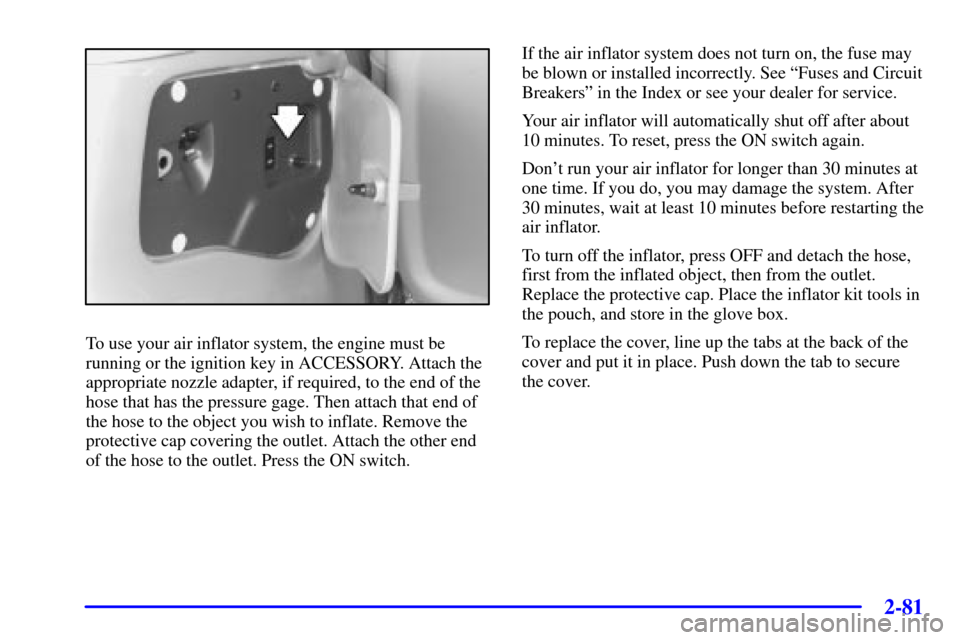
To use your air inflator system, the engine must be
running or the ignition key in ACCESSORY. Attach the
appropriate nozzle adapter, if required, to the end of the
hose that has the pressure gage. Then attach that end of
the hose to the object you wish to inflate. Remove the
protective cap covering the outlet. Attach the other end
of the hose to the outlet. Press the ON switch.If the air inflator system does not turn on, the fuse may
be blown or installed incorrectly. See ªFuses and Circuit
Breakersº in the Index or see your dealer for service.
Your air inflator will automatically shut off after about
10 minutes. To reset, press the ON switch again.
Don't run your air inflator for longer than 30 minutes at
one time. If you do, you may damage the system. After
30 minutes, wait at least 10 minutes before restarting the
air inflator.
To turn off the inflator, press OFF and detach the hose,
first from the inflated object, then from the outlet.
Replace the protective cap. Place the inflator kit tools in
the pouch, and store in the glove box.
To replace the cover, line up the tabs at the back of the
cover and put it in place. Push down the tab to secure
the cover.
Page 186 of 429
2-82
Accessory Power Outlets
Power outlets can be used to plug in electrical
equipment such as a cellular telephone, CB radio, etc.
Follow the proper installation instructions that are
included with any electrical equipment you install.
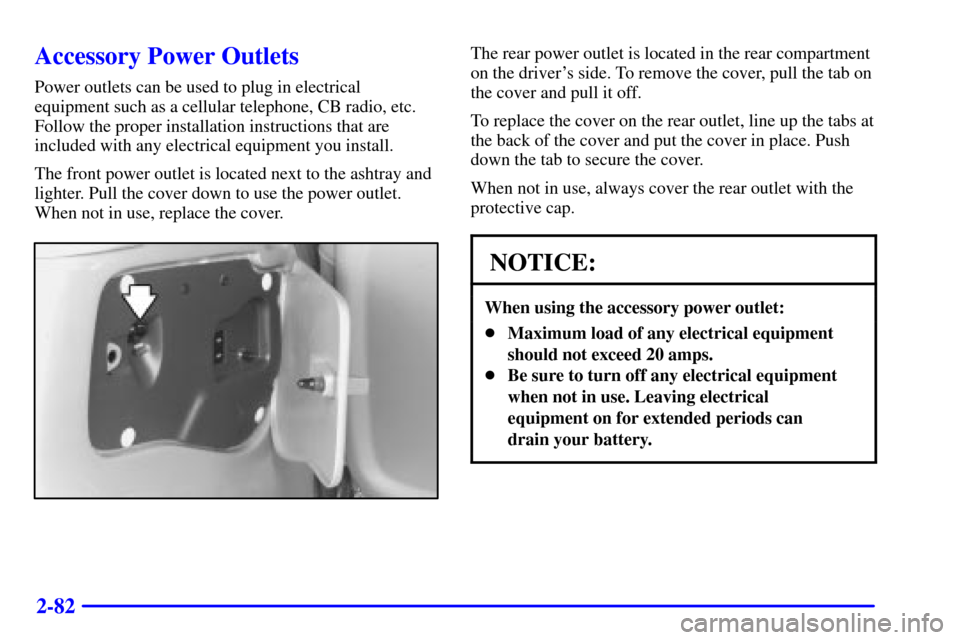
The front power outlet is located next to the ashtray and
lighter. Pull the cover down to use the power outlet.
When not in use, replace the cover.
The rear power outlet is located in the rear compartment
on the driver's side. To remove the cover, pull the tab on
the cover and pull it off.
To replace the cover on the rear outlet, line up the tabs at
the back of the cover and put the cover in place. Push
down the tab to secure the cover.
When not in use, always cover the rear outlet with the
protective cap.
NOTICE:
When using the accessory power outlet:
�Maximum load of any electrical equipment
should not exceed 20 amps.
�Be sure to turn off any electrical equipment
when not in use. Leaving electrical
equipment on for extended periods can
drain your battery.
Page 205 of 429
2-101
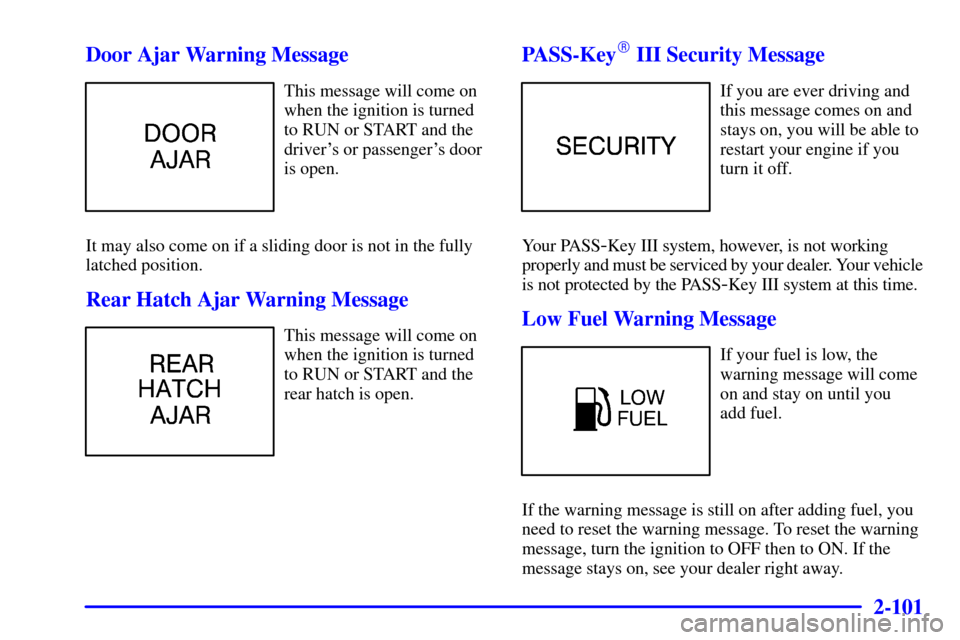
Door Ajar Warning Message
This message will come on
when the ignition is turned
to RUN or START and the
driver's or passenger's door
is open.
It may also come on if a sliding door is not in the fully
latched position.
Rear Hatch Ajar Warning Message
This message will come on
when the ignition is turned
to RUN or START and the
rear hatch is open.
PASS-Key� III Security Message
If you are ever driving and
this message comes on and
stays on, you will be able to
restart your engine if you
turn it off.
Your PASS
-Key III system, however, is not working
properly and must be serviced by your dealer. Your vehicle
is not protected by the PASS
-Key III system at this time.
Low Fuel Warning Message
If your fuel is low, the
warning message will come
on and stay on until you
add fuel.
If the warning message is still on after adding fuel, you
need to reset the warning message. To reset the warning
message, turn the ignition to OFF then to ON. If the
message stays on, see your dealer right away.