Page 71 of 361
2-13
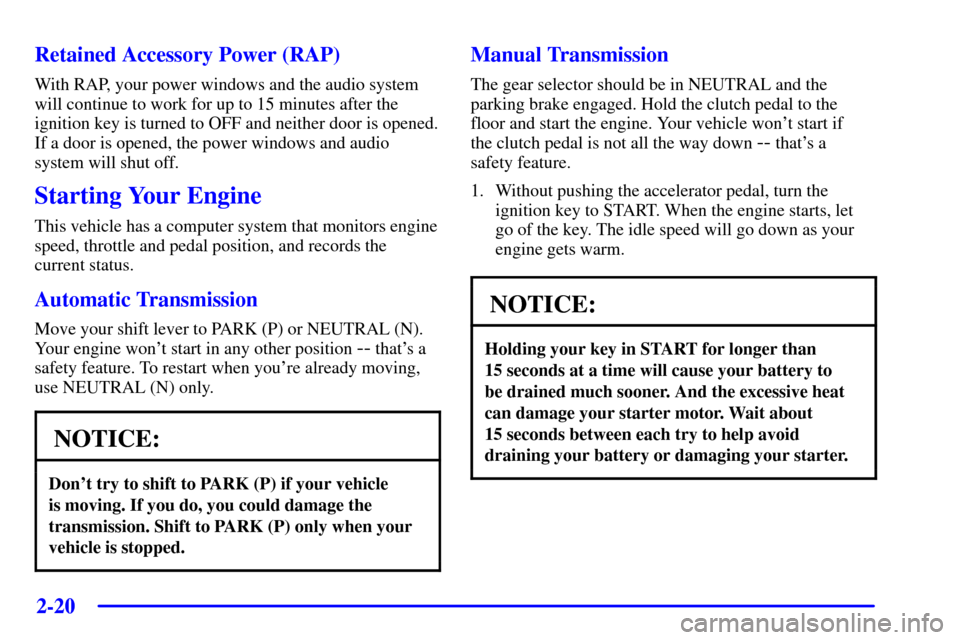
Pull each cable straight down for each latch to release
the hatch.
If your vehicle is equipped with a convertible
top/hardtop and you have lost battery power, use the
manual release cable to open the trunk lid. To access
the cable, remove the center storage compartment lid
located in the rear of the trunk area. (See ªRear Storage
Compartmentsº in the Index for more information.)Pull the cable straight down to release the trunk lid.
Page 74 of 361

2-16
Arming the System
Use one of the two following items listed here to arm
the system:
�Press the LOCK button on the remote keyless
entry transmitter.
�Open the door. (The SECURITY light should flash.)
Lock the door with the power door lock switch.
The SECURITY light will stop flashing and stay on.
Close the door. The SECURITY light should go off.
Testing the Alarm
Use the following to test the system:
1. Make sure the hatch/trunk lid is latched.
2. Lower a window on the door.
3. Manually arm the system.
4. Close the doors and wait 15 seconds.
5. Reach through the open window and manually
unlock the driver's door.
6. Open the door. The alarm should sound.
7. Turn off the alarm.
If the alarm is inoperative, check to see if the horn
works. If not, check the horn fuse. See ªFuses and
Circuit Breakersº in the Index. If the horn works, but the
alarm doesn't go off, see your dealer.
Disarming the System
Always use your key or the remote keyless entry
transmitter to unlock a door. Unlocking a door any other
way will set off the alarm. If your alarm sounds,
listed below are the ways you can disarm it:
�Unlock the driver's door with your key.
�Put the key in the ignition.
�Press the UNLOCK button on the remote keyless
entry transmitter.
Now, if a door or the hatch/trunk lid is opened without
the key or the remote keyless entry transmitter, the
alarm will go off. Your horn will sound for two minutes,
then it will go off to save battery power. And, your
vehicle won't start.
The theft
-deterrent system won't arm if you lock the
driver's door with a key, the manual door lock, or if you
use the power door lock after the doors are closed.
If your passenger stays in the vehicle when you leave
with the keys, have the passenger lock the vehicle after
the doors are closed. This way the alarm won't arm,
and your passenger won't set it off.
Page 78 of 361

2-20
Retained Accessory Power (RAP)
With RAP, your power windows and the audio system
will continue to work for up to 15 minutes after the
ignition key is turned to OFF and neither door is opened.
If a door is opened, the power windows and audio
system will shut off.
Starting Your Engine
This vehicle has a computer system that monitors engine
speed, throttle and pedal position, and records the
current status.
Automatic Transmission
Move your shift lever to PARK (P) or NEUTRAL (N).
Your engine won't start in any other position
-- that's a
safety feature. To restart when you're already moving,
use NEUTRAL (N) only.
NOTICE:
Don't try to shift to PARK (P) if your vehicle
is moving. If you do, you could damage the
transmission. Shift to PARK (P) only when your
vehicle is stopped.
Manual Transmission
The gear selector should be in NEUTRAL and the
parking brake engaged. Hold the clutch pedal to the
floor and start the engine. Your vehicle won't start if
the clutch pedal is not all the way down
-- that's a
safety feature.
1. Without pushing the accelerator pedal, turn the
ignition key to START. When the engine starts, let
go of the key. The idle speed will go down as your
engine gets warm.
NOTICE:
Holding your key in START for longer than
15 seconds at a time will cause your battery to
be drained much sooner. And the excessive heat
can damage your starter motor. Wait about
15 seconds between each try to help avoid
draining your battery or damaging your starter.
Page 79 of 361

2-21
2. If it doesn't start within 10 seconds, push the
accelerator pedal all the way to the floor, while you
hold the ignition key in START. When the engine
starts, let go of the key and let up on the accelerator
pedal. Wait about 15 seconds between each try to
help avoid draining your battery or damaging
your starter.
When starting your engine in very cold weather
(below 0�F or
-18�C), do this:
1. With your foot off the accelerator pedal, turn the
ignition key to START and hold it there. When the
engine starts, let go of the key. Use the accelerator
pedal to maintain engine speed, if you have to,
until your engine has run for a while.
2. If your engine still won't start (or starts but then
stops), it could be flooded with too much gasoline.
Try pushing your accelerator pedal all the way to the
floor and holding it there as you hold the key in
START for about three seconds. When the engine
starts, let go of the key and accelerator. If the vehicle
starts briefly but then stops again, do the same thing,
but this time keep the pedal down for five or
six seconds. This clears the extra gasoline from
the engine.
NOTICE:
Your engine is designed to work with the
electronics in your vehicle. If you add electrical
parts or accessories, you could change the way
the engine operates. Before adding electrical
equipment, check with your dealer. If you don't,
your engine might not perform properly.
If you ever have to have your vehicle towed,
see the part of this manual that tells how to do it
without damaging your vehicle. See ªTowing
Your Vehicleº in the Index.
Starter Interlock Feature
For your convenience and to avoid damage to your
starter, your vehicle is equipped with a starter interlock
feature. This feature will not allow you to crank the
engine when the vehicle is already running.
Page 109 of 361

2-51 Inadvertent Load Control
Your vehicle has a feature to help prevent you from
draining the battery in case the underhood lamp, vanity
mirror lamps, cargo lamps, reading lamps, console or
glove box lamps are accidentally left on. If you leave
any of these lamps on, they will automatically time out
after 15 minutes. To reset it, all of the above lamps must
be turned off or the ignition key must be in ON.
Mirrors
Inside Day/Night Rearview Mirror
An inside rearview mirror is attached above the
windshield. The mirror has pivots so that you can
adjust it.
You can adjust the mirror for day or night driving.
Pull the tab for night driving to reduce glare.
Push the tab for daytime driving.
Power/Heated Remote Control Mirrors
The electric mirror control is on the driver's door. It
controls the driver's and passenger's mirrors. To adjust
either mirror, press the LT (left) or RT (right) button to
select the mirror, then press the arrows to adjust the
direction of the mirror. The selected mirror will stay on
for 20 seconds after the last adjustment. An indicator
light will come on above the mirror that you select.
Your preferred mirror position can be stored if you have
the memory option. See ªMemoryº in the Index.
For operation of the heated outside mirrors,
see ªRear Window Defoggerº in the Index.
Page 114 of 361

2-56
Lighted Visor Vanity Mirrors (Option)
Pull down the sun visor and lift the cover to expose the
lighted vanity mirror. When the cover is lifted, the lamps
will come on automatically, even if the ignition is off.
Accessory Power Outlet
The accessory power outlet is located inside the center
console storage compartment, on the forward left side.
Remove the tethered cap to use the outlet. The outlet can
be used to connect electrical equipment such as a cellular
telephone or CB radio. Be sure to follow the installation
instructions included with the equipment. Leave the cap
on when the accessory power outlet is not in use.
NOTICE:
When using the accessory power outlet:
�The maximum load of any electrical
equipment should not exceed 15 amps.
�Be sure to turn off any electrical equipment
when not in use. Leaving electrical equipment
on for extended periods can drain the battery.
We recommend that you see a qualified technician or
your dealer for the proper installation of your equipment.
Floor Mats (Option)
Your vehicle's floor mats are specially designed to
remain in position under your feet and out of reach of
the accelerator pedal. The driver's side floor mat is held
in place by two locator hooks and the passenger's side is
held in place by one.
Be sure that the driver's side floor mat is properly
placed on the floor so that it does not block the
movement of the accelerator pedal.
How to Remove and Replace the Floor Mats
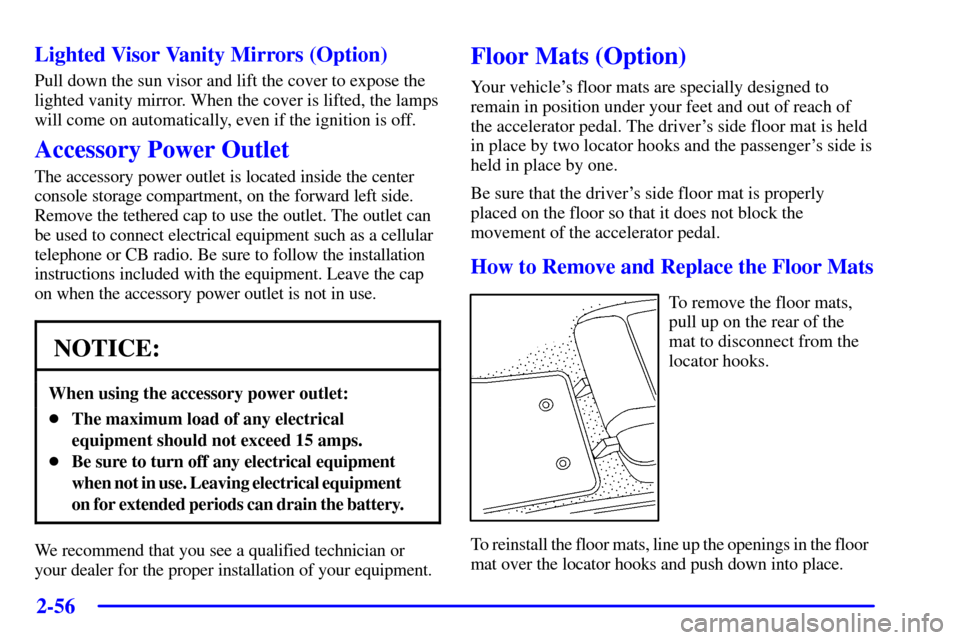
To remove the floor mats,
pull up on the rear of the
mat to disconnect from the
locator hooks.
To reinstall the floor mats, line up the openings in the floor
mat over the locator hooks and push down into place.
Page 124 of 361

2-66
5. Tilt the driver's seatback forward and press the storage
compartment release button located on the underside
of the storage compartment lid (C) behind the driver's
seat. Then raise the storage compartment lid (C). While
attempting to raise the lid, if the lid does not release
and you hear three chimes, check to make sure the
trunk lid is closed. Also, the lid will not release if the
alarm is turned on or the trunk lid is open.
After pressing the release button, the driver's and
passenger's door glass should retract to the
full
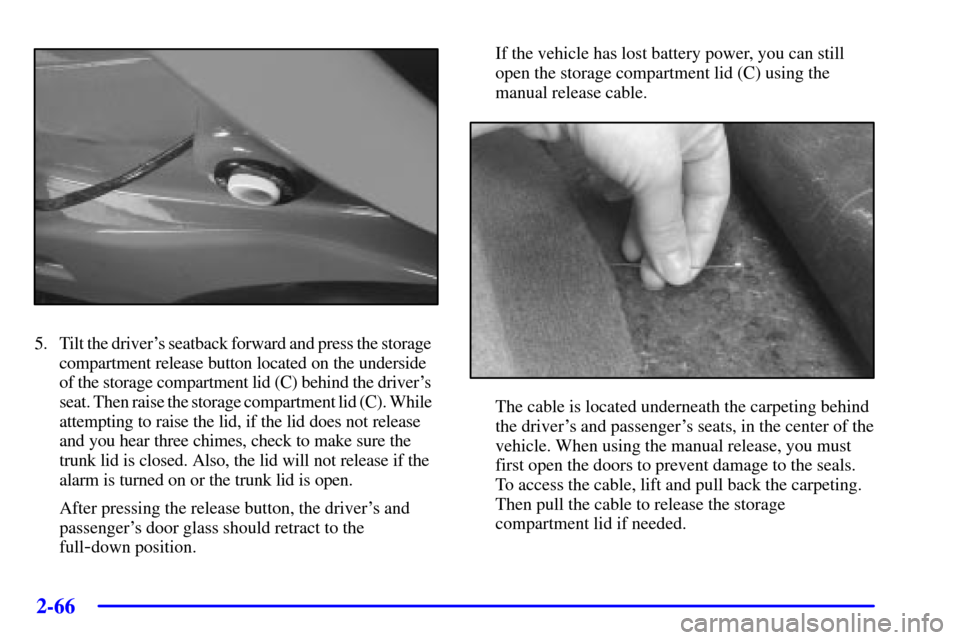
-down position.If the vehicle has lost battery power, you can still
open the storage compartment lid (C) using the
manual release cable.
The cable is located underneath the carpeting behind
the driver's and passenger's seats, in the center of the
vehicle. When using the manual release, you must
first open the doors to prevent damage to the seals.
To access the cable, lift and pull back the carpeting.
Then pull the cable to release the storage
compartment lid if needed.
Page 126 of 361
2-68
Raising the Convertible Top
1. Park on a level surface, set the parking brake firmly
and shift an automatic transmission into PARK (P).
Shift a manual transmission into REVERSE (R).
Lower both windows and sunshades and turn the
ignition key to OFF.
2. Tilt the driver's seat forward and press the storage
compartment release button, or use the manual
release cable if battery power has been lost. Lift the
storage compartment lid (C). (After pressing the
release button, the driver and passenger door glass
should retract to the full
-down position, if they have
not already been lowered.)
3. Pull the top up by firmly gripping the front edge (A)
of the convertible top with your hand and applying a
brisk, firm upward and forward motion to get the top
in the full
-up position.