Page 209 of 323

4-36 Backing Up
Hold the bottom of the steering wheel with one hand.
Then, to move the trailer to the left, just move that hand
to the left. To move the trailer to the right, move your
hand to the right. Always back up slowly and, if
possible, have someone guide you.
Making Turns
NOTICE:
Making very sharp turns while trailering could
cause the trailer to come in contact with the
vehicle. Your vehicle could be damaged. Avoid
making very sharp turns while trailering.
When you're turning with a trailer, make wider turns
than normal. Do this so your trailer won't strike soft
shoulders, curbs, road signs, trees or other objects.
Avoid jerky or sudden maneuvers. Signal well
in advance.
Turn Signals When Towing a Trailer
When you tow a trailer, your vehicle may need a
different turn signal flasher and/or extra wiring. Check
with your dealer. The arrows on your instrument panel
will flash whenever you signal a turn or lane change.
Properly hooked up, the trailer lamps will also flash,
telling other drivers you're about to turn, change lanes
or stop.
When towing a trailer, the arrows on your instrument
panel will flash for turns even if the bulbs on the trailer
are burned out. Thus, you may think drivers behind you
are seeing your signal when they are not. It's important
to check occasionally to be sure the trailer bulbs are
still working.
Driving On Grades
Reduce speed and shift to a lower gear before you start
down a long or steep downgrade. If you don't shift
down, you might have to use your brakes so much that
they would get hot and no longer work well.
On a long uphill grade, shift down and reduce your
speed to around 45 mph (70 km/h) or less to reduce
the possibility of engine and transaxle overheating.
Page 210 of 323

4-37 Parking on Hills
CAUTION:
You really should not park your vehicle, with a
trailer attached, on a hill. If something goes
wrong, your rig could start to move. People can
be injured, and both your vehicle and the trailer
can be damaged.
But if you ever have to park your rig on a hill, here's
how to do it:
1. Apply your regular brakes, but do not shift
into PARK (P).
2. Have someone place chocks under the trailer wheels.
3. When the wheel chocks are in place, release the
regular brakes until the chocks absorb the load.
4. Reapply the regular brakes. Then shift into
PARK (P) firmly and apply your parking brake.
5. Release the regular brakes.
When You Are Ready to Leave After
Parking on a Hill
1. Apply your regular brakes and hold the pedal down
while you:
�Start your engine;
�Shift into a gear; and
�Be sure the parking brake has released.
2. Let up on the brake pedal.
3. Drive slowly until the trailer is clear of the chocks.
4. Stop and have someone pick up and store the chocks.
Page 220 of 323

5-9
Towing Your Vehicle
CAUTION:
To help avoid serious personal injury to you
or others:
�Never let passengers ride in a vehicle that is
being towed.
�Never tow faster than safe or posted speeds.
�Never tow with damaged parts not
fully secured.
�Never get under your vehicle after it has
been lifted by the tow truck.
�Always secure the vehicle on each side with
separate safety chains when towing it.
�Use only the correct hooks.
NOTICE:
Use the proper towing equipment to avoid
damage to the bumper, fascia or fog lamp areas
of the vehicle.
With current trends in automotive styles and design, it is
essential that the correct towing equipment is used to
tow a vehicle. Your vehicle can be towed with wheel
-lift
or car
-carrier equipment.
Consult your dealer or a professional towing service if
you need to have your vehicle towed. See ªRoadside
Assistanceº in the Index.
Engine Overheating
You will find an ENGINE COOLANT HOT, IDLE
ENGINE message or an ENGINE OVERHEATED,
STOP ENGINE message on the Driver Information
Center (DIC). You will also hear a chime. There is also
an engine temperature warning light and/or gage on the
instrument panel. See ªEngine Coolant Temperature
Warning Lightº or ªEngine Coolant Temperature Gageº
in the Index.
Page 229 of 323

5-18
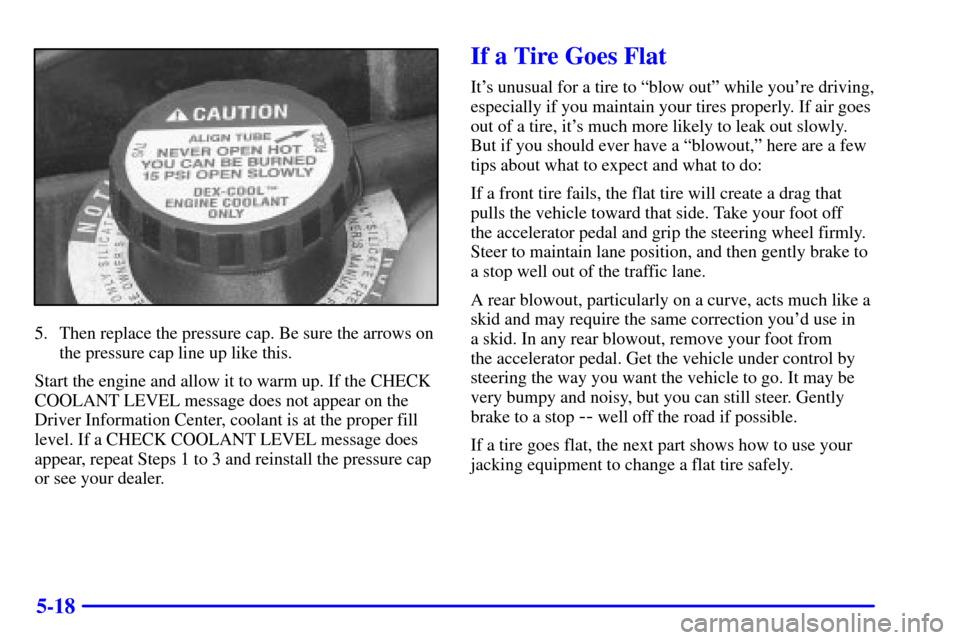
5. Then replace the pressure cap. Be sure the arrows on
the pressure cap line up like this.
Start the engine and allow it to warm up. If the CHECK
COOLANT LEVEL message does not appear on the
Driver Information Center, coolant is at the proper fill
level. If a CHECK COOLANT LEVEL message does
appear, repeat Steps 1 to 3 and reinstall the pressure cap
or see your dealer.
If a Tire Goes Flat
It's unusual for a tire to ªblow outº while you're driving,
especially if you maintain your tires properly. If air goes
out of a tire, it's much more likely to leak out slowly.
But if you should ever have a ªblowout,º here are a few
tips about what to expect and what to do:
If a front tire fails, the flat tire will create a drag that
pulls the vehicle toward that side. Take your foot off
the accelerator pedal and grip the steering wheel firmly.
Steer to maintain lane position, and then gently brake to
a stop well out of the traffic lane.
A rear blowout, particularly on a curve, acts much like a
skid and may require the same correction you'd use in
a skid. In any rear blowout, remove your foot from
the accelerator pedal. Get the vehicle under control by
steering the way you want the vehicle to go. It may be
very bumpy and noisy, but you can still steer. Gently
brake to a stop
-- well off the road if possible.
If a tire goes flat, the next part shows how to use your
jacking equipment to change a flat tire safely.
Page 230 of 323
5-19
Changing a Flat Tire
If a tire goes flat, avoid further tire and wheel damage
by driving slowly to a level place. Turn on your hazard
warning flashers.
CAUTION:
Changing a tire can cause an injury. The vehicle
can slip off the jack and roll over you or other
people. You and they could be badly injured.
Find a level place to change your tire. To help
prevent the vehicle from moving:
1. Put the shift lever in PARK (P).
2. Set the parking brake firmly.
3. Turn off the engine.
To be even more certain the vehicle won't move,
you can put blocks at the front and rear of the
tire farthest away from the one being changed.
That would be the tire on the other side of the
vehicle, at the opposite end.
The following steps will tell you how to use the jack and
change a tire.
Page 232 of 323
5-21
Turn the nut holding the jack and wheel wrench
counterclockwise and remove it. Then remove the jack
and wrench.The tools you'll be using include the jack (A) and the
wheel wrench (B).
Page 233 of 323
5-22 Removing the Wheel Cover
There is a center wheel cover on the aluminum wheel.
Using the flat end of the wheel wrench, gently pry the
wheel cover off. Be careful not to scratch the aluminum
wheel edge and don't try to remove it with your hands.
Removing the Flat Tire and Installing the
Spare Tire
1. Using the wheel wrench, loosen all the wheel nuts.
Don't remove them yet.
Page 235 of 323
5-24
CAUTION:
Raising your vehicle with the jack improperly
positioned can damage the vehicle and even make
the vehicle fall. To help avoid personal injury and
vehicle damage, be sure to fit the jack lift head
into the proper location before raising
the vehicle.
2. Attach the wheel wrench to the jack. Turn the wheel
wrench counterclockwise to lower the jack lift head
until the jack fits under the vehicle.
3. Position the jack under the vehicle and raise the jack
lift head until it fits firmly into the notch in the
vehicle's frame nearest the flat tire.
4. Put the compact spare tire near you.
5. Raise the vehicle by turning the wheel wrench
clockwise. Raise the vehicle far enough off the
ground so that the flat tire can be removed and the
spare tire will fit on the wheel mounting surface.
6. Remove all wheel nuts and take off the flat tire.