Page 94 of 321
2-29
Shifting Out of PARK (P)
Your vehicle has an automatic transmission shift lock
control system. You have to fully apply your regular
brakes before you can shift from PARK (P) when the
ignition is in ON. See ªAutomatic Transmissionº in
the Index.
If you cannot shift out of PARK (P), ease pressure on
the shift lever
-- push the shift lever all the way into
PARK (P) as you maintain brake application. Then
move the shift lever into the gear you want. If you ever
hold the brake pedal down but still can't shift out of
PARK (P), try this:
1. Turn the ignition key to OFF. Open and close the
driver's door to turn off the Retained Accessory
Power (RAP) feature.
2. Apply and hold the brake until the end of step 8.
3. With both hands, squeeze the base of the shift lever
boot (covering) together as shown.
4. Pull the upper part of the base out first and then slide
out the lower part of the base.
5. Lift the shift lever boot (covering) up to move it out
of your way.
Page 98 of 321

2-33
To raise the window, pull up the front of the control.
Pulling the control up for about one second and then
releasing it will express
-close the window.
When you stop your vehicle and turn the ignition
key to LOCK, you can still use the power windows.
The electrical power to operate the windows will not
shut off until a door is opened
-- there is no time
limit to this feature. As soon as a door is opened,
power window movement will stop immediately.
Programming the Power Windows
If the battery on your vehicle has been recharged,
disconnected or is not working, you will need to
reprogram each power window for the express
-open
and close features to work. Before reprogramming, you
will need to replace or recharge your vehicle's battery.
To program each window, follow these steps:
1. Close all doors.
2. Press and hold the power window control until the
window has fully opened.3. Pull the power window control up until the window
is fully closed.
4. Continue holding the control up for approximately
five seconds after the window is completely up.
The window is now programmed. Repeat the process for
each window.
Anti
-Pinch Feature
If a hand, an arm or another object is above the middle
of the window and is in the way of the power window
express
-closing, the window will stop at the obstruction
and express
-open to a preset factory position.
CAUTION:
Pressing and holding the power window control
button will turn off the anti
-pinch feature.
If this happens, a power window won't stop if
something gets in the way. You or others could
be injured, and your window could be damaged.
Be careful not to press and hold the power
window control button.
Page 107 of 321

2-42
Headlamps.
Fog lamps.
Twilight Sentinel.
Turns the Twilight Sentinel system off.
Instrument panel brightness control.
Turn the lamp control dial clockwise (to the first
position) to turn on the parking lamps, front and rear
sidemarker lamps, taillamps, license plate lamps, ashtray
lamps, instrument panel lights and backlighting to the
center console controls. Turn the lamp control dial all
the way clockwise (to the second position) to turn on
the low
-beam headlamps.
Turn the lamp control dial counterclockwise to turn
the lamps off.
Headlamps
Turn the lamp control dial all the way to the right to turn
on the low
-beam headlamps.
To turn on the high
-beam headlamps, the low-beam
headlamps must already be on. Push the turn signal lever on
the left side of the steering wheel away from you to engage
the high
-beam headlamps. Pull the lever toward you to
return to the low
-beam headlamps. For more information,
see ªHeadlamp High/Low Beamº in the Index.
Turn the lamp control dial all the way to the left to turn
the headlamps off.
Please note that if the headlamps are activated while
driving and then you turn your vehicle's ignition off
while the lamp dial is still turned on, the headlamps will
turn off. If, however, you open the driver's door while
the lamp dial is still turned on, a warning chime will
sound reminding you to turn the lamp control dial to
OFF. This will stop the warning chime from sounding.
(If you want the headlamps to remain on, you must
manually turn the lamp control dial off and then back
on to the headlamp position. The headlamps will stay
on until manually turned off again.)
Page 108 of 321

2-43
Your vehicle may be equipped with High Intensity
Discharge (HID) headlamps. Your headlamps come on at
a lower intensity and gradually increase to full brightness.
Wiper
-Activated Headlamps
This feature activates the low
-beam headlamps,
parking lamps, sidemarker lamps and taillamps after
the windshield wipers have been in use for about
20 seconds.
The wiper
-activated headlamps light the way in poor
weather and also make your vehicle more visible to
other drivers. If the wipers are on and the ignition switch
is turned off, the headlamps will immediately turn off.
The headlamps will also deactivate if the windshield
wipers have been turned off for about 20 seconds.
Perimeter Lighting
This feature turns on the low-beam headlamps,
parking lamps, sidemarker lamps and taillamps for
about 20 seconds after the unlock button on the
remote keyless entry transmitter is pressed. Perimeter
lighting immediately ends when your vehicle's ignition
is turned to ON or START.
Lamps On Reminder
You will hear a warning chime if you open the door
while leaving the lamps on, if the manual headlamp
control is activated. An exception to this is when
you're using the Twilight Sentinel
�.
Daytime Running Lamps
Daytime Running Lamps (DRL) can make it easier
for others to see the front of your vehicle during the
day. DRL can be helpful in many different driving
conditions, but they can be especially helpful in the
short periods after dawn and before sunset.
The DRL system will make the high
-beam headlamps
come on at reduced brightness when:
�your vehicle's ignition is in ON or START,
�the low
-beam headlamps are off (the manual lamp
switch is in the off or park lamp position) and
�your vehicle's transmission is shifted out of
PARK (P).
When DRL are on, only the high
-beam headlamps
(at reduced brightness) will be on. No other exterior
lamps such as the parking lamps, taillamps, etc. will be
on when the DRL are being used. The instrument panel
won't be lit up either.
Page 112 of 321

2-47
Interior Lamps
Instrument Panel Brightness Control
This control dial is located to the right of the fog lamp
button. As you turn the control dial up, the instrument
panel lights will brighten.
Illuminated Entry
This system turns on the courtesy lamps (dome lamps
and door entry lamps) for about 20 seconds when any of
the following occur:
�if you manually unlock your vehicle with the key,
�if any door is opened,
�if you press the unlock button on the remote keyless
entry transmitter, or
�after the last door on your vehicle is closed.
Illuminated entry immediately ends when your vehicle's
ignition is turned to ON or START.
Rear Reading Lamps
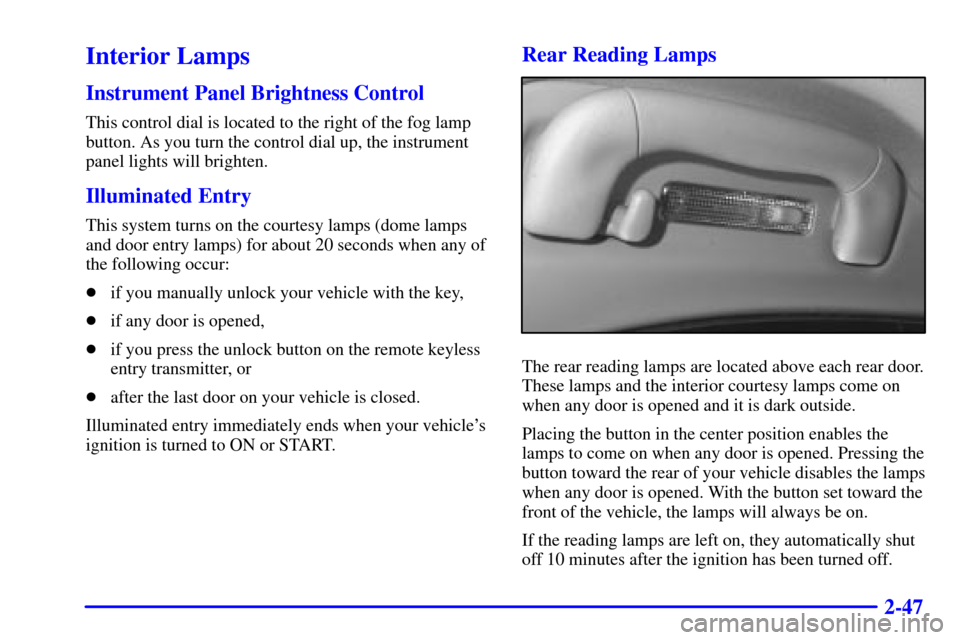
The rear reading lamps are located above each rear door.
These lamps and the interior courtesy lamps come on
when any door is opened and it is dark outside.
Placing the button in the center position enables the
lamps to come on when any door is opened. Pressing the
button toward the rear of your vehicle disables the lamps
when any door is opened. With the button set toward the
front of the vehicle, the lamps will always be on.
If the reading lamps are left on, they automatically shut
off 10 minutes after the ignition has been turned off.
Page 113 of 321
2-48 Map Lamps
These lamps are located in the front overhead console
(near the windshield). Press either button to turn the
driver's or passenger's side lamp on and press the button
again to turn the lamp off.
These lamps also come on when any door is opened or
unlocked when it is dark outside.
Mirrors
Electrochromic Day/Night Rearview Mirror
This mirror automatically changes to reduce glare from
headlamps behind you. A photocell on the back of
the mirror senses when it is becoming dark outside.
Another photocell built into the mirror surface senses
when headlamps are behind you.
Page 115 of 321

2-50 Convex Outside Mirror
Your passenger's side mirror is convex. A convex
mirror's surface is curved so you can see more from the
driver's seat.
CAUTION:
A convex mirror can make things (like other
vehicles) look farther away than they really are.
If you cut too sharply into the right lane, you
could hit a vehicle on your right. Check your
inside mirror or glance over your shoulder before
changing lanes.
Heated Rearview Mirrors
The manual folding outside rearview mirrors are heated.
To heat the mirrors, press the rear window defogger
button. See ºRear Window Defoggerº in the Index.
Manual Folding Outside Rearview Mirrors
The driver's and passenger's outside mirrors move
forward and rearward (ªbreak
-awayº) to help prevent
injury and/or damage to your vehicle.
Storage Compartments
Glove Box
The glove box is located in front of the passenger's seat.
To lock the glove box door, insert the key in the lock
cylinder and turn it counterclockwise. Turn the key
clockwise to unlock the door.
The glove box is air conditioned. This helps to keep
snack items cool while traveling. In order for cool air to
enter the glove box, the air conditioning must be turned
on. Use the slide control inside and at the rear of the
glove box to turn the air flow on and off. Moving the
slide control over the small hole turns the cool air off
and moving the control away from the hole turns the
cool air on.
Page 118 of 321

2-53
Accessory Power Outlet
An accessory power outlet can be used to plug in
additional electrical equipment designed to operate
with vehicle electrical systems.
The accessory power outlet is located on the center
console. Open the cover to use the power outlet.
When not in use, replace the cover.
NOTICE:
Be sure to turn off any electrical equipment when
not in use. Leaving electrical equipment on for
extended periods can drain your battery.
Cellular Telephone (Option)
Your vehicle has been prewired for dealer installation of
a dual
-mode (analog/digital) cellular portable telephone.
Voice activation and hands
-free operation are standard
features. For more information, contact your dealer.
A user's guide is provided with the telephone.
OnStar� System (If Equipped)
OnStar is a vehicle communications service which may
be ordered through your dealer. The following services
are available through subscription with OnStar and are
available 24 hours a day:
Emergency Services
�Automatic Notification of Air Bag Deployment
�Theft Notification and Stolen Vehicle Tracking
�Roadside Assistance with Location
�Remote Diagnostics
�OnStar MED
-NET
�Accident Assist
Convenience Services
�Remote Door Unlock
�Route Support
�Concierge Services
�Ride Assist
A complete user's guide is provided with the OnStar
System. For more information contact OnStar at
1
-888-ONSTAR7.