Page 17 of 392
1-5 Heated Seats (Option)
The heated seat controls are
located next to the climate
controls on the instrument
panel. Press this button to
turn on the heating element
in the seat.When the heated seat control is first pressed, the
HI setting is activated. Press the button again for the
LO setting. The third press of the button turns the
feature off.
The LO setting warms the seatback and cushion until the
seat nears body temperature. The HI setting heats the
seat to a slightly higher temperature.
A telltale light in the control reminds you that the
heating system is in use. When the ignition is turned off,
the heating element is also turned off.
Page 97 of 392

2-32
Running Your Engine While
You're Parked
It's better not to park with the engine running. But if you
ever have to, here are some things to know.
CAUTION:
Idling the engine with the climate control system
off could allow dangerous exhaust into your
vehicle (see the earlier Caution under
ªEngine Exhaustº).
Also, idling in a closed-in place can let deadly
carbon monoxide (CO) into your vehicle even if
the fan switch is at the highest setting. One place
this can happen is a garage. Exhaust
-- with
CO
-- can come in easily. NEVER park in a
garage with the engine running.
Another closed-in place can be a blizzard.
(See ªBlizzardº in the Index.)
CAUTION:
It can be dangerous to get out of your vehicle if
the shift lever is not fully in PARK (P) with the
parking brake firmly set. Your vehicle can roll.
Don't leave your vehicle when the engine is
running unless you have to. If you've left the
engine running, the vehicle can move suddenly.
You or others could be injured. To be sure your
vehicle won't move, even when you're on fairly
level ground, always set your parking brake and
move the shift lever to PARK (P).
Follow the proper steps to be sure your vehicle won't
move. See ªShifting Into PARK (P)º in the Index.
If you are parking on a hill and if you're pulling a
trailer, also see ªTowing a Trailerº in the Index.
Page 132 of 392
2-67
The main components of your instrument panel are:
A. Air Outlet
B. Headlamps/Parking Lamps Switch
C. Turn Signal/Multifunction Lever
D. Instrument Cluster/Gages
E. Hazard Warning Flasher Switch
F. Climate Control System and Audio Steering
Wheel Controls
G. Gearshift Lever
H. Audio System
I. Air OutletJ. Fuel Door Release Button
K. Trunk Release and Lockout Button
L. Hood Release
M. Audio System Steering Wheel Controls
N. Ignition Switch
O. Traction Control Button
P. Ashtray and Cigarette Lighter
Q. Climate Control System
R. Glove Box
S. Passenger Climate Control
Page 138 of 392

2-73 Battery Warning Light
When you turn the key to
RUN, this light will come
on briefly, to show the
battery charging system
is working.
When the light goes off and stays off, the charging
system is working.
If the light stays on, a chime will sound indicating you
need service, and you should take your vehicle to the
dealer at once. To save your battery until you get there,
turn off all accessories and turn off your climate
control system.
Brake System Warning Light
Your vehicle's hydraulic brake system is divided into
two parts. If one part isn't working, the other part can
still work and stop you. For good braking, though,
you need both parts working well.
If the warning light comes on, there is a brake problem.
Have your brake system inspected right away.
This light should come on
when you turn the key to
RUN. If it doesn't come on
then, have it fixed so it will
be ready to warn you if
there's a problem.
If the light comes on while you are driving, pull off the
road and stop carefully. You may notice that the pedal is
harder to push. Or, the pedal may go closer to the floor.
It may take longer to stop. If the light is still on, have the
vehicle towed for service. (See ªTowing Your Vehicleº
in the Index.)
Page 160 of 392

3-
3-1
Section 3 Comfort Controls and Audio Systems
In this section, you'll find out how to operate the comfort control and audio systems offered with your vehicle. Be
sure to read about the particular systems supplied with your vehicle.
3
-2 Comfort Controls
3
-2 Personal Choice Comfort Controls
(If Equipped)
3
-2 Dual Automatic ComforTemp Climate Control
3
-6 Air Conditioning
3
-6 Heating
3
-6 Defogging and Defrosting
3
-6 Rear Window Defogger
3
-7 Passenger Climate Control
3
-8 Ventilation System
3
-9 Steering Wheel Controls for Climate Control
(If Equipped)
3
-9 Audio Systems
3
-9 Setting the Clock
3
-9AM-FM Stereo with Cassette Tape Player
(If Equipped)
3
-13 AM-FM Stereo with Cassette Tape Player and
Automatic Tone Control (If Equipped)3
-17 AM-FM Stereo with Compact Disc Player and
Automatic Tone Control (If Equipped)
3
-21 AM-FM Stereo with Cassette Tape and
Compact Disc Player with Automatic Tone
Control (If Equipped)
3
-27 Trunk-Mounted CD Changer (Option)
3
-30 Personal Choice Radio Controls (If Equipped)
3
-31 Theft-Deterrent Feature
3
-33 Audio Steering Wheel Controls (If Equipped)
3
-34 Understanding Radio Reception
3
-34 Tips About Your Audio System
3
-35 Care of Your Cassette Tape Player
3
-36 Care of Your Compact Discs
3
-36 Care of Your Compact Disc Player
3
-36 Heated Backlite Antenna
Page 161 of 392

3-2
Comfort Controls
This section tells you how to operate your
comfort controls.
With these systems, you can control the heating, cooling
and ventilation in your vehicle. Your vehicle also has a
flow
-through ventilation system described later in
this section.
Personal Choice Comfort Controls
(If Equipped)
This feature allows two different drivers to store and
recall their own climate control settings for temperature,
air delivery mode, fan and passenger climate control
(on/off) status. The personal choice settings recalled are
determined by the transmitter used to enter the vehicle.
After the button with the unlock symbol on a remote
keyless entry transmitter is pressed, and the ignition is in
RUN, the climate control will adjust to the last settings
of the identified driver. The settings can also be changed
by pressing one of the MEMORY buttons (1 or 2)
located on the driver's door, until you hear two beeps.
When adjustments are made, the new settings are
automatically saved for that driver.
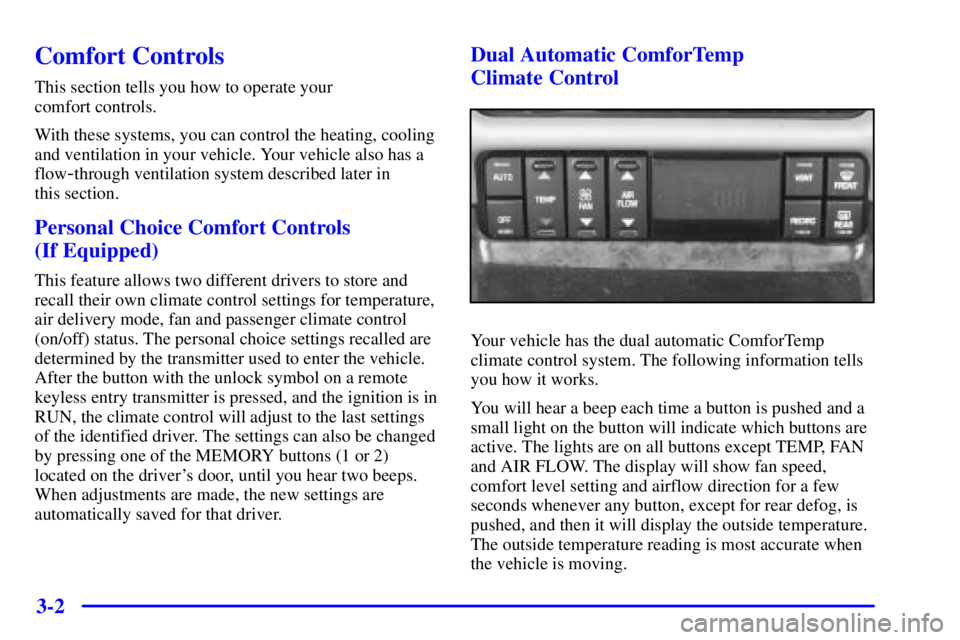
Dual Automatic ComforTemp
Climate Control
Your vehicle has the dual automatic ComforTemp
climate control system. The following information tells
you how it works.
You will hear a beep each time a button is pushed and a
small light on the button will indicate which buttons are
active. The lights are on all buttons except TEMP, FAN
and AIR FLOW. The display will show fan speed,
comfort level setting and airflow direction for a few
seconds whenever any button, except for rear defog, is
pushed, and then it will display the outside temperature.
The outside temperature reading is most accurate when
the vehicle is moving.
Page 162 of 392

3-3
During stops, when driving slow, or when the engine
is first started after a short trip, the outside temperature
reading can be affected by road or engine heat.
Also, starting the engine within a short time after the
vehicle has been running will affect the reading. To
ensure proper automatic climate control operation, the
outside temperature display may not update as quickly
as expected.
Sun and temperature sensors automatically adjust the
air temperature, the airflow direction and the fan speed
to maintain your comfort setting. The system may
supply cooler air to the side toward the sun. Be careful
not to put anything over the sensors on top of the dash.
Temperature Button
To adjust the comfort level you want maintained inside
the vehicle, push the TEMP button. If you want a
warmer comfort level, push the red arrow. If you want a
cooler comfort level, push the blue arrow. Your comfort
setting is shown in the display.Fan Button
The speed of the blower fan is controlled automatically
if you have the system set for AUTO. Pressing the
FAN button will display and hold the current blower
fan setting.
If you want the blower fan to run at a lower speed,
push the bottom of the FAN button. The fan speed will
decrease with every push of the button until the lowest
speed is reached. If you want to increase the fan speed,
push the top of the FAN button. Notice the fan
indicators on the display.
Mode Controls
Press the AIR FLOW button to deliver air through the
floor, middle or windshield outlets. The system will stay
in the selected mode until the AUTO button is pushed.
Press the up or down arrow on the AIR FLOW button to
cycle through the available modes.
Page 166 of 392

3-7
At speeds above 30 mph (48 km/h), the rear defogger
will stay on until you press the REAR button again.
After 10 minutes of driving below 30 mph (48 km/h),
the defogger will turn off automatically. If you need
additional warming time, push the button again. The
system will then operate for five minutes before going
off by itself.
Do not attach a temporary vehicle license, tape or decals
across the defogger grid on the rear window.
NOTICE:
Don't use a razor blade or something else sharp
on the inside of the rear window. If you do, you
could cut or damage the warming grid or the
integrated rear window antenna, and the repairs
wouldn't be covered by your warranty.
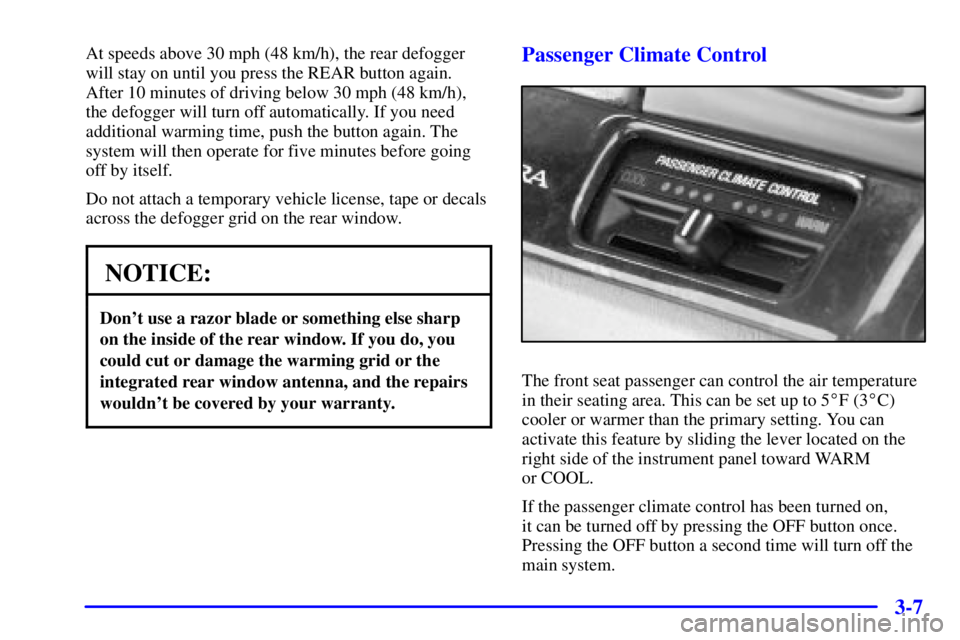
Passenger Climate Control
The front seat passenger can control the air temperature
in their seating area. This can be set up to 5�F (3�C)
cooler or warmer than the primary setting. You can
activate this feature by sliding the lever located on the
right side of the instrument panel toward WARM
or COOL.
If the passenger climate control has been turned on,
it can be turned off by pressing the OFF button once.
Pressing the OFF button a second time will turn off the
main system.