2000 BMW 328I wheel
[x] Cancel search: wheelPage 134 of 189
134n
Caring for your carWaxing your car Protect the finish using carnauba or
synthetic-based waxes only.
The best way to determine when the
finish needs to be waxed is by noting
when water stops beading on the sur-
face.
You can use a glass cleaner to remove
any wax or silicone that may have been
left on the windows during waxing.
Use cleaning and car-care
products that you can obtain at
your BMW center.<
Paint damageYou can touch up small areas of paint
damage with a BMW spray paint or a
BMW touchup stick.
The paint color code for your car is pro-
vided on a sticker located next to the
type plate and on the first page of your
Service and Warranty Information
Booklet (US models) or Warranty and
Service Guide Booklet (Canadian mod-
els).
Damage caused by flying stones,
scratches, etc., must be touched up
without delay to prevent rust from form-
ing.
If corrosion has started to form in an
area with paint damage, remove all rust
and clean the area. Then prime the area
with a BMW Primer Stick. Finally, apply
the finish coat. Wait a few days, then
polish the repaired area. Finish by
applying a wax preservative.
More extensive paint damage should
be professionally repaired in accor-
dance with the manufacturer's instruc-
tions. Your BMW center uses original
BMW finish materials in accordance
with official repair procedures.
Caring for other vehicle
components and materials Light-alloy wheels should be treated
with alloy wheel cleaner, especially dur-
ing the winter months. However, do not
use aggressive products containing
acids, strong alkalis or abrasives. Do
not use steam cleaners operating at
temperatures above 140 7 (60 6).
Follow the manufacturer's instructions.
If your vehicle has chrome parts
* such
as the window frames and door handles,
clean these parts carefully with ample
clean water and a shampoo supplement
if desired, especially if they have an
accumulation of road salt. Use chrome
polish as an additional treatment.
You can use window and glass cleaner
to clean inside window surfaces and
mirrors without smearing and streaking.
Never use polishing pastes or abrasive
(quartz) cleansers on mirror lenses.
Page 137 of 189
137n
IndexDataTechnologyRepairsCar careControlsOverview
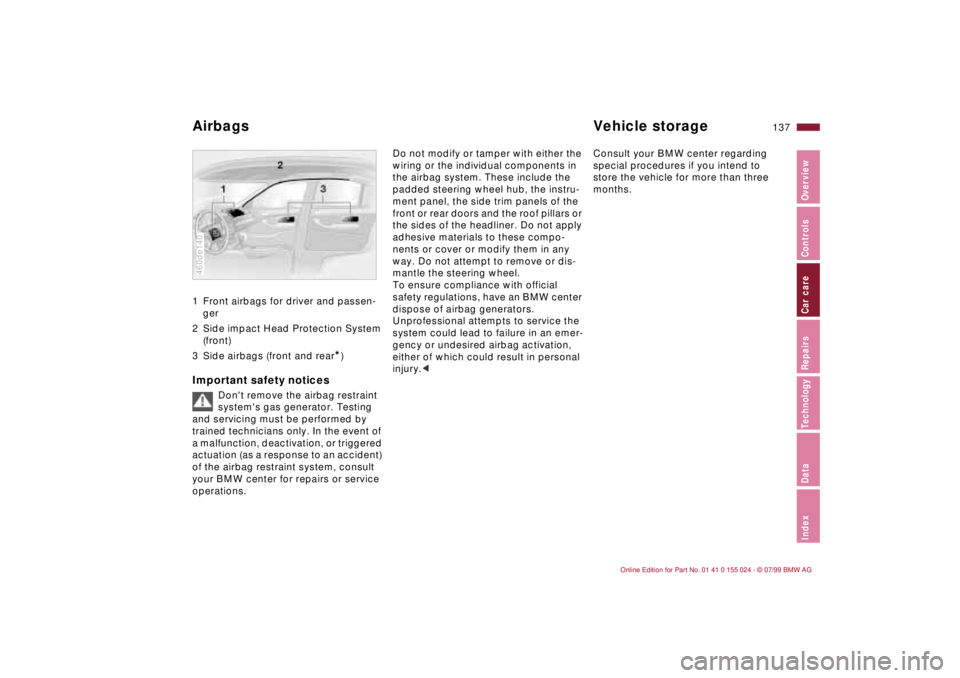
Airbags Vehicle storage1 Front airbags for driver and passen-
ger
2 Side impact Head Protection System
(front)
3 Side airbags (front and rear
*)
Important safety notices
Don't remove the airbag restraint
system's gas generator. Testing
and servicing must be performed by
trained technicians only. In the event of
a malfunction, deactivation, or triggered
actuation (as a response to an accident)
of the airbag restraint system, consult
your BMW center for repairs or service
operations.
460de140
Do not modify or tamper with either the
wiring or the individual components in
the airbag system. These include the
padded steering wheel hub, the instru-
ment panel, the side trim panels of the
front or rear doors and the roof pillars or
the sides of the headliner. Do not apply
adhesive materials to these compo-
nents or cover or modify them in any
way. Do not attempt to remove or dis-
mantle the steering wheel.
To ensure compliance with official
safety regulations, have an BMW center
dispose of airbag generators.
Unprofessional attempts to service the
system could lead to failure in an emer-
gency or undesired airbag activation,
either of which could result in personal
injury.
store the vehicle for more than three
months.
Page 141 of 189
Overview
Controls and features
Operation, care
and maintenance
Owner service procedures
Technical data
Index Advanced technology
141n
IndexDataTechnologyRepairsCar careControlsOverview
Replacement procedures:
Onboard tool kit142
Windshield wiper blades142
Lamps and bulbs142
Changing a wheel149
Battery152
Fuses154
Microfilter155
In case of electrical
malfunction:
Fuel filler door156
Sliding/Tilt sunroof156
Assistance, giving and
receiving:
Jump-starting157
Towing the vehicle158
Repairs
Page 149 of 189
149n
IndexDataTechnologyRepairsCar careControlsOverview
Changing a wheel
Take these precautionary mea-
sures if you have either a flat tire
or are changing the tire.
Stop the vehicle as far as possible from
passing traffic. Park on a firm, flat sur-
face. Switch on the hazard flashers.
Turn the steering wheel to the straight-
ahead position, remove the key and en-
gage the steering lock. Shift into 1st or
reverse (selector lever in "Park" with
automatic) and engage the parking
brake.
Have all passengers leave the car and
remain well away from your immediate
working area (behind a guardrail, for in-
stance).
If a warning triangle or portable hazard
warning lamp is available, set it up on
the roadside at an appropriate distance
from the rear of the vehicle. Comply
with all applicable safety guidelines and
regulations.
Change the wheel only on a level, firm
surface that is not slippery. Avoid jack-
ing the car on a soft or slippery support
surface (snow, ice, loose gravel, etc.),
as it could slide sideways.
Position the jack on a firm support sur-
face.
Do not place wooden blocks or similar
objects under the jack. If you do so, the
jack might not be able to reach its full
support capacity because of the limited
height.
Do not lie under the vehicle or start the
engine when the vehicle is supported
by the jack. Failure to comply with this
creates a risk of fatal injury.<
Your BMW has either a spare wheel
* or
a space-saver spare tire
* for temporary
use and to ensure your mobility.
To remove the spare wheel
*,
lift the floor panel in the luggage
compartment completely out (refer to
page 41).<
You will the need the following:In order to avoid rattling noises later,
note the position of the tools when you
remove them and return them to their
original position when you are through
using them.
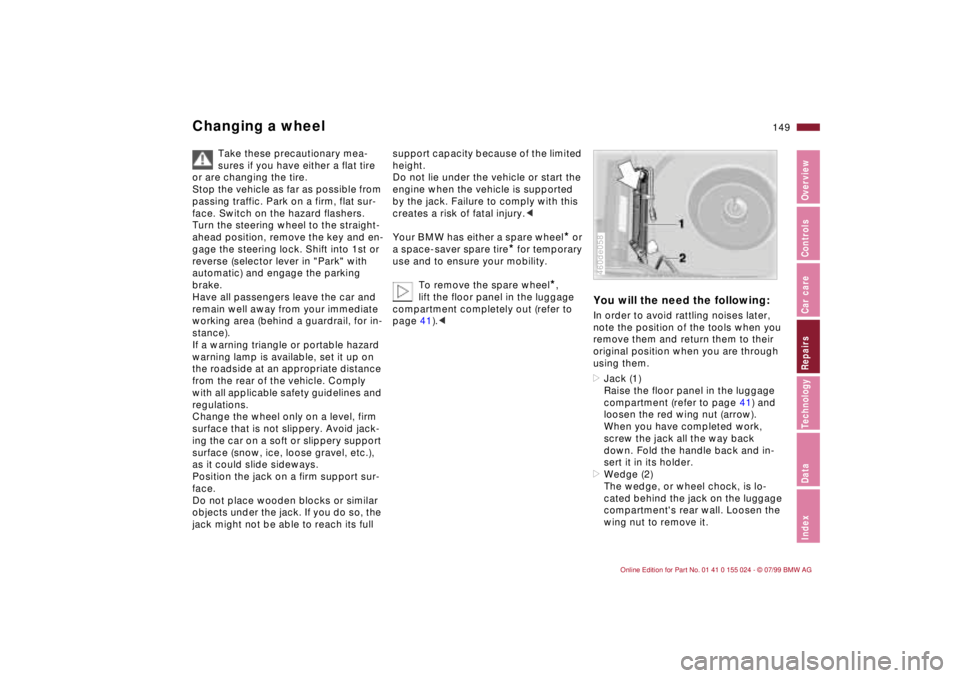
>Jack (1)
Raise the floor panel in the luggage
compartment (refer to page 41) and
loosen the red wing nut (arrow).
When you have completed work,
screw the jack all the way back
down. Fold the handle back and in-
sert it in its holder.
>Wedge (2)
The wedge, or wheel chock, is lo-
cated behind the jack on the luggage
compartment's rear wall. Loosen the
wing nut to remove it.460de058
Page 150 of 189
150n
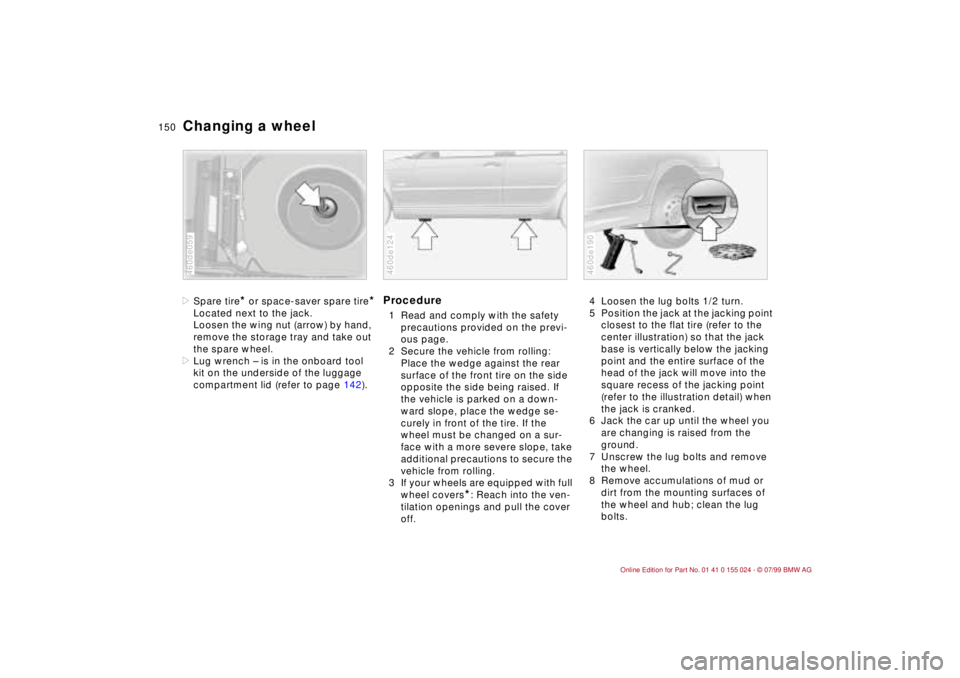
Changing a wheel>Spare tire
* or space-saver spare tire
*
Located next to the jack.
Loosen the wing nut (arrow) by hand,
remove the storage tray and take out
the spare wheel.
>Lug wrench Ð is in the onboard tool
kit on the underside of the luggage
compartment lid (refer to page 142).460de059
Procedure1 Read and comply with the safety
precautions provided on the previ-
ous page.
2 Secure the vehicle from rolling:
Place the wedge against the rear
surface of the front tire on the side
opposite the side being raised. If
the vehicle is parked on a down-
ward slope, place the wedge se-
curely in front of the tire. If the
wheel must be changed on a sur-
face with a more severe slope, take
additional precautions to secure the
vehicle from rolling.
3 If your wheels are equipped with full
wheel covers
*: Reach into the ven-
tilation openings and pull the cover
off.
460de124
4 Loosen the lug bolts 1/2 turn.
5 Position the jack at the jacking point
closest to the flat tire (refer to the
center illustration) so that the jack
base is vertically below the jacking
point and the entire surface of the
head of the jack will move into the
square recess of the jacking point
(refer to the illustration detail) when
the jack is cranked.
6 Jack the car up until the wheel you
are changing is raised from the
ground.
7 Unscrew the lug bolts and remove
the wheel.
8 Remove accumulations of mud or
dirt from the mounting surfaces of
the wheel and hub; clean the lug
bolts.460de190
Page 151 of 189
151n
IndexDataTechnologyRepairsCar careControlsOverview
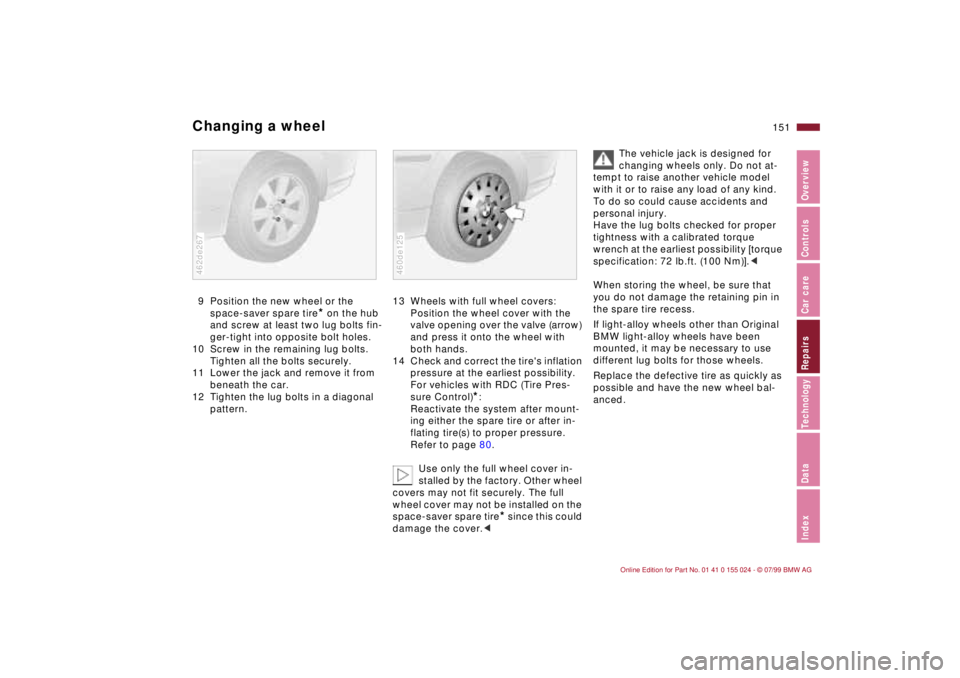
Changing a wheel9 Position the new wheel or the
space-saver spare tire
* on the hub
and screw at least two lug bolts fin-
ger-tight into opposite bolt holes.
10 Screw in the remaining lug bolts.
Tighten all the bolts securely.
11 Lower the jack and remove it from
beneath the car.
12 Tighten the lug bolts in a diagonal
pattern.
462de267
13 Wheels with full wheel covers:
Position the wheel cover with the
valve opening over the valve (arrow)
and press it onto the wheel with
both hands.
14 Check and correct the tire's inflation
pressure at the earliest possibility.
For vehicles with RDC (Tire Pres-
sure Control)
*:
Reactivate the system after mount-
ing either the spare tire or after in-
flating tire(s) to proper pressure.
Refer to page 80.
Use only the full wheel cover in-
stalled by the factory. Other wheel
covers may not fit securely. The full
wheel cover may not be installed on the
space-saver spare tire
* since this could
damage the cover.<
460de125
The vehicle jack is designed for
changing wheels only. Do not at-
tempt to raise another vehicle model
with it or to raise any load of any kind.
To do so could cause accidents and
personal injury.
Have the lug bolts checked for proper
tightness with a calibrated torque
wrench at the earliest possibility [torque
specification: 72 lb.ft. (100 Nm)].<
When storing the wheel, be sure that
you do not damage the retaining pin in
the spare tire recess.
If light-alloy wheels other than Original
BMW light-alloy wheels have been
mounted, it may be necessary to use
different lug bolts for those wheels.
Replace the defective tire as quickly as
possible and have the new wheel bal-
anced.
Page 152 of 189
152n
Changing a wheel Battery Driving with the space-saver
spare tire
*
Drive cautiously and do not exceed a
speed of 45 mph (80 km/h).
Be aware that vehicle handling will be
altered. Slower brake response time,
longer braking distances and changed
steering characteristics may be antici-
pated when approaching limit condi-
tions.
The changes in handling characteristics
will be even more pronounced in con-
junction with winter tires.
Only one space-saver spare tire
may be mounted at one time.
Mount a wheel and tire with the same
size and specifications as the others at
the earliest possible opportunity. Main-
tain correct tire pressures. Refer to
page 28.<
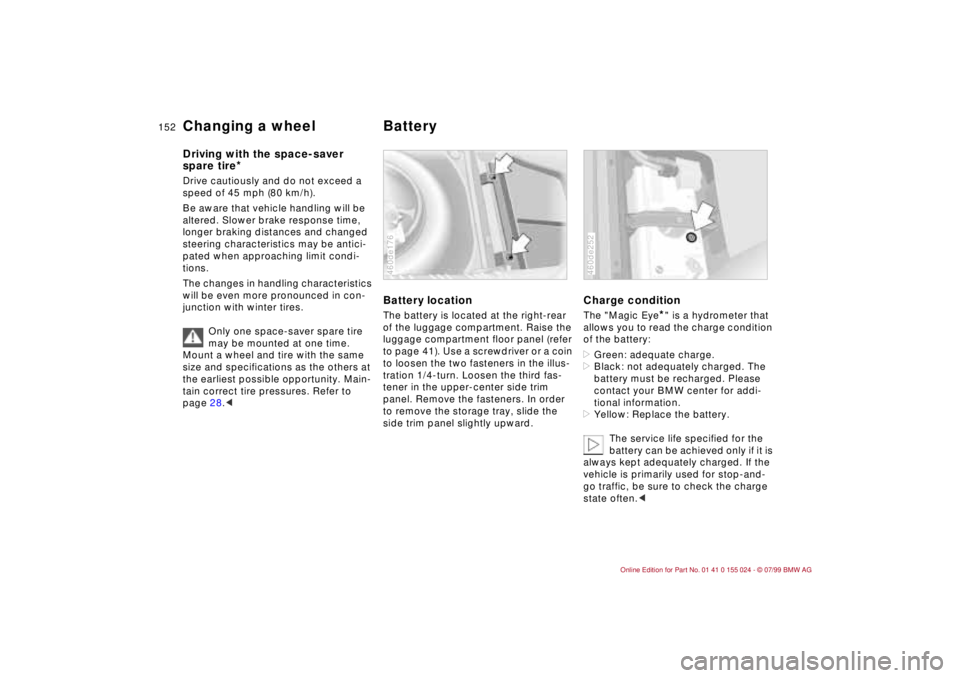
Battery locationThe battery is located at the right-rear
of the luggage compartment. Raise the
luggage compartment floor panel (refer
to page 41). Use a screwdriver or a coin
to loosen the two fasteners in the illus-
tration 1/4-turn. Loosen the third fas-
tener in the upper-center side trim
panel. Remove the fasteners. In order
to remove the storage tray, slide the
side trim panel slightly upward.460de176
Charge conditionThe "Magic Eye
*" is a hydrometer that
allows you to read the charge condition
of the battery:
>Green: adequate charge.
>Black: not adequately charged. The
battery must be recharged. Please
contact your BMW center for addi-
tional information.
>Yellow: Replace the battery.
The service life specified for the
battery can be achieved only if it is
always kept adequately charged. If the
vehicle is primarily used for stop-and-
go traffic, be sure to check the charge
state often.<
460de252
Page 158 of 189
158n
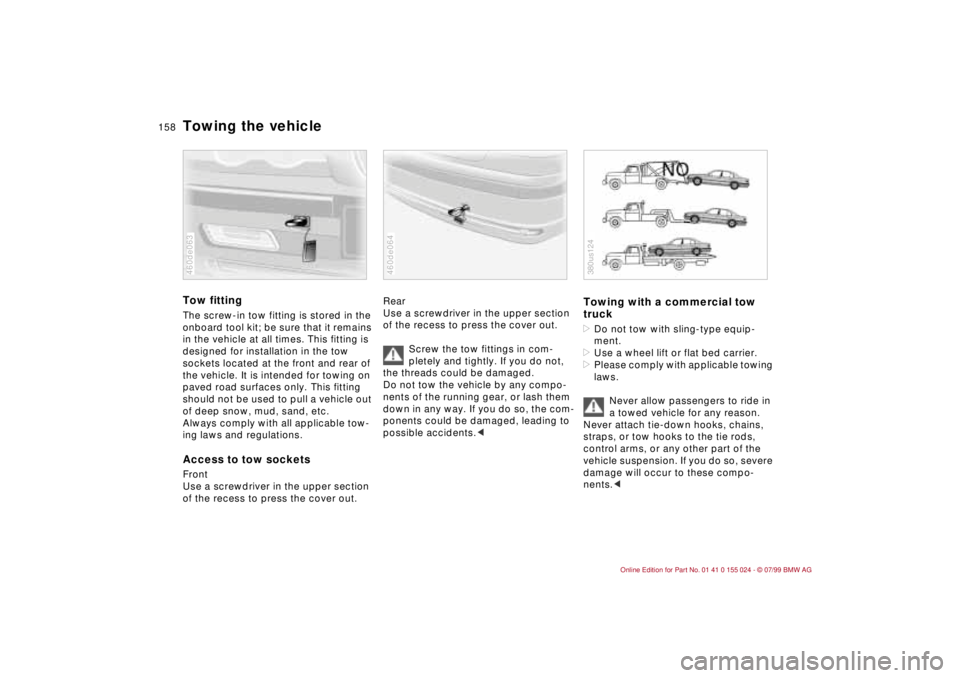
Towing the vehicleTow fittingThe screw-in tow fitting is stored in the
onboard tool kit; be sure that it remains
in the vehicle at all times. This fitting is
designed for installation in the tow
sockets located at the front and rear of
the vehicle. It is intended for towing on
paved road surfaces only. This fitting
should not be used to pull a vehicle out
of deep snow, mud, sand, etc.
Always comply with all applicable tow-
ing laws and regulations. Access to tow socketsFront
Use a screwdriver in the upper section
of the recess to press the cover out.460de063
Rear
Use a screwdriver in the upper section
of the recess to press the cover out.
Screw the tow fittings in com-
pletely and tightly. If you do not,
the threads could be damaged.
Do not tow the vehicle by any compo-
nents of the running gear, or lash them
down in any way. If you do so, the com-
ponents could be damaged, leading to
possible accidents.<460de064
Towing with a commercial tow
truck>Do not tow with sling-type equip-
ment.
>Use a wheel lift or flat bed carrier.
>Please comply with applicable towing
laws.
Never allow passengers to ride in
a towed vehicle for any reason.
Never attach tie-down hooks, chains,
straps, or tow hooks to the tie rods,
control arms, or any other part of the
vehicle suspension. If you do so, severe
damage will occur to these compo-
nents.c380us124