2000 BMW 328Ci COUPE ECU
[x] Cancel search: ECUPage 102 of 189
100n
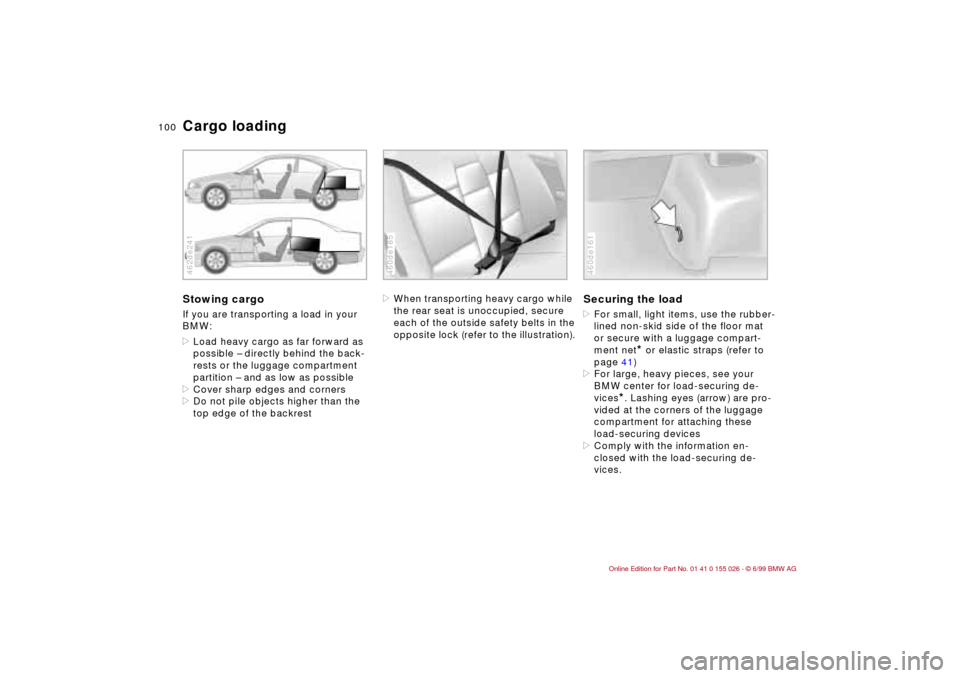
Cargo loadingStowing cargo If you are transporting a load in your
BMW:
>Load heavy cargo as far forward as
possible – directly behind the back-
rests or the luggage compartment
partition – and as low as possible
>Cover sharp edges and corners
>Do not pile objects higher than the
top edge of the backrest462de241
>When transporting heavy cargo while
the rear seat is unoccupied, secure
each of the outside safety belts in the
opposite lock (refer to the illustration).460de185
Securing the load >For small, light items, use the rubber-
lined non-skid side of the floor mat
or secure with a luggage compart-
ment net
* or elastic straps (refer to
page 41)
>For large, heavy pieces, see your
BMW center for load-securing de-
vices
*. Lashing eyes (arrow) are pro-
vided at the corners of the luggage
compartment for attaching these
load-securing devices
>Comply with the information en-
closed with the load-securing de-
vices.
460de161
Page 103 of 189
101n
RepairsIndexOverview Controls Car care Technology Data
Cargo loading Roof-mounted luggage rack
*
Always position and secure the
load correctly, otherwise it can en-
danger the passengers in the event of
braking or swerving.
Do not exceed the permissible gross
weight and axle load (refer to page 172),
otherwise the vehicle's operating safety
is no longer assured and you are in vio-
lation of the law.
Do not stow heavy or hard objects in the
passenger compartment without first
securing them. Otherwise they would
be thrown around during braking and
evasive maneuvers and endanger the
occupants.<
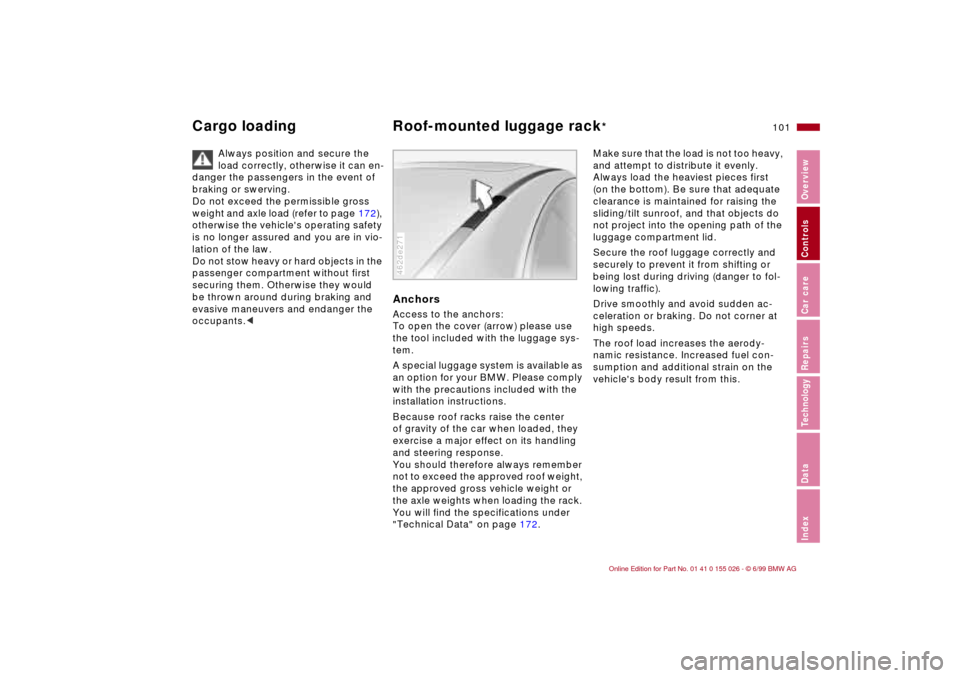
AnchorsAccess to the anchors:
To open the cover (arrow) please use
the tool included with the luggage sys-
tem.
A special luggage system is available as
an option for your BMW. Please comply
with the precautions included with the
installation instructions.
Because roof racks raise the center
of gravity of the car when loaded, they
exercise a major effect on its handling
and steering response.
You should therefore always remember
not to exceed the approved roof weight,
the approved gross vehicle weight or
the axle weights when loading the rack.
You will find the specifications under
"Technical Data" on page 172.462de271
Make sure that the load is not too heavy,
and attempt to distribute it evenly.
Always load the heaviest pieces first
(on the bottom). Be sure that adequate
clearance is maintained for raising the
sliding/tilt sunroof, and that objects do
not project into the opening path of the
luggage compartment lid.
Secure the roof luggage correctly and
securely to prevent it from shifting or
being lost during driving (danger to fol-
lowing traffic).
Drive smoothly and avoid sudden ac-
celeration or braking. Do not corner at
high speeds.
The roof load increases the aerody-
namic resistance. Increased fuel con-
sumption and additional strain on the
vehicle's body result from this.
Page 108 of 189

106n
Antilock Brake System (ABS)The concept ABS enhances active safety by helping
to prevent the wheels from locking dur-
ing brake applications. Locked wheels
are dangerous. When the front wheels
slide, the driver loses steering control
over the vehicle. Traction loss at the
rear wheels can cause the rear end to
break into an uncontrolled skid.
The system can achieve the shortest
braking distances possible under most
conditions (on straight-aways and in
curves, on asphalt, ice, wet road sur-
faces, etc.).
ABS is designed to meet two essential
requirements during every brake appli-
cation:
>To help provide vehicle stability
>To help maintain steering control and
maneuverability – on all types of road
surfaces (asphalt, concrete, mud,
wet, snow, ice).
Braking with ABSThe system becomes operative once
the vehicle exceeds a speed of approx.
6 mph (10 km/h). Below approx. 3 mph
(6 km/h), it is once again deactivated.
This means that the wheels can lock in
the final phase of a panic stop – a factor
of no significance in actual use.
If you are in a situation that requires full
braking, you will exploit the full benefits
of the ABS system if you apply maxi-
mum brake pressure ("panic stop").
Since the vehicle maintains steering re-
sponsiveness, you can avoid possible
obstacles with a minimum of steering
effort, despite the full brake application.
The ABS system closed-loop control
circuit cycles in fractions of a second.
A pulsation at the brake pedal indicates
to the driver that ABS is active, that is,
that the vehicle is within its maximum
braking range. In addition, a pulsation –
a result of the control function cycles –
indicates to the driver that vehicle
speed should be reduced to adapt to
road surface conditions when there is
reduced traction and grip between tires
and road surface (slippery road sur-
face).
In driving conditions where there is a
loose upper surface together with a
subsurface that provides good traction (on gravel or snow, for instance), or with
snow chains, the braking distance may
also be longer than when the wheels
are locked. However, ABS continues to
provide enhanced vehicle stability and
steering response under these condi-
tions.
Information for your safetyNot even ABS can suspend the laws
of physics. ABS cannot prevent the
consequences of brake applications
with inadequate clearances for safety
between vehicles, when exceeding the
speed limit in curves, or the risks in-
volved when aquaplaning occurs. Re-
sponsibility for these types of situations
remains in the hands (and at the feet) of
the driver.
You should never allow the added
safety of ABS to lull you into a false
sense of security, or mislead you into
taking increased risks that could affect
your own safety and that of others.
Do not make any modifications to
the ABS system.
Service procedures on ABS are to be
performed by authorized technicians
only.<
Page 121 of 189
119n
RepairsIndexOverview Controls Car care Technology Data
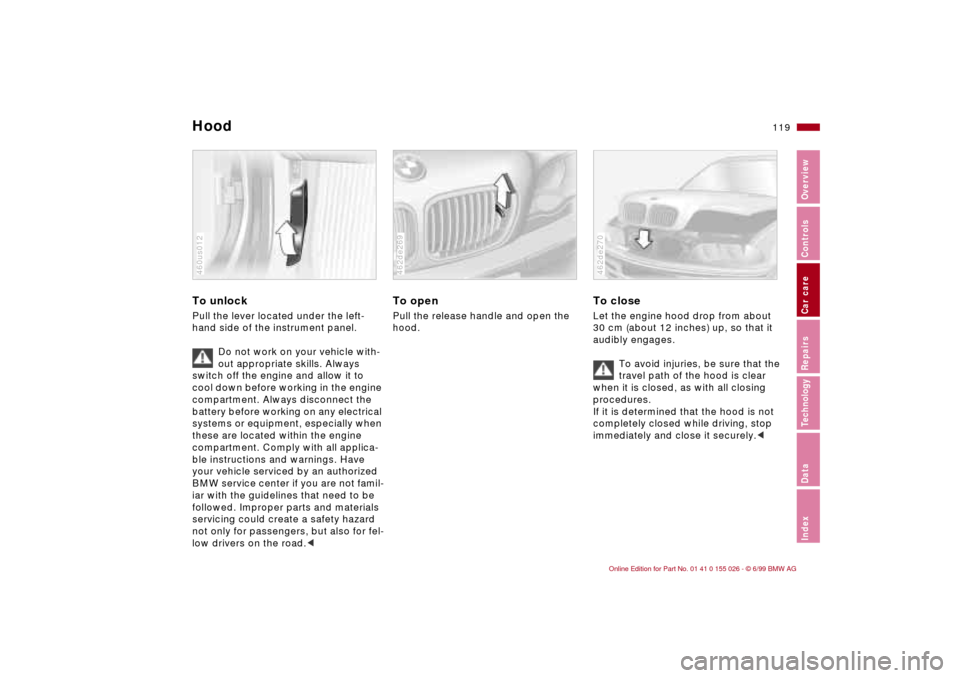
To unlock Pull the lever located under the left-
hand side of the instrument panel.
Do not work on your vehicle with-
out appropriate skills. Always
switch off the engine and allow it to
cool down before working in the engine
compartment. Always disconnect the
battery before working on any electrical
systems or equipment, especially when
these are located within the engine
compartment. Comply with all applica-
ble instructions and warnings. Have
your vehicle serviced by an authorized
BMW service center if you are not famil-
iar with the guidelines that need to be
followed. Improper parts and materials
servicing could create a safety hazard
not only for passengers, but also for fel-
low drivers on the road.<460us012
To openPull the release handle and open the
hood.462de269
To closeLet the engine hood drop from about
30 cm (about 12 inches) up, so that it
audibly engages.
To avoid injuries, be sure that the
travel path of the hood is clear
when it is closed, as with all closing
procedures.
If it is determined that the hood is not
completely closed while driving, stop
immediately and close it securely.<462de270
Hood
Page 136 of 189

134n
Caring for your carThe buildup of an electrostatic charge
on the seat covers, particularly if atmo-
spheric humidity is low, can give the
occupants an unpleasant electric shock
if they touch metal body parts after leav-
ing the vehicle. Although this not dan-
gerous in any way, it can be avoided by
touching a bare or polished metal part
of the car while getting out.
Leather care The leather upholstery
* used by BMW
is a natural product of the highest qual-
ity, processed using state-of-the-art
methods to ensure that it will maintain
its high quality for years to come, pro-
vided that it is properly cared for.
Because this product is manufactured
using natural materials, you must make
allowance for its special characteristics
and for the peculiarities of its use and
care.
Regular periodic cleaning and care are
essential, as dust and road dirt act as
abrasives in the pores and creases of
the material. This leads to wear spots
and premature brittleness on the sur-
face of the leather. We therefore sug-
gest that you clean the leather with a
vacuum cleaner or dust cloth at fre-
quent intervals.
For cleaning use BMW leather cleaning
foam.Since dirt and grease gradually attack
the protective layer of the leather, the
cleaned surfaces should be treated with
BMW leather care agent. This also acts
as an antistatic agent.
To protect against moisture and water
treat the leather with BMW Impregnat-
ing Agent.
We recommend that you perform this
procedure twice a year on leather ex-
posed to normal use.
Spills should be wiped up immediately.
Remove grease and oil stains without
rubbing, but rather by dabbing with
spot remover.
If the upholstery is to be exposed to in-
tense sunlight or if the vehicle is to be
stored for an extended period, cover all
leather surfaces (or, better yet, the win-
dows) to prevent fading.
A full range of car-care products is
available from your BMW center.<
Page 151 of 189
149n
RepairsIndexOverview Controls Car care Technology Data
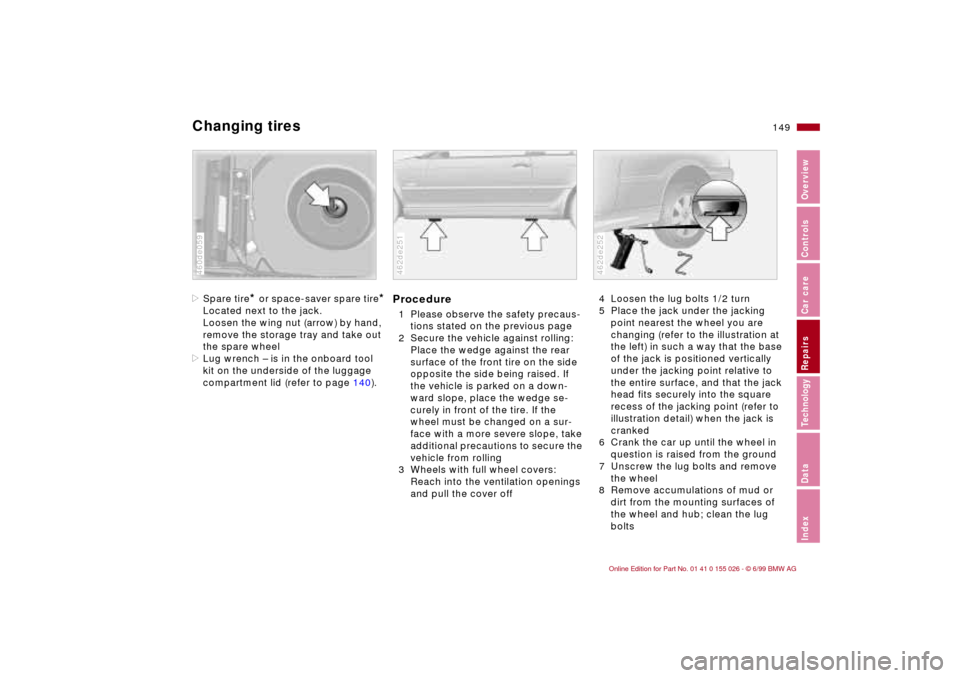
Changing tires>Spare tire
* or space-saver spare tire
*
Located next to the jack.
Loosen the wing nut (arrow) by hand,
remove the storage tray and take out
the spare wheel
>Lug wrench – is in the onboard tool
kit on the underside of the luggage
compartment lid (refer to page 140).460de059
Procedure1 Please observe the safety precaus-
tions stated on the previous page
2 Secure the vehicle against rolling:
Place the wedge against the rear
surface of the front tire on the side
opposite the side being raised. If
the vehicle is parked on a down-
ward slope, place the wedge se-
curely in front of the tire. If the
wheel must be changed on a sur-
face with a more severe slope, take
additional precautions to secure the
vehicle from rolling
3 Wheels with full wheel covers:
Reach into the ventilation openings
and pull the cover off462de251
4 Loosen the lug bolts 1/2 turn
5 Place the jack under the jacking
point nearest the wheel you are
changing (refer to the illustration at
the left) in such a way that the base
of the jack is positioned vertically
under the jacking point relative to
the entire surface, and that the jack
head fits securely into the square
recess of the jacking point (refer to
illustration detail) when the jack is
cranked
6 Crank the car up until the wheel in
question is raised from the ground
7 Unscrew the lug bolts and remove
the wheel
8 Remove accumulations of mud or
dirt from the mounting surfaces of
the wheel and hub; clean the lug
bolts462de252
Page 152 of 189
150n
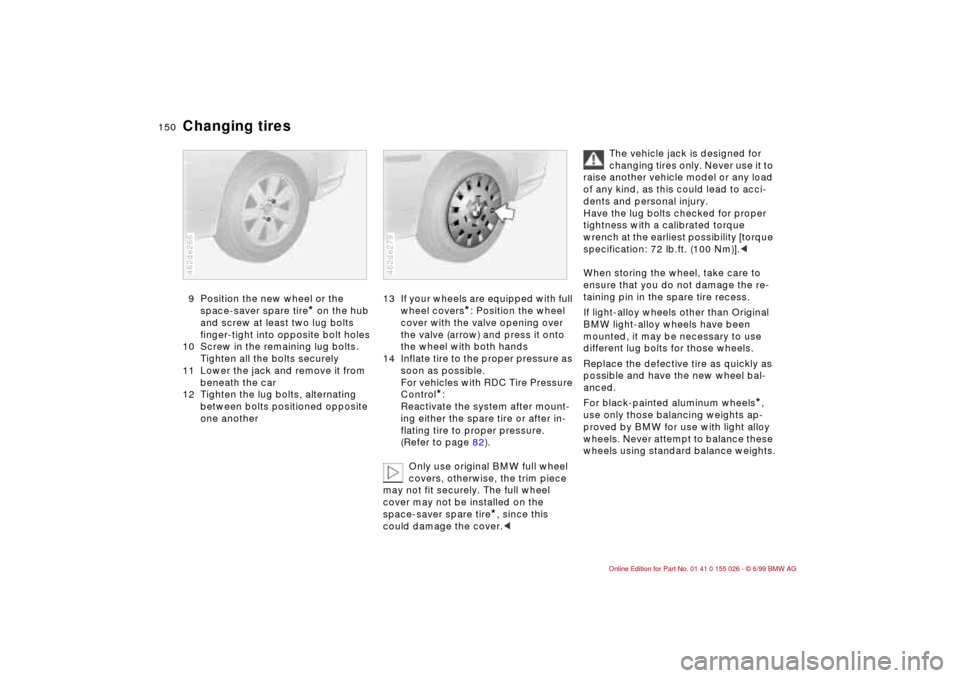
Changing tires9 Position the new wheel or the
space-saver spare tire
* on the hub
and screw at least two lug bolts
finger-tight into opposite bolt holes
10 Screw in the remaining lug bolts.
Tighten all the bolts securely
11 Lower the jack and remove it from
beneath the car
12 Tighten the lug bolts, alternating
between bolts positioned opposite
one another
462de266
13 If your wheels are equipped with full
wheel covers
*: Position the wheel
cover with the valve opening over
the valve (arrow) and press it onto
the wheel with both hands
14 Inflate tire to the proper pressure as
soon as possible.
For vehicles with RDC Tire Pressure
Control
*:
Reactivate the system after mount-
ing either the spare tire or after in-
flating tire to proper pressure.
(Refer to page 82).
Only use original BMW full wheel
covers, otherwise, the trim piece
may not fit securely. The full wheel
cover may not be installed on the
space-saver spare tire
*, since this
could damage the cover.<
462de279
The vehicle jack is designed for
changing tires only. Never use it to
raise another vehicle model or any load
of any kind, as this could lead to acci-
dents and personal injury.
Have the lug bolts checked for proper
tightness with a calibrated torque
wrench at the earliest possibility [torque
specification: 72 lb.ft. (100 Nm)].<
When storing the wheel, take care to
ensure that you do not damage the re-
taining pin in the spare tire recess.
If light-alloy wheels other than Original
BMW light-alloy wheels have been
mounted, it may be necessary to use
different lug bolts for those wheels.
Replace the defective tire as quickly as
possible and have the new wheel bal-
anced.
For black-painted aluminum wheels
*,
use only those balancing weights ap-
proved by BMW for use with light alloy
wheels. Never attempt to balance these
wheels using standard balance weights.
Page 154 of 189
152n
Battery
A highly-explosive gas is gener-
ated when the battery is
charged.
If you happen to get acid in your
eyes, rinse thoroughly for 15 min-
utes with clear water. Consult a
physician immediately. Rinse your skin
or clothing with plenty of water if you get
acid spray on them. If electrolyte is acci-
dentally ingested, consult a physician
immediately.
In order to protect the battery
case from ultraviolet radiation,
do not place it in direct sunlight.
A discharged battery can freeze. Store
the battery in areas where temperature
remains above freezing.
Battery careThe battery is completely maintenance-
free, as per DIN 43 539/2; that is, the
amount of acid put in the battery origi-
nally will normally last for the service life
of the battery.
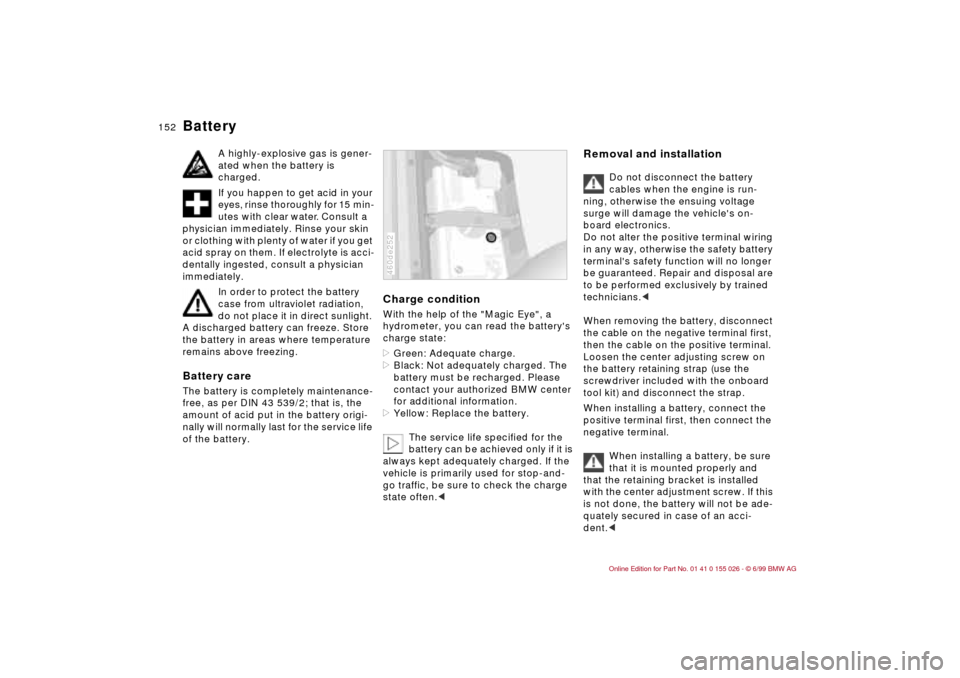
Charge conditionWith the help of the "Magic Eye", a
hydrometer, you can read the battery's
charge state:
>Green: Adequate charge.
>Black: Not adequately charged. The
battery must be recharged. Please
contact your authorized BMW center
for additional information.
>Yellow: Replace the battery.
The service life specified for the
battery can be achieved only if it is
always kept adequately charged. If the
vehicle is primarily used for stop-and-
go traffic, be sure to check the charge
state often.<460de252
Removal and installation
Do not disconnect the battery
cables when the engine is run-
ning, otherwise the ensuing voltage
surge will damage the vehicle's on-
board electronics.
Do not alter the positive terminal wiring
in any way, otherwise the safety battery
terminal's safety function will no longer
be guaranteed. Repair and disposal are
to be performed exclusively by trained
technicians.<
When removing the battery, disconnect
the cable on the negative terminal first,
then the cable on the positive terminal.
Loosen the center adjusting screw on
the battery retaining strap (use the
screwdriver included with the onboard
tool kit) and disconnect the strap.
When installing a battery, connect the
positive terminal first, then connect the
negative terminal.
When installing a battery, be sure
that it is mounted properly and
that the retaining bracket is installed
with the center adjustment screw. If this
is not done, the battery will not be ade-
quately secured in case of an acci-
dent.<