2000 BMW 323i SEDAN change wheel
[x] Cancel search: change wheelPage 42 of 189

42n
Alarm system
*
The conceptThe vehicle's alarm system responds:
>When a door, the hood or the lug-
gage compartment lid is opened
>To movement inside the vehicle
(interior motion sensor)
>To a change of the vehicle's tilt Ð if
someone attempts to steal the wheels
or tow the vehicle without authoriza-
tion, for example
>If there is an interruption of battery
voltage.
The alarm system signals unauthorized
access to the vehicle or an attempted
theft in different ways:
>Sounding an acoustical alarm for
30 seconds
>The hazard warning flashers are acti-
vated for approx. five minutes.
To activate and deactivate the
alarm systemWhen the vehicle is locked or unlocked
by using a key or with the remote con-
trol, the alarm system is also simulta-
neously armed or disarmed.
The interior motion sensor is activated
approx. 30 seconds after you have fin-
ished locking the car.
If the alarm system has been armed
correctly, the hazard warning flashers
flash once. An acoustic warning signal
sounds at the same time.
You can have different acknow-
ledgment messages set to confirm
arming and disarming.<
You can also open the luggage com-
partment lid when the system is armed
by pressing button 3 of the remote con-
trol (refer to page 37). When it is closed,
the lid is once again secured.
Indicator lamp displaysThe indicator lamp is located under the
interior rearview mirror.
>When the indicator lamp flashes con-
tinuously: The system is armed.
>If the indicator lamp flashes during
arming of the system: The door(s),
the hood or luggage compartment lid
are not completely closed. Even if
you do not close the alerted area, the
system begins to monitor the remain-
ing areas, and the indicator lamp
flashes continuously after 10 sec-
onds. However, the interior motion
sensor is not activated.
>If the indicator lamp goes out when
the system is disarmed: No manipu-
lation or attempted intrusions have
been detected in the period since the
system was armed.460de105
Page 65 of 189
65n
IndexDataTechnologyRepairsCar careControlsOverview
Automatic transmission with Steptronic
*
You have the option of driving with a
normal automatic transmission or
switching to manual.
When you move the selector lever from
the "D" position to the left into the M/S
range, the performance-oriented shift
programs of the automatic transmission
are engaged. As soon as you briefly
touch the selector lever in the "+" or "Ð"
direction, Steptronic changes the gear.
The manual mode is engaged. When-
ever you want to use automatic again,
just shift the selector lever toward the
right to position D.
The automatic transmission with Step-
tronic is equipped with ATC (Adaptive
Transmission Control). ATC reacts with
precision to your individual driving style
and the current driving conditions. It is
for this reason that various shift pro-
grams are used.
For additional details concerning the
ATC, please refer to the chapter de-
scribing "Advanced technology" on
page 162.
Selector lever positions
P R N D M/S + Ð
Starting the engineThe engine can only be started in selec-
tor lever positions P ("Park") or N ("Neu-
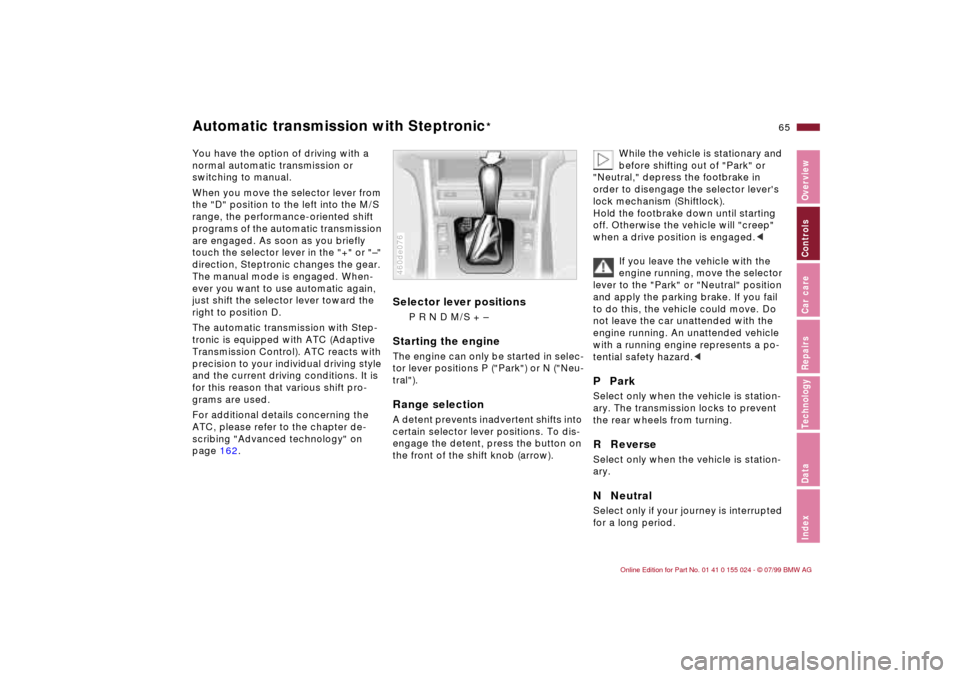
tral").Range selectionA detent prevents inadvertent shifts into
certain selector lever positions. To dis-
engage the detent, press the button on
the front of the shift knob (arrow).460de076
While the vehicle is stationary and
before shifting out of "Park" or
"Neutral," depress the footbrake in
order to disengage the selector lever's
lock mechanism (Shiftlock).
Hold the footbrake down until starting
off. Otherwise the vehicle will "creep"
when a drive position is engaged.<
If you leave the vehicle with the
engine running, move the selector
lever to the "Park" or "Neutral" position
and apply the parking brake. If you fail
to do this, the vehicle could move. Do
not leave the car unattended with the
engine running. An unattended vehicle
with a running engine represents a po-
tential safety hazard.<
P ParkSelect only when the vehicle is station-
ary. The transmission locks to prevent
the rear wheels from turning.R ReverseSelect only when the vehicle is station-
ary.N NeutralSelect only if your journey is interrupted
for a long period.
Page 81 of 189
81n
IndexDataTechnologyRepairsCar careControlsOverview
Tire Pressure Control (RDC)
*
Flat tireIf there is a tire failure with loss of pres-
sure, the indicator lamp comes on with
a red lamp. In addition, an acoustic sig-
nal is sounded.
If this occurs, reduce vehicle speed im-
mediately and stop the vehicle in a safe
location. Avoid hard brake applications.
Do not oversteer. Replace the wheel
and flat tire.
The space-saver spare tire
* is
provided for temporary use only in
the event of a tire failure. It does not
have RDC electronics and is not moni-
tored. A full-size spare tire
* that has the
same dimensions as the tires already
mounted on the vehicle is equipped
with the necessary RDC electronics,
and will be also be monitored once the
tires have been mounted and the sys-
tem activated.<
RDC cannot alert you to severe
and sudden tire damage caused
by external factors.<
Have the tires changed by your
BMW center.
Your BMW center has been trained to
work with the RDC system and is
equipped with the necessary special
tools.<
System interferenceThe RDC system may be interrupted
temporarily by other systems or devices
that use the same radio frequency.
The yellow indicator lamp will come on
during the malfunction.
The indicator lamp also comes on
>in the event of a system fault
>if a wheel is mounted without the
appropriate electronics
>if, in addition to the spare tire
*, addi-
tional wheels with RDC electronics
are on board.
Please contact your BMW center for
additional information.
Page 110 of 189

110n
Winter operationThe onset of winter is often accompa-
nied by rapid changes in weather.
Adaptations in driving style should be
accompanied by preparations on the
vehicle itself to ensure that your
progress through the winter remains
safe and trouble-free.CoolantBe sure that the coolant mixture con-
tains the year-round ratio of 50:50
water and extended-duty antifreeze/
corrosion protection. This mixture pro-
vides protection against freezing down
to approx. Ð 34 7 (Ð 37 6). Replace
the coolant every four years.LocksBMW door lock deicer can be used to
free them if frozen. This deicer also
contains lubricant.
After its use, treatment with BMW lock
barrel grease is recommended.Rubber seals and components To prevent the weather-stripping from
freezing, apply a spray-on rubber treat-
ment or silicone spray to the door, hood
and luggage compartment lid seals.
A full range of car care products is
available from your BMW center.<
Snow chains BMW snow chains
* can be mounted on
both summer and winter tires. Mount
them in pairs on the rear wheels only
and comply with the manufacturer's
safety precautions. Do not exceed a
maximum speed of 30 mph (50 km/h).
For best performance, deactivate the
DSC when snow chains are mounted.
Refer to page 79.
Starting offWhen starting from a full stop in deep
snow or for "rocking" the vehicle to free
it, we recommend that you deactivate
the DSC system. Refer to page 79.Driving on low-traction road
surfacesUse smooth, gentle pressure to control
the accelerator pedal. Avoid excessive
engine speeds and shift to the next
higher gear at an early point. On down-
grades or slopes, shift down to the next
lower gear at an early point. Maintain an
adequate distance between yourself
and the car ahead.
BrakesWinter road conditions substantially re-
duce the traction available between the
tires and the road surface. Remember
that braking distances will be signifi-
cantly longer as a result.
ABS is intended to prevent the wheels
from locking during brake applications,
thus helping to maintain vehicle stability
and steering response.
If the ABS does not respond in a critical
braking situation and the wheels lock:
Reduce the pressure on the brake pedal
until the wheels just start to roll again
while still maintaining enough force to
continue braking.
Following that, increase pedal pressure
again. Reduce the pressure as the
wheels lock, then reapply pressure.
Repeat this procedure. This type of
staggered braking will reduce the brak-
ing distance, and the vehicle still re-
mains responsive to steering. It allows
you to steer around hazards once you
have reduced the pressure on the brake
pedal.
Page 117 of 189

117n
IndexDataTechnologyRepairsCar careControlsOverview
Winter tiresChoosing the right tireBMW recommends winter tires (M+S
radial tires) for driving in adverse winter
road conditions. Although all-season
M+S tires provide better winter traction
than standard summer tires with H, V,
W, Y and ZR speed ratings, they gener-
ally fail to provide the same levels of
performance as standard snow tires in
winter driving.
In the interest of safe tracking and
steering response, install winter tires
made by the same manufacturer having
the same tread configuration on all four
wheels.
Mount only winter tires approved by
BMW. Any BMW center will be glad to
provide you with information on the
best winter tires for your particular driv-
ing conditions.Never exceed the maximum speed
for which the tires are rated.
Unprofessional attempts by laymen to
service tires can lead to damage and
accidents.
Have this work performed by skilled
professionals only. Any BMW center
has the required technical knowledge
and the proper equipment and will be
happy to assist you.<
Tire condition, tire pressureWinter tires display a perceptible loss in
their ability to cope with winter driving
conditions once the tread wears to
below 0.16 inches (4 mm), and should
thus be replaced.
Comply with the specified tire inflation
pressures Ð and be sure to have the
wheel and tire assemblies balanced
every time you change the tires.
StorageAlways store tires in a cool, dry place.
Store them away from light whenever
possible. Protect the tires against con-
tact with oil, grease and fuel.Snow chains
*
The use of narrow-link BMW snow
chains on summer or winter tires is
approved only in pairs and only on the
rear wheels. Comply with all manufac-
turer's safety precautions when mount-
ing the chains.
Page 149 of 189
149n
IndexDataTechnologyRepairsCar careControlsOverview
Changing a wheel
Take these precautionary mea-
sures if you have either a flat tire
or are changing the tire.
Stop the vehicle as far as possible from
passing traffic. Park on a firm, flat sur-
face. Switch on the hazard flashers.
Turn the steering wheel to the straight-
ahead position, remove the key and en-
gage the steering lock. Shift into 1st or
reverse (selector lever in "Park" with
automatic) and engage the parking
brake.
Have all passengers leave the car and
remain well away from your immediate
working area (behind a guardrail, for in-
stance).
If a warning triangle or portable hazard
warning lamp is available, set it up on
the roadside at an appropriate distance
from the rear of the vehicle. Comply
with all applicable safety guidelines and
regulations.
Change the wheel only on a level, firm
surface that is not slippery. Avoid jack-
ing the car on a soft or slippery support
surface (snow, ice, loose gravel, etc.),
as it could slide sideways.
Position the jack on a firm support sur-
face.
Do not place wooden blocks or similar
objects under the jack. If you do so, the
jack might not be able to reach its full
support capacity because of the limited
height.
Do not lie under the vehicle or start the
engine when the vehicle is supported
by the jack. Failure to comply with this
creates a risk of fatal injury.<
Your BMW has either a spare wheel
* or
a space-saver spare tire
* for temporary
use and to ensure your mobility.
To remove the spare wheel
*,
lift the floor panel in the luggage
compartment completely out (refer to
page 41).<
You will the need the following:In order to avoid rattling noises later,
note the position of the tools when you
remove them and return them to their
original position when you are through
using them.
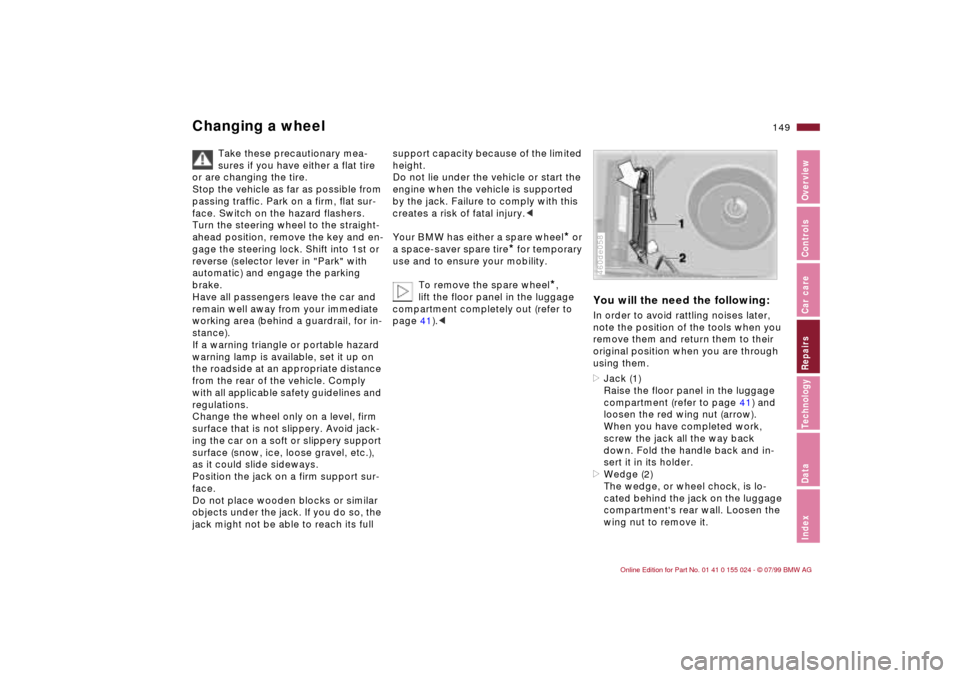
>Jack (1)
Raise the floor panel in the luggage
compartment (refer to page 41) and
loosen the red wing nut (arrow).
When you have completed work,
screw the jack all the way back
down. Fold the handle back and in-
sert it in its holder.
>Wedge (2)
The wedge, or wheel chock, is lo-
cated behind the jack on the luggage
compartment's rear wall. Loosen the
wing nut to remove it.460de058
Page 150 of 189
150n
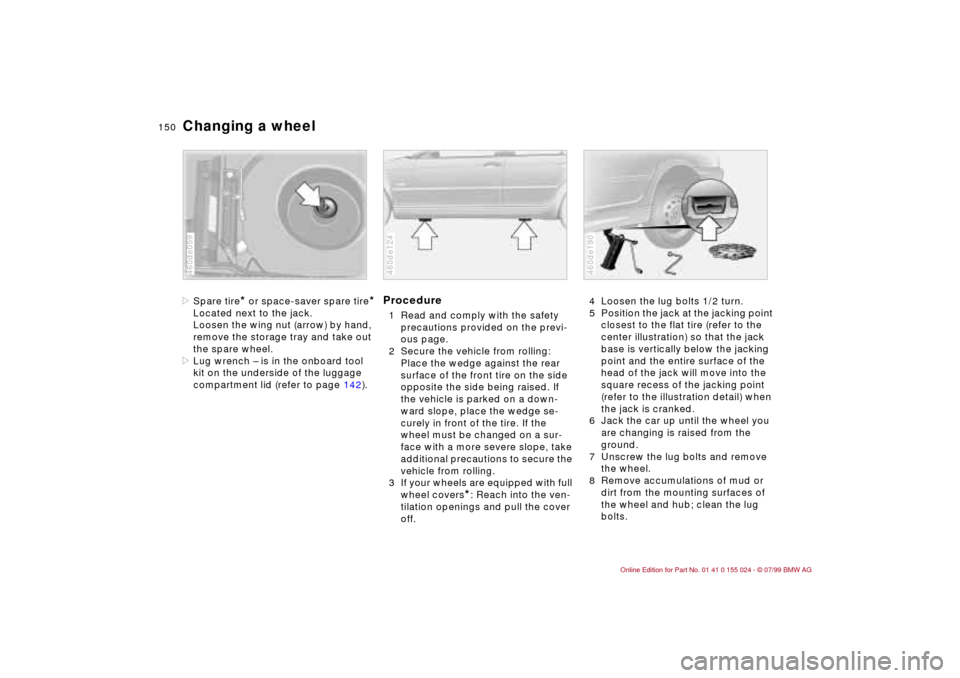
Changing a wheel>Spare tire
* or space-saver spare tire
*
Located next to the jack.
Loosen the wing nut (arrow) by hand,
remove the storage tray and take out
the spare wheel.
>Lug wrench Ð is in the onboard tool
kit on the underside of the luggage
compartment lid (refer to page 142).460de059
Procedure1 Read and comply with the safety
precautions provided on the previ-
ous page.
2 Secure the vehicle from rolling:
Place the wedge against the rear
surface of the front tire on the side
opposite the side being raised. If
the vehicle is parked on a down-
ward slope, place the wedge se-
curely in front of the tire. If the
wheel must be changed on a sur-
face with a more severe slope, take
additional precautions to secure the
vehicle from rolling.
3 If your wheels are equipped with full
wheel covers
*: Reach into the ven-
tilation openings and pull the cover
off.
460de124
4 Loosen the lug bolts 1/2 turn.
5 Position the jack at the jacking point
closest to the flat tire (refer to the
center illustration) so that the jack
base is vertically below the jacking
point and the entire surface of the
head of the jack will move into the
square recess of the jacking point
(refer to the illustration detail) when
the jack is cranked.
6 Jack the car up until the wheel you
are changing is raised from the
ground.
7 Unscrew the lug bolts and remove
the wheel.
8 Remove accumulations of mud or
dirt from the mounting surfaces of
the wheel and hub; clean the lug
bolts.460de190
Page 152 of 189
152n
Changing a wheel Battery Driving with the space-saver
spare tire
*
Drive cautiously and do not exceed a
speed of 45 mph (80 km/h).
Be aware that vehicle handling will be
altered. Slower brake response time,
longer braking distances and changed
steering characteristics may be antici-
pated when approaching limit condi-
tions.
The changes in handling characteristics
will be even more pronounced in con-
junction with winter tires.
Only one space-saver spare tire
may be mounted at one time.
Mount a wheel and tire with the same
size and specifications as the others at
the earliest possible opportunity. Main-
tain correct tire pressures. Refer to
page 28.<
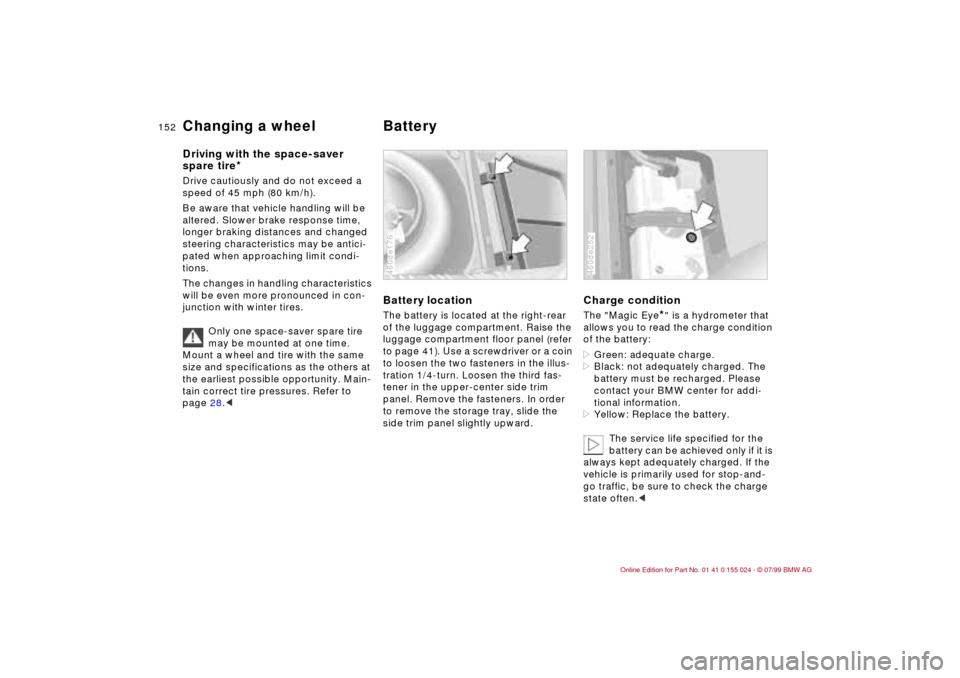
Battery locationThe battery is located at the right-rear
of the luggage compartment. Raise the
luggage compartment floor panel (refer
to page 41). Use a screwdriver or a coin
to loosen the two fasteners in the illus-
tration 1/4-turn. Loosen the third fas-
tener in the upper-center side trim
panel. Remove the fasteners. In order
to remove the storage tray, slide the
side trim panel slightly upward.460de176
Charge conditionThe "Magic Eye
*" is a hydrometer that
allows you to read the charge condition
of the battery:
>Green: adequate charge.
>Black: not adequately charged. The
battery must be recharged. Please
contact your BMW center for addi-
tional information.
>Yellow: Replace the battery.
The service life specified for the
battery can be achieved only if it is
always kept adequately charged. If the
vehicle is primarily used for stop-and-
go traffic, be sure to check the charge
state often.<
460de252