2000 BMW 323i SEDAN door lock
[x] Cancel search: door lockPage 39 of 189
39n
IndexDataTechnologyRepairsCar careControlsOverview
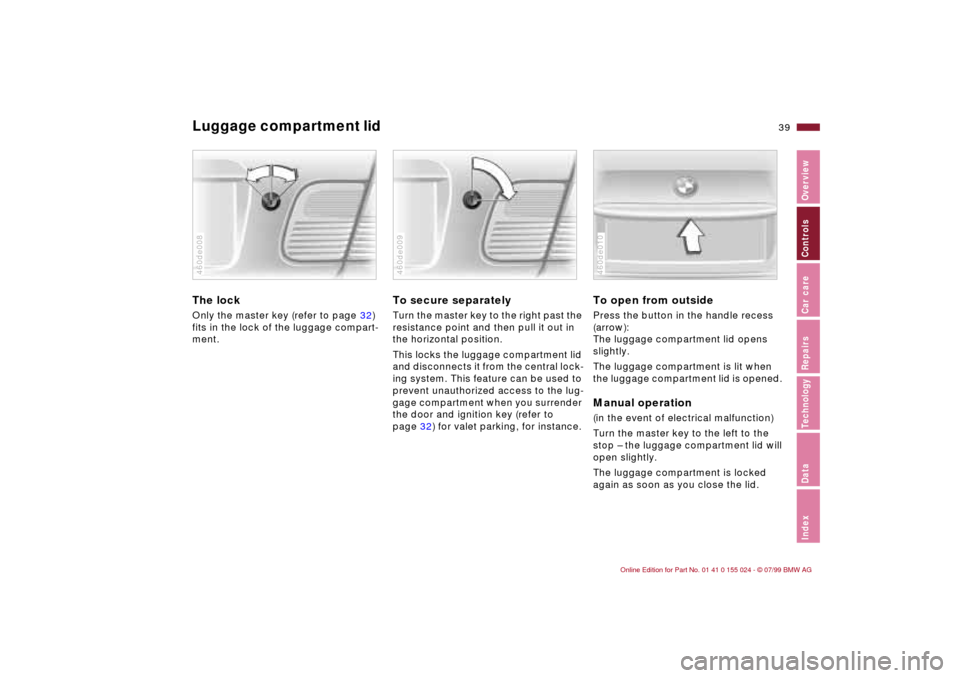
Luggage compartment lid The lockOnly the master key (refer to page 32)
fits in the lock of the luggage compart-
ment.460de008
To secure separatelyTurn the master key to the right past the
resistance point and then pull it out in
the horizontal position.
This locks the luggage compartment lid
and disconnects it from the central lock-
ing system. This feature can be used to
prevent unauthorized access to the lug-
gage compartment when you surrender
the door and ignition key (refer to
page 32) for valet parking, for instance.460de009
To open from outsidePress the button in the handle recess
(arrow):
The luggage compartment lid opens
slightly.
The luggage compartment is lit when
the luggage compartment lid is opened. Manual operation(in the event of electrical malfunction)
Turn the master key to the left to the
stop Ð the luggage compartment lid will
open slightly.
The luggage compartment is locked
again as soon as you close the lid.460de010
Page 42 of 189

42n
Alarm system
*
The conceptThe vehicle's alarm system responds:
>When a door, the hood or the lug-
gage compartment lid is opened
>To movement inside the vehicle
(interior motion sensor)
>To a change of the vehicle's tilt Ð if
someone attempts to steal the wheels
or tow the vehicle without authoriza-
tion, for example
>If there is an interruption of battery
voltage.
The alarm system signals unauthorized
access to the vehicle or an attempted
theft in different ways:
>Sounding an acoustical alarm for
30 seconds
>The hazard warning flashers are acti-
vated for approx. five minutes.
To activate and deactivate the
alarm systemWhen the vehicle is locked or unlocked
by using a key or with the remote con-
trol, the alarm system is also simulta-
neously armed or disarmed.
The interior motion sensor is activated
approx. 30 seconds after you have fin-
ished locking the car.
If the alarm system has been armed
correctly, the hazard warning flashers
flash once. An acoustic warning signal
sounds at the same time.
You can have different acknow-
ledgment messages set to confirm
arming and disarming.<
You can also open the luggage com-
partment lid when the system is armed
by pressing button 3 of the remote con-
trol (refer to page 37). When it is closed,
the lid is once again secured.
Indicator lamp displaysThe indicator lamp is located under the
interior rearview mirror.
>When the indicator lamp flashes con-
tinuously: The system is armed.
>If the indicator lamp flashes during
arming of the system: The door(s),
the hood or luggage compartment lid
are not completely closed. Even if
you do not close the alerted area, the
system begins to monitor the remain-
ing areas, and the indicator lamp
flashes continuously after 10 sec-
onds. However, the interior motion
sensor is not activated.
>If the indicator lamp goes out when
the system is disarmed: No manipu-
lation or attempted intrusions have
been detected in the period since the
system was armed.460de105
Page 44 of 189
44n
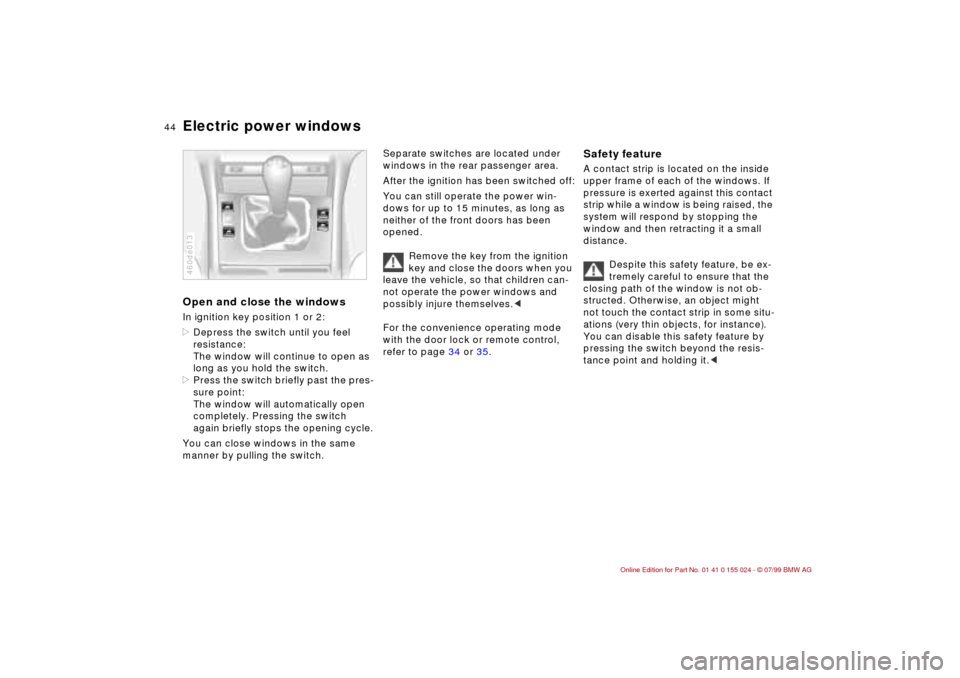
Electric power windowsOpen and close the windowsIn ignition key position 1 or 2:
>Depress the switch until you feel
resistance:
The window will continue to open as
long as you hold the switch.
>Press the switch briefly past the pres-
sure point:
The window will automatically open
completely. Pressing the switch
again briefly stops the opening cycle.
You can close windows in the same
manner by pulling the switch.460de013
Separate switches are located under
windows in the rear passenger area.
After the ignition has been switched off:
You can still operate the power win-
dows for up to 15 minutes, as long as
neither of the front doors has been
opened.
Remove the key from the ignition
key and close the doors when you
leave the vehicle, so that children can-
not operate the power windows and
possibly injure themselves.<
For the convenience operating mode
with the door lock or remote control,
refer to page 34 or 35.
Safety feature A contact strip is located on the inside
upper frame of each of the windows. If
pressure is exerted against this contact
strip while a window is being raised, the
system will respond by stopping the
window and then retracting it a small
distance.
Despite this safety feature, be ex-
tremely careful to ensure that the
closing path of the window is not ob-
structed. Otherwise, an object might
not touch the contact strip in some situ-
ations (very thin objects, for instance).
You can disable this safety feature by
pressing the switch beyond the resis-
tance point and holding it.<
Page 45 of 189
45n
IndexDataTechnologyRepairsCar careControlsOverview
Electric power windows Sliding/Tilt sunroof
*
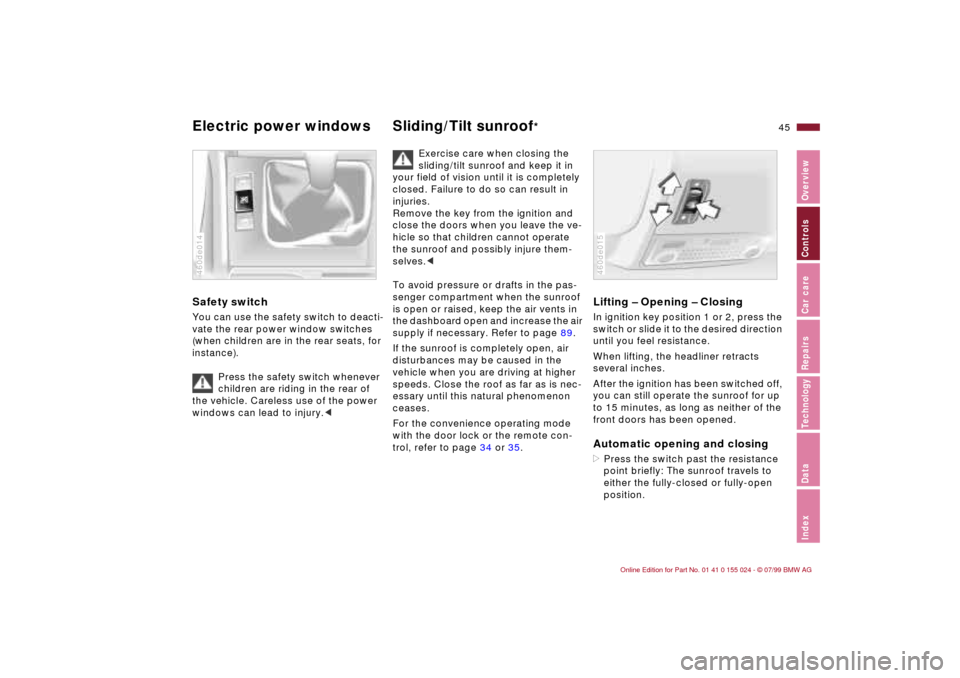
Safety switch You can use the safety switch to deacti-
vate the rear power window switches
(when children are in the rear seats, for
instance).
Press the safety switch whenever
children are riding in the rear of
the vehicle. Careless use of the power
windows can lead to injury.<460de014
Exercise care when closing the
sliding/tilt sunroof and keep it in
your field of vision until it is completely
closed. Failure to do so can result in
injuries.
Remove the key from the ignition and
close the doors when you leave the ve-
hicle so that children cannot operate
the sunroof and possibly injure them-
selves.<
To avoid pressure or drafts in the pas-
senger compartment when the sunroof
is open or raised, keep the air vents in
the dashboard open and increase the air
supply if necessary. Refer to page 89.
If the sunroof is completely open, air
disturbances may be caused in the
vehicle when you are driving at higher
speeds. Close the roof as far as is nec-
essary until this natural phenomenon
ceases.
For the convenience operating mode
with the door lock or the remote con-
trol, refer to page 34 or 35.
Lifting Ð Opening Ð ClosingIn ignition key position 1 or 2, press the
switch or slide it to the desired direction
until you feel resistance.
When lifting, the headliner retracts
several inches.
After the ignition has been switched off,
you can still operate the sunroof for up
to 15 minutes, as long as neither of the
front doors has been opened.Automatic opening and closing>Press the switch past the resistance
point briefly: The sunroof travels to
either the fully-closed or fully-open
position.460de015
Page 50 of 189
50n
Power seat
*
Seat and mirror memory
*
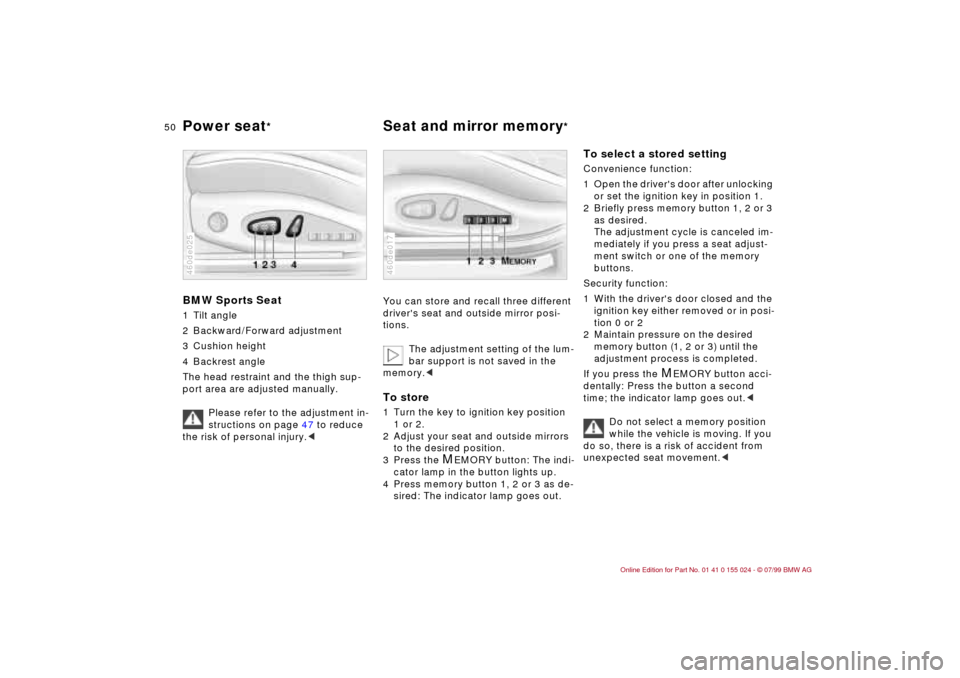
BMW Sports Seat1 Tilt angle
2 Backward/Forward adjustment
3 Cushion height
4 Backrest angle
The head restraint and the thigh sup-
port area are adjusted manually.
Please refer to the adjustment in-
structions on page 47 to reduce
the risk of personal injury.<460de025
You can store and recall three different
driver's seat and outside mirror posi-
tions.
The adjustment setting of the lum-
bar support is not saved in the
memory.
2 Adjust your seat and outside mirrors
to the desired position.
3 Press the
M
EMORY button: The indi-
cator lamp in the button lights up.
4 Press memory button 1, 2 or 3 as de-
sired: The indicator lamp goes out.
460de017
To select a stored setting Convenience function:
1 Open the driver's door after unlocking
or set the ignition key in position 1.
2 Briefly press memory button 1, 2 or 3
as desired.
The adjustment cycle is canceled im-
mediately if you press a seat adjust-
ment switch or one of the memory
buttons.
Security function:
1 With the driver's door closed and the
ignition key either removed or in posi-
tion 0 or 2
2 Maintain pressure on the desired
memory button (1, 2 or 3) until the
adjustment process is completed.
If you press the
M
EMORY button acci-
dentally: Press the button a second
time; the indicator lamp goes out.<
Do not select a memory position
while the vehicle is moving. If you
do so, there is a risk of accident from
unexpected seat movement.<
Page 56 of 189
56n
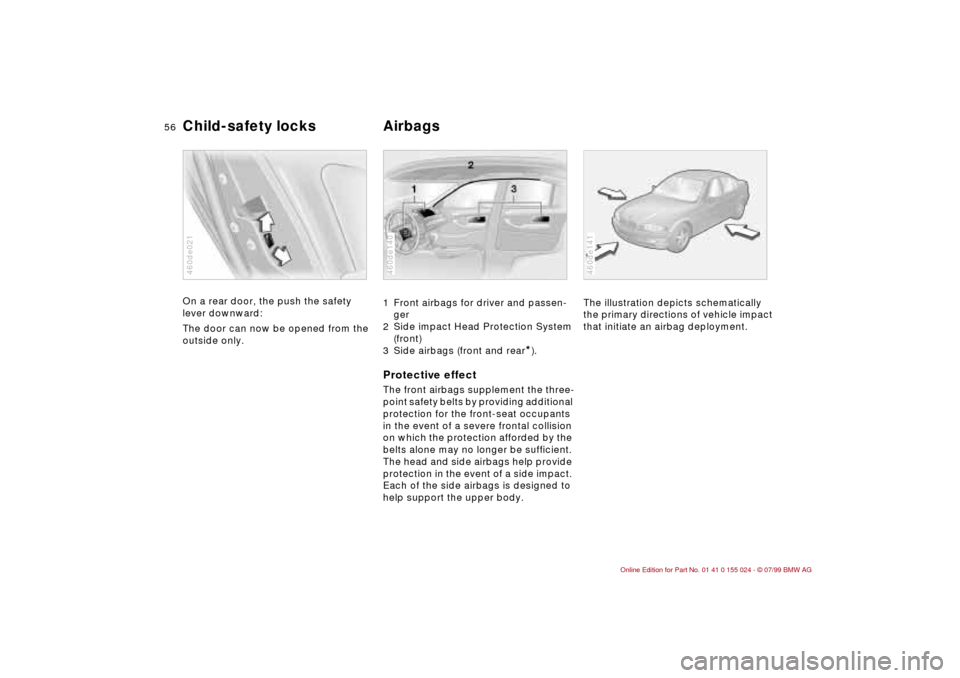
Child-safety locks Airbags On a rear door, the push the safety
lever downward:
The door can now be opened from the
outside only.460de021
1 Front airbags for driver and passen-
ger
2 Side impact Head Protection System
(front)
3 Side airbags (front and rear
*).
Protective effectThe front airbags supplement the three-
point safety belts by providing additional
protection for the front-seat occupants
in the event of a severe frontal collision
on which the protection afforded by the
belts alone may no longer be sufficient.
The head and side airbags help provide
protection in the event of a side impact.
Each of the side airbags is designed to
help support the upper body.460de140
The illustration depicts schematically
the primary directions of vehicle impact
that initiate an airbag deployment.460de141
Page 57 of 189

57n
IndexDataTechnologyRepairsCar careControlsOverview
AirbagsIndicator lamp
The indicator lamp displays the
operational status of the airbag
system when the ignition key is
in position 1 and higher.
System operational:
>The indicator lamp comes on briefly
then goes out.
System malfunction:
>The indicator lamp fails to come on.
>The indicator lamp comes on briefly
before going out, and then lights up
again.
If there is a system malfunction, there is
a risk that the airbags will not be trig-
gered within their normal response
range, even if the level of impact would
normally have triggered them.
Have your BMW center inspect and
repair the system immediately.
The airbag indicator lamp also
comes on if the safety belt ten-
sioners have been triggered.<
For your own safety, please com-
ply with the following precautions
concerning airbags. If you do not, their
protective function may be impaired
and your personal safety endangered.
The following information pertains to all
occupants:
The airbags are supplemental restraint
devices designed to provide extra pro-
tection; they are not a substitute for
safety belts. Wear your safety belt at all
times. The airbags will not be triggered
in the event of a minor accident, a vehi-
cle roll-over, or collisions from the rear.
In these instances, the safety belt offers
the best protection.
Airbags are located under the cover
panels in the steering wheel, in the in-
strument panel, in the side trim panels
in the front and rear
*, in the roof panels,
and in the sides of the inside roof lining.
Select a seat position that is comfort-
able and allows the greatest possible
distance from each of the applicable air-
bags. Hold the steering wheel at the rim
(hands at the "9 o'clock and 3 o'clock"
positions) in order to avoid injuries to
your hands or arms if the airbag is trig-
gered.
Never allow any objects to obstruct the
area between the airbag and an occu-
pant.
Do not use the cover panel above the
front passenger airbag as a storage
area.
Never tape the airbag cover panels,
cover them over or alter them in any
other way.
Never install a rear-facing child restraint
device on the front passenger seat. Chil-
dren under 13 years of age and children
who are smaller than 5 feet (150 cm),
should only travel in the rear seat.
If your vehicle is equipped with side air-
bags in the rear, be sure that child seats
are installed correctly and with the
greatest possible distance from the side
trim panels. Do not allow children to
lean out of the child's seat in the direc-
tion of the side trim panels. Otherwise,
serious injuries could occur if the airbag
is triggered.
At all times, occupants should sit up-
right and be properly restrained (infants
and small children in appropriate child
restraint systems; larger children and
adults using the safety belts). Never let
an occupant's head rest near or on a
side airbag because the inflating airbag
could cause a serious or fatal injury.
Please note that the word "Airbag" im-
printed on the door trim panel indicates
the airbag's location.
Page 61 of 189
61n
IndexDataTechnologyRepairsCar careControlsOverview
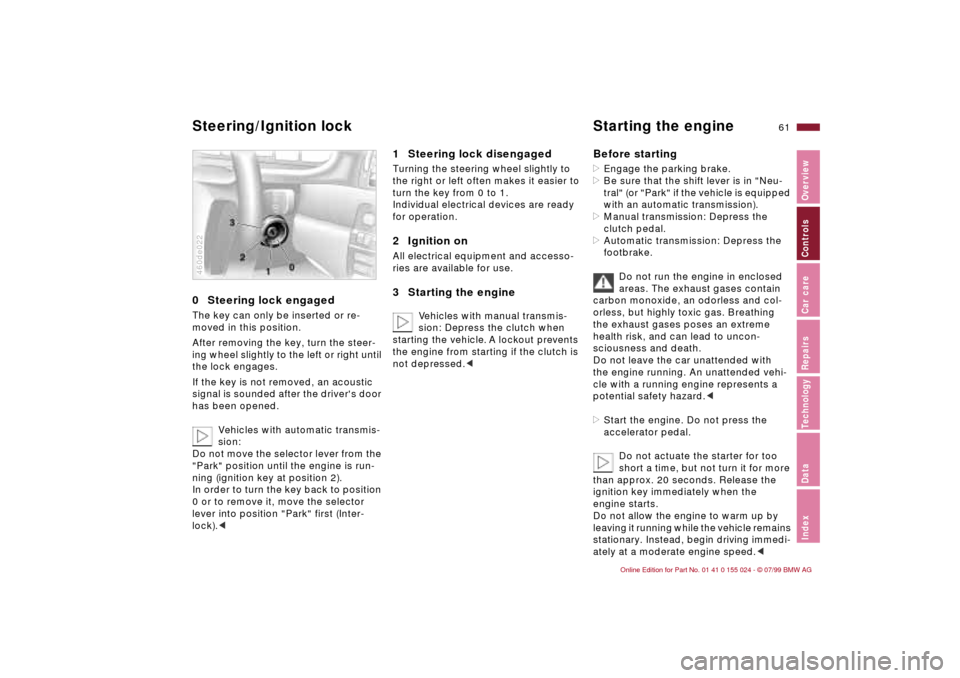
0 Steering lock engaged The key can only be inserted or re-
moved in this position.
After removing the key, turn the steer-
ing wheel slightly to the left or right until
the lock engages.
If the key is not removed, an acoustic
signal is sounded after the driver's door
has been opened.
Vehicles with automatic transmis-
sion:
Do not move the selector lever from the
"Park" position until the engine is run-
ning (ignition key at position 2).
In order to turn the key back to position
0 or to remove it, move the selector
lever into position "Park" first (Inter-
lock).<460de022
1 Steering lock disengaged Turning the steering wheel slightly to
the right or left often makes it easier to
turn the key from 0 to 1.
Individual electrical devices are ready
for operation.2 Ignition onAll electrical equipment and accesso-
ries are available for use.3 Starting the engine
Vehicles with manual transmis-
sion: Depress the clutch when
starting the vehicle. A lockout prevents
the engine from starting if the clutch is
not depressed.c
Before starting>Engage the parking brake.
>Be sure that the shift lever is in "Neu-
tral" (or "Park" if the vehicle is equipped
with an automatic transmission).
>Manual transmission: Depress the
clutch pedal.
>Automatic transmission: Depress the
footbrake.
Do not run the engine in enclosed
areas. The exhaust gases contain
carbon monoxide, an odorless and col-
orless, but highly toxic gas. Breathing
the exhaust gases poses an extreme
health risk, and can lead to uncon-
sciousness and death.
Do not leave the car unattended with
the engine running. An unattended vehi-
cle with a running engine represents a
potential safety hazard.<
>Start the engine. Do not press the
accelerator pedal.
Do not actuate the starter for too
short a time, but not turn it for more
than approx. 20 seconds. Release the
ignition key immediately when the
engine starts.
Do not allow the engine to warm up by
leaving it running while the vehicle remains
stationary. Instead, begin driving immedi-
ately at a moderate engine speed.<
Steering/Ignition lock Starting the engine