Page 52 of 189
50n
Electric power seat
*
Seat and mirror memory
*
1 Longitudinal adjustment
2 Cushion height
3 Backrest angle
The head restraint is adjusted manually.
Please refer to the adjustment in-
structions on page 47 to reduce
the risk of personal injury.<460de016
BMW Sports Seat1 Tilt angle
2 Longitudinal adjustment
3 Cushion height
4 Backrest angle
Adjust the head restraints (page 48) and
the thigh support (page 49) manually.
Please refer to the adjustment in-
structions on page 47 to reduce
the risk of personal injury.<460de025
You can store and recall three different
driver's seat and outside mirror posi-
tions.
The adjustment setting of the lum-
bar support is not saved in the
memory.
1 or 2
2 Adjust your seat and outside mirrors
to the desired position
3 Press the
M
EMORY button: the indi-
cator lamp in the button lights up
4 Press memory button 1, 2 or 3 as
desired: the indicator lamp goes out.
460de017
Page 53 of 189

51n
RepairsIndexOverview Controls Car care Technology Data
Seat and mirror memory
*
Adjusting steering wheel
To select a stored setting:Automatic:
1 Open driver's door after unlocking or
ignition key in position 1
2 Briefly press memory button 1, 2 or 3
as desired.
The adjustment cycle is canceled im-
mediately if you press a seat adjust-
ment switch or one of the memory
buttons.
Manual:
1 With driver's door closed and ignition
key either removed or in position
0 or 2
2 Maintain pressure on desired mem-
ory button 1, 2 or 3 until the adjust-
ment process is completed.
If you press the
M
EMORY button acci-
dentally: Press the button a second
time, the indicator lamp goes out.
Do not select a memory position
while the vehicle is moving. There
is a risk of accident from unexpected
seat movement.<
You can adapt the vehicle settings
so that your own personalized
seat setting is initiated when you unlock
the car using your personalized remote
control key.<
When this setting is used, be sure
that the footwell behind the driver's
seat is clear before unlocking the vehi-
cle. Otherwise, persons or objects could
be injured or damaged should the seat
move backward.<
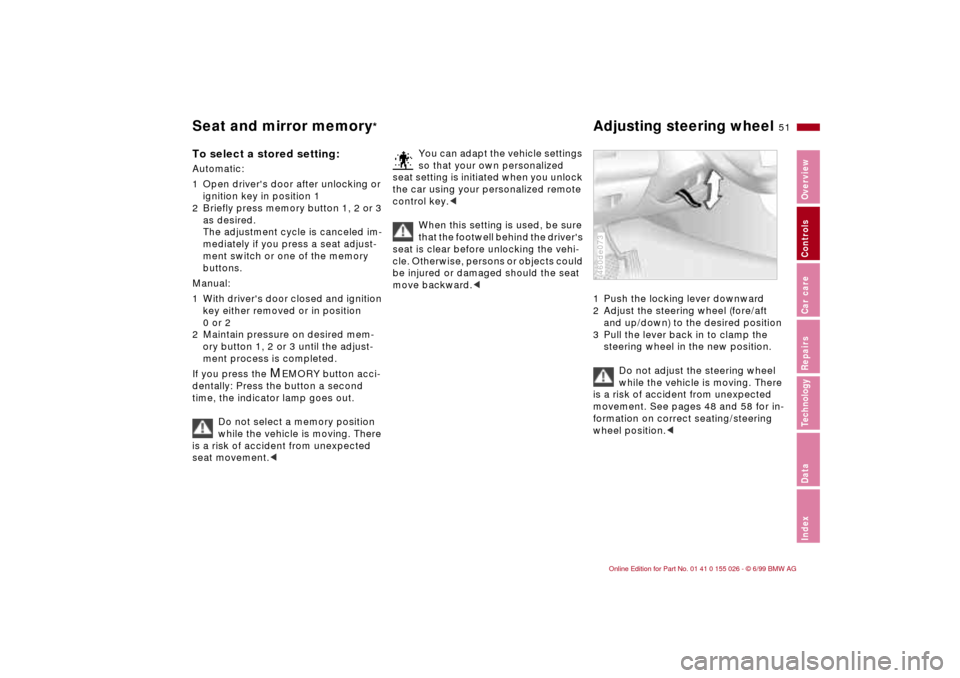
1 Push the locking lever downward
2 Adjust the steering wheel (fore/aft
and up/down) to the desired position
3 Pull the lever back in to clamp the
steering wheel in the new position.
Do not adjust the steering wheel
while the vehicle is moving. There
is a risk of accident from unexpected
movement. See pages 48 and 58 for in-
formation on correct seating/steering
wheel position.<460de073
Page 54 of 189
52n
Mirrors Exterior mirrors1 Switch for 4-way adjustment
2 Selection switch for changing
between mirrors.462us016
You can also adjust the mirrors manu-
ally by pressing against the outer edges
of their lenses.
The mirror on the passenger's
side features a lens with a more
convex surface than the mirror installed
on the driver's side. When estimating
the distance between yourself and
other traffic, bear in mind that the ob-
jects reflected in the mirror are closer
than they appear. Estimations of the
distance to following traffic should
therefore not be regarded as precise.
with the ignition key in position 2.
Inside rearview mirror To reduce glare from behind when driv-
ing at night, tilt the small lever forward.Lighted vanity mirror
*
Fold down the sun visor and slide the
cover panel to the side as required.
The mirror lamps come on in ignition
key position 1 or 2.Sun visorsThese can be folded down toward the
windshield or swiveled out against the
side windows.460de019
Page 59 of 189

57n
RepairsIndexOverview Controls Car care Technology Data
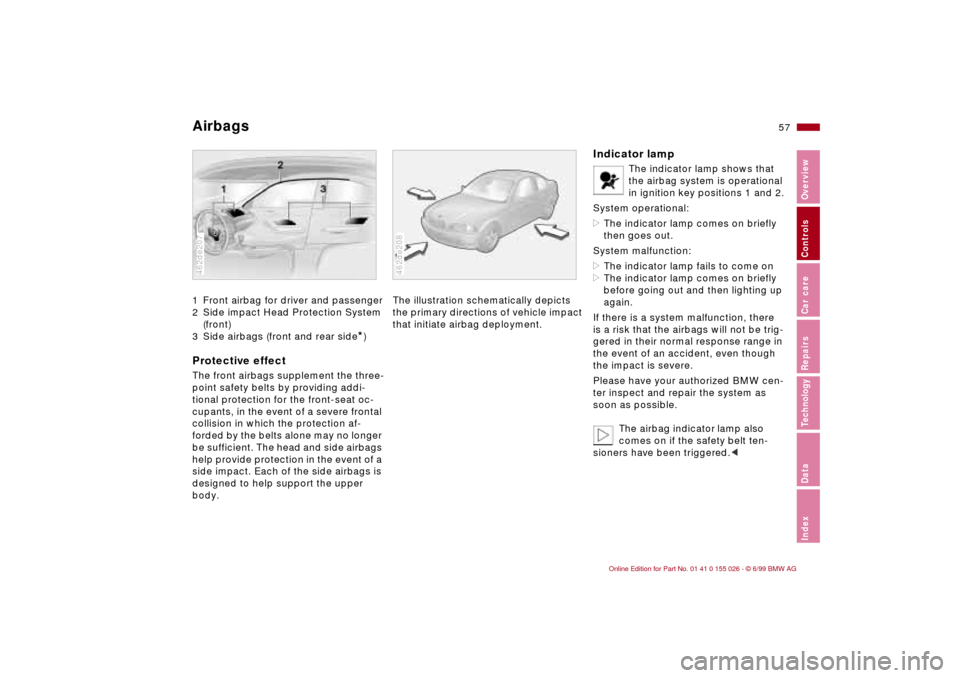
Airbags 1 Front airbag for driver and passenger
2 Side impact Head Protection System
(front)
3 Side airbags (front and rear side
*)
Protective effectThe front airbags supplement the three-
point safety belts by providing addi-
tional protection for the front-seat oc-
cupants, in the event of a severe frontal
collision in which the protection af-
forded by the belts alone may no longer
be sufficient. The head and side airbags
help provide protection in the event of a
side impact. Each of the side airbags is
designed to help support the upper
body.462de207
The illustration schematically depicts
the primary directions of vehicle impact
that initiate airbag deployment.462de208
Indicator lamp
The indicator lamp shows that
the airbag system is operational
in ignition key positions 1 and 2.
System operational:
>The indicator lamp comes on briefly
then goes out.
System malfunction:
>The indicator lamp fails to come on
>The indicator lamp comes on briefly
before going out and then lighting up
again.
If there is a system malfunction, there
is a risk that the airbags will not be trig-
gered in their normal response range in
the event of an accident, even though
the impact is severe.
Please have your authorized BMW cen-
ter inspect and repair the system as
soon as possible.
The airbag indicator lamp also
comes on if the safety belt ten-
sioners have been triggered.<
Page 64 of 189

62n
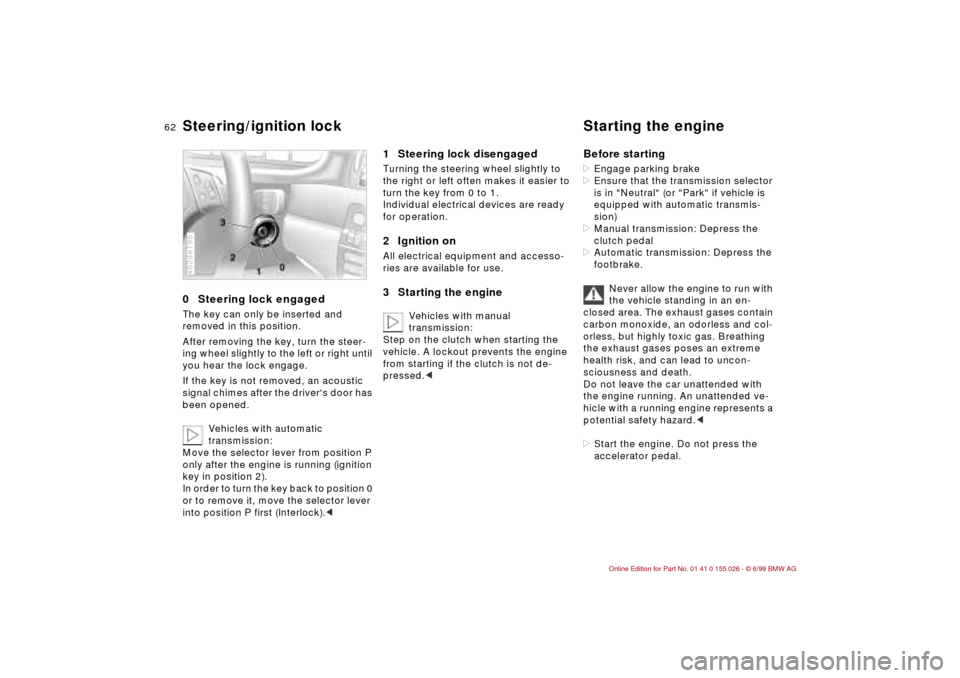
0 Steering lock engaged The key can only be inserted and
removed in this position.
After removing the key, turn the steer-
ing wheel slightly to the left or right until
you hear the lock engage.
If the key is not removed, an acoustic
signal chimes after the driver's door has
been opened.
Vehicles with automatic
transmission:
Move the selector lever from position P
only after the engine is running (ignition
key in position 2).
In order to turn the key back to position 0
or to remove it, move the selector lever
into position P first (Interlock).<462de195
1 Steering lock disengaged Turning the steering wheel slightly to
the right or left often makes it easier to
turn the key from 0 to 1.
Individual electrical devices are ready
for operation.2 Ignition onAll electrical equipment and accesso-
ries are available for use.3 Starting the engine
Vehicles with manual
transmission:
Step on the clutch when starting the
vehicle. A lockout prevents the engine
from starting if the clutch is not de-
pressed.c
Before starting>Engage parking brake
>Ensure that the transmission selector
is in "Neutral" (or "Park" if vehicle is
equipped with automatic transmis-
sion)
>Manual transmission: Depress the
clutch pedal
>Automatic transmission: Depress the
footbrake.
Never allow the engine to run with
the vehicle standing in an en-
closed area. The exhaust gases contain
carbon monoxide, an odorless and col-
orless, but highly toxic gas. Breathing
the exhaust gases poses an extreme
health risk, and can lead to uncon-
sciousness and death.
Do not leave the car unattended with
the engine running. An unattended ve-
hicle with a running engine represents a
potential safety hazard.<
>Start the engine. Do not press the
accelerator pedal.
Steering/ignition lock Starting the engine
Page 65 of 189

63n
RepairsIndexOverview Controls Car care Technology Data
Starting the engine Switching off the engine
Do not operate the starter too
briefly, but not longer than
approx. 20 seconds. Release the igni-
tion key immediately as soon as the
engine starts.
Do not allow the engine to warm up by
leaving it running while the vehicle re-
mains stationary. Instead, drive off
immediately at a moderate engine
speed.<
Should the engine fail to start on the
first attempt, e.g. if it is very hot or cold:
>Press the accelerator pedal halfway
down while engaging the starter.
Cold start at extremely low tempera-
tures, from approx. + 57 (– 156)
and at elevations above 3300 feet
(1000 meters):
>On the first start attempt, engage the
starter for a longer period (approx.
10 seconds)
>Press the accelerator pedal halfway
down while engaging the starter.
Turn the ignition key to position 1 or 0.
Do not pull the ignition key out of a
rolling vehicle, otherwise the igni-
tion switch could lock and it is impossi-
ble to steer the vehicle.
When you leave the vehicle, always
remove the ignition key and engage the
steering lock.
Vehicles with manual transmission:
Always engage the parking brake when
parking on slopes and inclined sur-
faces, as placing the lever in 1st gear or
reverse may not provide adequate re-
sistance to rolling.
Vehicles with automatic transmission:
Place the selector lever in "Park".<
Page 66 of 189

64n
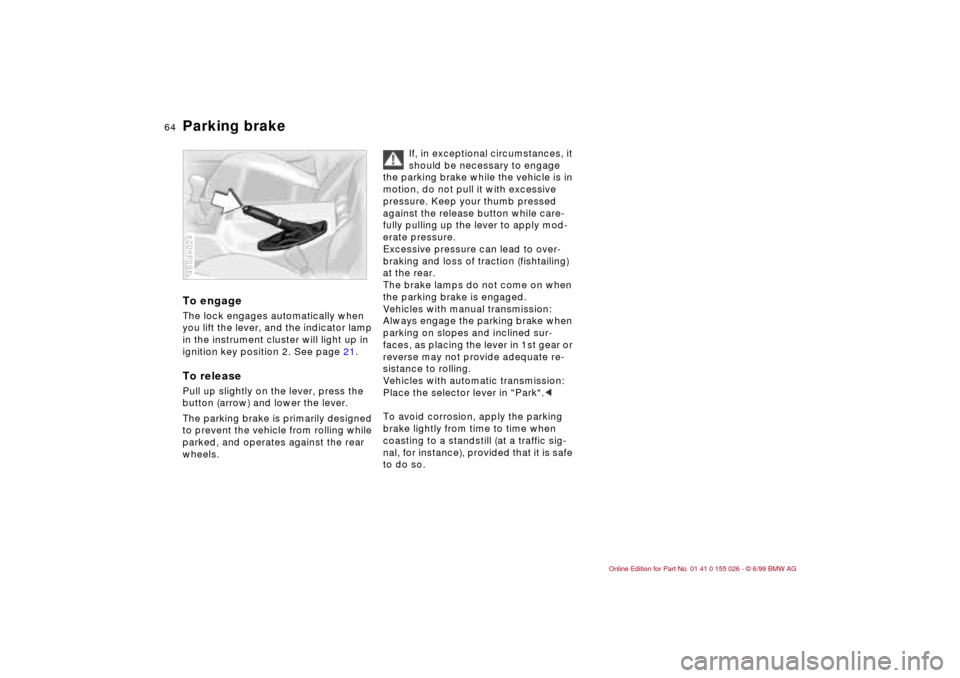
Parking brake To engageThe lock engages automatically when
you lift the lever, and the indicator lamp
in the instrument cluster will light up in
ignition key position 2. See page 21.To releasePull up slightly on the lever, press the
button (arrow) and lower the lever.
The parking brake is primarily designed
to prevent the vehicle from rolling while
parked, and operates against the rear
wheels.460de024
If, in exceptional circumstances, it
should be necessary to engage
the parking brake while the vehicle is in
motion, do not pull it with excessive
pressure. Keep your thumb pressed
against the release button while care-
fully pulling up the lever to apply mod-
erate pressure.
Excessive pressure can lead to over-
braking and loss of traction (fishtailing)
at the rear.
The brake lamps do not come on when
the parking brake is engaged.
Vehicles with manual transmission:
Always engage the parking brake when
parking on slopes and inclined sur-
faces, as placing the lever in 1st gear or
reverse may not provide adequate re-
sistance to rolling.
Vehicles with automatic transmission:
Place the selector lever in "Park".<
To avoid corrosion, apply the parking
brake lightly from time to time when
coasting to a standstill (at a traffic sig-
nal, for instance), provided that it is safe
to do so.
Page 67 of 189
65n
RepairsIndexOverview Controls Car care Technology Data
Manual transmission The shift lever's neutral plane (dot in the
illustration) is located between 3rd and
4th gears.
When shifting from each gear into
"Neutral," the shift lever returns auto-
matically to this neutral position be-
cause of its spring loading.360de044
Reverse Select only with the vehicle stationary.
Press the shift lever to the left to over-
come the slight resistance.
As you do this, the backup lamps will
turn on automatically when the ignition
key is in position 2.
Do not hold the vehicle in place on
slopes by slipping or "riding" the
clutch. Use the parking brake instead.
A slipping clutch increases clutch
wear.<