2000 BMW 323Ci CONVERTIBLE mirror controls
[x] Cancel search: mirror controlsPage 10 of 199

Contents
Overview
Controls and features
Cockpit16
Instrument cluster18
Indicator and warning lamps20
Multifunction steering wheel
(MFL)24
Hazard warning flashers25
Warning triangle25
First-aid kit25
Refueling26
Fuel specifications27
Tire inflation pressure27
Opening and closing:
Keys32
Electronic vehicle
immobilizer33
Central locking system34
Opening and closing – from
outside34
Opening and closing – from
inside38
Luggage compartment lid39
Luggage compartment40
Alarm system42
Electric power windows44
Manual convertible top45
The fully automatic convertible
top49
Wind deflector51
Adjustments:
Seats53
Seat and mirror memory57
Steering wheel58
Mirrors58
Car Memory, Key Memory60
Passenger safety systems:
Safety belts61
ISOFIX Attachment of the
child seat62
Airbags63
Child restraints66
Installing a child restraint
system67
Rollover protection system68
Driving:
Steering/Ignition lock70
Starting the engine70
Switch off the engine71
Parking brake72
Manual transmission73
Automatic transmission with
Steptronic74
Turn signal indicator/
Headlamp flasher77
Washer/Wiper system/
Rain sensor77
Rear window defroster79
Cruise control80
Everything under control:
Odometer82
Tachometer82
Energy Control82
Fuel gauge83
Coolant temperature gauge83
Service Interval Display83
Check Control84
Clock84
Onboard computer85
Technology for safety and
driving convenience:
Park Distance Control (PDC)87
Dynamic Stability Control
(DSC)88
Tire Pressure Control (RDC)89
Contents
Page 30 of 199
30n
Opening and closing:
Keys32
Electronic vehicle immobilizer33
Central locking system34
Opening and closing – from
outside34
Opening and closing – from
inside38
Luggage compartment lid39
Luggage compartment40
Alarm system42
Electric power windows44
Manual convertible top45
The fully automatic
convertible top49
Wind deflector51
Adjustments:
Seats53
Seat and mirror memory57
Steering wheel58
Mirrors58
Car Memory, Key Memory60
Passenger safety systems:
Safety belts61
ISOFIX Attachment of
the child seat62
Airbags63
Child restraints66
Installing a child restraint
system67
Rollover protection system68
Controls
Page 57 of 199
57n
IndexDataTechnologyRepairsCar careControlsOverview
Seat and mirror memory
*
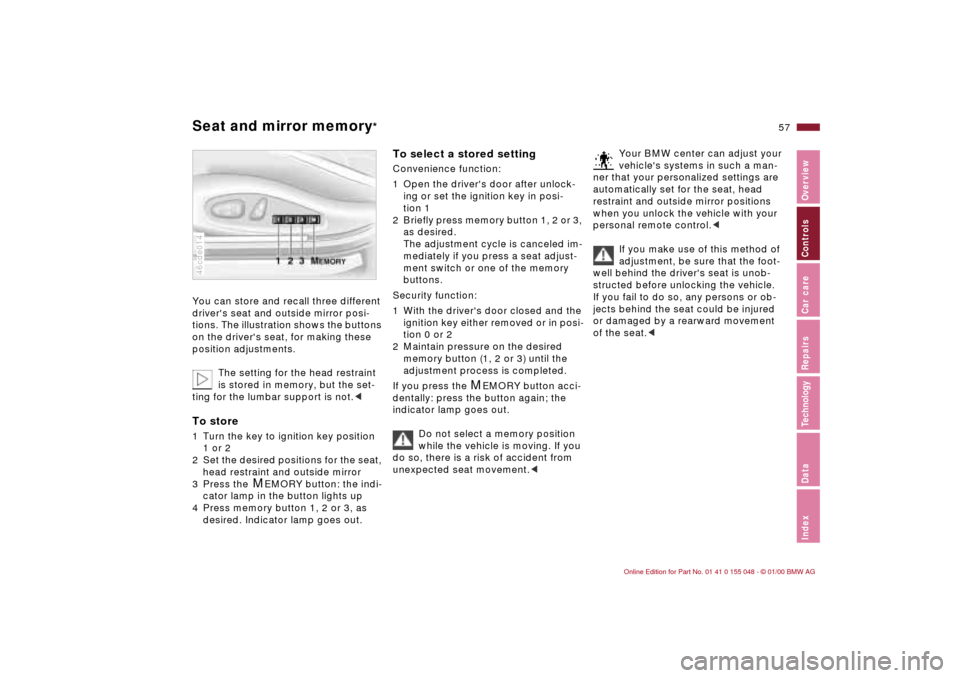
You can store and recall three different
driver's seat and outside mirror posi-
tions. The illustration shows the buttons
on the driver's seat, for making these
position adjustments.
The setting for the head restraint
is stored in memory, but the set-
ting for the lumbar support is not.
2 Set the desired positions for the seat,
head restraint and outside mirror
3 Press the
M
EMORY button: the indi-
cator lamp in the button lights up
4 Press memory button 1, 2 or 3, as
desired. Indicator lamp goes out.
46cde014
To select a stored setting Convenience function:
1 Open the driver's door after unlock-
ing or set the ignition key in posi-
tion 1
2 Briefly press memory button 1, 2 or 3,
as desired.
The adjustment cycle is canceled im-
mediately if you press a seat adjust-
ment switch or one of the memory
buttons.
Security function:
1 With the driver's door closed and the
ignition key either removed or in posi-
tion 0 or 2
2 Maintain pressure on the desired
memory button (1, 2 or 3) until the
adjustment process is completed.
If you press the
M
EMORY button acci-
dentally: press the button again; the
indicator lamp goes out.
Do not select a memory position
while the vehicle is moving. If you
do so, there is a risk of accident from
unexpected seat movement.<
Your BMW center can adjust your
vehicle's systems in such a man-
ner that your personalized settings are
automatically set for the seat, head
restraint and outside mirror positions
when you unlock the vehicle with your
personal remote control.<
If you make use of this method of
adjustment, be sure that the foot-
well behind the driver's seat is unob-
structed before unlocking the vehicle.
If you fail to do so, any persons or ob-
jects behind the seat could be injured
or damaged by a rearward movement
of the seat.<
Page 59 of 199
59n
IndexDataTechnologyRepairsCar careControlsOverview
MirrorsYou can also adjust the mirrors manu-
ally by pressing against the outer edges
of their lenses.
The mirror on the passenger's
side features a lens with a more
convex surface than the mirror installed
on the driver's side. When estimating
the distance between yourself and
other traffic, bear in mind that the ob-
jects reflected in the mirror are closer
than they appear. Estimating the dis-
tance between you and the traffic be-
hind you is therefore imprecise.
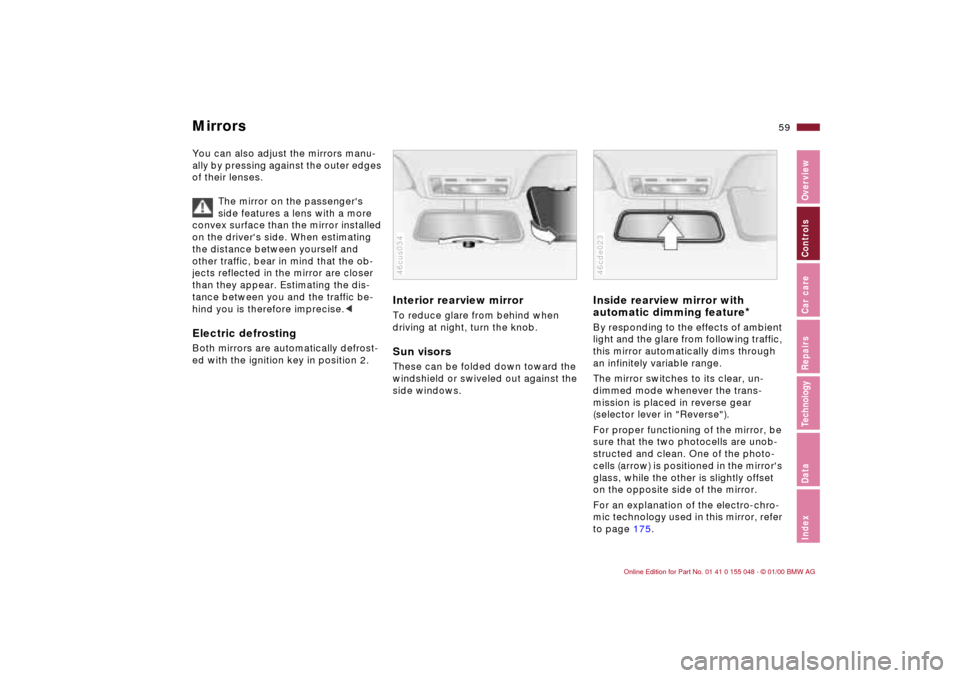
Interior rearview mirror To reduce glare from behind when
driving at night, turn the knob.Sun visorsThese can be folded down toward the
windshield or swiveled out against the
side windows.46cus034
Inside rearview mirror with
automatic dimming feature
*
By responding to the effects of ambient
light and the glare from following traffic,
this mirror automatically dims through
an infinitely variable range.
The mirror switches to its clear, un-
dimmed mode whenever the trans-
mission is placed in reverse gear
(selector lever in "Reverse").
For proper functioning of the mirror, be
sure that the two photocells are unob-
structed and clean. One of the photo-
cells (arrow) is positioned in the mirror's
glass, while the other is slightly offset
on the opposite side of the mirror.
For an explanation of the electro-chro-
mic technology used in this mirror, refer
to page 175.46cde023
Page 101 of 199
101n
IndexDataTechnologyRepairsCar careControlsOverview
BMW Universal Transmitter
*
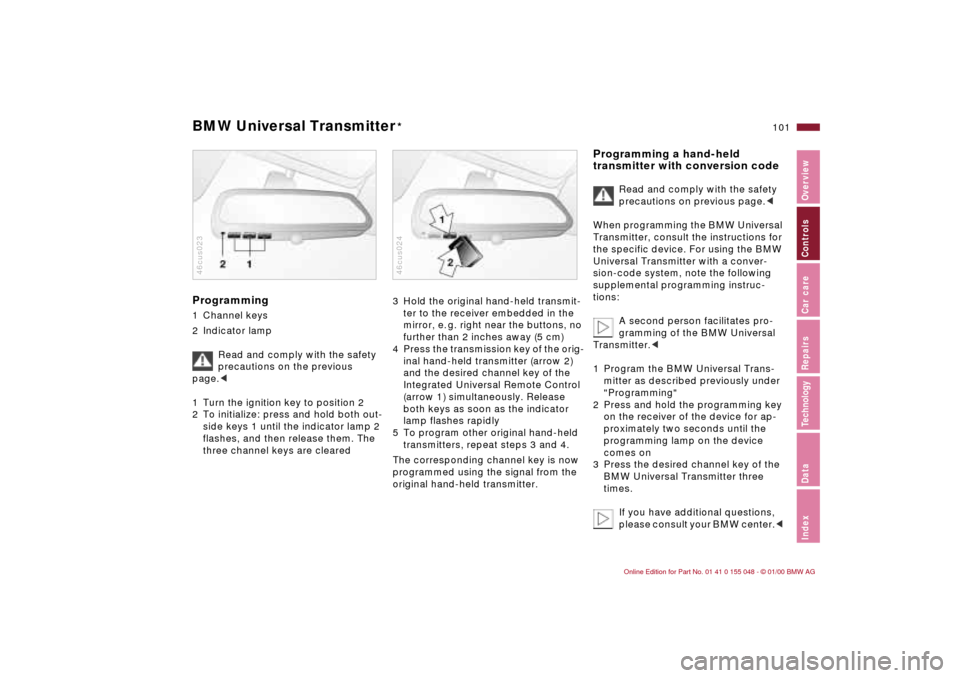
Programming 1 Channel keys
2 Indicator lamp
Read and comply with the safety
precautions on the previous
page.<
1 Turn the ignition key to position 2
2 To initialize: press and hold both out-
side keys 1 until the indicator lamp 2
flashes, and then release them. The
three channel keys are cleared46cus023
3 Hold the original hand-held transmit-
ter to the receiver embedded in the
mirror, e. g. right near the buttons, no
further than 2 inches away (5 cm)
4 Press the transmission key of the orig-
inal hand-held transmitter (arrow 2)
and the desired channel key of the
Integrated Universal Remote Control
(arrow 1) simultaneously. Release
both keys as soon as the indicator
lamp flashes rapidly
5 To program other original hand-held
transmitters, repeat steps 3 and 4.
The corresponding channel key is now
programmed using the signal from the
original hand-held transmitter. 46cus024
Programming a hand-held
transmitter with conversion code
Read and comply with the safety
precautions on previous page.<
When programming the BMW Universal
Transmitter, consult the instructions for
the specific device. For using the BMW
Universal Transmitter with a conver-
sion-code system, note the following
supplemental programming instruc-
tions:
A second person facilitates pro-
gramming of the BMW Universal
Transmitter.<
1 Program the BMW Universal Trans-
mitter as described previously under
"Programming"
2 Press and hold the programming key
on the receiver of the device for ap-
proximately two seconds until the
programming lamp on the device
comes on
3 Press the desired channel key of the
BMW Universal Transmitter three
times.
If you have additional questions,
please consult your BMW center.<
Page 103 of 199
103n
IndexDataTechnologyRepairsCar careControlsOverview
Storage compartments Cellular phone
*
Ashtray front
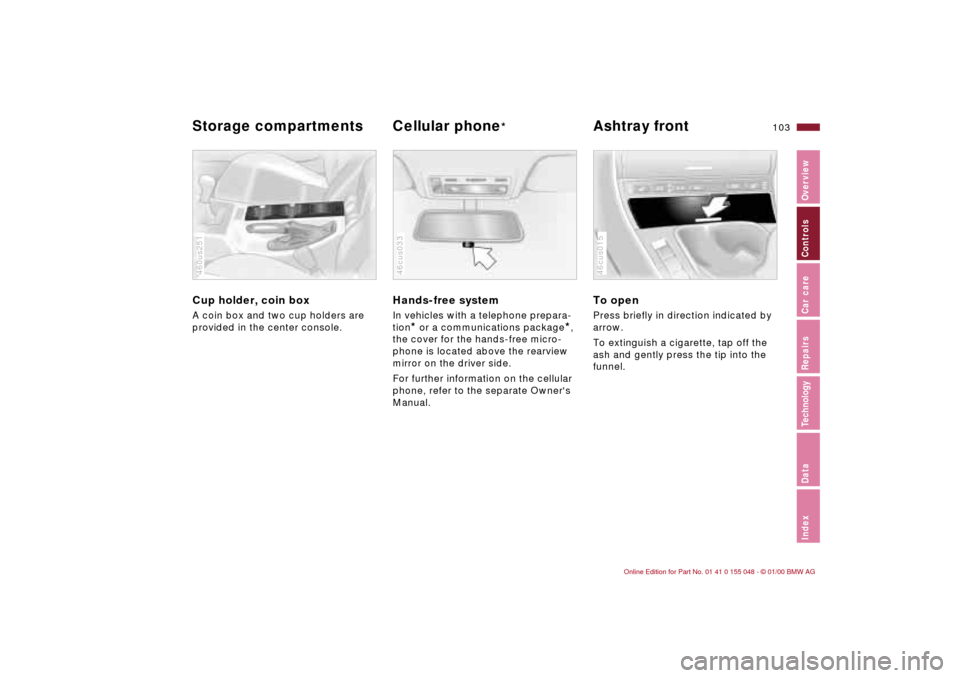
Cup holder, coin box A coin box and two cup holders are
provided in the center console.460us251
Hands-free systemIn vehicles with a telephone prepara-
tion
* or a communications package
*,
the cover for the hands-free micro-
phone is located above the rearview
mirror on the driver side.
For further information on the cellular
phone, refer to the separate Owner's
Manual.
46cus033
To open Press briefly in direction indicated by
arrow.
To extinguish a cigarette, tap off the
ash and gently press the tip into the
funnel.46cus015
Page 141 of 199
141n
IndexDataTechnologyRepairsCar careControlsOverview
Caring for your vehicleWaxing your vehicle Protect the finish using only carnauba
or synthetic-based waxes.
The best way to determine when the
finish needs to be waxed is by noting
when water stops beading on the
surface.
You can use a glass cleaner to remove
any wax or silicone that may have been
left on the windows during waxing.
Use the cleaning and car-care
products available at your BMW
center.<
Paint damageYou can touch up small areas of paint
damage with a BMW spray paint or a
BMW touchup stick.
The paint color code for your vehicle is
provided on a sticker located on the
right hand side under the hood and on
the first page of your Service and War-
ranty Information Booklet (US models)
or Warranty and Service Guide (Cana-
dian models).
Damage caused by flying stones,
scratches, etc., must be touched up
without delay to prevent rust from
forming.
If corrosion has started to form in an
area with paint damage, remove all rust
and clean the area. Then prime the area
with a BMW Primer Stick. Finally, apply
the finish coat. Wait a few days, then
polish the repaired area. Finish by ap-
plying a wax preservative.
More extensive paint damage should
be repaired professionally in accor-
dance with the manufacturer's instruc-
tions. Your BMW center uses original
BMW finish materials in accordance
with approved repair procedures.
Caring for other vehicle
components and materials Light-alloy wheels should be treated
with alloy wheel cleaner, especially dur-
ing the winter months. However, do not
use aggressive products containing ac-
ids, strong alkalis or abrasives. Do not
use steam cleaners operating at tem-
peratures above 140 7 (+60 6). Fol-
low the manufacturer's instructions.
If your vehicle has chrome parts
*, such
as the window frames and door han-
dles, clean these parts carefully with
ample clean water and a shampoo sup-
plement if desired, especially if they
have an accumulation of road salt.
Use a chrome polish for an additional
treatment.
You can use window and glass cleaner
to clean inside window surfaces and
mirrors without smearing and streaking.
Never use polishing pastes or abrasive
(quartz) cleansers on mirror lenses.
Page 171 of 199

Overview
Controls and features
Operation, care
and maintenance
Owner service procedures
Technical data
Index Advanced technology
171n
IndexDataTechnologyRepairsCar careControlsOverview
Adaptive Transmission Control
(ATC)172
Airbags173
Dynamic Stability Control
(DSC)173
Radio reception174
Safety belt tensioner174
Interior rearview mirror with
automatic dimmer175
Rain sensor176
Tire Pressure Control (RDC)177
Self-diagnostics178
Rollover protection system179
Xenon lamps179
Technology