2000 BMW 323Ci CONVERTIBLE dashboard
[x] Cancel search: dashboardPage 64 of 199

64n
AirbagsSitting correctly with airbags
For your safety, comply with the
following instructions for the air-
bags. If you do not, the airbags may not
be able to provide their maximum pro-
tection. All passengers in the vehicle
should be aware of and comply with
this information:
The airbags are supplemental restraint
devices designed to provide extra pro-
tection; they are not a substitute for
safety belts. Wear your safety belt at all
times. The airbags will not be triggered
in the event of a minor accident, a vehi-
cle roll-over, or collisions from the rear.
In these instances, the safety belt pro-
vides optimal protection.
Airbags are located under cover panels
in the steering wheel, in the dashboard
and in the side trim panels in the front.
Adjust your seat to a position that pro-
vides maximum distance between you
and the steering wheel, the instrument
panel and the door while still allowing
comfortable and safe access to all
vehicle controls.
To avoid sustaining hand and arm inju-
ries, always grasp the steering wheel
on the rim with the hands at the 9 and
3 o'clock positions. Do not place your
hands on the center pad.
Never allow any objects to obstruct the
area between the airbag and an occu-
pant.
Do not use the cover panel above the
passenger-side airbag as a storage
area.
Do not apply adhesive materials to the
cover panels of the airbags, cover them
or modify them in any other way.
Do not install a rear-facing child re-
straint system in the front passenger
seat of this car.
Children under 13 years of age and
children less than 5 feet (150 cm) tall
should ride only in the rear seat.
Infants or small children should never
be held on the lap of a passenger.
If your car is equipped with side airbags
in the rear passenger area, be sure that
child restraints are mounted correctly
and provided with the greatest-possible
distance between the airbags in the
side trim panels. Do not allow children
to lean out of the child's seat in the di-
rection of the side trim panels. If they
do so, serious injuries can occur if the
airbag is triggered.
(infants and small children in appropri-
ate child restraint systems; larger chil-
dren and adults using the safety belts).
Never let an occupant's head rest near
or on a side airbag because the inflating
airbag could cause a serious or fatal in-
jury. Please note that the word "Airbag"
imprinted on the door trim panel indi-
cates the airbag's location.
Accident research shows that the saf-
est place for children in an automobile
is in the rear seat. However, a child sit-
ting in the rear seat and not properly re-
strained may place his or her head on
or near the airbag, if so equipped. For
example, a child — even though belted
— may fall asleep with his or her head
against the side airbag. It may be diffi-
cult for a driver to ensure that children
in the rear seat will remain properly po-
sitioned at all times and not place their
heads on or near the side airbag.
Therefore, we recommend that the rear
seat side airbags, if so equipped, be
deactivated if children will travel in the
rear seat.
The rear seat side airbags may already
have been deactivated, either at the
time of manufacture or by a BMW
center. Labels in the rear door opening
Page 66 of 199

66n
Child restraints
*
Commercially-available child restraint
systems are designed to be secured
with a lap belt or with the lap belt por-
tion of a combination lap/shoulder belt.
Improperly or inadequately installed
restraint systems can increase the risk
of injury to children. Always read and
follow the instructions that come with
the system.
If you use a child restraint system with
a tether strap, two additional tether an-
chorage points (refer to the arrows in
the illustration) have been provided.
Depending on the location selected for
seating in the rear passenger area, at-
tach the tether strap to the correspond-
ing anchorage point to secure the child
restraint system.46cus001
If the respective seating position is fit-
ted with a headrest lift the headrest and
pass the tether strap between the
headrest and the seat back.
Adjust the tether strap according to the
child restraint manufacturer's instruc-
tions.
Before installing any child restraint
device or child seat, please read
the following:
Never install a rear-facing child restraint
system in the front passenger seat of
this vehicle.
Your vehicle is equipped with an airbag
supplemental restraint system for the
front passenger. Because the backrest
on any rear-facing child restraint sys-
tem (of the kind designed for infants
under 1 year and 20 Ibs./9 kg) would be
within the airbag's deployment range,
you should never mount such a device
in the front passenger seat, since the
impact of the airbag against the child
restraint's backrest could lead to seri-
ous or fatal injuries.
If it is necessary for a child (not an in-
fant) to ride in the front seat, certain
precautions should be taken. First,
move the passenger seat as far away
from the dashboard as possible. This
important precaution is intended to
maximize the distance between the
airbag and the child. Older children
should be tightly secured with a safety
belt. Younger children should be se-
cured in an appropriate forward-facing
child restraint system that has first been
properly secured with a safety belt.
Never install a rear-facing child restraint
system in the front passenger seat.
We strongly urge you to carefully read
and comply with the instructions for in-
stallation and use provided by the child
restraint's manufacturer whenever you
use such a device.
Be sure that all occupants (of all ages)
remain properly and securely restrained
at all times.<
All rear seating positions in your vehicle
meet the recommendations of SAE
J1819, an industry-recommended prac-
tice for securing child restraint systems
in motor vehicles.
Page 129 of 199

129n
IndexDataTechnologyRepairsCar careControlsOverview
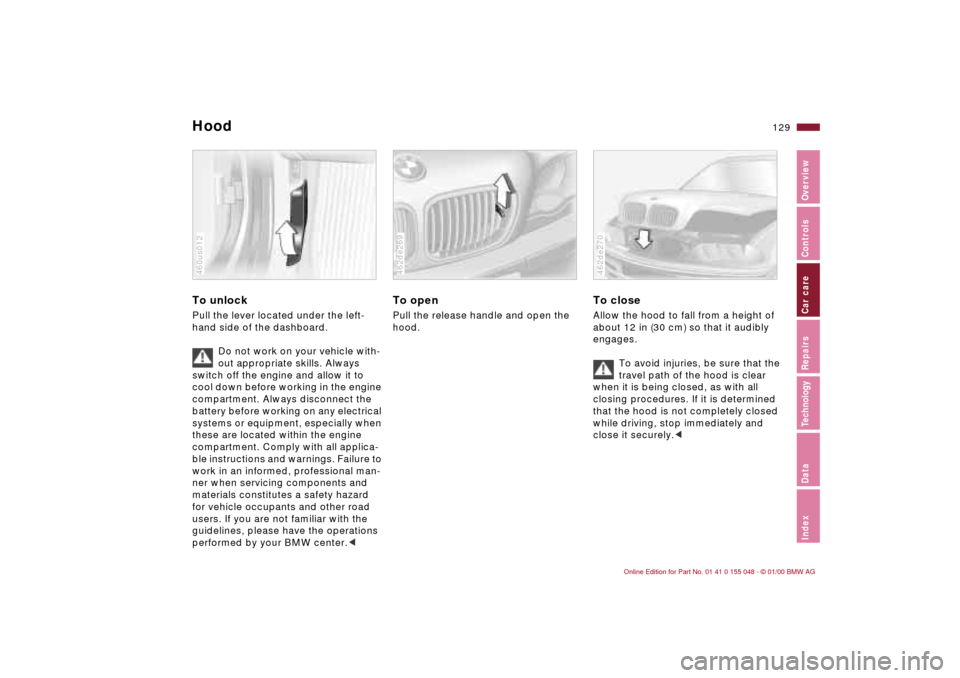
To unlock Pull the lever located under the left-
hand side of the dashboard.
Do not work on your vehicle with-
out appropriate skills. Always
switch off the engine and allow it to
cool down before working in the engine
compartment. Always disconnect the
battery before working on any electrical
systems or equipment, especially when
these are located within the engine
compartment. Comply with all applica-
ble instructions and warnings. Failure to
work in an informed, professional man-
ner when servicing components and
materials constitutes a safety hazard
for vehicle occupants and other road
users. If you are not familiar with the
guidelines, please have the operations
performed by your BMW center.<460us012
To openPull the release handle and open the
hood.462de269
To closeAllow the hood to fall from a height of
about 12 in (30 cm) so that it audibly
engages.
To avoid injuries, be sure that the
travel path of the hood is clear
when it is being closed, as with all
closing procedures. If it is determined
that the hood is not completely closed
while driving, stop immediately and
close it securely.<462de270
Hood
Page 149 of 199

149n
IndexDataTechnologyRepairsCar careControlsOverview
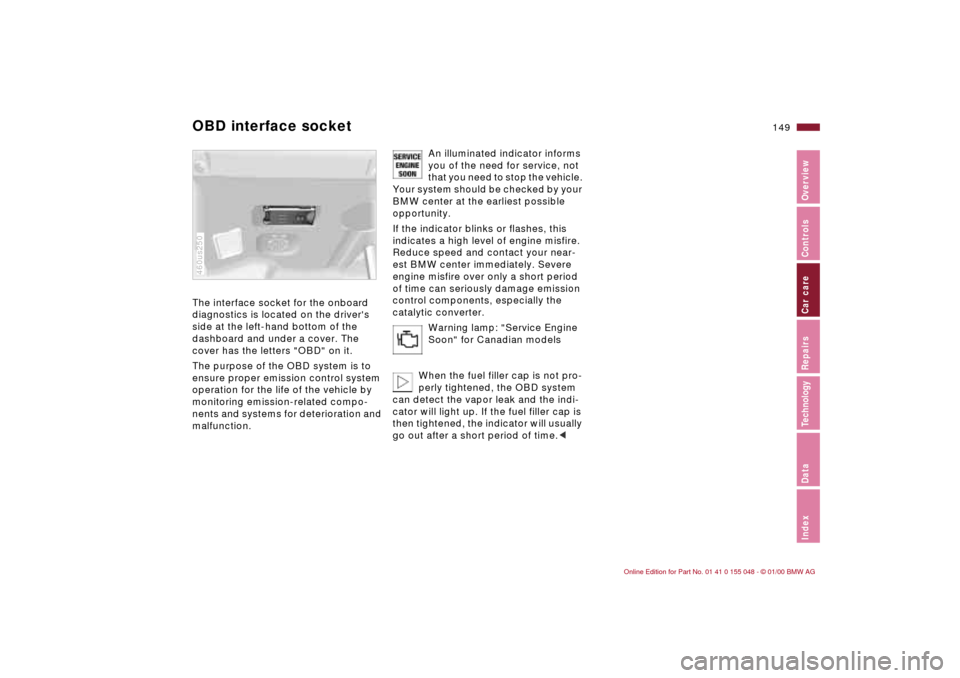
OBD interface socket The interface socket for the onboard
diagnostics is located on the driver's
side at the left-hand bottom of the
dashboard and under a cover. The
cover has the letters "OBD" on it.
The purpose of the OBD system is to
ensure proper emission control system
operation for the life of the vehicle by
monitoring emission-related compo-
nents and systems for deterioration and
malfunction.460us250
An illuminated indicator informs
you of the need for service, not
that you need to stop the vehicle.
Your system should be checked by your
BMW center at the earliest possible
opportunity.
If the indicator blinks or flashes, this
indicates a high level of engine misfire.
Reduce speed and contact your near-
est BMW center immediately. Severe
engine misfire over only a short period
of time can seriously damage emission
control components, especially the
catalytic converter.
Warning lamp: "Service Engine
Soon" for Canadian models
When the fuel filler cap is not pro-
perly tightened, the OBD system
can detect the vapor leak and the indi-
cator will light up. If the fuel filler cap is
then tightened, the indicator will usually
go out after a short period of time.<
Page 191 of 199

Everything from A to Z
191n
IndexDataTechnologyRepairsCar careControlsOverview
Cigarette lighter104
Clock84
Cockpit16
Code, refer to the Radio
Owner's Manual
Coin box, cup holder103
Combination switch77
Compression182
Computer85
Configure settings60
Consumption86
Consumption display83
Convertible top
care144
electrical defect166
Convertible top
compartment panel41
Convertible top operation,
fully automatic convertible
top49
Coolant118, 135, 185
antifreeze118
Coolant temperature
gauge83
Cooling system185
Cornering Brake Control
(CBC)21, 115
Cruise control80
Cruising range86
Curb weight184
Current check indicator20
DDash lighting91
Dashboard16
Data
dimensions183
engine182
technical182
weights184
Daytime-driving lamp
switch91
Defrost setting97
Defrosting the
windows97, 98
Digital clock84
Dimensions183
Dipstick, engine oil133
Disc brakes116
Displacement182
Display lighting91
Displays18
Distance warning87
Diversity Antenna174
Door key32
Door locks, care118
Doors
emergency actuation34
remote control35
unlocking and locking34
Drive belts186
Driving hints113
Driving in winter118Driving lamps91
DSC (Dynamic Stability
Control)22, 88, 173
EElectric power windows44
Electrical accessories,
failure165
Electrical system186
Electronic vehicle
immobilizer33
Elements of operation16
Emergency actuation
doors34
fuel filler door165
fully automatic convertible
top166
Emergency closure166
Energy Control82
Engine compartment130
Engine coolant135, 185
Engine data182
Engine oil
capacity185
consumption133
pressure20
quality134
specifications134
viscosity134
Engine oil level21
check133Engine speed182
Engine, starting70
Entry to the rear56
Exterior mirrors58
Eyes169
FFailure messages84
Fault displays84
Fault, ABS115
Filler cap cover26
Filling capacities185
Filling the washer
reservoir185
First-aid kit25
Flashlight99
Flat tire123, 159
Fog lamps92
bulb replacement155
"Follow-Me-Home"
lamps91
Footbrake116
Footwell lamps92
bulb replacement158
Front seat adjustment53
Frost protection,
radiator135
Fuel27
gauge83
preparation182
quality27
Fuel consumption86