2000 BMW 323Ci CONVERTIBLE ECO mode
[x] Cancel search: ECO modePage 3 of 199

Congratulations, and thank you for choosing a BMW.
Thorough familiarity with your vehicle will provide you with enhanced control and
security when you drive it. We therefore have this request:
Please take the time to read this Owner's Manual and familiarize yourself with the
information that we have compiled for you before starting off in your new vehicle.
It contains important data and instructions intended to assist you in gaining maxi-
mum use and satisfaction from the unique range of technical features on your BMW.
The manual also contains information on care and maintenance designed to en-
hance operating safety and contribute to maintaining the value of your BMW
throughout an extended service life.
This Owner's Manual should be considered a permanent part of this vehicle. It
should stay with the vehicle when sold to provide the next owner with important
operating, safety and maintenance information.
This manual is supplemented by a Service and Warranty Information Booklet
(US models) or a Warranty and Service Guide Booklet (Canadian models).
We recommend that you read this publication thoroughly.
Your BMW is covered by the following warranties:
– New Vehicle Limited Warranty
– Limited Warranty Rust Perforation
– Federal Emissions System Defect Warranty
– Federal Emissions Performance Warranty
– California Emission Control System Limited Warranty
Detailed information about these warranties is listed in the Service and Warranty
Information Booklet (US models) or in the Warranty and Service Guide Booklet
(Canadian models).
We wish you an enjoyable driving experience.
BMW AG
Preface
Page 21 of 199

21n
IndexDataTechnologyRepairsCar careControlsOverview
Indicator and warning lampsYellow: stop immediately
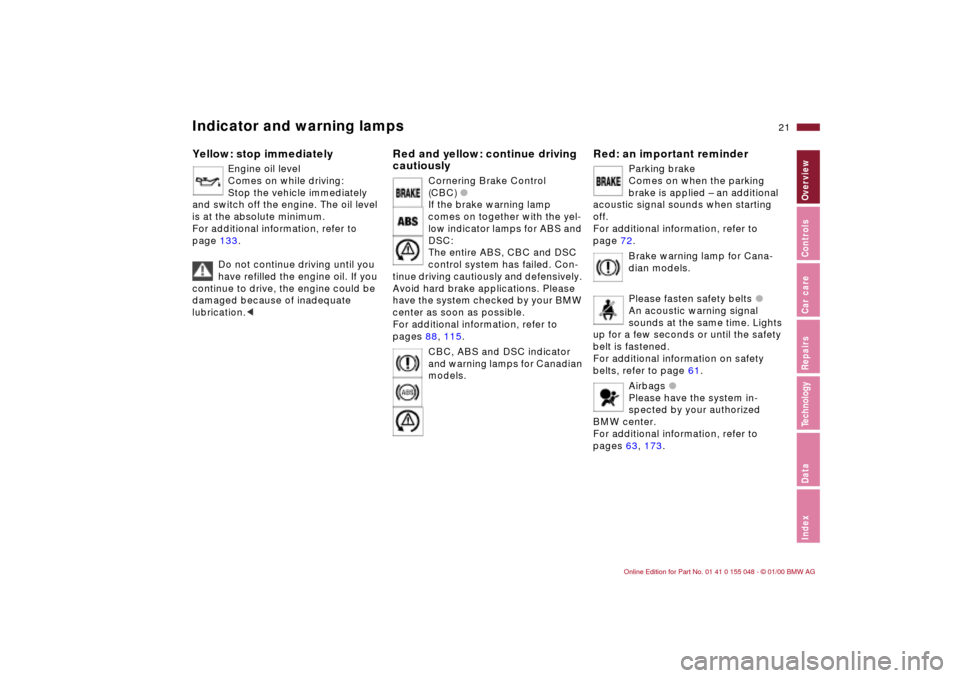
Engine oil level
Comes on while driving:
Stop the vehicle immediately
and switch off the engine. The oil level
is at the absolute minimum.
For additional information, refer to
page 133.
Do not continue driving until you
have refilled the engine oil. If you
continue to drive, the engine could be
damaged because of inadequate
lubrication.<
Red and yellow: continue driving
cautiously
Cornering Brake Control
(CBC) l
If the brake warning lamp
comes on together with the yel-
low indicator lamps for ABS and
DSC:
The entire ABS, CBC and DSC
control system has failed. Con-
tinue driving cautiously and defensively.
Avoid hard brake applications. Please
have the system checked by your BMW
center as soon as possible.
For additional information, refer to
pages 88, 115.
CBC, ABS and DSC indicator
and warning lamps for Canadian
models.
Red: an important reminder
Parking brake
Comes on when the parking
brake is applied – an additional
acoustic signal sounds when starting
off.
For additional information, refer to
page 72.
Brake warning lamp for Cana-
dian models.
Please fasten safety belts l
An acoustic warning signal
sounds at the same time. Lights
up for a few seconds or until the safety
belt is fastened.
For additional information on safety
belts, refer to page 61.
Airbags l
Please have the system in-
spected by your authorized
BMW center.
For additional information, refer to
pages 63, 173.
Page 34 of 199

34n
Central locking system Opening and closing – from outside The conceptThe central locking system is ready for
operation whenever the driver's door is
closed. The system engages and re-
leases the locks on the
>doors
>luggage compartment lid
>fuel filler door
>glove compartment.
The central locking system can be
operated
>from outside via the door lock and
using the remote control
>from inside by pressing a button.
Activating the central locking system
from inside does not lock the fuel filler
door (refer to page 38). Operating it
from the outside simultaneously acti-
vates the anti-theft protection. Both the
door locks and release handles remain
locked. The alarm system
* is also
armed or disarmed.
In the event of an accident, the central
locking system unlocks automatically
(only those doors that were not locked
separately with the safety lock buttons).
Refer to page 38. In addition, the ha-
zard warning flashers and interior lamps
come on.
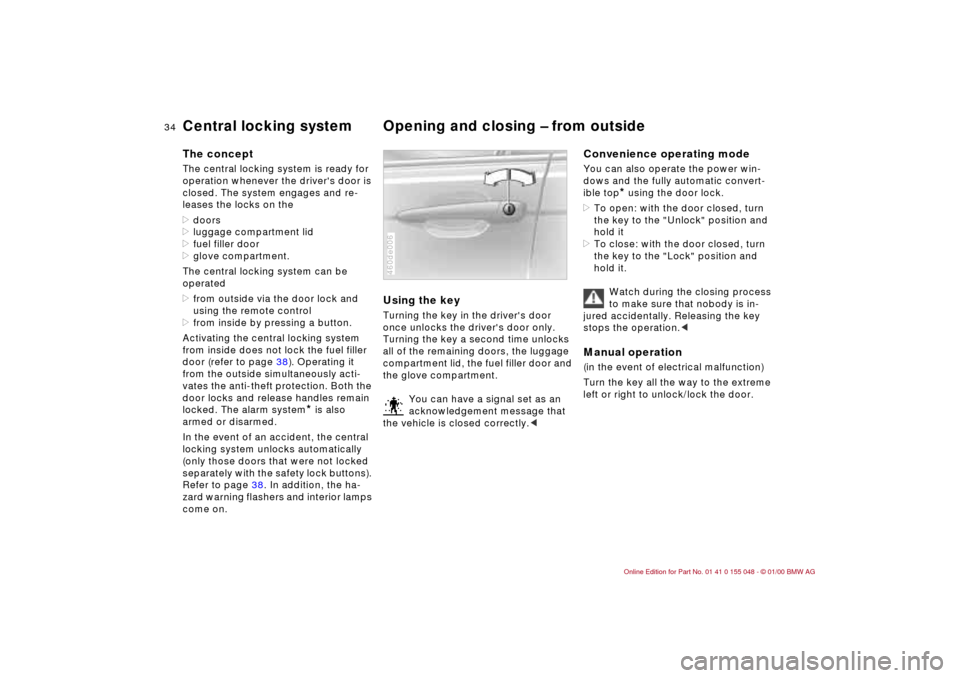
Using the keyTurning the key in the driver's door
once unlocks the driver's door only.
Turning the key a second time unlocks
all of the remaining doors, the luggage
compartment lid, the fuel filler door and
the glove compartment.
You can have a signal set as an
acknowledgement message that
the vehicle is closed correctly.<460de006
Convenience operating modeYou can also operate the power win-
dows and the fully automatic convert-
ible top
* using the door lock.
>To open: with the door closed, turn
the key to the "Unlock" position and
hold it
>To close: with the door closed, turn
the key to the "Lock" position and
hold it.
Watch during the closing process
to make sure that nobody is in-
jured accidentally. Releasing the key
stops the operation.<
Manual operation (in the event of electrical malfunction)
Turn the key all the way to the extreme
left or right to unlock/lock the door.
Page 59 of 199

59n
IndexDataTechnologyRepairsCar careControlsOverview
MirrorsYou can also adjust the mirrors manu-
ally by pressing against the outer edges
of their lenses.
The mirror on the passenger's
side features a lens with a more
convex surface than the mirror installed
on the driver's side. When estimating
the distance between yourself and
other traffic, bear in mind that the ob-
jects reflected in the mirror are closer
than they appear. Estimating the dis-
tance between you and the traffic be-
hind you is therefore imprecise.
Interior rearview mirror To reduce glare from behind when
driving at night, turn the knob.Sun visorsThese can be folded down toward the
windshield or swiveled out against the
side windows.46cus034
Inside rearview mirror with
automatic dimming feature
*
By responding to the effects of ambient
light and the glare from following traffic,
this mirror automatically dims through
an infinitely variable range.
The mirror switches to its clear, un-
dimmed mode whenever the trans-
mission is placed in reverse gear
(selector lever in "Reverse").
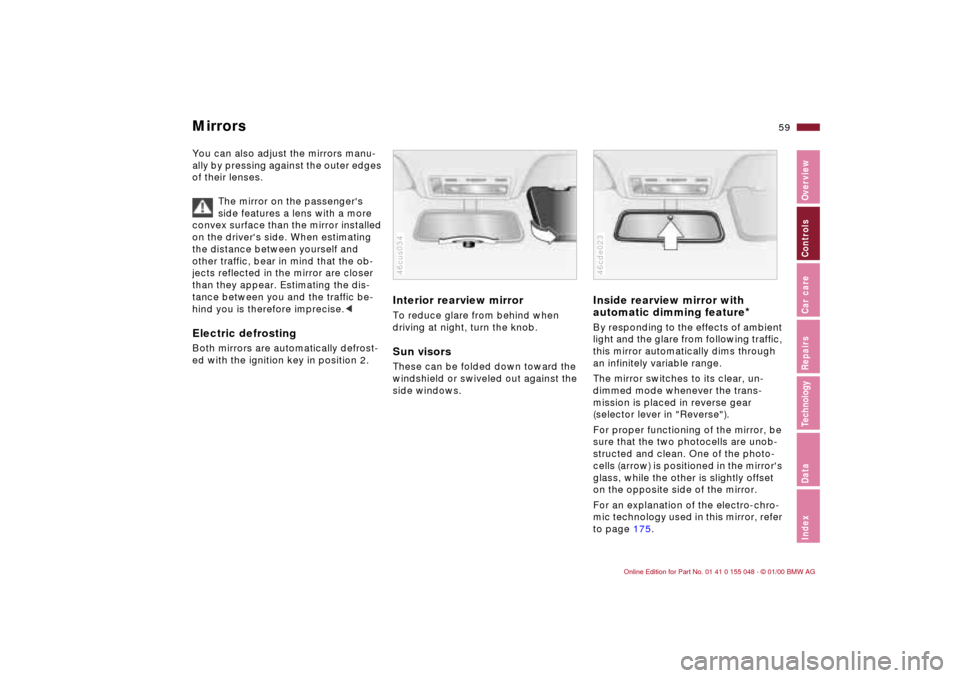
For proper functioning of the mirror, be
sure that the two photocells are unob-
structed and clean. One of the photo-
cells (arrow) is positioned in the mirror's
glass, while the other is slightly offset
on the opposite side of the mirror.
For an explanation of the electro-chro-
mic technology used in this mirror, refer
to page 175.46cde023
Page 70 of 199

70n
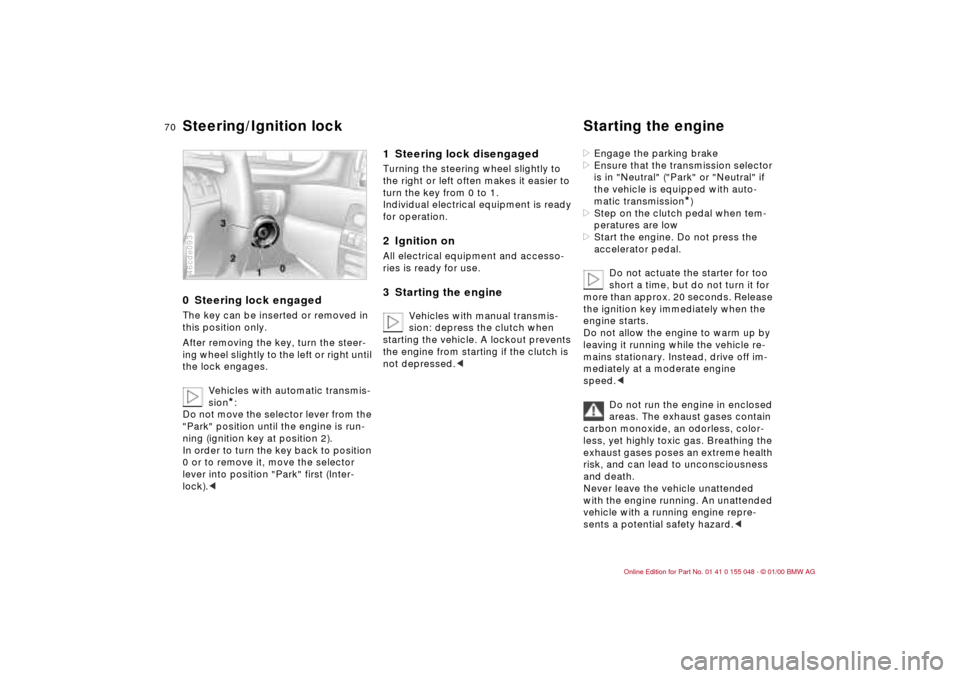
0 Steering lock engaged The key can be inserted or removed in
this position only.
After removing the key, turn the steer-
ing wheel slightly to the left or right until
the lock engages.
Vehicles with automatic transmis-
sion
*:
Do not move the selector lever from the
"Park" position until the engine is run-
ning (ignition key at position 2).
In order to turn the key back to position
0 or to remove it, move the selector
lever into position "Park" first (Inter-
lock).<
46cde093
1 Steering lock disengaged Turning the steering wheel slightly to
the right or left often makes it easier to
turn the key from 0 to 1.
Individual electrical equipment is ready
for operation.2 Ignition onAll electrical equipment and accesso-
ries is ready for use.3 Starting the engine
Vehicles with manual transmis-
sion: depress the clutch when
starting the vehicle. A lockout prevents
the engine from starting if the clutch is
not depressed.<
>Engage the parking brake
>Ensure that the transmission selector
is in "Neutral" ("Park" or "Neutral" if
the vehicle is equipped with auto-
matic transmission
*)
>Step on the clutch pedal when tem-
peratures are low
>Start the engine. Do not press the
accelerator pedal.
Do not actuate the starter for too
short a time, but do not turn it for
more than approx. 20 seconds. Release
the ignition key immediately when the
engine starts.
Do not allow the engine to warm up by
leaving it running while the vehicle re-
mains stationary. Instead, drive off im-
mediately at a moderate engine
speed.<
Do not run the engine in enclosed
areas. The exhaust gases contain
carbon monoxide, an odorless, color-
less, yet highly toxic gas. Breathing the
exhaust gases poses an extreme health
risk, and can lead to unconsciousness
and death.
Never leave the vehicle unattended
with the engine running. An unattended
vehicle with a running engine repre-
sents a potential safety hazard.<
Steering/Ignition lock Starting the engine
Page 75 of 199

75n
IndexDataTechnologyRepairsCar careControlsOverview
Automatic transmission with Steptronic
*
D Drive (automatic shift program)This position is designed for driving un-
der all normal operating conditions. All
forward gears are available."Kickdown" In the "Kickdown" mode, you achieve
maximum performance and the top
speed in position "D".
To activate this mode, depress the ac-
celerator pedal beyond the full-throttle
position, going beyond the point of re-
sistance.
M/S Manual mode and Sport
ProgramShifting from D into M/S activates the
Sport Program. This is indicated by
"SD" in the gear selection display. This
position is recommended for a perfor-
mance-oriented driving style.
With the first brief touch, the automatic
transmission shifts from the Sport Pro-
gram to the manual mode.
When you move the selector lever for-
ward in the "+" direction, the transmis-
sion shifts up. When the lever is moved
back in the "–" direction, the transmis-
sion shifts down. M1 to M5 appear in
the gear indicator.46cde054
Upshifts or downshifts will only be car-
ried out by the ATC at appropriate en-
gine speeds and road speeds. If the en-
gine speed is too high, for instance, a
downshift will not be executed. The
gear selected will appear briefly in the
instrument cluster followed by the cur-
rent gear.
To accelerate quickly in the man-
ual mode (to pass another vehi-
cle), shift down manually or employ the
"Kickdown" mode.<
Shifting from M/S to the selector lever
positions P, R and N is possible only by
going through D.
Page 76 of 199

76n
Automatic transmission with Steptronic
*
In the following situations, the Step-
tronic "thinks" for you in the manual
mode:
>In order to prevent the engine from
overrevving, the transmission shifts
automatically to the next higher gear
just before the RPM cutoff point
>If you do not do anything to inter-
vene, it will automatically downshift
at lower speeds
>In the "Kickdown" mode, the trans-
mission shifts down to the lowest
gear which is possible, depending on
the engine speed
>Depending on the situation – when
driving in adverse winter conditions,
for example – you may also start out
in 2nd or 3rd gear.
Available displays
P R N D SD M1 M2 M3 M4 M5
Electronic transmission control
module
If the indicator lamp comes on,
there is a malfunction in the
transmission system.
46cus005
Bring the vehicle to a stop. Move the
transmission selector lever to "P". Set
the parking brake and turn the engine
off (ignition key to position 0).
Wait a few seconds, then start the
engine.
If the indicator lamp goes out after a
few seconds, normal transmission per-
formance has been restored. You may
continue to drive as usual. If the indica-
tor lamp does not go out, you can put
the selector lever in all positions. How-
ever, the vehicle will now only operate
in 3rd and 4th gear.
If this happens, avoid extreme engine
loads and consult the nearest BMW
center.
Do not work in the engine com-
partment when a drive gear (for-
ward or reverse) is engaged. If you do
this, the vehicle could move.<
For towing and jump-starting the
vehicle, refer to page 168
Page 82 of 199

82n
1 Odometer You can activate the displays shown in
the illustration with the ignition key in
position 0 by pressing the button in the
instrument cluster (arrow).2 Trip odometerTo reset the trip odometer to zero,
press the button (arrow) with the
ignition key in position 1 and up.462us005
Avoid engine speeds that fall within the
gauge's red warning zone.
To protect the engine, the fuel supply is
automatically interrupted in this zone;
you will notice a loss of power.462us017
Indicates current fuel consumption in
mpg (in liters per 100 km on Canadian
models). You can check your current
driving style to see whether it is condu-
cive to economy and minimum exhaust
emissions.
When the vehicle is stationary, the
needle goes to "Maximum" (zero on
Canadian models).462us018
Odometer Tachometer Energy Control