2000 BMW 323Ci CONVERTIBLE lock
[x] Cancel search: lockPage 119 of 199
119n
IndexDataTechnologyRepairsCar careControlsOverview
Winter operationBrakesWinter road conditions substantially
reduce the amount of traction available
between the tires and the road surface.
Keep this in mind, because the braking
distance increases substantially.
ABS is intended to prevent the wheels
from locking during brake applications,
thus helping to maintain vehicle stability
and steering response.
If the ABS does not respond in a critical
braking situation and the wheels lock,
reduce the pressure on the brake pedal
until the wheels just start to roll again
while still maintaining enough force to
continue braking. Then increase the
pressure, reduce the pressure when the
wheels lock, reapply pressure, etc.
This staggered braking procedure will
reduce stopping distances while help-
ing you maintain steering control.
You can then attempt to steer around
hazards after you have reduced pres-
sure on the brake pedal.Do not shift down on slick road
surfaces. Doing so could cause
the rear wheels to lose traction and
skid, which could result in the loss of
vehicle control.<
Depress the clutch during hard
braking on road surfaces that pro-
vide only poor or uneven traction.<
Skid control Depress the clutch and release the ac-
celerator pedal, or place the selector
lever of the automatic transmission into
the "Neutral" position. Countersteer
carefully and attempt to regain control
of the vehicle.
ParkingEngage first or reverse gear. If your
vehicle is equipped with an automatic
transmission, place the selector lever in
Park. On vehicles with manual trans-
mission, also apply the parking brake
when parking on inclined surfaces. In
order to prevent the parking brake pads
from locking due to frost or corrosion,
dry them by gently applying the parking
brake as the vehicle is coming to a
stop. Make sure that following traffic
is not endangered.
The brake lamps do not come
on when the parking brake
is applied.<
Page 121 of 199
121n
IndexDataTechnologyRepairsCar careControlsOverview
Hardtop*It is not necessary to remove the fabric
top even in the winter, when the hard-
top is generally in constant use. But you
can take it off at any time with no prob-
lem. Before the fabric top is stored in
the convertible top compartment, it
must be absolutely dry in order to keep
water and mildew from forming.
The hardtop offers reading lamps as
well as clothes hooks in the rear, which
can be used simply by pressing on
them. In addition, a luggage rack sys-
tem can also be mounted on the hard-
top. If you have a problem in this re-
gard, please contact your BMW center.
When suspending clothing from
the hooks, ensure that they will
not obstruct the driver's vision. Do not
hang heavy objects on the hooks. If you
do so, they could cause personal injury
during braking or evasive maneuvers.<
Two persons are required for installing
or removing the hardtop. Work with
extreme caution in order to avoid paint
damage and damage to the body or
hardtop.
To facilitate the installation or removal of
the hardtop, you can purchase either a
specially designed hardtop lift
* or hard-
top roller carrier
* at your BMW center.
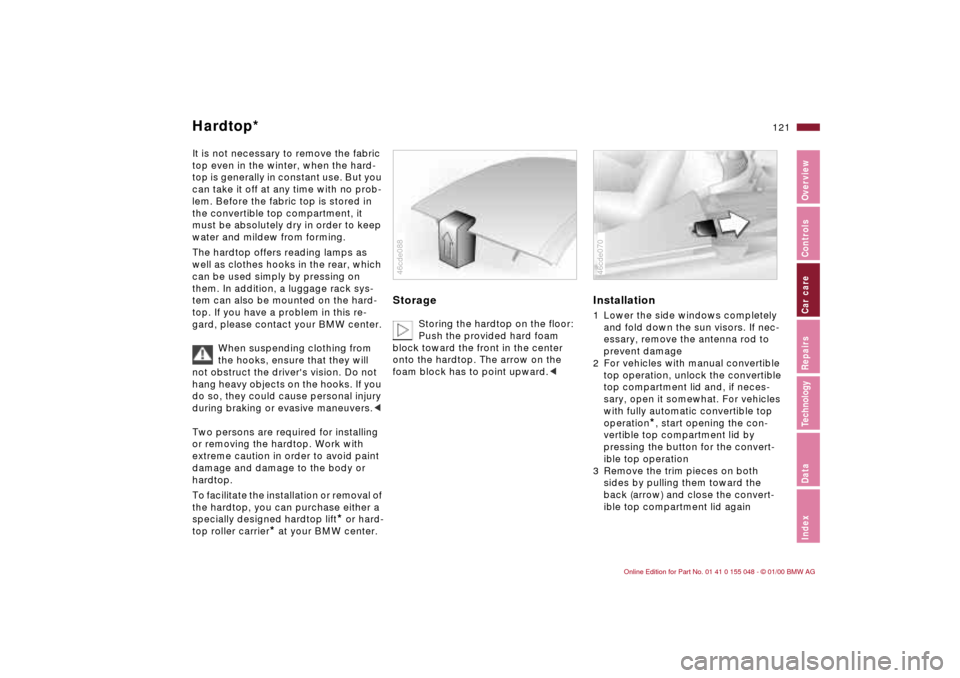
Storage
Storing the hardtop on the floor:
Push the provided hard foam
block toward the front in the center
onto the hardtop. The arrow on the
foam block has to point upward.<
46cde088
Installation1 Lower the side windows completely
and fold down the sun visors. If nec-
essary, remove the antenna rod to
prevent damage
2 For vehicles with manual convertible
top operation, unlock the convertible
top compartment lid and, if neces-
sary, open it somewhat. For vehicles
with fully automatic convertible top
operation
*, start opening the con-
vertible top compartment lid by
pressing the button for the convert-
ible top operation
3 Remove the trim pieces on both
sides by pulling them toward the
back (arrow) and close the convert-
ible top compartment lid again
46cde070
Page 122 of 199
122n
Hardtop
*
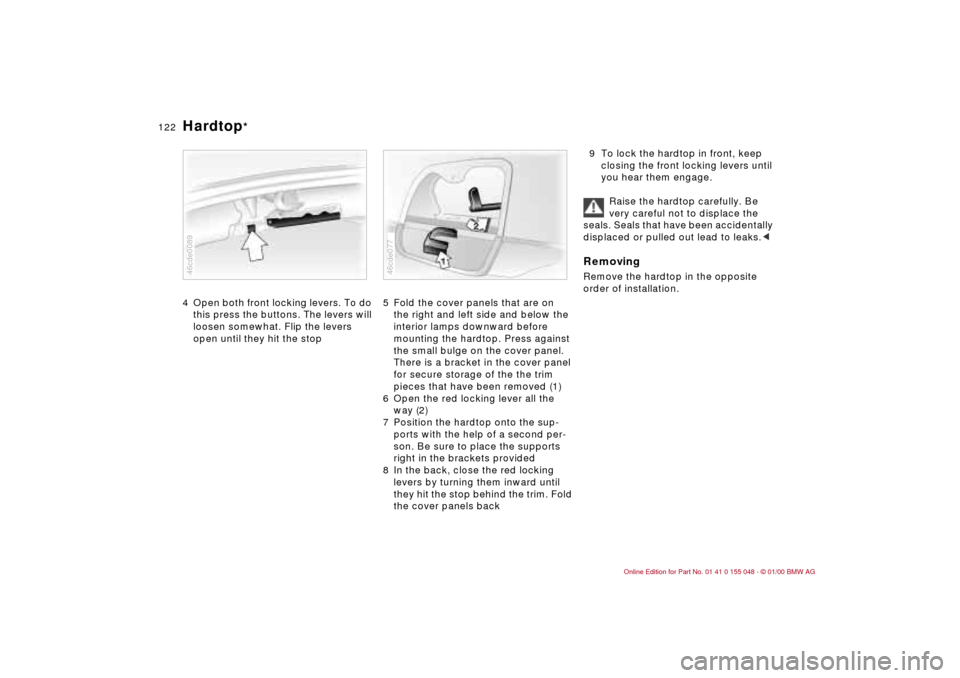
4 Open both front locking levers. To do
this press the buttons. The levers will
loosen somewhat. Flip the levers
open until they hit the stop46cde0089
5 Fold the cover panels that are on
the right and left side and below the
interior lamps downward before
mounting the hardtop. Press against
the small bulge on the cover panel.
There is a bracket in the cover panel
for secure storage of the the trim
pieces that have been removed (1)
6 Open the red locking lever all the
way (2)
7 Position the hardtop onto the sup-
ports with the help of a second per-
son. Be sure to place the supports
right in the brackets provided
8 In the back, close the red locking
levers by turning them inward until
they hit the stop behind the trim. Fold
the cover panels back 46cde077
9 To lock the hardtop in front, keep
closing the front locking levers until
you hear them engage.
Raise the hardtop carefully. Be
very careful not to displace the
seals. Seals that have been accidentally
displaced or pulled out lead to leaks.cRemovingRemove the hardtop in the opposite
order of installation.
Page 129 of 199
129n
IndexDataTechnologyRepairsCar careControlsOverview
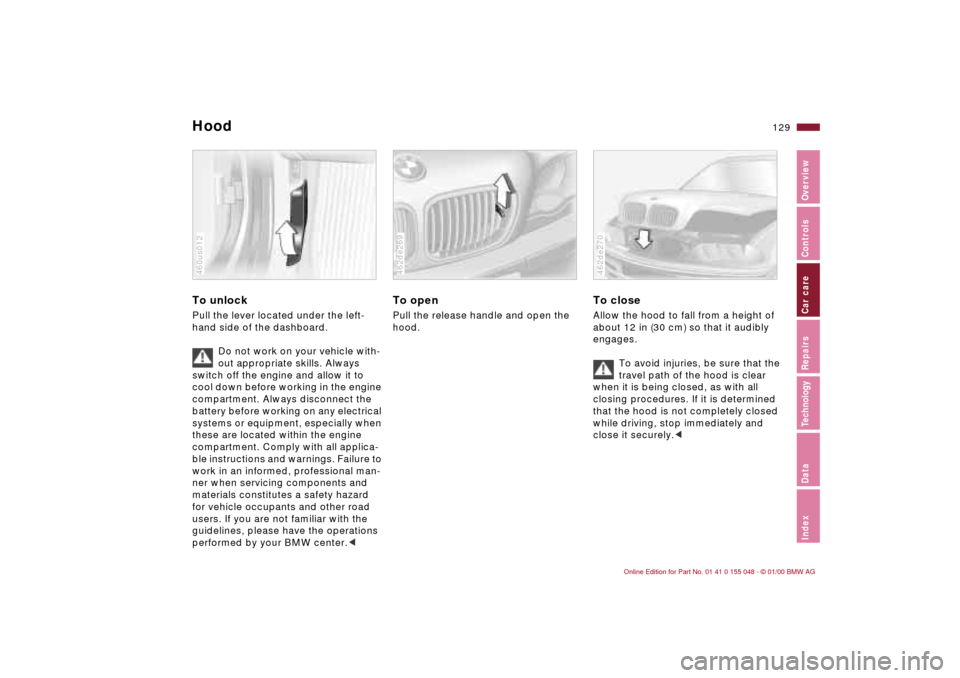
To unlock Pull the lever located under the left-
hand side of the dashboard.
Do not work on your vehicle with-
out appropriate skills. Always
switch off the engine and allow it to
cool down before working in the engine
compartment. Always disconnect the
battery before working on any electrical
systems or equipment, especially when
these are located within the engine
compartment. Comply with all applica-
ble instructions and warnings. Failure to
work in an informed, professional man-
ner when servicing components and
materials constitutes a safety hazard
for vehicle occupants and other road
users. If you are not familiar with the
guidelines, please have the operations
performed by your BMW center.<460us012
To openPull the release handle and open the
hood.462de269
To closeAllow the hood to fall from a height of
about 12 in (30 cm) so that it audibly
engages.
To avoid injuries, be sure that the
travel path of the hood is clear
when it is being closed, as with all
closing procedures. If it is determined
that the hood is not completely closed
while driving, stop immediately and
close it securely.<462de270
Hood
Page 136 of 199
136n
Coolant Brake fluidAdding coolant Wait until the engine cools before re-
moving the cap from the expansion
tank. The coolant gauge needle in the
instrument cluster must be located in
the blue zone. If it is not, there is a
danger of scalding.
1 Turn the cap slightly counterclock-
wise in order to allow accumulated
pressure to escape. Then open
the cap
2 If the coolant is low, slowly add
coolant until the correct level is
reached – do not overfill.
The coolant is a mixture of water and
extended-duty antifreeze with corrosion
inhibitor. Always maintain the pre-
scribed all-season 50:50 mixture ratio
for year-round protection against inter-
nal corrosion. No other additives are
required.
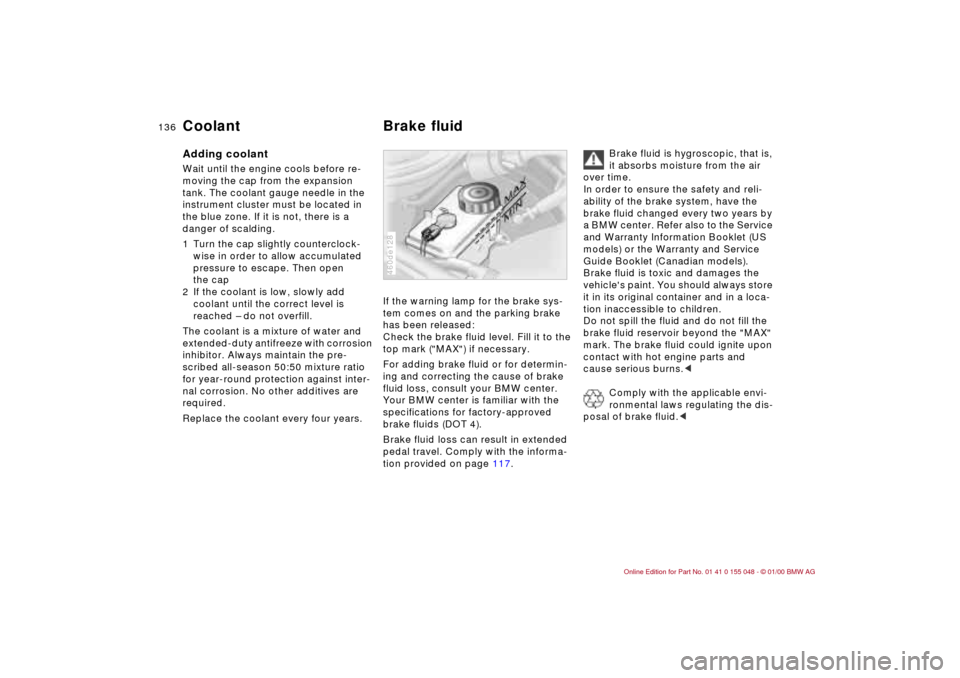
Replace the coolant every four years.If the warning lamp for the brake sys-
tem comes on and the parking brake
has been released:
Check the brake fluid level. Fill it to the
top mark ("MAX") if necessary.
For adding brake fluid or for determin-
ing and correcting the cause of brake
fluid loss, consult your BMW center.
Your BMW center is familiar with the
specifications for factory-approved
brake fluids (DOT 4).
Brake fluid loss can result in extended
pedal travel. Comply with the informa-
tion provided on page 117.
460de128
Brake fluid is hygroscopic, that is,
it absorbs moisture from the air
over time.
In order to ensure the safety and reli-
ability of the brake system, have the
brake fluid changed every two years by
a BMW center. Refer also to the Service
and Warranty Information Booklet (US
models) or the Warranty and Service
Guide Booklet (Canadian models).
Brake fluid is toxic and damages the
vehicle's paint. You should always store
it in its original container and in a loca-
tion inaccessible to children.
Do not spill the fluid and do not fill the
brake fluid reservoir beyond the "MAX"
mark. The brake fluid could ignite upon
contact with hot engine parts and
cause serious burns.<
Comply with the applicable envi-
ronmental laws regulating the dis-
posal of brake fluid.<
Page 145 of 199
145n
IndexDataTechnologyRepairsCar careControlsOverview
Cleaning and caring for your convertible topDo not use spot removers, paint thin-
ners, solvents, gasoline or similar sub-
stances for removing spots from the
convertible top or from the rear win-
dow. These materials destroy the rub-
ber layer, which will lead to leaks. Use
only BMW-approved cleaners.
Cleaning agents can contain sub-
stances that are dangerous or
that pose health risks. For this reason,
always comply with the warnings and
danger notices on the packaging.
Open the doors or windows on your
vehicle when cleaning the interior.
Never clean your vehicle with solvents
not specifically intended for it.c
Getting your vehicle ready for
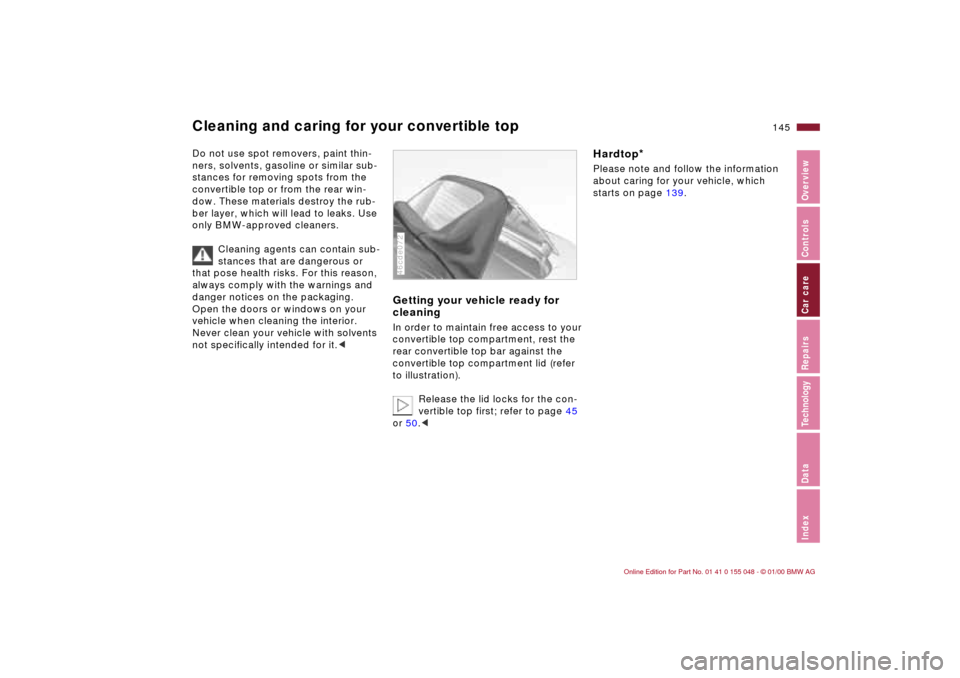
cleaningIn order to maintain free access to your
convertible top compartment, rest the
rear convertible top bar against the
convertible top compartment lid (refer
to illustration).
Release the lid locks for the con-
vertible top first; refer to page 45
or 50.<46cde072
Hardtop
*
Please note and follow the information
about caring for your vehicle, which
starts on page 139.
Page 159 of 199
159n
IndexDataTechnologyRepairsCar careControlsOverview
Changing a wheel
Safety measures in the event of a
flat tire or wheel change:
Stop the vehicle as far as possible from
passing traffic. Park on a firm, flat sur-
face. Switch on the hazard flashers.
Turn the steering wheel to the straight-
ahead position, remove the key and en-
gage the steering lock. Shift into 1st or
reverse (selector lever in "Park" with au-
tomatic transmission) and engage the
parking brake.
Have all passengers leave the vehicle
and remain well away from your immedi-
ate working area (behind a guardrail, for
instance).
If a warning triangle
* or portable hazard
warning lamp is available, set it up on
the roadside at an appropriate distance
from the rear of the vehicle. Comply with
all safety guidelines and regulations.
Change the wheel only on a level, firm
surface that is not slippery. Avoid jack-
ing the vehicle on a soft or slippery sup-
port surface (snow, ice, loose gravel,
etc.), as it could slide sideways.
Position the jack on a firm support sur-
face.
Do not place wooden blocks or similar
objects under the jack, otherwise, the
jack might not be able to reach its full
support capacity because of the limited
height.
Do not lie under the vehicle or start the
engine when the vehicle is supported by
the jack. Failure to comply with this cre-
ates a risk of fatal injury.<
Your BMW has a space-saver spare
tire for temporary use to ensure your
mobility.
To remove the space-saver spare
tire, lift the floor panel in the lug-
gage compartment completely out
(refer to page 41).<
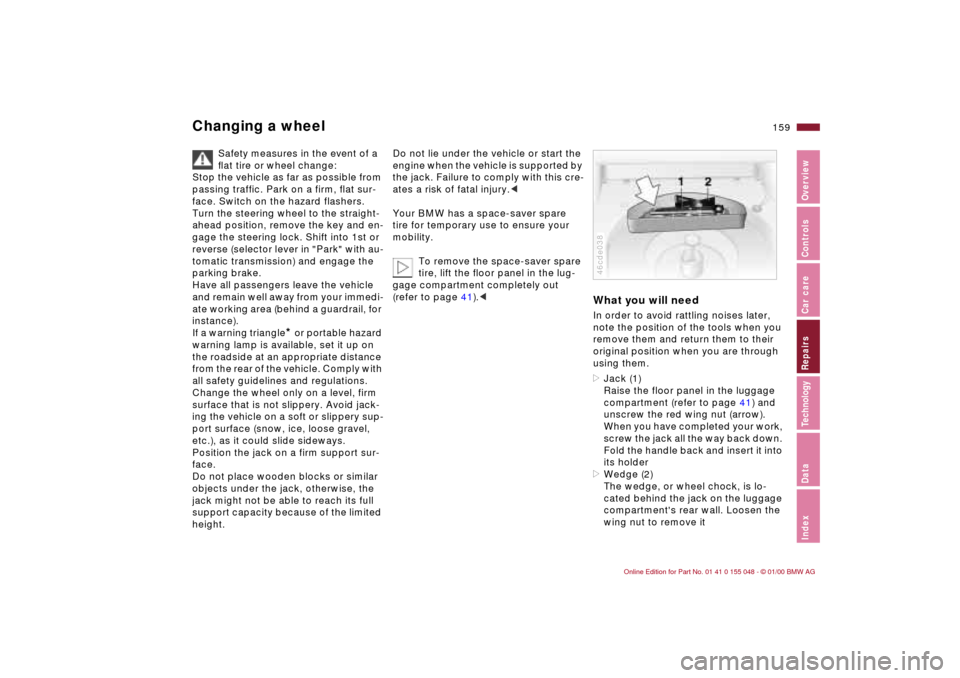
What you will needIn order to avoid rattling noises later,
note the position of the tools when you
remove them and return them to their
original position when you are through
using them.
>Jack (1)
Raise the floor panel in the luggage
compartment (refer to page 41) and
unscrew the red wing nut (arrow).
When you have completed your work,
screw the jack all the way back down.
Fold the handle back and insert it into
its holder
>Wedge (2)
The wedge, or wheel chock, is lo-
cated behind the jack on the luggage
compartment's rear wall. Loosen the
wing nut to remove it46cde038
Page 162 of 199
162n
Changing a wheel Battery Driving with the space-saver
spare tireDrive cautiously. Do not exceed a speed
of 45 mph (80 km/h).
You can anticipate changes in vehicle
handling such as delayed braking re-
sponse, longer braking distances and
changes in self-steering properties
when approaching stability limits.
The changes in handling characteristics
will be even more pronounced in con-
junction with winter tires.
Only one space-saver spare tire
may be mounted at one time. Re-
install wheels and tires of the same size
and specification as soon as possible.
Maintain correct tire pressures. Refer to
page 28.<
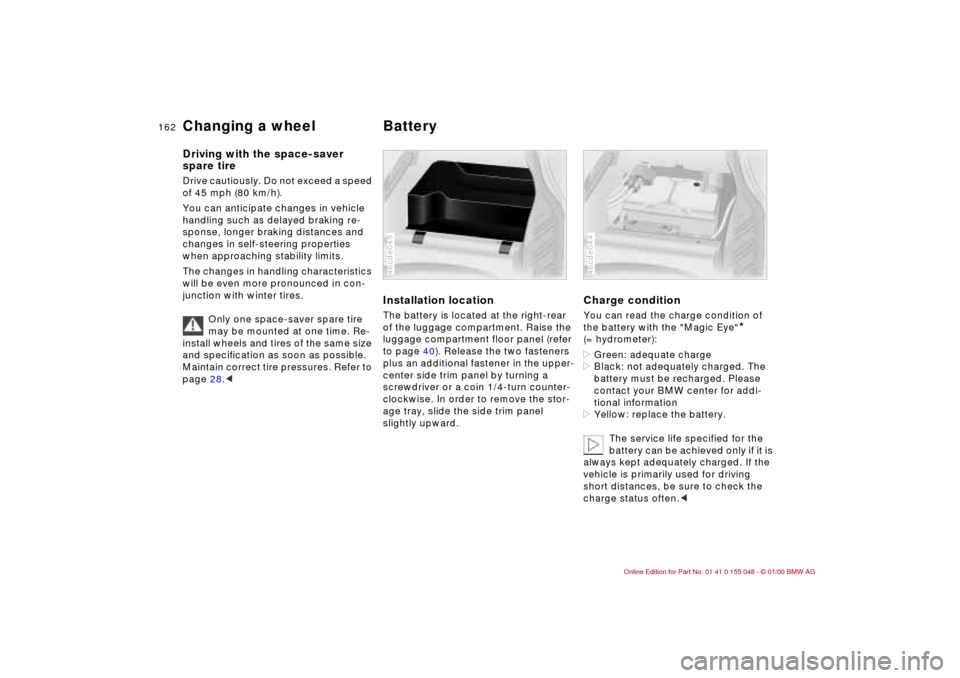
Installation locationThe battery is located at the right-rear
of the luggage compartment. Raise the
luggage compartment floor panel (refer
to page 40). Release the two fasteners
plus an additional fastener in the upper-
center side trim panel by turning a
screwdriver or a coin 1/4-turn counter-
clockwise. In order to remove the stor-
age tray, slide the side trim panel
slightly upward.46cde045
Charge conditionYou can read the charge condition of
the battery with the "Magic Eye"
*
(= hydrometer):
>Green: adequate charge
>Black: not adequately charged. The
battery must be recharged. Please
contact your BMW center for addi-
tional information
>Yellow: replace the battery.
The service life specified for the
battery can be achieved only if it is
always kept adequately charged. If the
vehicle is primarily used for driving
short distances, be sure to check the
charge status often.<
46cde044