2000 AUDI ALLROAD check engine
[x] Cancel search: check enginePage 202 of 306
Braking
General notes
• The brakes on today's automobiles are
still subject to wear, depending largely on
operating conditions and driving habits. On
vehicles which are driven mostly in stop
an d-go city traffic or which are driven hard,
the brake pads should be checked by your
authorized Audi Dealer more often than
specified in the Maintenance booklet.
• On steep slopes, you should use the
braking effect of the engine. This way, you
prevent unnecessary wear to the brake sys
tem. If you must use your brakes, do not
hold the brakes down continu ously. Pump
the brakes at interv als.
• Under certain conditions, for example,
when driving through water or very heavy
rain, or even after washing your vehicle, the
braking effect can be reduced due to the
wet brake pads or pads which are iced-up in
the winter. A few cautious brake applica
tions should dry off the brake pads or re
move ice coati ngs. The
effect iveness of the brakes can be re
duced when the vehicle is driven on a salt
covered road and the brakes are not used.
Clean off accumulated salt coating from
brake discs and pads with a few cautious
brake applications.
�W ARNING
• If you damage the front spoiler,
or if you install a different spoiler,
be sure the air flow to the front
brakes is not obstructed, other
wise the brake system could over
heat reducing the effectiveness of
the entire brake aystem.
• Failure of one brake circuit will
impair the braking capability re
sulting in an increased stopping
distance.
Avo id driving the vehicle and have
it towed to the nearest authorized
Audi Dealer or qualified work
shop. VEH
ICLE OPERATION
Brake booster
�W ARNING
• The brake booster works with
vacuum pressure which is created
only when the engine is running.
Never let the vehicle roll to a stop
with the angina shut off.
• If the brake booster is not work
ing, for example when towing your
vehicle, or because the brake boo
ster has somehow been damaged,
the brake pedal must be pressed
harder to make up for the lack of
booster assistance.
201
Page 203 of 306
VE
HICL E OPER ATION------------------------
Functioning of Anti-Lock Brake
System (ABS)
The ABS contributes effectively to vehicle
control since it prevents the wheels from
locking when the brakes are applied. This
means that the vehicle remains steerable
and is less likely to skid.
Nota
Yo u don't have to "pump" the brake.
Just hold the brake pedal down.
However, do not expect that the ABS short
ens braking distance under all circum
stances. When driving on gravel or on newly
fallen snow on top of icy surfaces, braking
distance may be even longer , therefore, un
der these circumstances, it is especially im
portant that you drive slowly and with great
care.
202 How the
ABS system works
An automatic check is made when a speed
of about 4 mph (6 km/h) is reached.
When this happens a pumping noise can be
heard.
If an individual wheel begins to rotate too
slowly in relation to vehicle speed and tends
to lock, the ABS automatically reduces
brake pressure to prevent that wheel from
locking.
This automatic adjustment process
will cause a slight vibration of the
brake pedal and soma noises to alert
you that vehicle speed must be
adapted to existing road and traffic
conditions. Enhanced
ABS function {Offroad
Mode)
To improve braking on loose terrain (for ex
ample: gravel, scree, mud, slush, snow),
turn off the ESP (see page 205), which will
switch the ABS to a special mode designed
for off-road requirements.
In this mode, the ABS control system is
changed to allow a "wedge" of loose rock
or soil to form in the front of the wheels.
This improves braking performance.
The ESP indicator light in the instrument
cluster will come on when you have
switched to this special ABS mode (see
page 124).
This special ABS mode will remain active up
to about 40 mph (60 km/h). ABS operation
is not affected at speeds over 40 mph
(60 km/h).
To turn his special ABS mode off, press the
ESP button (To activate ESP, see page 152).
The ABS off-road mode will also be deacti
vated when vou turn off the engine.
Page 209 of 306
VEHICLE OPERA
TION-----------------------
Trailer towing
Yo ur Audi was designed primarily for pas
senger transportat ion. The additional load
will affect durability, economy and perfor
mance.
Tra iler towing not only places more stress
on the vehicle, it also calls for more con
centration from the driver.
For this reasons, always follow the opera
ting and driving instructions given and use
common sense.
208 Te
chnical requirements
Tr ailer hitch
Use a weight-carrying hitch conforming to
the gross trailer weight. The hitch must be
suitable for your vehicle and trailer and
securely bolted to appropriate place on the
vehicle's chassis. Use only a trailer hitch
with removable ball mount. Always check
with the trailer hitch manufacturer to make
sure that you are using the correct hitch.
Do not use a bumper hitch.
The hitch must be installed in such a way
that it does not interfere with the impact-ab
sorbing bumper system. No modifications
should be made to the vehicle exhaust and
brake systems. From time to time, check
that all hitch mounting bolts remain secure
ly fastened. When
you are not towing a trailer, remove
the trailer hitch ball mount. This prevents
the hitch from causing damage should your
vehicle be struck from behind.
�W ARNING
When you are no longer towing a
trailer, remove the entire trailer
hitch. When doing so, seal all bolt
holes to prevent water and deadly
exhaust fumes from entering the
vehicle.
Engine cooling system
To wing a tr ailer make the engine work hard
er. It is important that the engine cooling
system be up to the job. Make sure that the
cooling system has enough fluid.
Page 230 of 306
---------------------------------------------------VEHICLE CARE
If in doubt about any servicing, nave 1t done
by your authorized Audi Dealer or any other
properly equipped and qualif ied workshop.
We strongly urge you_ to give your autho
rized Audi Dealer the opportunity to perform
all scheduled maintenance and necessary
repairs. Your dealer has the facilities, origi
nal parts and trained specialists to keep your
vehicle running properly.
Perf orming limited maintenance
yourself
The following pages describe a limited num
ber of procedures which can be performed
on your vehicle with ordinary tools, should
the need arise and trained personnel be un
available. Before perform ing any of these
procedures, always thoroughly read all of
the applicable text and carefully follow the
instructions given. Always rigorously ob
serve the WA RNINGS provided. �W
ARNING
• Serious personal injury may oc
cur as a result of improperly per
formed maintenance, adjustments
or repairs.
• Be extremely careful when
working on the vehicle. Follow
commonly accepted safety prac
tices and good judgment. Never
risk personal injury.
• Do not attempt any of the main
tenance, checks or repairs de
scribed on the following pages if
you are not fully familiar with
these or other procedures with re
spect to the vehicle, or are uncer
tain how to proceed. Do not do any
work without the proper tools and
equipment. Have the necessary
work done by your authorized
Audi Dealer or another properly
equipped and qualified workshop. '4
WARNING continued
• The engine compartment of any
motor vehicle is a potent ially haz
ardous area.
• Always support your vehicle
with safety stands if it is neces
sary to work underneath the ve
hicle. The jack supplied with the
vehicle is not adequate for this
purpose and could collapse caus
ing serious personal injury.
• Never reach into the area
around or touch the radiator fan.
The auxiliary fan is temperature
controlled and can switch on sud
denly.
Always heed all WAR NINGS
on next page.
229
Page 232 of 306

Engine
hood
To unlock the engine hood, pull the re
lease lever on the left under the dashboard.
The hood pops up slightly under spring pres
sure.
Note
Before opening the engine hood,
make sure that the windshield wip
ers are folded flat against the wind
shield. Otherwise, they could dam
age the paint on the hood. To
open, pull the release lever in the direc
tion indicated by the arrow. This will release
the hook under the hood.
Open the hood all the way. It will be held up
by gas pressure in the strut. VEH
ICLE CARE
To close
Pull the hood down until the pressure from
the strut is reduced. Then Jet the hood fall
and latch in place -you do not need to
press the hood down again.
m WARNING
• A hood that is not 'completely
latched could fly up and block
your view while driving. When you
close the engine hood, check it to
make sure the safety catch has
properly engaged. The hood
should be flush with the surround
ing vehicle body parts.
• If you ever notice while driving
that the hood is not secured prop
erly, stop at once and close it.
Always heed all WA RNINGS
on next page.
231
Page 233 of 306
VEH
ICLE CARE---------------------------------------------------
Engine compartment
�W ARNING
To help avoid injury, before you
check anything under the hood:
• Switch off the engine. Remove
the ignition key.
• Set the parking brake fully.
Move the selector lever toP (Park).
• Always let the engine cool
down. Hot components will burn
skin on contact.
• Never spill fluids on hot engine
components. They can cause a
fire.
• Never touch the radiator fan.
The auxiliary electric fan can
switch on suddenly and injure you.
232 r4
WARNING continued
• If work on the fuel system or the
electrical system is necessary:
- Always disconnect the battery.
Never smoke or work near heat
ers or open flames. Fluids in the
engine compartment could start
a fire.
Keep an approved fire extin
guisher immediately available.
• To avoid electrical shock and
personal injury while the engine is
running or being started, never
touch:
- Ignition cables
- Other components of the high
voltage electronic ignition system. M
WARNING continued
• If you must perform a check or
repair with the engine running:
First, fully apply the parking
brake, move selector lever to
P (Park).
Always use extreme caution to
prevent clothing, jewelry, or
long hair from getting caught in
the radiator fan, V-belts or other
moving parts, or from contact
ing hot parts. Tie back hair be
fore starting, and wear no cloth
ing that will hang or droop into
the engine.
Page 236 of 306
Engine
oil consumption
The rate of the oil consumption depends on
the quality and viscosity of oil, the speed at
which the engine is operated, the climate,
and road conditions as well as amount of
dilution and oxidation of the lubricant.
Because of these variables, no standard
rate of oil consumption can be established,
but drivers should expect higher oil con
sumption at high speeds and when the en
gine is new.
Therefore, we recommend that you check
the oil level at regular intervals (for example,
each time you are refuelling, or before going
on a long trip).
If the oil level should go below the minimal
level, the check engine oil level warn
ing light* in the instrument cluster will
come on. See page 144. You should check
the oil level using the oil dip stick as soon as
possible, and then top off the oil as neces
sary. Notes
• The engine in your vehicle de
pends on oil to lubricate and cool all
of its moving parts. Therefore the
engine oil should be checked regu
larly and kept at the required level.
• Lack of sufficient engine oil may
lead to severe engine damage.
• The oil pressure warning light is
not an oil level indicator.
A Always
heed all WAR NINGS
� on page 232.
Checking the engine oil level
The best time to check the engine oil level
is when the oil is warm.
To get a true reading, the vehicle must be on
level ground.
A Always heed all WAR NINGS
� on page 232.
• After turning off the engine, wait a few
minu tes for the oil to return to the oil pan. VE
HICLE CARE
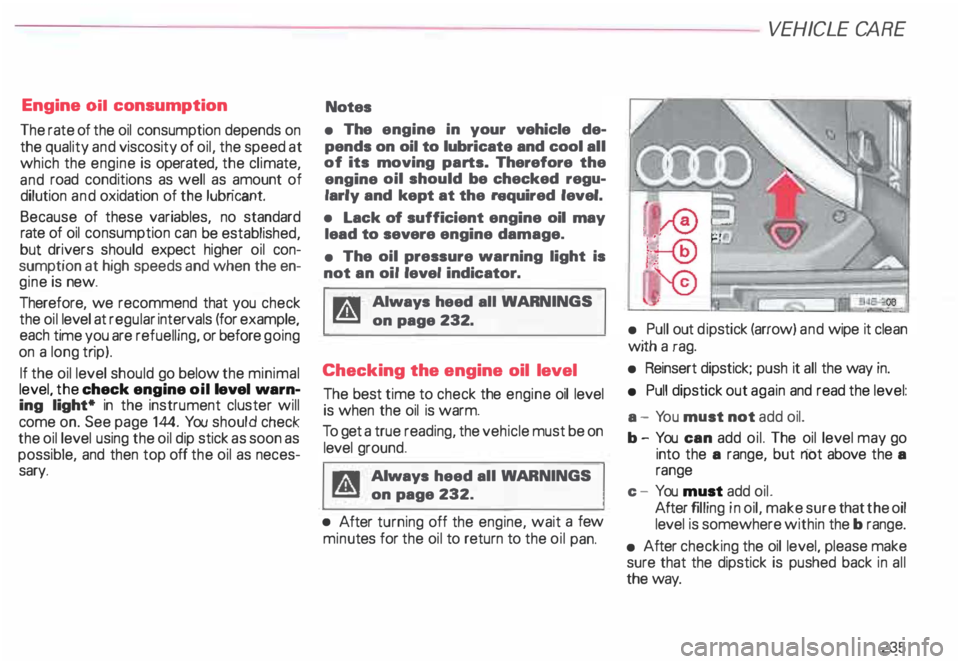
• Pull out dipstick (arrow) and wipe it clean
with a rag.
• Reinsert dipstick; push it all the way in.
• Pull dipstick out again and read the level:
a - Yo u must not add oil.
b- You can add oil. The oil level may go
into the a range, but riot above the a
range
c - You must add oil.
After filling in oil, make sure that the oil
level is somewhere within the b range.
• After checking the oil level, please make
sure that the dipstick is pushed back in all
the way.
235
Page 237 of 306
VEHICLE CA
RE---------------------------------------------------
Adding engine oil
A Always heed all WA RNINGS
r!!J on page 232.
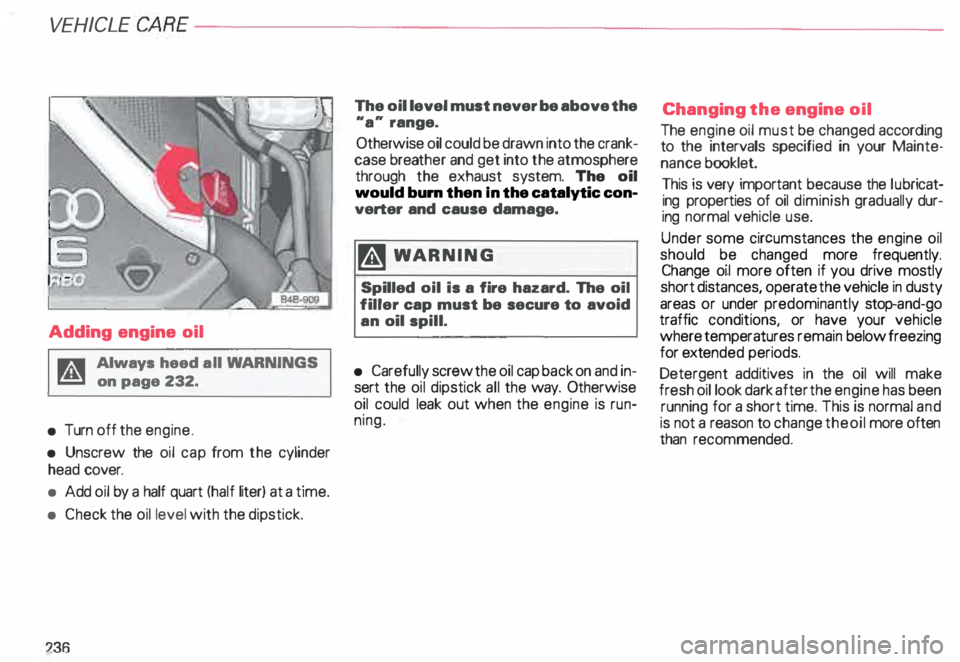
• Turn off the engine.
• Unscrew the oil cap from the cylinder
head cover.
• Add oil by a half quart (half liter) at a time.
• Check the oil level with the dipstick.
:236 The
oil level must never be above the
"a .. range.
Otherwise oil could be drawn into the crank
case breather and get into the atmosphere
through the exhaust system. The oil
would bum then In the catalytic con
verter and cause damage.
� WARNING
Spilled oil is a fire hazard. The oil
filler cap must be secure to avoid
an oil spill.
• Carefully screw the oil cap back on and in
sert the oil dipstick all the way. Otherwise
oil could leak out when the engine is run
ning. Changing
the engine oil
The engine oil must be changed according
to the intervals specified in your Mainte
nance booklet.
This is very important because the lubricat
ing properties of oil diminish gradually dur
ing normal vehicle use.
Under some circumstances the engine oil
should be changed more frequently.
Change oil more often if you drive mostly
short distances, operate the vehicle in dusty
areas or under predominantly stop-and-go
traffic conditions, or have your vehicle
where temperatures remain below freezing
for exte nded periods.
Detergent additives in the oil will make
fresh oil look dark after the engine has been
running for a short time. This is normal and
is not a reason to change the oil more often
than recommended.