Page 25 of 58
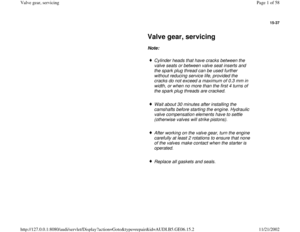
15-61
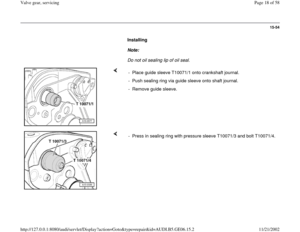
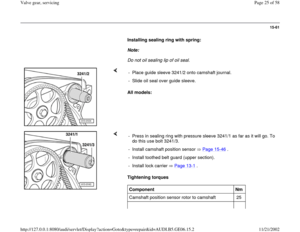
Installing sealing ring with spring:
Note:
Do not oil sealing lip of oil seal.
All models: - Place guide sleeve 3241/2 onto camshaft journal.
- Slide oil seal over guide sleeve.
Tightening torques - Press in sealing ring with pressure sleeve 3241/1 as far as it will go. To
do this use bolt 3241/3.
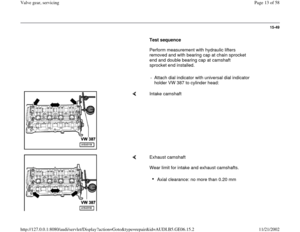
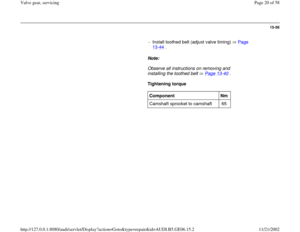
- Install camshaft position sensor Page 15
-46
.
- Install toothed belt guard (upper section).
- Install lock carrier Page 13
-1 .
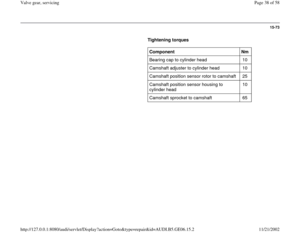
Component
Nm
Camshaft position sensor rotor to camshaft 25
Pa
ge 25 of 58 Valve
gear, servicin
g
11/21/2002 htt
p://127.0.0.1:8080/audi/servlet/Dis
play?action=Goto&t
yp
e=re
pair&id=AUDI.B5.GE06.15.2
Page 26 of 58
Camshaft position sensor housing to cylinder head 10
Pa
ge 26 of 58 Valve
gear, servicin
g
11/21/2002 htt
p://127.0.0.1:8080/audi/servlet/Dis
play?action=Goto&t
yp
e=re
pair&id=AUDI.B5.GE06.15.2
Page 27 of 58
15-62
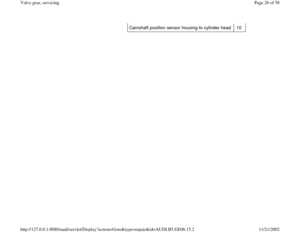
Camshafts and camshaft adjuster,
removing and installing
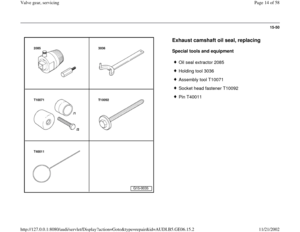
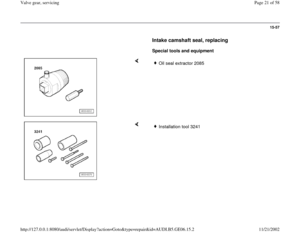
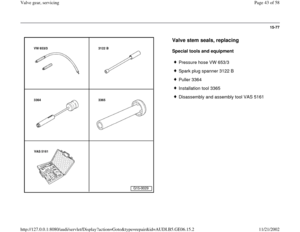
Special tools and equipment
Holding tool 3036
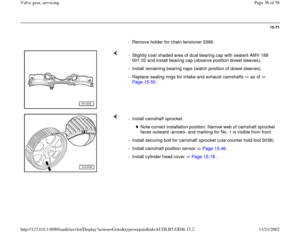
Retainer for chain tensioner 3366
Tensioning screw T10092
Guide pin T40011
Pa
ge 27 of 58 Valve
gear, servicin
g
11/21/2002 htt
p://127.0.0.1:8080/audi/servlet/Dis
play?action=Goto&t
yp
e=re
pair&id=AUDI.B5.GE06.15.2
Page 28 of 58
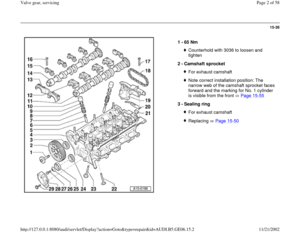
15-63
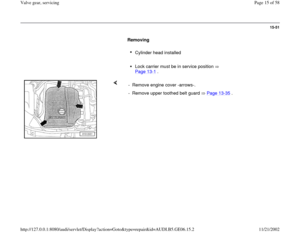
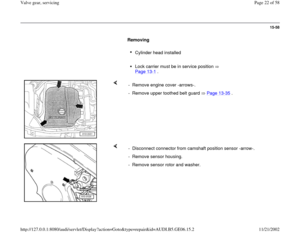
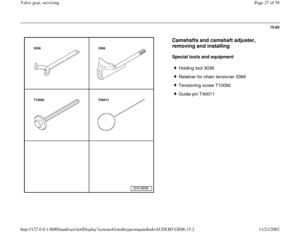
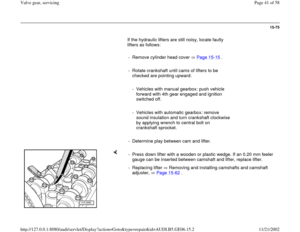
Removing
Cylinder head installed
Lock carrier must be in service position
Page 13
-1 .
- Remove engine cover -arrows-.
- Remove combination valve for secondary air inlet Page 26
-64
.
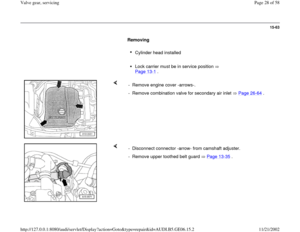
- Disconnect connector -arrow- from camshaft adjuster.
- Remove upper toothed belt guard Page 13
-35
.
Pa
ge 28 of 58 Valve
gear, servicin
g
11/21/2002 htt
p://127.0.0.1:8080/audi/servlet/Dis
play?action=Goto&t
yp
e=re
pair&id=AUDI.B5.GE06.15.2
Page 29 of 58
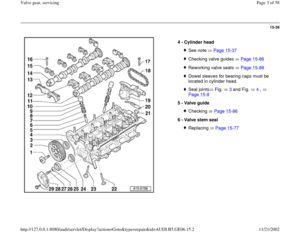
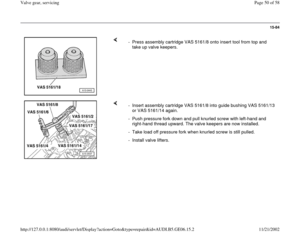
15-64
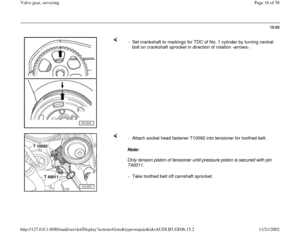
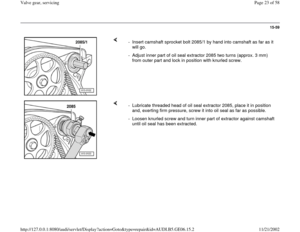
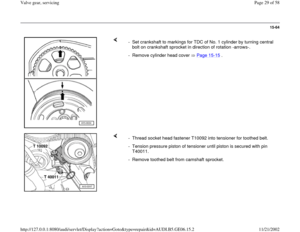
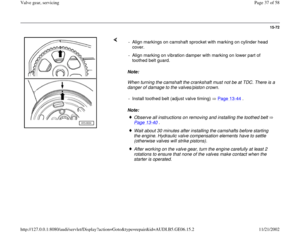
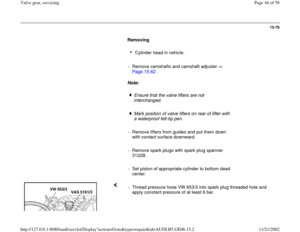
- Set crankshaft to markings for TDC of No. 1 cylinder by turning central
bolt on crankshaft sprocket in direction of rotation -arrows-.
- Remove cylinder head cover Page 15
-15
.
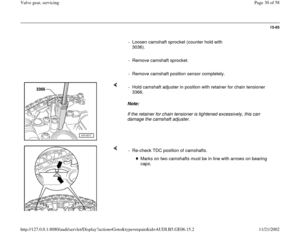
- Thread socket head fastener T10092 into tensioner for toothed belt.
- Tension pressure piston of tensioner until piston is secured with pin
T40011.
- Remove toothed belt from camshaft sprocket.
Pa
ge 29 of 58 Valve
gear, servicin
g
11/21/2002 htt
p://127.0.0.1:8080/audi/servlet/Dis
play?action=Goto&t
yp
e=re
pair&id=AUDI.B5.GE06.15.2
Page 30 of 58
15-65
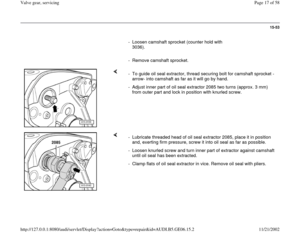
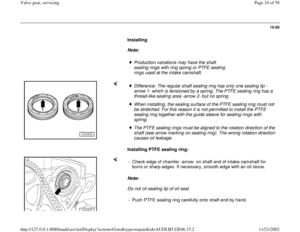
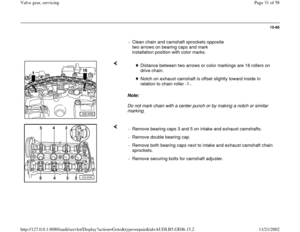
- Loosen camshaft sprocket (counter hold with
3036).
- Remove camshaft sprocket.
- Remove camshaft position sensor completely.
Note:
If the retainer for chain tensioner is tightened excessively, this can
damage the camshaft adjuster. - Hold camshaft adjuster in position with retainer for chain tensioner
3366.
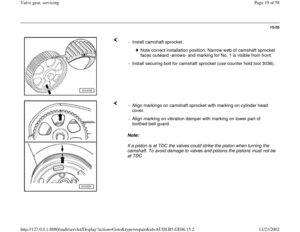
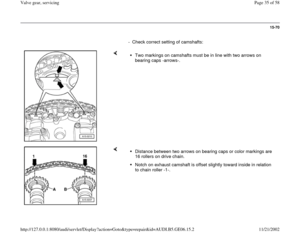
- Re-check TDC position of camshafts.
Marks on two camshafts must be in line with arrows on bearing
caps.
Pa
ge 30 of 58 Valve
gear, servicin
g
11/21/2002 htt
p://127.0.0.1:8080/audi/servlet/Dis
play?action=Goto&t
yp
e=re
pair&id=AUDI.B5.GE06.15.2
Page 31 of 58
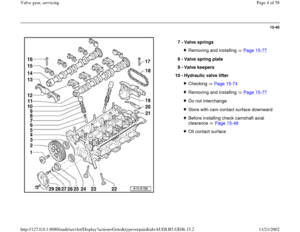
15-66
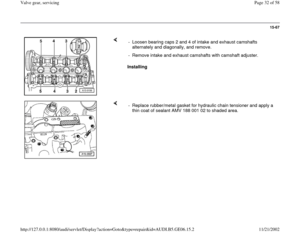
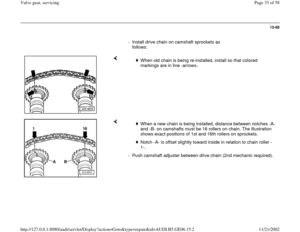
- Clean chain and camshaft sprockets opposite
two arrows on bearing caps and mark
installation position with color marks.
Note:
Do not mark chain with a center punch or by making a notch or similar
marking.
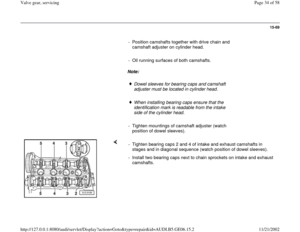
Distance between two arrows or color markings are 16 rollers on
drive chain.
Notch on exhaust camshaft is offset slightly toward inside in
relation to chain roller -1-.
- Remove bearing caps 3 and 5 on intake and exhaust camshafts.
- Remove double bearing cap.
- Remove both bearing caps next to intake and exhaust camshaft chain
sprockets.
- Remove securing bolts for camshaft adjuster.
Pa
ge 31 of 58 Valve
gear, servicin
g
11/21/2002 htt
p://127.0.0.1:8080/audi/servlet/Dis
play?action=Goto&t
yp
e=re
pair&id=AUDI.B5.GE06.15.2
Page 32 of 58
15-67
Installing - Loosen bearing caps 2 and 4 of intake and exhaust camshafts
alternately and diagonally, and remove.
- Remove intake and exhaust camshafts with camshaft adjuster.
- Replace rubber/metal gasket for hydraulic chain tensioner and apply a
thin coat of sealant AMV 188 001 02 to shaded area.
Pa
ge 32 of 58 Valve
gear, servicin
g
11/21/2002 htt
p://127.0.0.1:8080/audi/servlet/Dis
play?action=Goto&t
yp
e=re
pair&id=AUDI.B5.GE06.15.2


.
- Remove camshaft sprocket.
- Remove camshaft position sensor completely.
Note:
If the retainer for chain tensi")

