Page 115 of 311

Climate Control System
3.2 TL without Navigation System
Fully-automatic Operation
To put the Automatic Climate Control in fully-automatic mode,
press the AUTO button and set the
fan control dial to AUTO, then set
the desired temperature by turning
the temperature control dial. You will see FULL AUTO in the system's
display. The light above the
button also shows you which
mode, Recirculation or Fresh Air, is selected.
The system automatically selects the proper mix of conditioned and/or
heated air that will, as quickly as
possible, raise or lower the interior
temperature from its current level to
the set temperature.
TEMPERATURE
CONTROL DIAL FULL AUTO FAN CONTROL DIAL
DISPLAY
AUTO BUTTON OFF BUTTON
When you set the temperature to its lower limit (60°F/18°C) or its upper
limit (90°F/32°C), the system runsat full cooling or heating only. It does
not regulate the interior temperature.
When the temperature is set between the lower and upper limits,the system regulates the interior
temperature to the set value.
Comfort and Convenience Features
Page 120 of 311
Climate Control System
Sunlight Sensor/Temperature
Sensor
SUNLIGHT SENSOR
The climate control system has twosensors. A sunlight sensor is located
in the top of the dashboard and a
temperature sensor is next to the steering column. Do not cover the
sensors or spill any liquid on them.
TEMPERATURE SENSOR
Comfort and Convenience Features
Page 131 of 311

Audio System
Adjusting the SoundBalance/Fader — These twocontrols adjust the strength of thesound coming from each speaker.
The Balance control adjusts the side- to-side strength, while the Fadercontrol adjusts the front-to-backstrength.
To adjust the fader, push on the BASS/FADER control knob to get it
to pop out. Pull it out slightly farther,and adjust the front-to-back sound to
your liking. Push the knob back in
when you are done so you cannot change the setting by accidentally
bumping it.
To adjust the balance, push on the
TREBLE/BALANCE control knob to get it to pop out. Pull it out slightly
farther, and adjust the side-to-side sound to your liking. Push the knob
back in when you are done so you cannot change the setting by
accidentally bumping it.BASS/FADER
CONTROL TREBLE/BALANCE
CONTROL
Treble/Bass — Use these controls
to adjust the tone to your liking.
To adjust the Treble level, push on the TREBLE/BALANCE control
knob to get it to pop out. Without
pulling it out farther, turn the knob
to adjust the treble level. Push the
knob back in when you are done so
you cannot change the setting by accidentally bumping it. To adjust the Bass level, push on the
BASS/FADER control knob to get it
to pop out. Without pulling it out
farther, turn the knob to adjust the
bass level. Push the knob back in
when you are done so you cannot change the setting by accidentally
bumping it.
Comfort and Convenience Features
Page 132 of 311

Audio System
Audio System LightingYou can use the instrument panel brightness control knob to adjust the
illumination of the audio system (see
page 64). The audio system
illuminates when the parking lightsare on, even if the radio is turned off.
Radio Frequencies
Your Acura's radio can receive the complete AM and FM bands.
Those bands cover these frequen- cies:
AM band: 530 to 1,710 kilohertz
FM band: 87.7 to 107.9 megahertz
Radio stations on the AM band are
assigned frequencies at least ten
kilohertz apart (530, 540, 550). Stations on the FM band are
assigned frequencies at least 0.2
megahertz apart (87.9, 88.1, 88.3). Stations must use these exact
frequencies. It is fairly common for stations to round-off the frequency in
their advertising, so your radio could display a frequency of 100.9 even
though the announcer may identify
the station as "FM101."
Radio Reception How well your Acura's radio receivesstations is dependent on many
factors, such as the distance from
the station's transmitter, nearby
large objects, and atmospheric conditions.
A radio station's signal gets weaker as you get farther away from its
transmitter. If you are listening to an
AM station, you will notice the sound volume becoming weaker, and the station drifting in and out. If you are
listening to an FM station, you will see the stereo indicator flickering off
and on as the signal weakens.
Eventually, the stereo indicator will go off and the sound will fade
completely as you get out of range of
the station's signal.
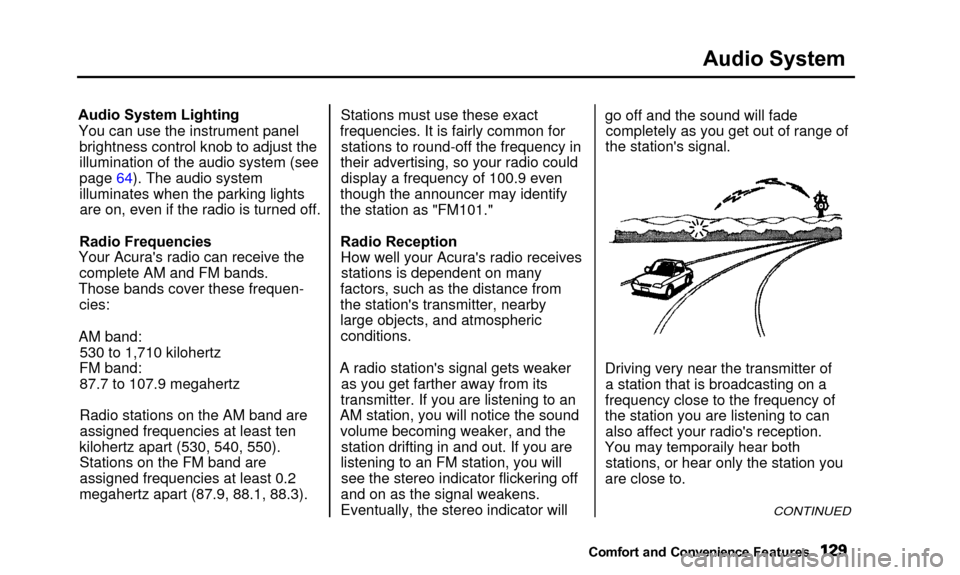
Driving very near the transmitter of a station that is broadcasting on a
frequency close to the frequency of
the station you are listening to can also affect your radio's reception.
Yo u
ma
y
temporaril
y
hea
r
bot
h
stations, or hear only the station you
are close to.
CONTINUED
Comfort and Convenienc e Features
You may temporaily hear both
Page 137 of 311
Audio System
Protecting Compact Discs
Handle a CD by its edges; never
touch either surface. Contamination
from fingerprints, liquids, felt-tip
pens, and labels can cause the CD to
not play properly, or possibly jam in
the drive.
When a CD is not being played, store
it in its case to protect it from dust and other contamination. To prevent
warpage, keep CDs out of direct sunlight and extreme heat.
To clean a disc, use a clean soft cloth.
Wipe across the disc from the centerto the outside edge. A new CD may be rough on the
inner and outer edges. The small
plastic pieces causing this roughness can flake off and fall on the re-
cording surface of the disc, causing
skipping or other problems. Remove
these pieces by rubbing the inner
and outer edges with the side of a
pencil or pen.
Never try to insert foreign objects in
the CD player or the magazine.
Comfort and Convenience Features
Page 141 of 311

Audio System
The tape direction indicator will lightto show you which side of the
cassette is playing. The indicates
the side you inserted facing upward is now playing. If you want to play
the other side, press the PROG
button.
Dolby B noise reduction turns on
when you insert a cassette. If the
tape was not recorded with Dolby B noise reduction, turn it off by
pressing the NR button.
When the system reaches the end of
the tape, it will automatically reverse direction and play the other side. If
you want to remove the cassette from the drive, press the EJECT
button. If you turn the system off while a
tape is playing, either with the PWR/
VOL knob or by turning off the ignition, the cassette will remain in
the drive. When you turn the system
back on, the tape will begin playing
where it left off.
To switch to the radio or CD player while a tape is playing, press the AM,FM or CD button. To change back to
the cassette player, push the TAPEbutton. Tape Search Functions
With a cassette playing, you can usethe FF, REW, SKIP, or REPEAT
function to find a desired program.
FF/REW - Fast Forward and Re-
wind move the tape rapidly. To re-
wind the tape, push the REW button.
You will see REW in the display. To fast forward the tape, push the FF
button. You will see FF displayed.
Press the PLAY button to take thesystem out of rewind or fast forward.
If the system reaches the end of the
tape while in fast forward or rewind, it automatically stops that function,
reverses direction, and begins to play.
Comfort and Convenience Features
Page 143 of 311

Audio System
Caring for the Cassette Player
The cassette player picks up dirt and oxides from the tape. This contami-
nation builds up over time and
causes the sound quality to degrade.
To prevent this, you should clean the player after every 30 hours of use.
Your dealer has a cleaning kit available.
If you do not clean the cassette
player regularly, it may eventually
become impossible to remove the contamination with a normal
cleaning kit. Use 100-minute or shorter cassettes.
Cassettes longer than that use
thinner tape that may break or jam the drive.
Look at the cassette before you
insert it. If the tape is loose, tightenit by turning a hub with a pencil or
your finger.
If the label is peeling off, remove it
from the cassette or it could cause
the cassette to jam in the player.
Never try to insert a warped ordamaged cassette in the player. When they are not in use, store
cassettes in their cases to protect
them from dust and moisture. Never
place cassettes where they will beexposed to direct sunlight, high heat,
or high humidity. If a cassette is
exposed to extreme heat or cold, let
it reach a moderate temperature
before inserting it in the player.
Never try to insert foreign objects
into the cassette player.
Comfort and Convenience Features
Page 146 of 311

Security System
The security system helps to protectyour vehicle and valuables from theft.
The horn sounds and a combination of headlights, parking lights, side
marker lights and taillights flashes if someone attempts to break into your
vehicle or remove the radio. This alarm continues for two minutes,
then the system resets. To reset an alarming system before the two
minutes have elapsed, unlock either
front door with the key or the remote transmitter.
The security system sets auto- matically fifteen seconds after you
lock the doors, hood, and trunk. For
the system to activate, you must lock
the doors from the outside with the
key, lock tab, door lock switch, or
remote transmitter. The securitysystem light next to the driver's door
lock starts blinking immediately to show you the system is setting itself.SECURITY SYSTEM LIGHT
Once the security system is set,
opening any door (without using the
key or the remote transmitter), or the hood, will cause it to alarm. Italso alarms if the radio is removed
from the dashboard or the wiring is cut. With the system set, you can still
open the trunk with the remote
transmitter without triggering the alarm. The alarm will sound if the
trunk is opened with the trunk
release handle.
The security system will not set if the hood, trunk, or any door is not
fully closed. If the system will not set,check the Door Monitor on the
instrument panel (see page 56), to see if the doors and trunk are fully
closed. Since it is not part of the
monitor display, manually check the
hood.
Do not attempt to alter this system or add other devices to it.
Comfort and Convenience Features