1999 TOYOTA LAND CRUISER ignition
[x] Cancel search: ignitionPage 3 of 202
New L/C100(U)11
�
Do not cover the key grip with any
material that cuts off electromagnet-ic waves.
�Do not knock the key hard against
other objects.
�Do not leave the key exposed to
high temperatures for a long period,such as on the dashboard and hood under the direct sunlight.
�Do not put the key in water orwash it in an ultrasonic washer.
�Do not use the key with electromag-
netic materials.
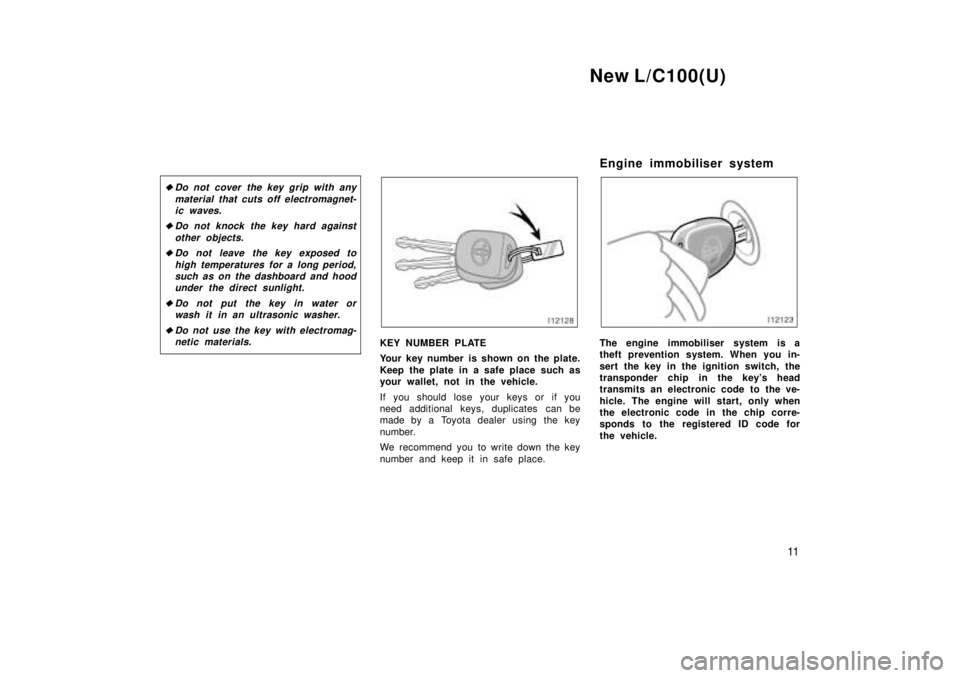
KEY NUMBER PLATE
Your key number is shown on the plate.
Keep the plate in a safe place such as
your wallet, not in the vehicle.
If you should lose your keys or if you
need additional keys, duplicates can be
made by a Toyota dealer using the key
number.
We recommend you to write down the key
number and keep it in safe place. Engine immobiliser systemThe engine immobiliser system is a
theft prevention system. When you in-
sert the key in the ignition switch, the
transponder chip in the key's head
transmits an electronic code to the ve-
hicle. The engine will start, only when
the electronic code in the chip corre-
sponds to the registered ID code for
the vehicle.
Page 4 of 202
New L/C100(U)
12
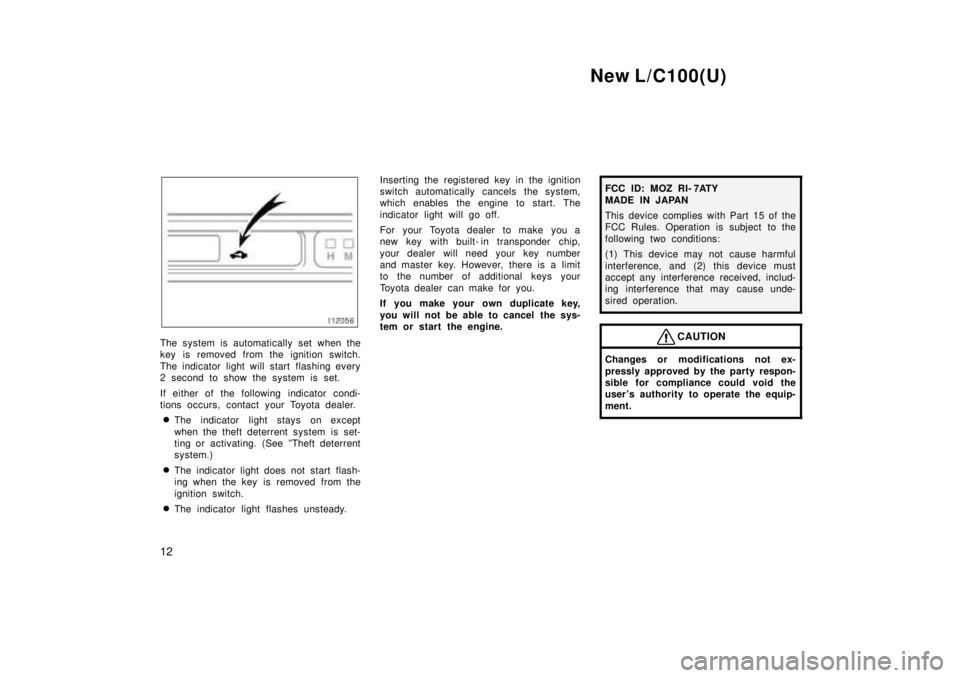
The system is automatically set when the
key is removed from the ignition switch.
The indicator light will start flashing every
2 second to show the system is set.
If either of the following indicator condi-
tions occurs, contact your Toyota dealer. � The indicator light stays on except
when the theft deterrent system is set-
ting or activating. (See ºTheft deterrent
system.)
� The indicator light does not start flash-
ing when the key is removed from the
ignition switch.
� The indicator light flashes unsteady. Inserting the registered key in the ignition
switch automatically cancels the system,
which enables the engine to start. The
indicator light will go off.
For your Toyota dealer to make you a
new key with built- in transponder chip,
your dealer will need your key number
and master key. However, there is a limit
to the number of additional keys your
Toyota dealer can make for you.
If you make your own duplicate key,
you will not be able to cancel the sys-
tem or start the engine.
FCC ID: MOZ RI- 7ATY
MADE IN JAPAN
This device complies with Part 15 of the
FCC Rules. Operation is subject to the
following two conditions:
(1) This device may not cause harmful
interference, and (2) this device must
accept any interference received, includ-
ing interference that may cause unde-
sired operation.
CAUTION
Changes or modifications not ex-
pressly approved by the party respon-
sible for compliance could void the
user's authority to operate the equip-
ment.
Page 5 of 202
New L/C100(U)13
Side doorsÐ
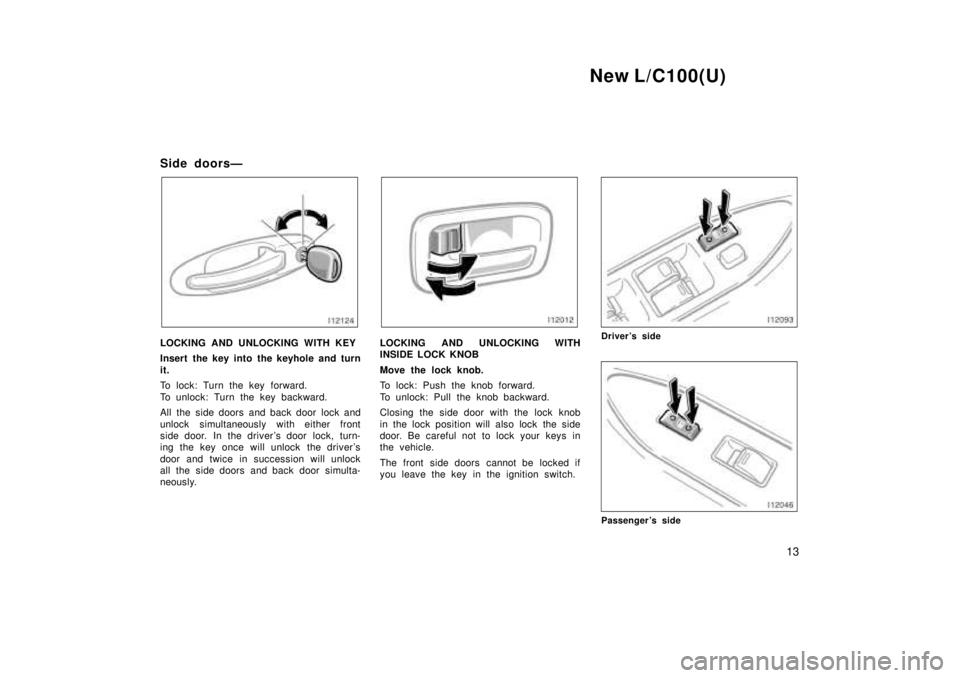
LOCKING AND UNLOCKING WITH KEY
Insert the key into the keyhole and turn it.
To lock: Turn the key forward.
To unlock: Turn the key backward.
All the side doors and back door lock and
unlock simultaneously with either front
side door. In the driver's door lock, turn-
ing the key once will unlock the driver's
door and twice in succession will unlock
all the side doors and back door simulta-
neously.LOCKING AND UNLOCKING WITH
INSIDE LOCK KNOB
Move the lock knob.
To lock: Push the knob forward.
To unlock: Pull the knob backward.
Closing the side door with the lock knob
in the lock position will also lock the side
door. Be careful not to lock your keys in
the vehicle.
The front side doors cannot be locked if
you leave the key in the ignition switch.Driver's side
Passenger's side
Page 7 of 202
New L/C100(U)15
ÐWireless remote control
Locking operation
Unlocking operation
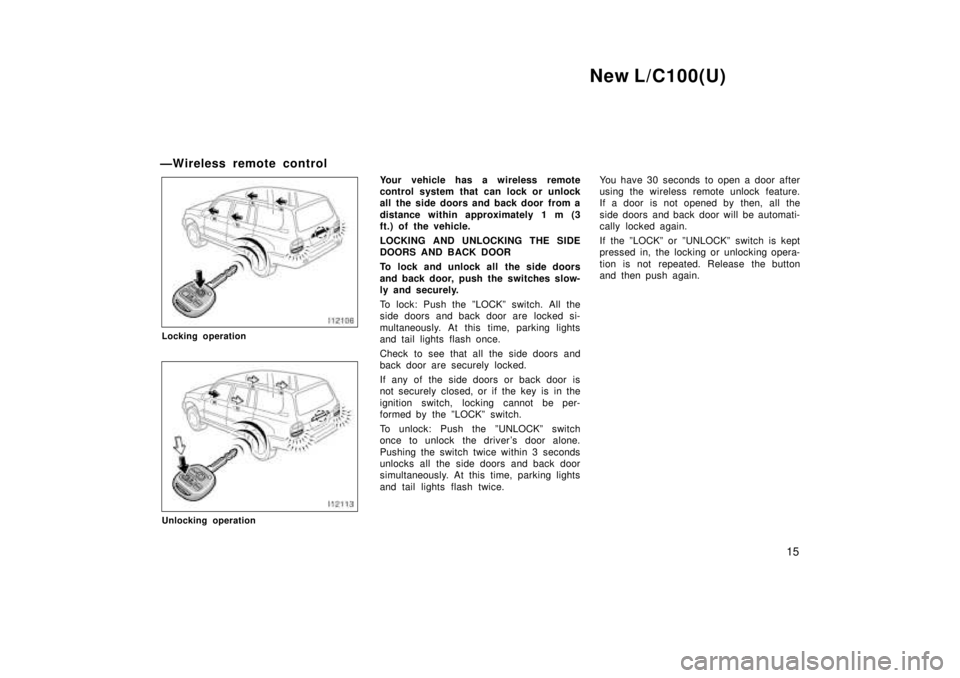
Your vehicle has a wireless remote
control system that can lock or unlock
all the side doors and back door from a
distance within approximately 1 m (3
ft.) of the vehicle.
LOCKING AND UNLOCKING THE SIDE
DOORS AND BACK DOOR
To lock and unlock all the side doors
and back door, push the switches slow-
ly and securely.
To lock: Push the ºLOCKº switch. All the
side doors and back door are locked si-
multaneously. At this time, parking lights
and tail lights flash once.
Check to see that all the side doors and
back door are securely locked.
If any of the side doors or back door is
not securely closed, or if the key is in the
ignition switch, locking cannot be per-
formed by the ºLOCKº switch.
To unlock: Push the ºUNLOCKº switch
once to unlock the driver 's door alone.
Pushing the switch twice within 3 seconds
unlocks all the side doors and back door
simultaneously. At this time, parking lights
and tail lights flash twice.
You have 30 seconds to open a door after
using the wireless remote unlock feature.
If a door is not opened by then, all the
side doors and back door will be automati-
cally locked again.
If the ºLOCKº or ºUNLOCKº switch is kept
pressed in, the locking or unlocking opera-
tion is not repeated. Release the button
and then push again.
Page 8 of 202
New L/C100(U)
16
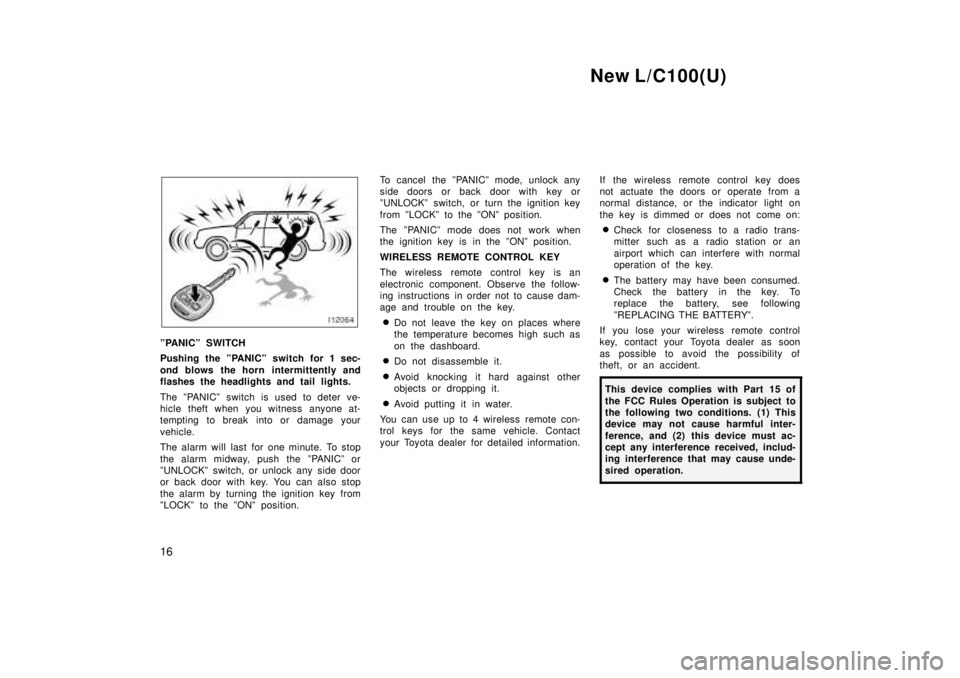
ºPANICº SWITCH
Pushing the ºPANICº switch for 1 sec-
ond blows the horn intermittently and
flashes the headlights and tail lights.
The ºPANICº switch is used to deter ve-
hicle theft when you witness anyone at-
tempting to break into or damage your
vehicle.
The alarm will last for one minute. To stop
the alarm midway, push the ºPANICº or
ºUNLOCKº switch, or unlock any side door
or back door with key. You can also stop
the alarm by turning the ignition key from
ºLOCKº to the ºONº position. To cancel the ºPANICº mode, unlock any
side doors or back door with key or
ºUNLOCKº switch, or turn the ignition key
from ºLOCKº to the ºONº position.
The ºPANICº mode does not work when
the ignition key is in the ºONº position.
WIRELESS REMOTE CONTROL KEY
The wireless remote control key is an
electronic component. Observe the follow-
ing instructions in order not to cause dam-
age and trouble on the key.
� Do not leave the key on places where
the temperature becomes high such as
on the dashboard.
� Do not disassemble it.
� Avoid knocking it hard against other
objects or dropping it.
� Avoid putting it in water.
You can use up to 4 wireless remote con-
trol keys for the same vehicle. Contact
your Toyota dealer for detailed information. If the wireless remote control key does
not actuate the doors or operate from a
normal distance, or the indicator light on
the key is dimmed or does not come on:
� Check for closeness to a radio trans-
mitter such as a radio station or an
airport which can interfere with normal
operation of the key.
� The battery may have been consumed.
Check the battery in the key. To
replace the battery, see following
ºREPLACING THE BATTERYº.
If you lose your wireless remote control
key, contact your Toyota dealer as soon
as possible to avoid the possibility of
theft, or an accident.
This device complies with Part 15 of
the FCC Rules Operation is subject to
the following two conditions. (1) This
device may not cause harmful inter-
ference, and (2) this device must ac-
cept any interference received, includ-
ing interference that may cause unde-
sired operation.
Page 11 of 202
New L/C100(U)19
4. Install the lid with the 2 screws.
5. Install the module into the key frame
and secure the cover with the screw.
6. When pushing any switch on the wire- less key, make sure the indicator light
comes on.
NOTICE
�Make sure the positive side and
negative side of the battery shouldbe faced correctly.
�Be careful not to bend the electrode
of the battery insertion and thatdust or oils do not adhere to the
case.
�Take care not to lose the screws.
�Close the cover securely.
Power windows
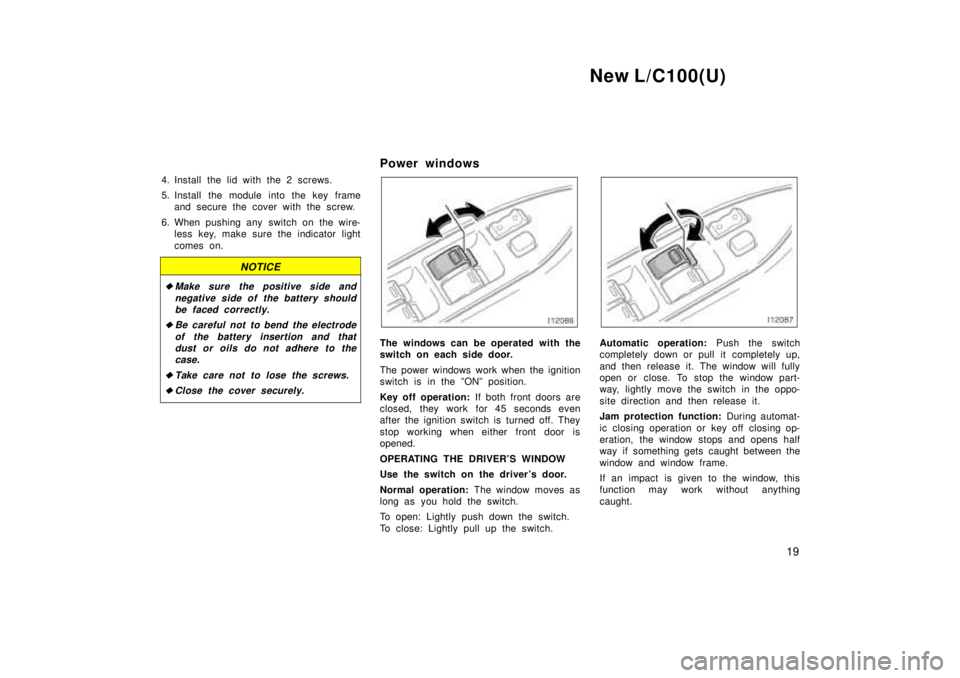
The windows can be operated with the
switch on each side door.
The power windows work when the ignition
switch is in the ºONº position.
Key off operation: If both front doors are
closed, they work for 45 seconds even
after the ignition switch is turned off. They
stop working when either front door is opened.
OPERATING THE DRIVER'S WINDOW
Use the switch on the driver's door.
Normal operation: The window moves as
long as you hold the switch.
To open: Lightly push down the switch.
To close: Lightly pull up the switch.Automatic operation: Push the switch
completely down or pull it completely up,
and then release it. The window will fully
open or close. To stop the window part-
way, lightly move the switch in the oppo-
site direction and then release it.
Jam protection function: During automat-
ic closing operation or key off closing op-
eration, the window stops and opens half
way if something gets caught between the
window and window frame.
If an impact is given to the window, this
function may work without anything
caught.
Page 13 of 202
New L/C100(U)21
CAUTION
To avoid serious personal injury, you
must do the following. �Always make sure the head, hands
and other parts of the body of all
occupants are kept completely in-
side the vehicle before you close
the power windows. If someone's
neck, head or hands gets caught in
a closing window, it could result in
a serious injury. When anyone
closes the power windows, be sure
that they operate the windows safe-
ly.
� When small children are in the ve-
hicle, never let them use the power
window switches without supervi-
sion. Use the window lock switch to
prevent them from making unex-
pected use of the switches.
� Never leave small children alone in
the vehicle, especially with the igni-
tion key still inserted. They could
use the power window switches and
get trapped in a window. Unat-
tended children can become in-
volved in serious accidents.
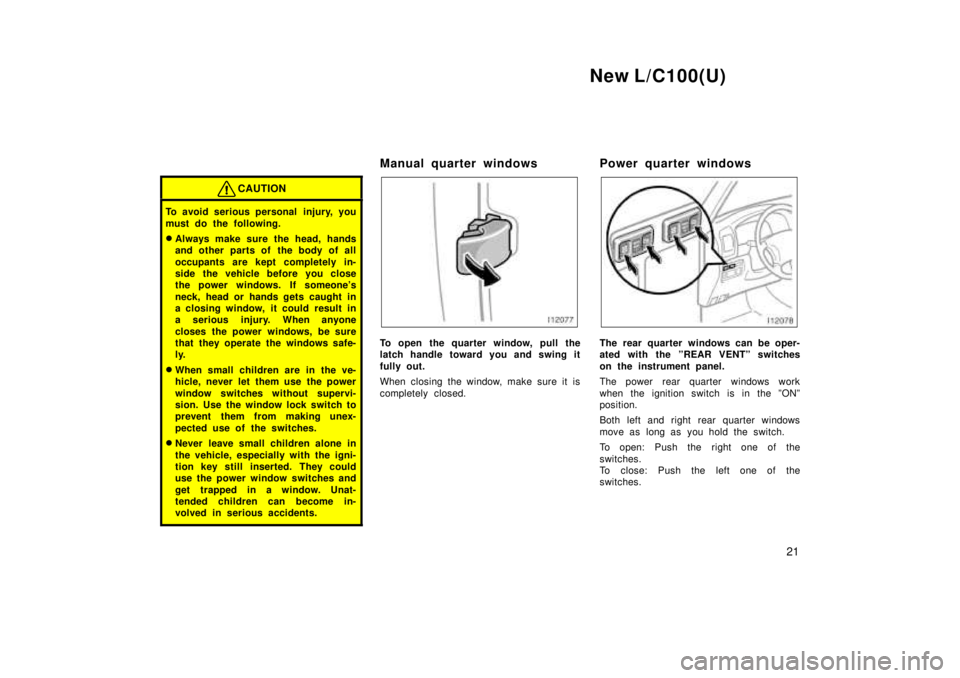
Manual quarter windows
To open the quarter window, pull the
latch handle toward you and swing it
fully out.
When closing the window, make sure it is
completely closed. Power quarter windowsThe rear quarter windows can be oper-
ated with the ºREAR VENTº switches
on the instrument panel.
The power rear quarter windows work
when the ignition switch is in the ºONº
position.
Both left and right rear quarter windows
move as long as you hold the switch.
To open: Push the right one of the
switches.
To close: Push the left one of the
switches.
Page 17 of 202

New L/C100(U)25
2. In front of the vehicle, pull up theauxiliary catch l ever and lift the
hood.
Before closing the hood, check to see that
you have not forgotten any tools, rags,
etc. Then lower the hood and make sure
it locks into place. If necessary, press
down gently on the front edge to lock it. Theft deterrent systemÐTo deter the vehicle theft, the system
is designed to give an alarm if any of
the side doors, back door or hood is
forcibly unlocked or opened or the bat-
tery terminal is disconnected and then
reconnected when the vehicle is locked.
The alarm blows the horn intermittently
and flashes the headlights and tail lights.SETTING THE SYSTEM
1. Turn the ignition key to the ºLOCKº position and remove it.
The indicator light will start flashing every
2 second when the key is removed from
the ignition switch. (See ºEngine
immobiliser systemº for details.)
2. Have all passengers get out of the vehicle.
3. Close and lock all the side doors, back door and hood.
The indicator light will come on when all
the side doors, back door and hood are
closed and locked.