1999 NISSAN SENTRA warning light
[x] Cancel search: warning lightPage 123 of 223
increases wear on the brake linings and
pads, and reduces gas mileage.
To help save the brakes and to prevent the
brakes from overheating, reduce speed and
downshift to a lower gear before going down
a slope or long grade. Overheated brakes
may reduce braking performance and could
result in loss of vehicle control.
WARNING
cWhile driving on a slippery surface,
be careful when braking, accelerat-
ing or downshifting. Abrupt braking
or accelerating could cause the
wheels to skid and result in an acci-
dent.
cIf the engine is not running or is
turned off while driving, the power
assist for the brakes will not work.
Braking will be harder.
The anti-lock brake system controls the
brakes at each wheel so the wheels do not
lock when braking abruptly or when braking
on slippery surfaces. The system detects the
rotation speed at each wheel and varies the
brake fluid pressure to prevent each wheel
from locking and sliding. By preventing wheel
lockup, the system helps the driver maintain
steering control and helps to minimize swerv-
ing and spinning on slippery surfaces.
Using the System
Depress the brake pedal and hold it down.
WARNING
Do not pump the brake pedal. Doing so
may result in increased stopping dis-
tances.
Normal operation
The anti-lock brake system does not oper-
ate at speeds below 3 to 6 MPH (5 to 10
km/h). The speeds vary according to road
conditions. When the anti-lock system
senses that one or more wheels are close to
locking up, the actuator (under the hood)
rapidly applies and releases hydraulic pres-
sure (like pumping the brakes very quickly).While the actuator is working, you may feel
a pulsation in the brake pedal and hear a
noise or vibration from the actuator under
the hood. This is normal and indicates that
the anti-lock system is working properly.
However, the pulsation may indicate that
road conditions are hazardous and extra
care is required while driving.
Self-test feature
The anti-lock brake system is sophisticated,
with electronic sensors, electric pumps, and
hydraulic solenoids controlled by a com-
puter. The computer has a built-in diagnos-
tic feature that tests the system each time
you start the engine and move the vehicle at
a low speed in forward or reverse. When the
self-test occurs, you may hear a ``clunk''
noise and/or feel a pulsation in the brake
pedal. This is normal and is not an indica-
tion of any malfunction. If the computer
senses any malfunction, it switches the anti-
lock brake system OFF and turns on the
ABS brake warning light in the dashboard.
The brake system then operates normally,
but without anti-lock assistance.
If the light comes on during the self-test or
while driving, take the vehicle to an autho-
rized NISSAN dealer for repair.
ANTI-LOCK BRAKE SYSTEM
(ABS) (if so equipped)
5-18Starting and driving
ZX
Page 158 of 223
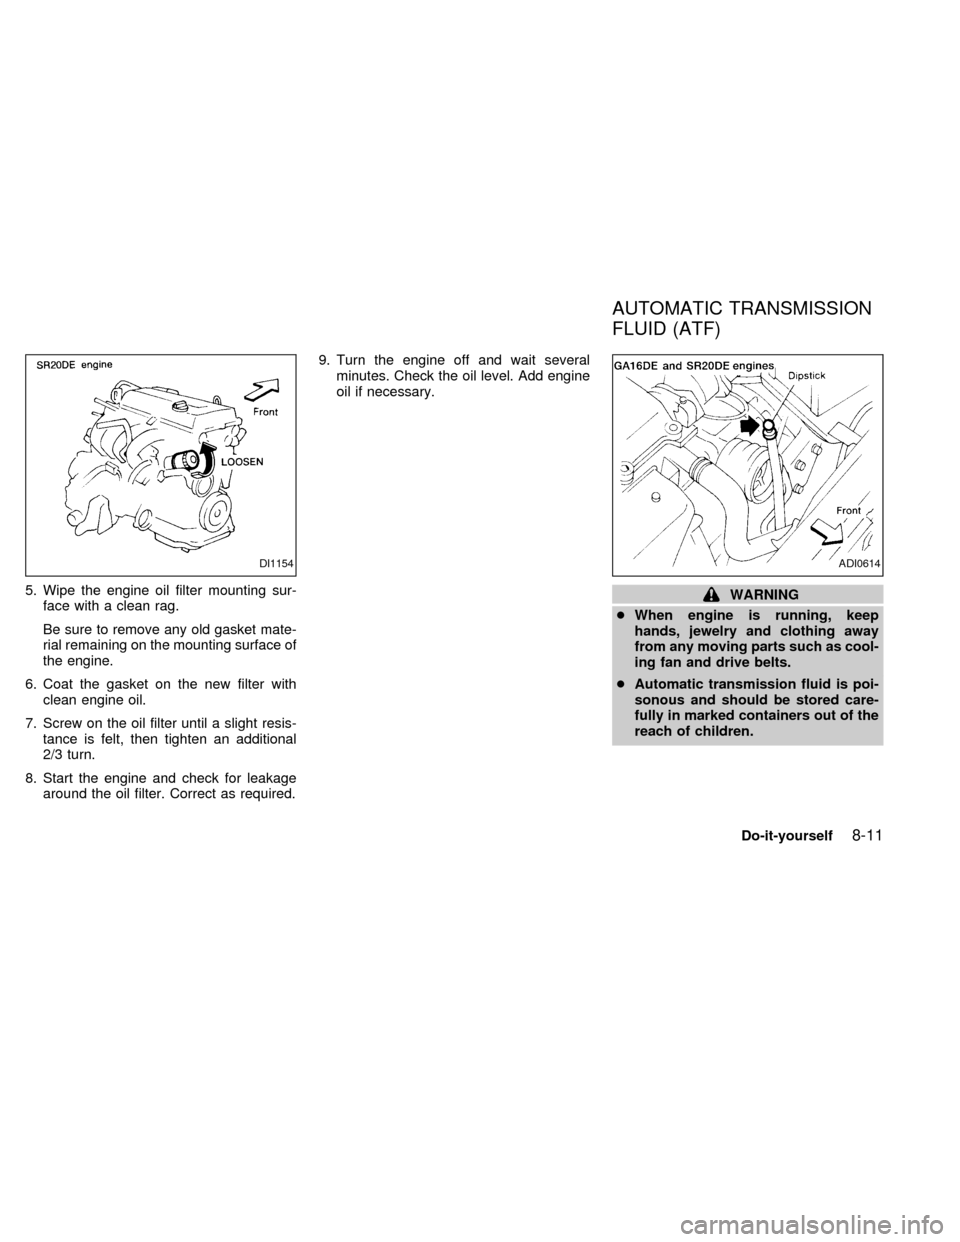
5. Wipe the engine oil filter mounting sur-
face with a clean rag.
Be sure to remove any old gasket mate-
rial remaining on the mounting surface of
the engine.
6. Coat the gasket on the new filter with
clean engine oil.
7. Screw on the oil filter until a slight resis-
tance is felt, then tighten an additional
2/3 turn.
8. Start the engine and check for leakage
around the oil filter. Correct as required.9. Turn the engine off and wait several
minutes. Check the oil level. Add engine
oil if necessary.WARNING
cWhen engine is running, keep
hands, jewelry and clothing away
from any moving parts such as cool-
ing fan and drive belts.
cAutomatic transmission fluid is poi-
sonous and should be stored care-
fully in marked containers out of the
reach of children.
DI1154ADI0614
AUTOMATIC TRANSMISSION
FLUID (ATF)
Do-it-yourself8-11
ZX
Page 161 of 223
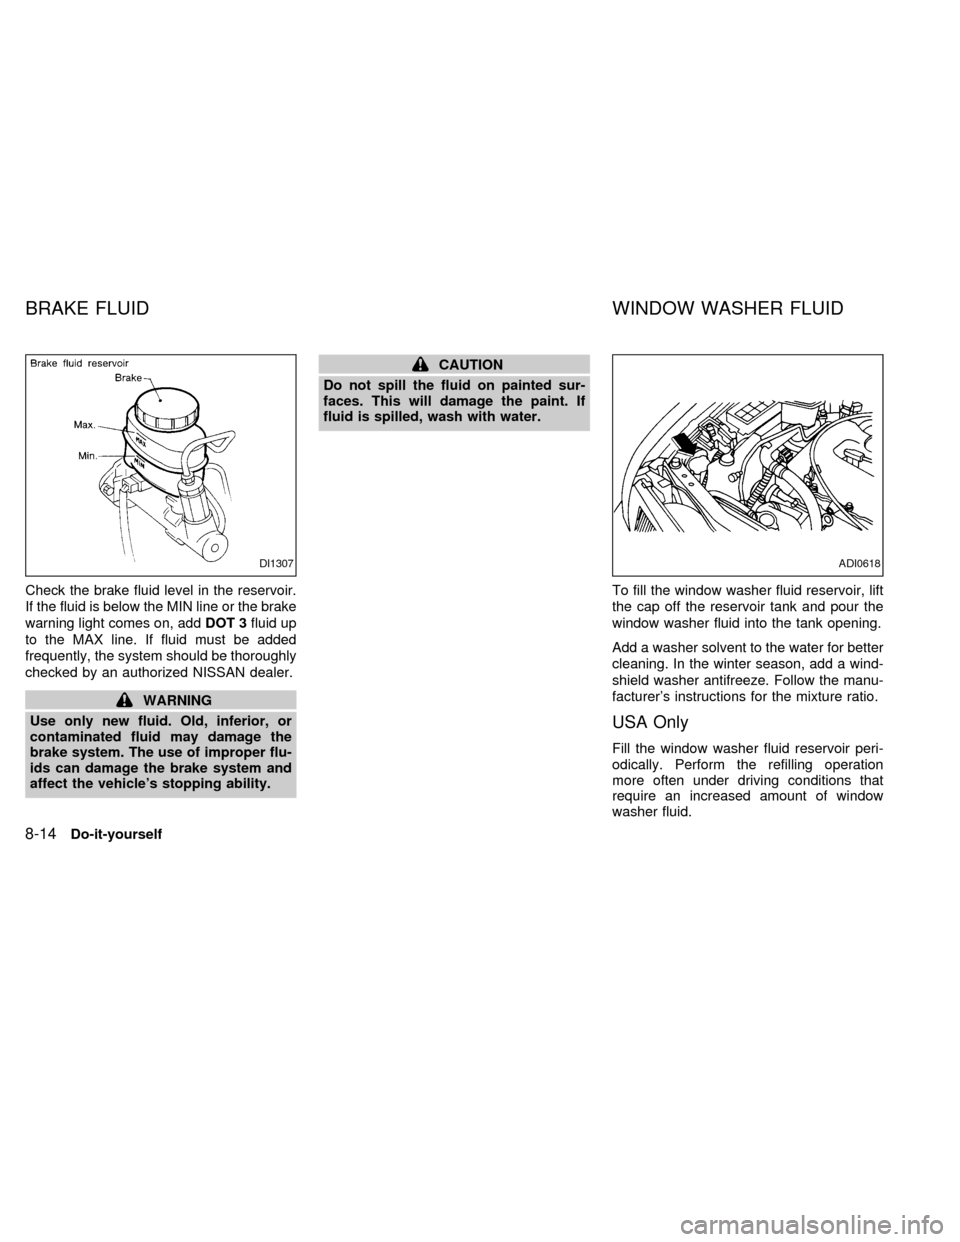
Check the brake fluid level in the reservoir.
If the fluid is below the MIN line or the brake
warning light comes on, addDOT 3fluid up
to the MAX line. If fluid must be added
frequently, the system should be thoroughly
checked by an authorized NISSAN dealer.
WARNING
Use only new fluid. Old, inferior, or
contaminated fluid may damage the
brake system. The use of improper flu-
ids can damage the brake system and
affect the vehicle's stopping ability.
CAUTION
Do not spill the fluid on painted sur-
faces. This will damage the paint. If
fluid is spilled, wash with water.
To fill the window washer fluid reservoir, lift
the cap off the reservoir tank and pour the
window washer fluid into the tank opening.
Add a washer solvent to the water for better
cleaning. In the winter season, add a wind-
shield washer antifreeze. Follow the manu-
facturer's instructions for the mixture ratio.
USA Only
Fill the window washer fluid reservoir peri-
odically. Perform the refilling operation
more often under driving conditions that
require an increased amount of window
washer fluid.
DI1307ADI0618
BRAKE FLUID WINDOW WASHER FLUID
8-14Do-it-yourself
ZX
Page 162 of 223
Canada Only
Add fluid when the low washer fluid warning
light comes on. Add a washer solvent to the
water for better cleaning. In the winter sea-
son, add a windshield washer antifreeze.
Follow the manufacturer's instructions for
the mixture ratio.
CAUTION
Do not substitute engine antifreeze
coolant for windshield washer solution.
This may result in damage to the paint.cKeep the battery surface clean and dry.
Any corrosion should be washed off with
a solution of baking soda and water.
cMake certain the terminal connections
are clean and securely tightened.
cIf the vehicle is not to be used for 30 days
or longer, disconnect the negative (þ) bat-
tery terminal cable to prevent discharge.
WARNING
cDo not expose the battery to flames
or electrical sparks. Hydrogen gas
generated by battery action is explo-
sive. Do not allow battery fluid to
contact your skin, eyes, fabrics, or
painted surfaces. After touching a
battery or battery cap, do not touch
or rub your eyes. Thoroughly wash
your hands. If the acid contacts your
eyes, skin or clothing, immediately
flush with water for at least 15 min-
utes and seek medical attention.
cWhen working on or near a battery,
always wear suitable eye protection
and remove all jewelry.
cKeep the battery out of the reach of
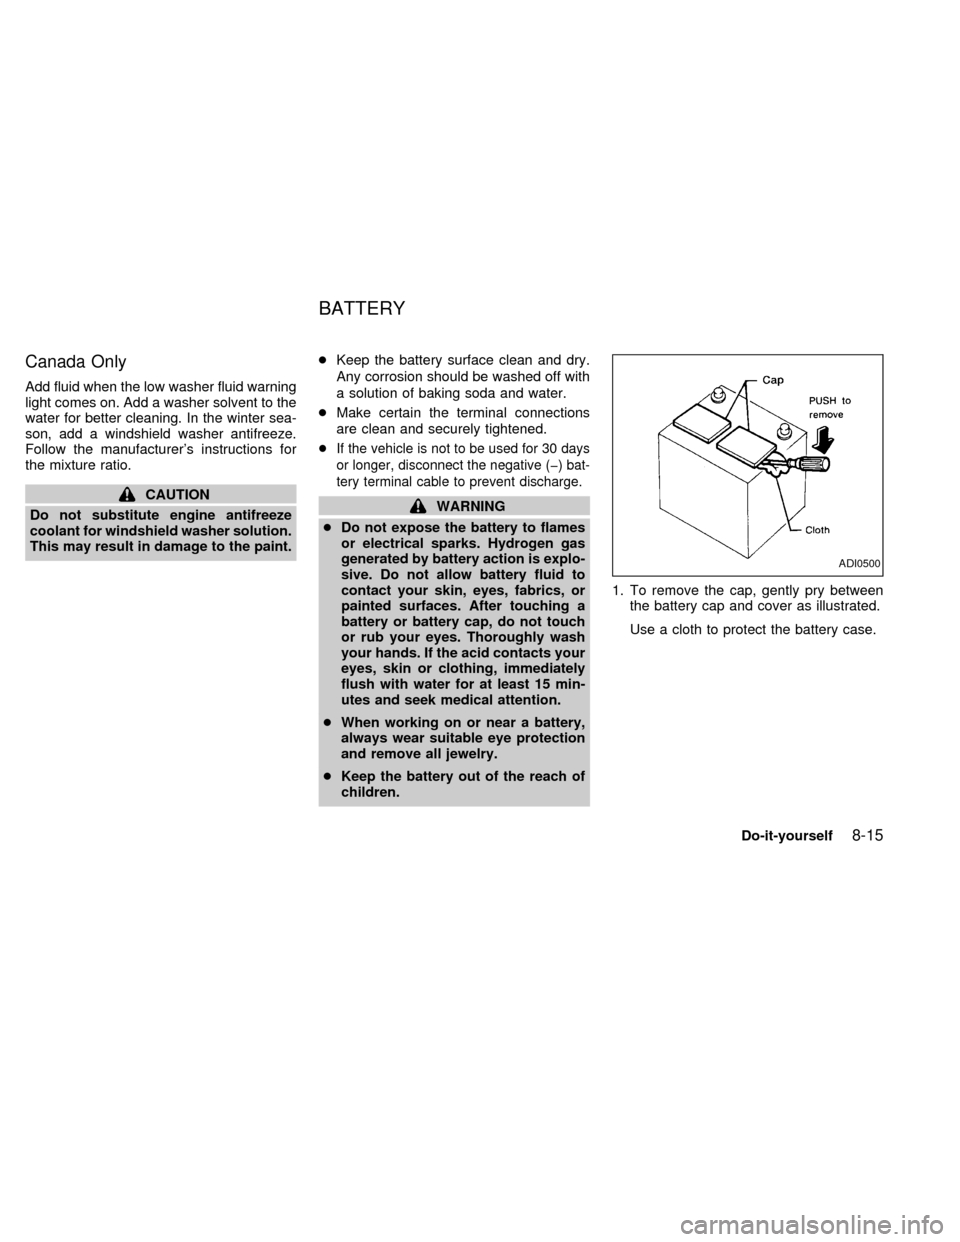
children.1. To remove the cap, gently pry between
the battery cap and cover as illustrated.
Use a cloth to protect the battery case.
ADI0500
BATTERY
Do-it-yourself8-15
ZX
Page 170 of 223
normal, it may be due to a lack of adjust-
ment of the rear drum brakes. To adjust
apply the parking brake several times.
WARNING
See an authorized NISSAN dealer and
have it checked if the brake pedal
height does not return to normal.
Brake pad wear indicators
The disc brake pads on your vehicle have
audible wear indicators. When a brake pad
requires replacement, it makes a high
pitched scraping or screeching sound when
the vehicle is in motion whether or not the
brake pedal is depressed. Have the brakes
checked as soon as possible if the wear
indicator sound is heard.
Under some driving or climate conditions,
occasional brake squeak, squeal or other
noise may be heard. Occasional brake
noise during light to moderate stops is nor-
mal and does not affect the function or
performance of the brake system.
The rear drum brakes (if so equipped) do
not have audible wear indicators. Should
you ever hear an unusually loud noise fromthe rear drum brakes, have them inspected
as soon as possible by an authorized NIS-
SAN dealer.
Proper brake inspection intervals should
be followed.For more information regard-
ing brake inspections, see the appropriate
maintenance schedule information in the
``Maintenance'' section of this manual.Check the brake booster function as fol-
lows:
1. With the engine off, press and release
the brake pedal several times. When
brake pedal movement (distance of
travel) remains the same from one pedal
application to the next, continue on to the
next step.
2. While depressing the brake pedal, start
the engine. The pedal height should drop
a little.
3. With the brake pedal depressed, stop the
engine. Keeping the pedal depressed for
about 30 seconds, the pedal height
should not change.
4. Run the engine for one minute without
depressing the brake pedal, then turn it
off. Depress the brake pedal several
times. The pedal travel distance will de-
crease gradually with each depression
as the vacuum is released from the
booster.
If the brakes do not operate properly, see an
authorized NISSAN dealer.
BRAKE BOOSTER
Do-it-yourself8-23
ZX
Page 182 of 223
WARNING
cAfter rotating the tires, adjust the tire
pressure.
cRetighten the wheel nuts when the
vehicle has been driven for 600 miles
(1,000 km) (also in cases of a flat tire,
etc.).
cDo not include the T-type spare tire
in the tire rotation.
Tire wear and damage
WARNING
c
Tires should be periodically inspected
for wear, cracking, bulging, or objects
caught in the tread. If excessive wear,
cracks, bulging, or deep cuts are
found, the tire should be replaced.
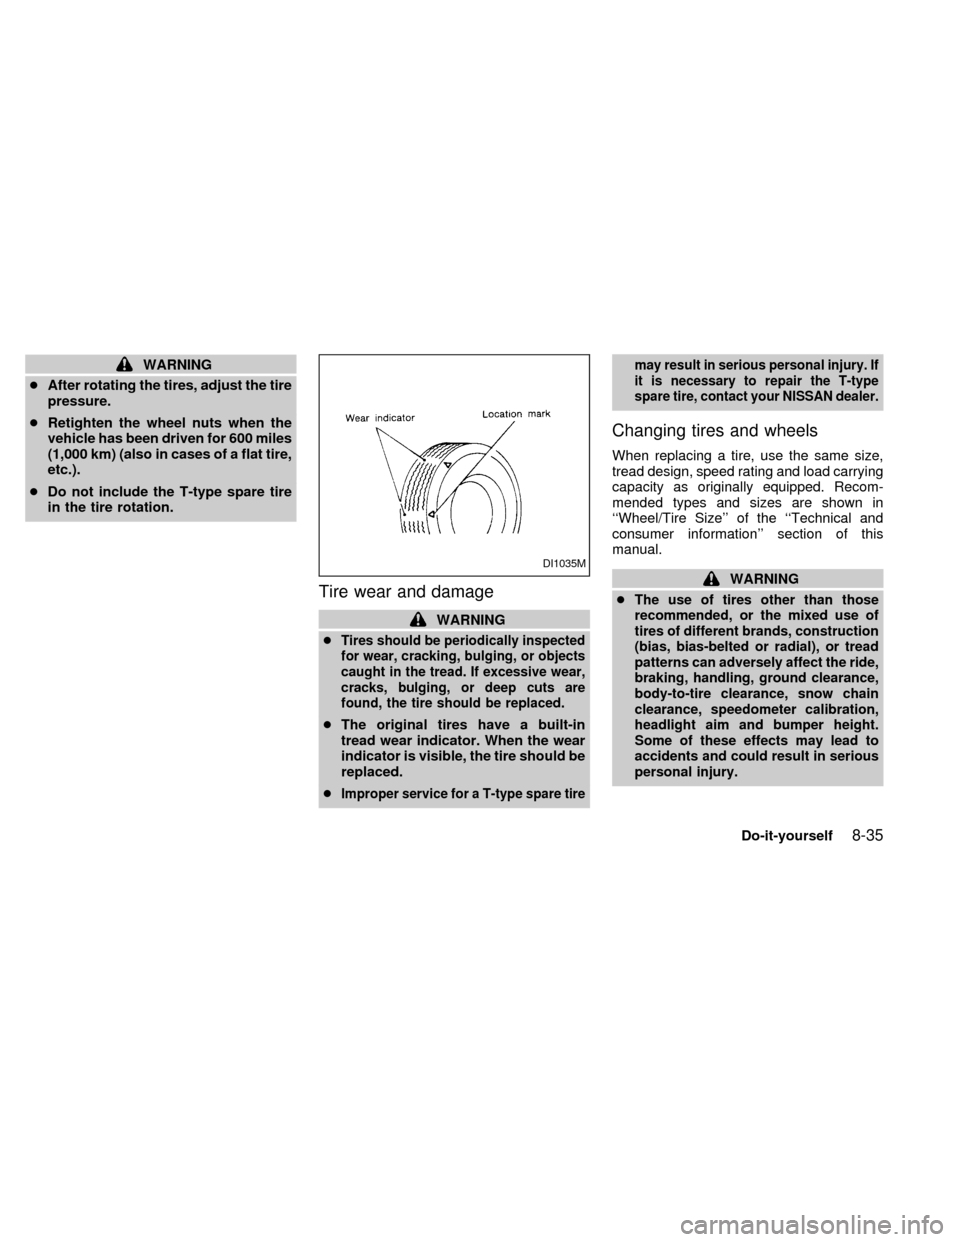
cThe original tires have a built-in
tread wear indicator. When the wear
indicator is visible, the tire should be
replaced.
c
Improper service for a T-type spare tiremay result in serious personal injury. If
it is necessary to repair the T-type
spare tire, contact your NISSAN dealer.
Changing tires and wheels
When replacing a tire, use the same size,
tread design, speed rating and load carrying
capacity as originally equipped. Recom-
mended types and sizes are shown in
``Wheel/Tire Size'' of the ``Technical and
consumer information'' section of this
manual.
WARNING
c
The use of tires other than those
recommended, or the mixed use of
tires of different brands, construction
(bias, bias-belted or radial), or tread
patterns can adversely affect the ride,
braking, handling, ground clearance,
body-to-tire clearance, snow chain
clearance, speedometer calibration,
headlight aim and bumper height.
Some of these effects may lead to
accidents and could result in serious
personal injury.
DI1035M
Do-it-yourself8-35
ZX
Page 188 of 223

check for any loose wheel nuts. Tighten if
necessary.
Tire rotation* ÐTires should be rotated
every 7,500 miles (12,000 km).
Wheel alignment and balance ÐIf the
vehicle should pull to either side while driv-
ing on a straight and level road, or if you
detect uneven or abnormal tire wear, there
may be a need for a wheel alignment.
If the steering wheel or seat vibrates at
normal highway speeds, wheel balancing
may be needed.
Windshield wiper blades* ÐCheck for
cracks or wear if they do not wipe properly.
Doors and hood ÐCheck that all doors
and the hood operate properly. Also ensure
that all latches lock securely. Lubricate
hinges, latches, rollers and links if neces-
sary. Make sure the secondary latch keeps
the hood from opening when the primary
latch is released.
When driving in areas that use road salt or
other corrosive materials, check lubrication
frequently.
Lights* ÐMake sure the headlights, stop
lights, tail lights, turn signal lights, and otherlights are all operating properly and installed
securely. Also check headlight aim.
INSIDE THE VEHICLE
The maintenance items listed here should
be checked on a regular basis, such as
when performing periodic maintenance,
cleaning the vehicle, etc.
Additional information on the following
items with an ``*'' is found in the ``Do-it-
yourself'' section of this manual.
Warning lights and chimes ÐMake sure
all warning lights and chimes are operating
properly.
Windshield wiper and washer* ÐCheck
that the wipers and washer operate properly
and that the wipers do not streak.
Windshield defroster ÐCheck that the air
comes out of the defroster outlets properly
and in sufficient quantity when operating the
heater or air conditioner.
Steering wheel ÐCheck for changes in
the steering conditions, such as excessive
freeplay, hard steering or strange noises.
Seats ÐCheck seat position controls such
as seat adjusters, seatback recliner, etc. toensure they operate smoothly and all
latches lock securely in every position.
Check that the head restraints move up and
down smoothly and the locks hold securely
in all latched positions.
Seat belts ÐCheck that all parts of the seat
belt system (For example buckles, anchors,
adjusters and retractors) operate properly
and smoothly, and are installed securely.
Check the belt webbing for cuts, fraying,
wear or damage.
Accelerator pedal ÐCheck the pedal for
smooth operation and make sure the pedal
does not catch or require uneven effort.
Keep the floor mat away from the pedal.
Clutch pedal* ÐMake sure the pedal
operates smoothly and check that it has the
proper free travel.
Brakes ÐCheck that the brakes do not pull
the vehicle to one side when applied.
Brake pedal and booster* ÐCheck the
pedal for smooth operation and make sure it
has the proper distance under it when de-
pressed fully. Check the brake booster func-
tion. Be certain to keep the floor mat away
from the pedal.
Maintenance
9-3
ZX
Page 208 of 223
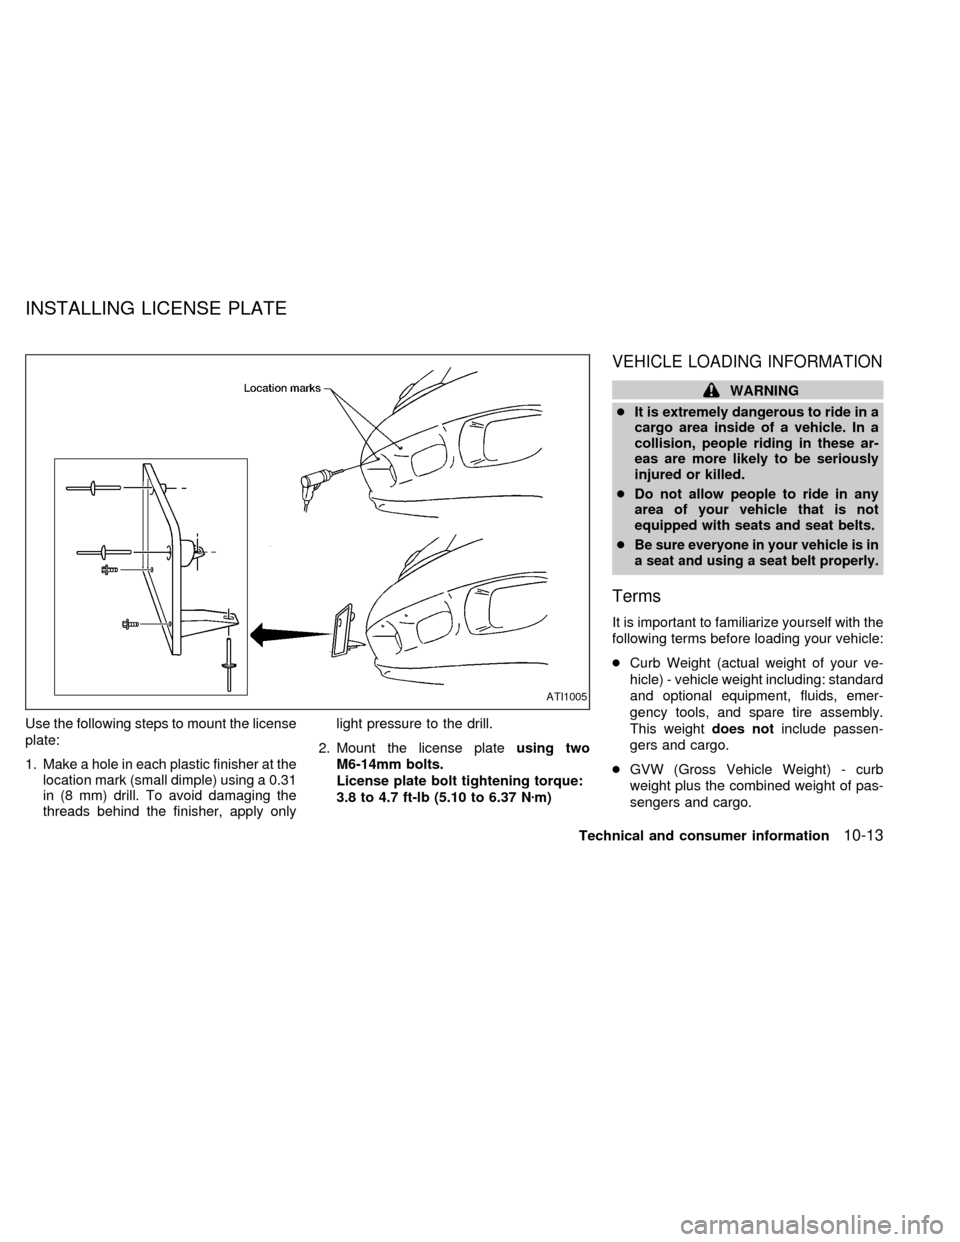
Use the following steps to mount the license
plate:
1. Make a hole in each plastic finisher at the
location mark (small dimple) using a 0.31
in (8 mm) drill. To avoid damaging the
threads behind the finisher, apply onlylight pressure to the drill.
2. Mount the license plateusing two
M6-14mm bolts.
License plate bolt tightening torque:
3.8 to 4.7 ft-lb (5.10 to 6.37 Nzm)
VEHICLE LOADING INFORMATION
WARNING
cIt is extremely dangerous to ride in a
cargo area inside of a vehicle. In a
collision, people riding in these ar-
eas are more likely to be seriously
injured or killed.
cDo not allow people to ride in any
area of your vehicle that is not
equipped with seats and seat belts.
c
Be sure everyone in your vehicle is in
a seat and using a seat belt properly.
Terms
It is important to familiarize yourself with the
following terms before loading your vehicle:
cCurb Weight (actual weight of your ve-
hicle) - vehicle weight including: standard
and optional equipment, fluids, emer-
gency tools, and spare tire assembly.
This weightdoes notinclude passen-
gers and cargo.
cGVW (Gross Vehicle Weight) - curb
weight plus the combined weight of pas-
sengers and cargo.
ATI1005
INSTALLING LICENSE PLATE
Technical and consumer information10-13
ZX