1999 NISSAN QUEST mirror controls
[x] Cancel search: mirror controlsPage 11 of 286

POWER FRONT SEAT
ADJUSTMENT (if so equipped)
WARNING
cDo not adjust the driver's seat while
driving. The seat may move sud-
denly and could cause loss of con-
trol of the vehicle.
c
Do not leave children unattended in-
side the vehicle. They could unknow-
ingly activate switches or controls.
Unattended children could become
involved in serious accidents.
For memory seat and mirror information
see ``Memory driver seat and mirrors'' in the
``Pre-driving checks and adjustments'' sec-
tion.
Operating tips
cThe motor has an auto-reset overload
protection circuit. If the motor stops dur-
ing operation, wait 30 seconds, then re-
activate the switch.
cDo not operate the power support seat
for a long period of time when the engine
is off. This discharges the battery.
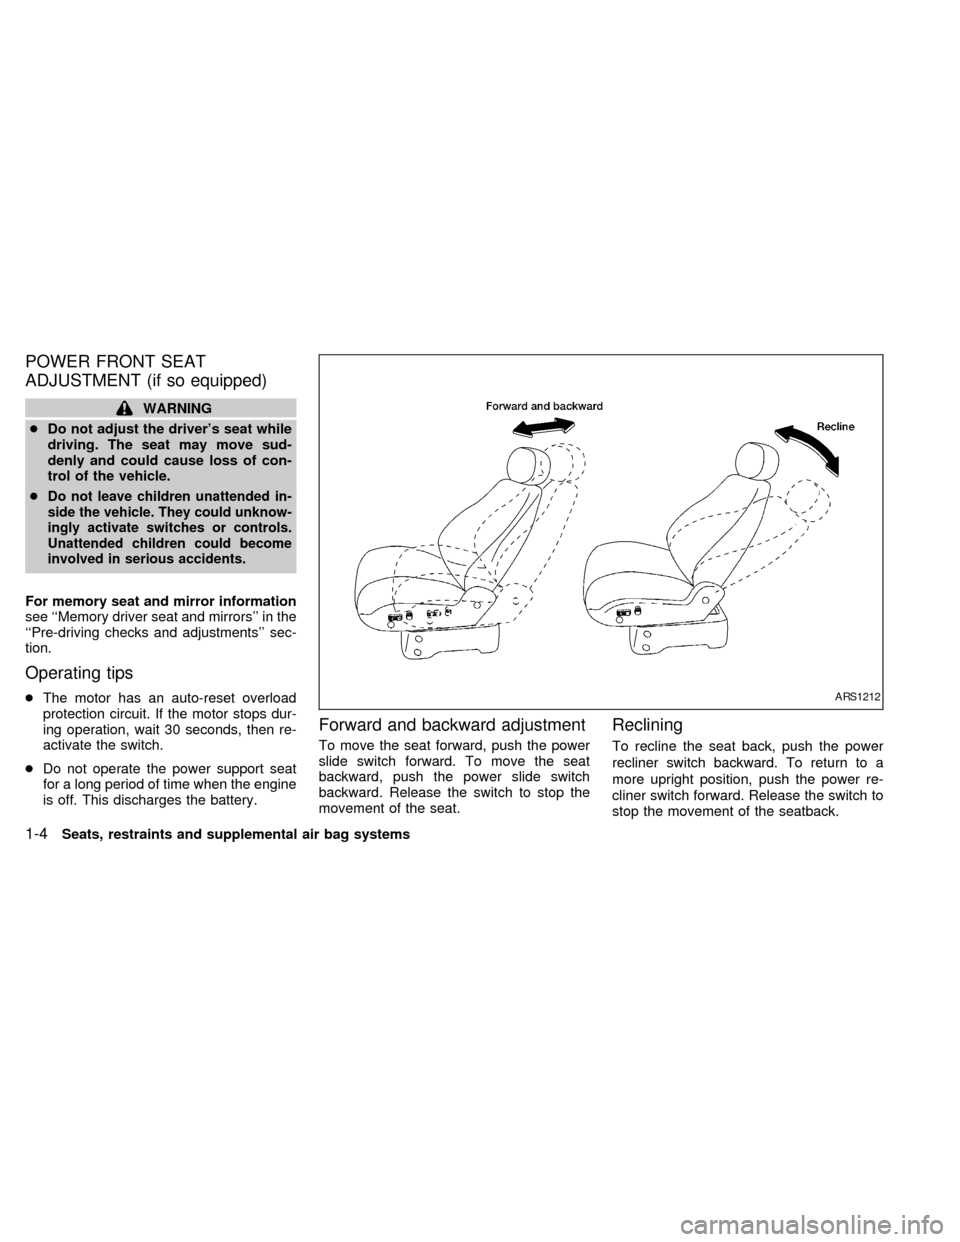
Forward and backward adjustment
To move the seat forward, push the power
slide switch forward. To move the seat
backward, push the power slide switch
backward. Release the switch to stop the
movement of the seat.
Reclining
To recline the seat back, push the power
recliner switch backward. To return to a
more upright position, push the power re-
cliner switch forward. Release the switch to
stop the movement of the seatback.
ARS1212
1-4Seats, restraints and supplemental air bag systems
ZX
Page 98 of 286

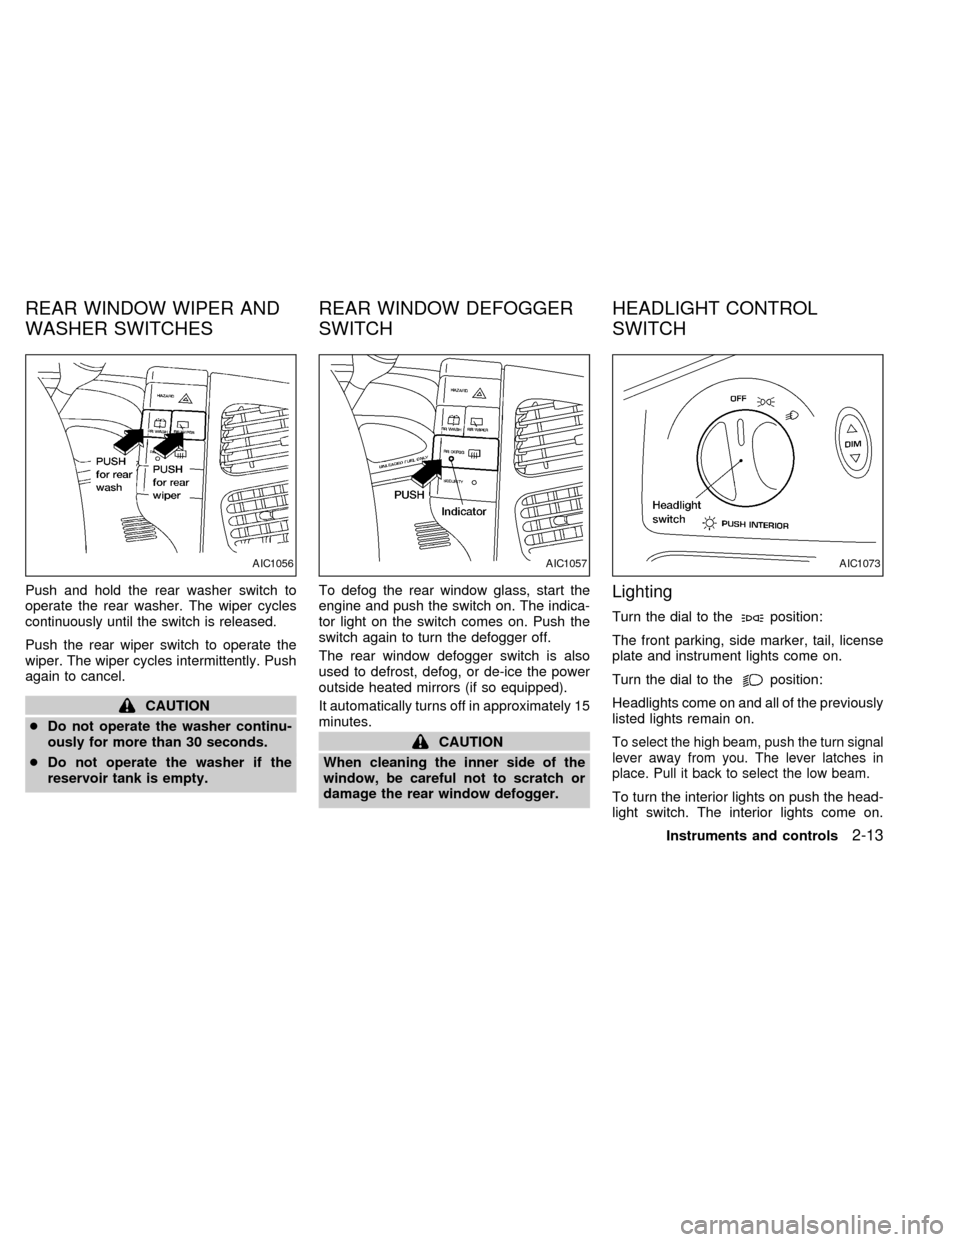
Push and hold the rear washer switch to
operate the rear washer. The wiper cycles
continuously until the switch is released.
Push the rear wiper switch to operate the
wiper. The wiper cycles intermittently. Push
again to cancel.
CAUTION
cDo not operate the washer continu-
ously for more than 30 seconds.
cDo not operate the washer if the
reservoir tank is empty.To defog the rear window glass, start the
engine and push the switch on. The indica-
tor light on the switch comes on. Push the
switch again to turn the defogger off.
The rear window defogger switch is also
used to defrost, defog, or de-ice the power
outside heated mirrors (if so equipped).
It automatically turns off in approximately 15
minutes.
CAUTION
When cleaning the inner side of the
window, be careful not to scratch or
damage the rear window defogger.
Lighting
Turn the dial to theposition:
The front parking, side marker, tail, license
plate and instrument lights come on.
Turn the dial to the
position:
Headlights come on and all of the previously
listed lights remain on.
To select the high beam, push the turn signal
lever away from you. The lever latches in
place. Pull it back to select the low beam.
To turn the interior lights on push the head-
light switch. The interior lights come on.
AIC1056AIC1057AIC1073
REAR WINDOW WIPER AND
WASHER SWITCHESREAR WINDOW DEFOGGER
SWITCHHEADLIGHT CONTROL
SWITCH
Instruments and controls2-13
ZX
Page 110 of 286

To turn on the map lights, press the
switches. To turn them off, press the
switches again.
The interior lights, the cargo light, the glove
box light, the stepwell lights near the sliding
doors and on the front doors, and the foot-
well lights near the driver's and front pas-
senger's feet illuminate when the front or
sliding doors are opened. Once the doors
are closed, these lights gradually dim to off
within 30 seconds or turn off immediately
when the key is turned to the ON position.
Battery saver
If the vehicle doors are not fully closed and
the interior lights remain illuminated, they
eventually turn off automatically to prevent
the battery from becoming discharged. If the
interior lights are left in the ON position, with
all doors closed, they will automatically turn
off after approximately 30 minutes. Lights
that illuminate when the front or sliding
doors are opened turn off after approxi-
mately 30 minutes. Lights that illuminate
when the back door is opened turn off after
approximately 60 minutes. Vanity mirror
lights are not part of the battery saver
system.
If the personal reading lights are left on after
the key is removed from the ignition, they
will automatically turn off after approxi-
mately 30 minutes.Some vehicles are equipped with an addi-
tional storage compartment in the map light
unit. This storage compartment has been
specially designed to hold some garage
door transmitters. Some transmitters may
not fit. When properly installed, the garage
door transmitter can be activated while it is
within the storage compartment.
AIC1097AIC1089
MAP LIGHTS ILLUMINATED ENTRY
SYSTEMSTORAGE COMPARTMENT
FOR GARAGE DOOR
TRANSMITTER (if so equipped)
Instruments and controls2-25
ZX
Page 137 of 286

Memory Driver Seat and Mirror
Buttons
The memory seat and mirror buttons are
located on the driver door. Pressing the
memory driver seat and mirror position 1 or
position 2 button will recall the memory set-
tings for both outside mirrors and driver seat
for that memory seat position, provided the
vehicle is in P (Park) or N (Neutral). For easy
vehicle exit, press memory driver seat and
mirror position 1 and position 2 buttons to-
gether to move the driver seat fully rearward
and fully downward. This function is preset
and cannot be changed.
Programming Memory Positions
1. Move the driver seat and outside mirrors
to the desired position using the manual
controls.
2. Push and hold the memory seat and
mirror position 1 or position 2 button for
at least 3 seconds.
cThe indicator light will illuminate and re-
main illuminated until the position is pro-
grammed.cAfter the position has been programmed
the indicator light will flash to indicate the
position is set.
The driver seat and/or outside mirrors must
be adjusted before programming position 1
or position 2.
Programming a multi-remote con-
troller
1. Move the driver seat and outside mirrors
by pressing the desired position 1 or
position 2 button.
2. Press and hold the same (position 1 or
position 2) button.
3. Within 10 seconds press the
button on
the multi-remote controller.
The controller is now programmed for that
(position 1 or position 2) button.
After the multi-remote controller has been
programmed, the memory seat and mirror
button indicator light will flash to indicate the
controller is programmed. If the memory
seat button is pressed and held the indicator
light will remain illuminated for as long as
the button is held or 10 seconds which ever
is shorter.To remove a multi-remote controller from
the memory seat system press and hold
both memory seat and mirror position but-
tons 1 and 2 and then press the
button
on the multi-remote controller.
3-22Pre-driving checks and adjustments
ZX
Page 180 of 286

cMake sure the area around the vehicle is
clear.
cMaintenance items listed here should be
checked periodically (for example, each
time you check engine oil).
cCheck that all windows and lights are
clean.
cVisually inspect tires for their appearance
and condition. Also check tires for proper
inflation.
cLock all doors.
cPosition seat and adjust head restraints.
cAdjust inside and outside mirrors.
cFasten seat belts and ask all passengers
to do likewise.
cCheck the operation of warning lights
when key is turned to the ON position.
See ``Warning/Indicator lights and chimes''
in the ``Instrument and controls'' section.
WARNING
cDo not depress the accelerator pedal
while shifting from P (Park) or N
(Neutral) to: R (Reverse), D (Drive),
2 or 1. Always depress the brake
pedal until shifting is completed.
Failure to do so could cause you to
lose control and have an accident.
cCold engine idle speed is high, so
use caution when shifting into a for-
ward or reverse gear before the en-
gine has warmed up.
cNever shift to P (Park) or R (Reverse)
while the vehicle is moving. This
could cause an accident.
CAUTION
cWhen stopping the vehicle on an
uphill grade, do not hold the vehicle
by depressing the accelerator pedal.
The foot brakes should be used for
this purpose.
cOn slippery roads, do not downshift.
This may cause a loss of control.The automatic transmission in your vehicle
is electronically controlled by a transmission
control module to produce maximum power
and smooth operation.
Shown on the following pages are the rec-
ommended operating procedures for this
transmission. Follow these procedures for
maximum vehicle performance and driving
enjoyment.
Starting the vehicle
cAfter starting the engine, fully depress the
foot brake pedal before shifting the selec-
tor lever to the R (Reverse), N (Neutral),
D (Drive), 2 or 1 position. Be sure the
vehicle is at a complete stop before at-
tempting to shift the selector lever.
This automatic transmission is designed
so the foot brake pedal MUST be de-
pressed before shifting from P (Park) to
any other position while the ignition
switch is ON.
The selector lever cannot be moved out
of P (Park) and into any of the other gear
positions if the ignition key is turned to
ACC, LOCK, or if the key is removed
from the switch.
BEFORE STARTING THE
ENGINEDRIVING WITH AN
AUTOMATIC TRANSMISSION
Starting and driving5-5
ZX