Page 64 of 220
IF THE SUNROOF DOES NOT
CLOSE
1. Turn the ignition key to the OFF position.
Be sure no objects are caught in the
sunroof opening.
2. Remove the map light unit. The shaft end
of the sunroof motor will be visible.3. Using a wide blade screwdriver, turn the
shaft clockwise to close the sunroof.
Have the sunroof system checked and re-
paired by your NISSAN dealer.
AIC1034AIC1016
Instruments and controls2-19
ZX
Page 66 of 220
Once the garage door transmitter is in-
stalled, close the storage compartment
door. Press the button on the center of the
storage compartment door to operate the
garage door transmitter.The interior light operates regardless of
ignition key position.
The interior light has a three-position switch.
cWhen the switch is in the OFF position,
the interior light does not illuminate, re-
gardless of door position.
cWhen the switch is in the centerj
position, the interior light illuminates
when a door is opened.
cWhen the switch is in the ON position,
the interior light illuminates, whether any
door is open or closed.
CAUTION
Leaving the interior light or spot light
switches in the ON position for ex-
tended periods of time will result in a
discharged battery.
AIC1006IC1235M
INTERIOR LIGHT
Instruments and controls2-21
ZX
Page 71 of 220

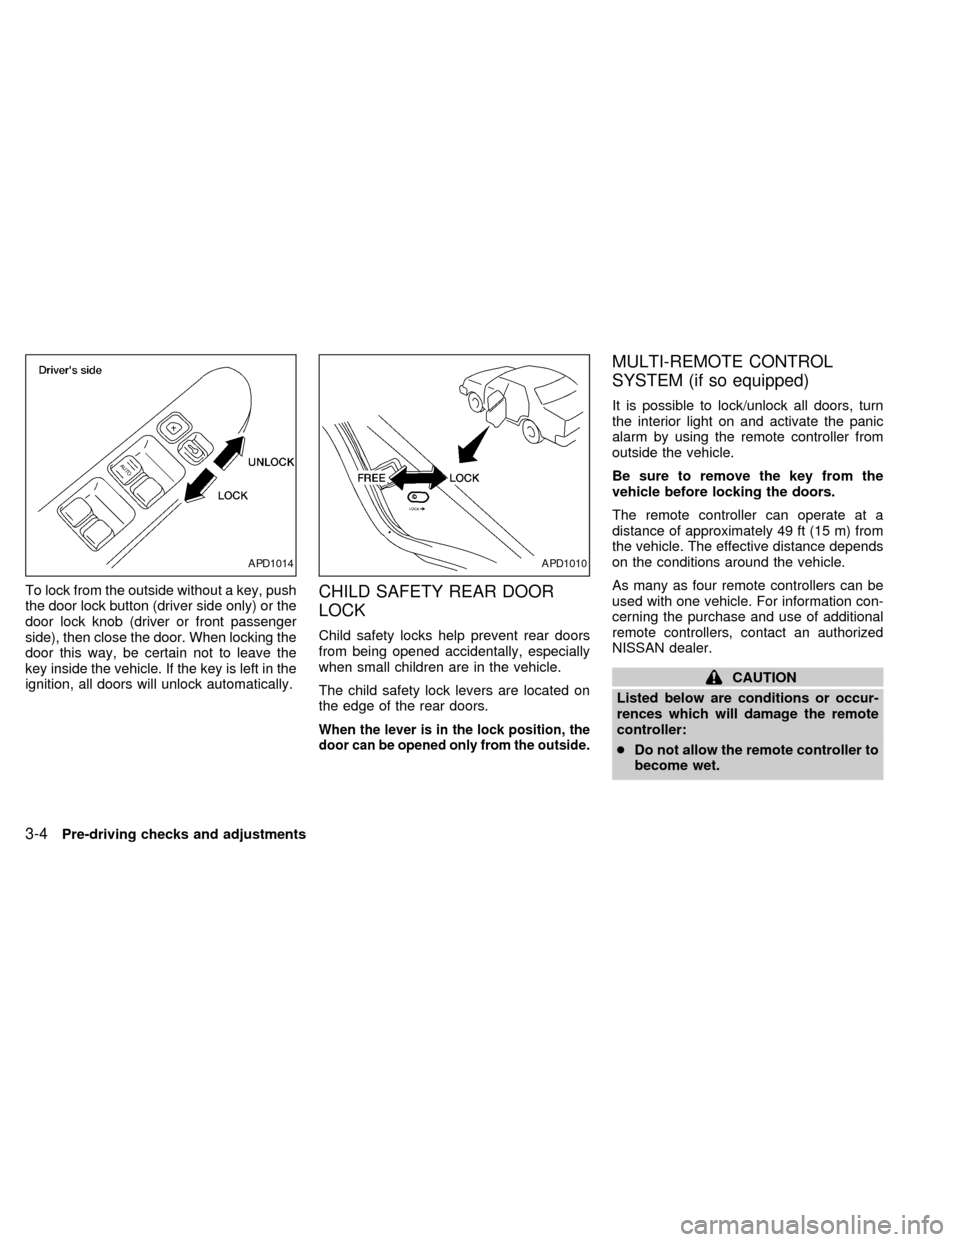
To lock from the outside without a key, push
the door lock button (driver side only) or the
door lock knob (driver or front passenger
side), then close the door. When locking the
door this way, be certain not to leave the
key inside the vehicle. If the key is left in the
ignition, all doors will unlock automatically.CHILD SAFETY REAR DOOR
LOCK
Child safety locks help prevent rear doors
from being opened accidentally, especially
when small children are in the vehicle.
The child safety lock levers are located on
the edge of the rear doors.
When the lever is in the lock position, the
door can be opened only from the outside.
MULTI-REMOTE CONTROL
SYSTEM (if so equipped)
It is possible to lock/unlock all doors, turn
the interior light on and activate the panic
alarm by using the remote controller from
outside the vehicle.
Be sure to remove the key from the
vehicle before locking the doors.
The remote controller can operate at a
distance of approximately 49 ft (15 m) from
the vehicle. The effective distance depends
on the conditions around the vehicle.
As many as four remote controllers can be
used with one vehicle. For information con-
cerning the purchase and use of additional
remote controllers, contact an authorized
NISSAN dealer.
CAUTION
Listed below are conditions or occur-
rences which will damage the remote
controller:
cDo not allow the remote controller to
become wet.
APD1014APD1010
3-4Pre-driving checks and adjustments
ZX
Page 72 of 220

cDo not drop the remote controller.
cDo not strike the remote controller
sharply against another object.
cDo not place the remote controller
for an extended period in an area
where temperatures exceed 140ÉF
(60ÉC).
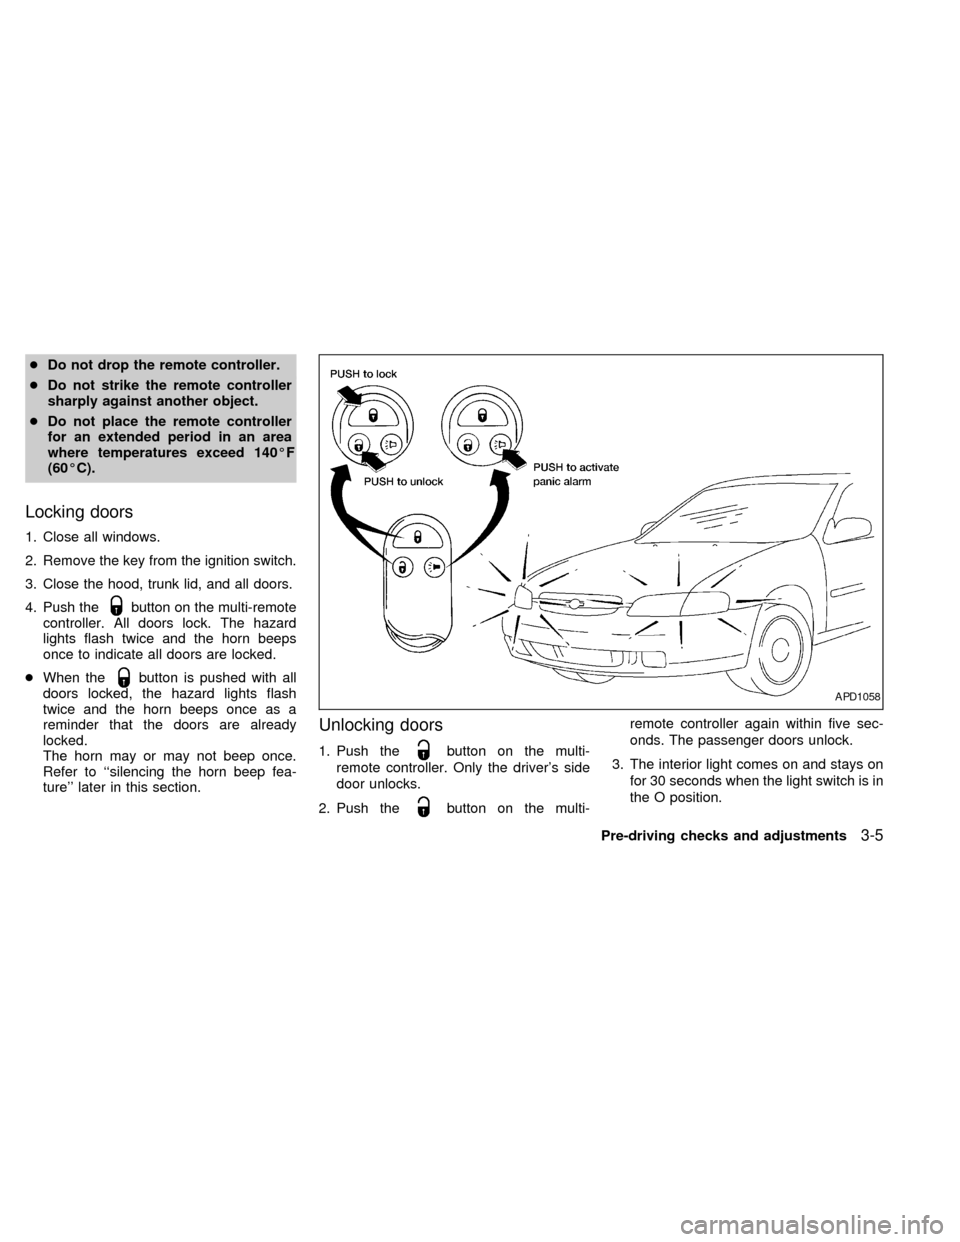
Locking doors
1. Close all windows.
2. Remove the key from the ignition switch.
3. Close the hood, trunk lid, and all doors.
4. Push the
button on the multi-remote
controller. All doors lock. The hazard
lights flash twice and the horn beeps
once to indicate all doors are locked.
cWhen the
button is pushed with all
doors locked, the hazard lights flash
twice and the horn beeps once as a
reminder that the doors are already
locked.
The horn may or may not beep once.
Refer to ``silencing the horn beep fea-
ture'' later in this section.
Unlocking doors
1. Push thebutton on the multi-
remote controller. Only the driver's side
door unlocks.
2. Push the
button on the multi-remote controller again within five sec-
onds. The passenger doors unlock.
3. The interior light comes on and stays on
for 30 seconds when the light switch is in
the O position.
APD1058
Pre-driving checks and adjustments3-5
ZX
Page 73 of 220

The interior light can be turned off without
waiting 30 seconds by inserting the key into
the ignition or locking the doors with the
multi-remote controller or pushing the
interior light button to OFF.
Using the panic alarm
If you are near your vehicle and feel threat-
ened, you may activate the alarm to call
attention as follows:
1. Push the
button on the remote con-
troller forlonger than 0.8 seconds.
2. The theft warning alarm and headlights
will stay on for 30 seconds.
3. The panic alarm stops when:
cit has run for 30 seconds, or
cthe
,or thebutton is
pressed, on the multi-remote controller.
Silencing the horn beep feature
If desired, the horn beep feature can be
deactivated using the multi-remote control-
ler. The instructions are on the back of the
multi-remote controller.
To deactivate:Press and hold the
andbuttonsfor at least two seconds.
The hazard lights will quickly flash three
times to confirm that the horn beep feature
has been deactivated.
To activate:Press and hold the
andbuttonsfor at least two seconds
once more.The hazard lights will quickly flash three
times to confirm that the horn beep feature
has been reactivated.
Deactivating the horn feature does not si-
lence the horn if the alarm is triggered.
AIC1037
3-6Pre-driving checks and adjustments
ZX
Page 80 of 220

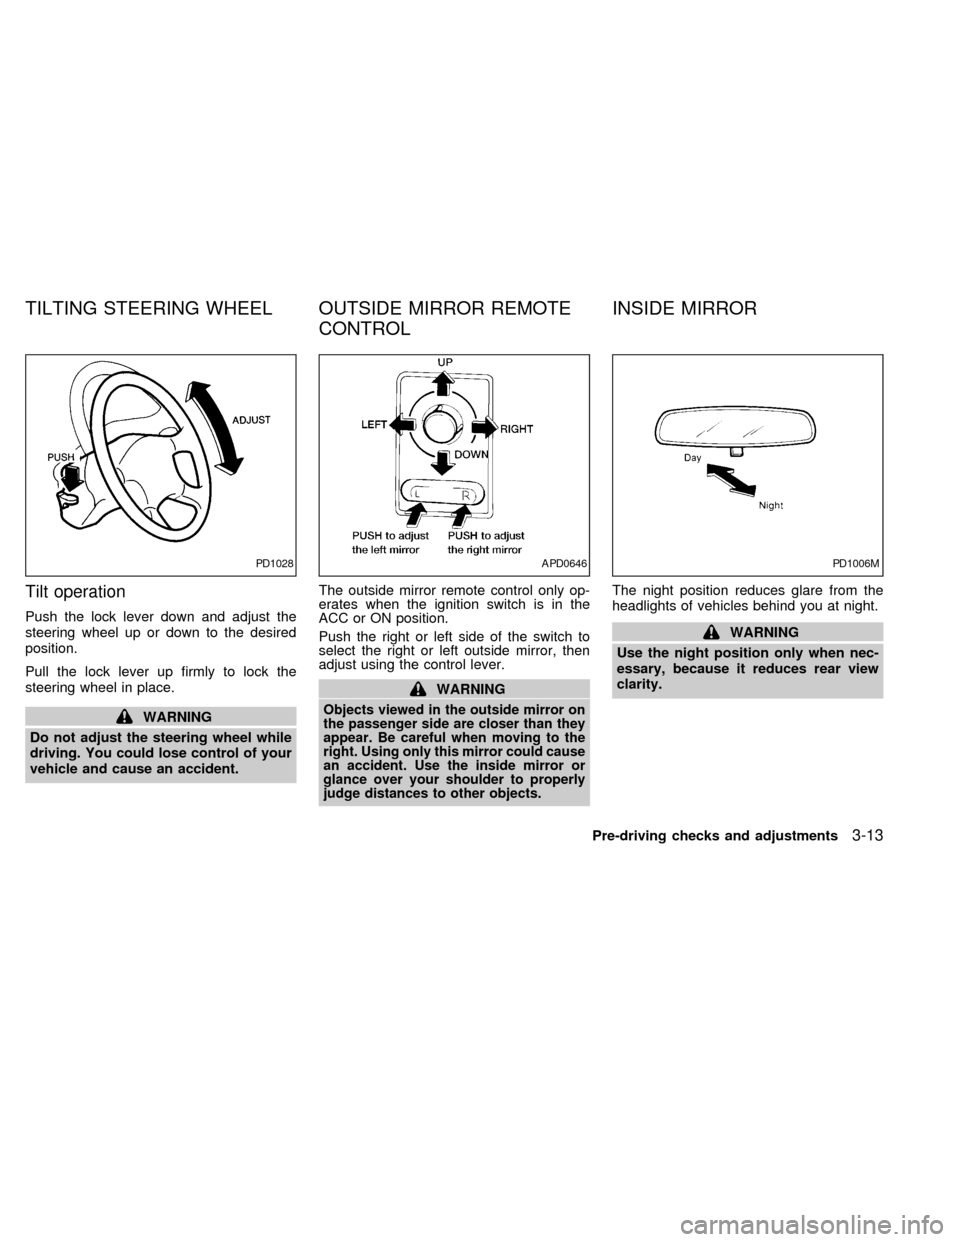
Tilt operation
Push the lock lever down and adjust the
steering wheel up or down to the desired
position.
Pull the lock lever up firmly to lock the
steering wheel in place.
WARNING
Do not adjust the steering wheel while
driving. You could lose control of your
vehicle and cause an accident.The outside mirror remote control only op-
erates when the ignition switch is in the
ACC or ON position.
Push the right or left side of the switch to
select the right or left outside mirror, then
adjust using the control lever.
WARNING
Objects viewed in the outside mirror on
the passenger side are closer than they
appear. Be careful when moving to the
right. Using only this mirror could cause
an accident. Use the inside mirror or
glance over your shoulder to properly
judge distances to other objects.
The night position reduces glare from the
headlights of vehicles behind you at night.
WARNING
Use the night position only when nec-
essary, because it reduces rear view
clarity.
PD1028APD0646PD1006M
TILTING STEERING WHEEL OUTSIDE MIRROR REMOTE
CONTROLINSIDE MIRROR
Pre-driving checks and adjustments3-13
ZX
Page 91 of 220
AM-FM RADIO WITH CASSETTE
PLAYER
RADIO OPERATION
To turn the radio on, turn the ignition key to
ACC or ON. If you listen to the radio with the
engine not running, turn the key to the ACC
position.
Radio reception is affected by station signal
strength, distance from radio transmitter,
buildings, bridges, mountains and other ex-
ternal influences. Intermittent changes in
reception quality normally are caused by
these external influences.
Using a cellular phone in or near the
vehicle may influence radio reception
quality.
ONzOFF/VOL control knob
Turn the ignition key to ACC or ON, then push
the ONzOFF/VOL control knob. The mode
(radio or cassette) which was playing imme-
diately before the system was turned off re-
sumes playing. When no cassette is loaded,
the radio comes on. Pushing the ONzOFF/-
VOL button again turns the system off.
Turn the ONzOFF/VOL control knob to ad-
just the volume.AHA1004
4-10Heater, air conditioner and audio systems
ZX
Page 94 of 220

sound level between the right and left
speakers.
After 10 seconds, the radio or cassette tape
display reappears. Once the sound quality
is set to the desired level, press the AUDIO
button repeatedly until the radio or cassette
tape display appears.
CASSETTE TAPE OPERATION
Turn the ignition key to ACC or ON, and
carefully insert a cassette tape into the tape
door. The cassette tape automatically pulls
into the player.
The word TAPE and moving digital squares
illuminate on the right side of the display
window.
If the radio is already operating, it automati-
cally turns off and the cassette tape begins
to play.
CAUTION
Do not force the cassette tape into the
tape door. This could cause player
damage.
The cassette tape automatically changes
directions to play the other side when the
first side is complete. At this time, the mov-ing digital squares illuminate on the left side
of the display window.
Precautions on cassette player op-
eration
cTo maintain good quality sound, NIS-
SAN recommends using cassette
tapes of 60 minutes or shorter in
length.
cCassette tapes should be removed
from the player when not in use. Store
cassettes in their protective cases
and away from direct sunlight, heat,
dust, moisture and magnetic sources.
cDirect sunlight can cause the cassette
to become deformed. The use of de-
formed cassettes may cause the cas-
sette to jam in the player.
cDo not use cassettes with labels
which are peeling and loose. If used,
the label could jam in the player.
cIf a cassette has loose tape, insert a
pencil through one of the cassette
hubs and rewind the tape firmly
around the hubs. Loose tape may
cause tape jamming and wavering
sound quality.cOver a period of time, the playback
head, capstan and pinch roller may
collect a tape coating residue as the
tape is played. This residue accumu-
lation can cause weak or wavering
sound, and should be removed peri-
odically with a head cleaning tape. If
the residue is not removed periodi-
cally, the player may need to be dis-
assembled for cleaning.
Fast forwarding or rewinding the
tape
Push either theorbutton for
the desired direction.
The FF or REW symbol illuminates in the
display.
To stop the FF or REW function, press the
oragain, or thebutton.
Automatic Program Search (APS)
fast forwarding or APS rewinding
the tape
Push either theorbutton
while the cassette tape is playing. The tape
runs quickly, stops, then plays the next
Heater, air conditioner and audio systems
4-13
ZX