1999 LINCOLN TOWN CAR fuel cap
[x] Cancel search: fuel capPage 7 of 208
2. Poor fuel quality or water in the fuel.
3. The fuel cap may not have been properly installed and securely
tightened.
These temporary malfunctions can be corrected by filling the fuel tank
with good quality fuel and/or properly installing and securely tightening
the gas cap. After three driving cycles without these or any other
temporary malfunctions present, theService Engine Soonlight should
turn off. (A driving cycle consists of a cold engine startup followed by
mixed city/highway driving.) No additional vehicle service is required.
If theService Engine Soonlight remains on, have your vehicle serviced
at the first available opportunity.
Light is blinking:
Engine misfire is occurring which could damage your catalytic converter.
You should drive in a moderate fashion (avoid heavy acceleration and
deceleration) and have your vehicle serviced at the first available
opportunity.
Under engine misfire conditions, excessive exhaust temperatures
could damage the catalytic converter, the fuel system, interior
floor coverings or other vehicle components, possibly causing a fire.
Air bag readiness
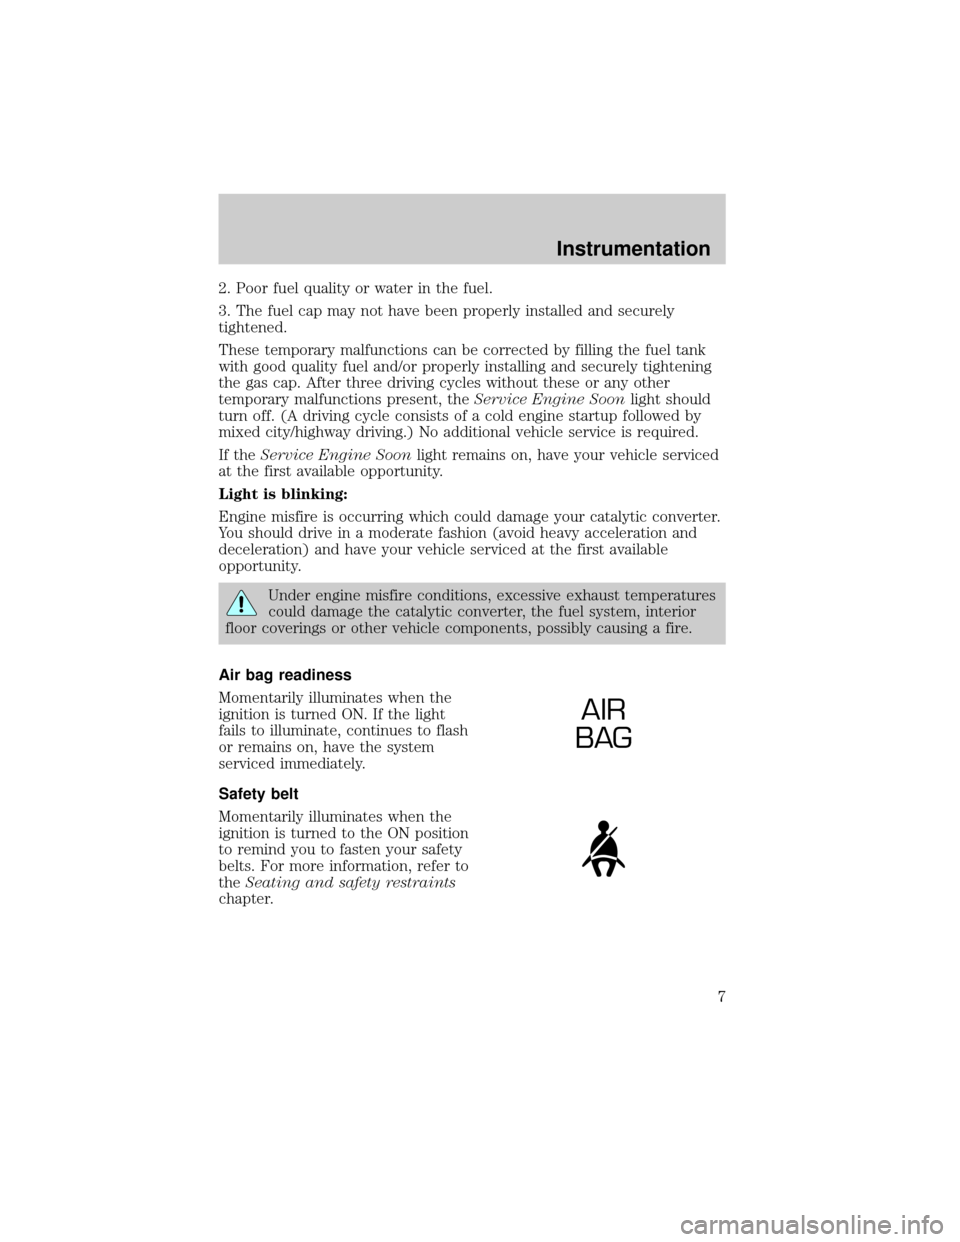
Momentarily illuminates when the
ignition is turned ON. If the light
fails to illuminate, continues to flash
or remains on, have the system
serviced immediately.
Safety belt
Momentarily illuminates when the
ignition is turned to the ON position
to remind you to fasten your safety
belts. For more information, refer to
theSeating and safety restraints
chapter.
AIR
BAG
Instrumentation
7
Page 13 of 208
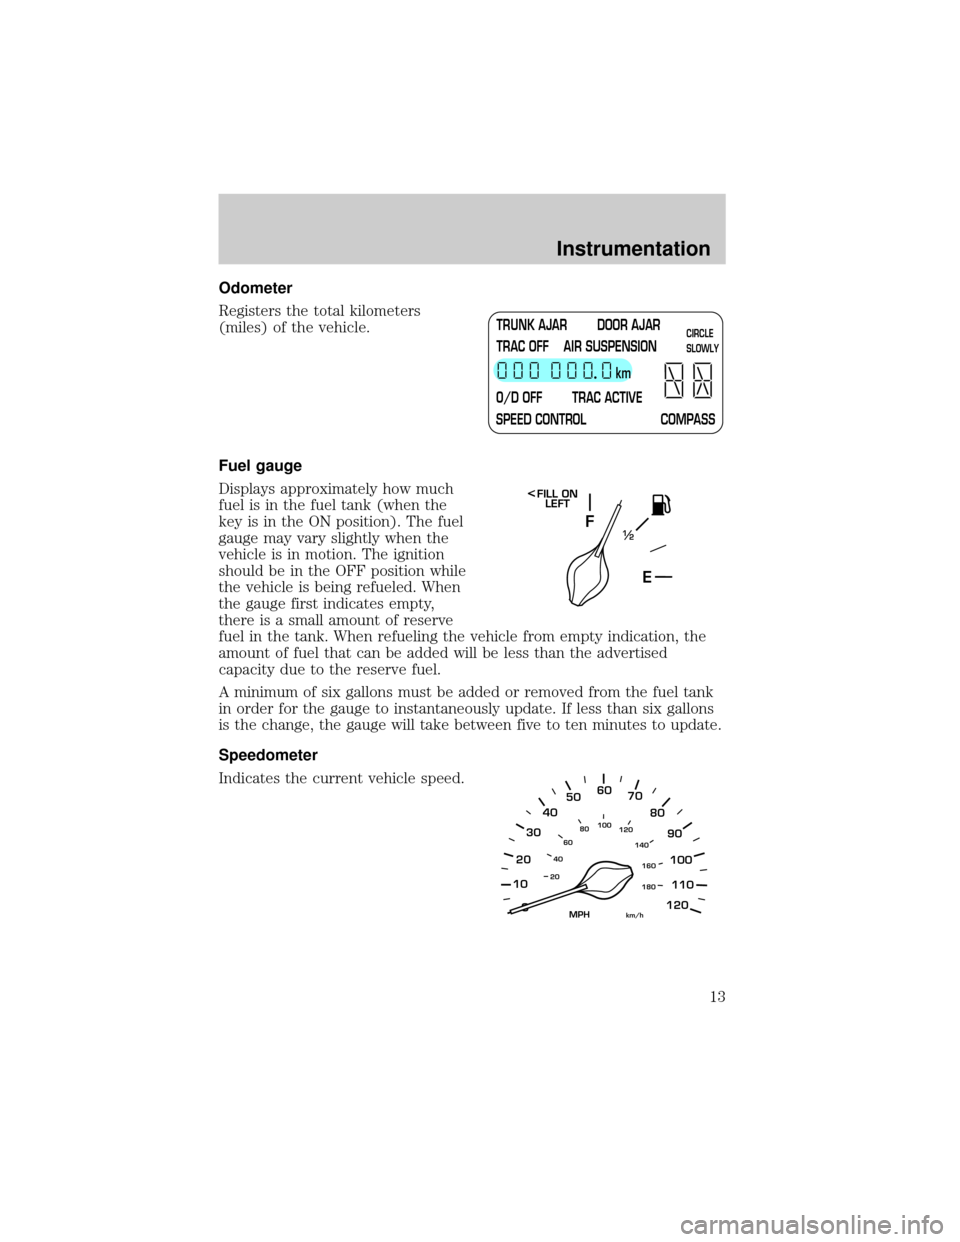
Odometer
Registers the total kilometers
(miles) of the vehicle.
Fuel gauge
Displays approximately how much
fuel is in the fuel tank (when the
key is in the ON position). The fuel
gauge may vary slightly when the
vehicle is in motion. The ignition
should be in the OFF position while
the vehicle is being refueled. When
the gauge first indicates empty,
there is a small amount of reserve
fuel in the tank. When refueling the vehicle from empty indication, the
amount of fuel that can be added will be less than the advertised
capacity due to the reserve fuel.
A minimum of six gallons must be added or removed from the fuel tank
in order for the gauge to instantaneously update. If less than six gallons
is the change, the gauge will take between five to ten minutes to update.
Speedometer
Indicates the current vehicle speed.
TRUNK AJAR DOOR AJAR
TRAC OFF AIR SUSPENSION
O/D OFF TRAC ACTIVE
SPEED CONTROL COMPASSkmCIRCLE
SLOWLY
F
E1
2
FILL ON
LEFT<
10
2030405060
70
80
90
100
120206080
40100
120
160 140
180
MPHkm/h
110
Instrumentation
13
Page 155 of 208
If your battery has a cover/shield, make sure it is reinstalled
after the battery has been cleaned or replaced.
For longer, trouble-free operation, keep the top of the battery clean and
dry. Also, make certain the battery cables are always tightly fastened to
the battery terminals.
If you see any corrosion on the battery or terminals, remove the cables
from the terminals and clean with a wire brush. You can neutralize the
acid with a solution of baking soda and water.
Batteries normally produce explosive gases which can cause
personal injury. Therefore, do not allow flames, sparks or lighted
substances to come near the battery. When working near the battery,
always shield your face and protect your eyes. Always provide proper
ventilation.
When lifting a plastic-cased battery, excessive pressure on the
end walls could cause acid to flow through the vent caps,
resulting in personal injury and/or damage to the vehicle or battery.
Lift the battery with a battery carrier or with your hands on opposite
corners.
Keep batteries out of reach of children. Batteries contain sulfuric
acid. Avoid contact with skin, eyes or clothing. Shield your eyes
when working near the battery to protect against possible splashing of
acid solution. In case of acid contact with skin or eyes, flush
immediately with water for a minimum of 15 minutes and get prompt
medical attention. If acid is swallowed, call a physician immediately.
Because your vehicle's engine is electronically controlled by a computer,
some control conditions are maintained by power from the battery. When
the battery is disconnected or a new battery is installed, the engine must
relearn its idle and fuel trim strategy for optimum driveability and
performance. To begin this process:
1. Set your parking brake.
2. Put the gearshift in P (Park), turn off all accessories and start the
engine.
3. Let the engine idle for at least one minute.
Maintenance and care
155
Page 161 of 208
wheels (of the same size and specifications) be used as chains may chip
aluminum wheels.
Follow these guidelines when using snow tires and chains:
²Use only SAE Class S chains.
²Install chains securely, verifying that the chains do not touch any
wiring, brake lines or fuel lines.
²Drive cautiously. If you hear the chains rub or bang against your
vehicle, stop and re-tighten the chains. If this does not work, remove
the chains to prevent damage to your vehicle.
²If possible, avoid fully loading your vehicle.
²Remove the tire chains when they are no longer needed. Do not use
tire chains on dry roads.
²The suspension insulation and bumpers will help prevent vehicle
damage. Do not remove these components from your vehicle when
using snow tires and chains.
WHAT YOU SHOULD KNOW ABOUT AUTOMOTIVE FUELS
Important safety precautions
Do not overfill the fuel tank. The pressure in an overfilled tank
may cause leakage and lead to fuel spray and fire.
The fuel system may be under pressure. If the fuel filler cap is
venting vapor or if you hear a hissing sound, wait until it stops
before completely removing the fuel filler cap. Otherwise, fuel may
spray out and injure you or others.
If you do not use the proper fuel filler cap, excessive pressure or
vacuum in the fuel tank may damage the fuel system or cause
the fuel system to work improperly in a collision, which may result in
possible personal injury.
Automotive fuels can cause serious injury or death if misused or
mishandled.
Maintenance and care
161
Page 163 of 208
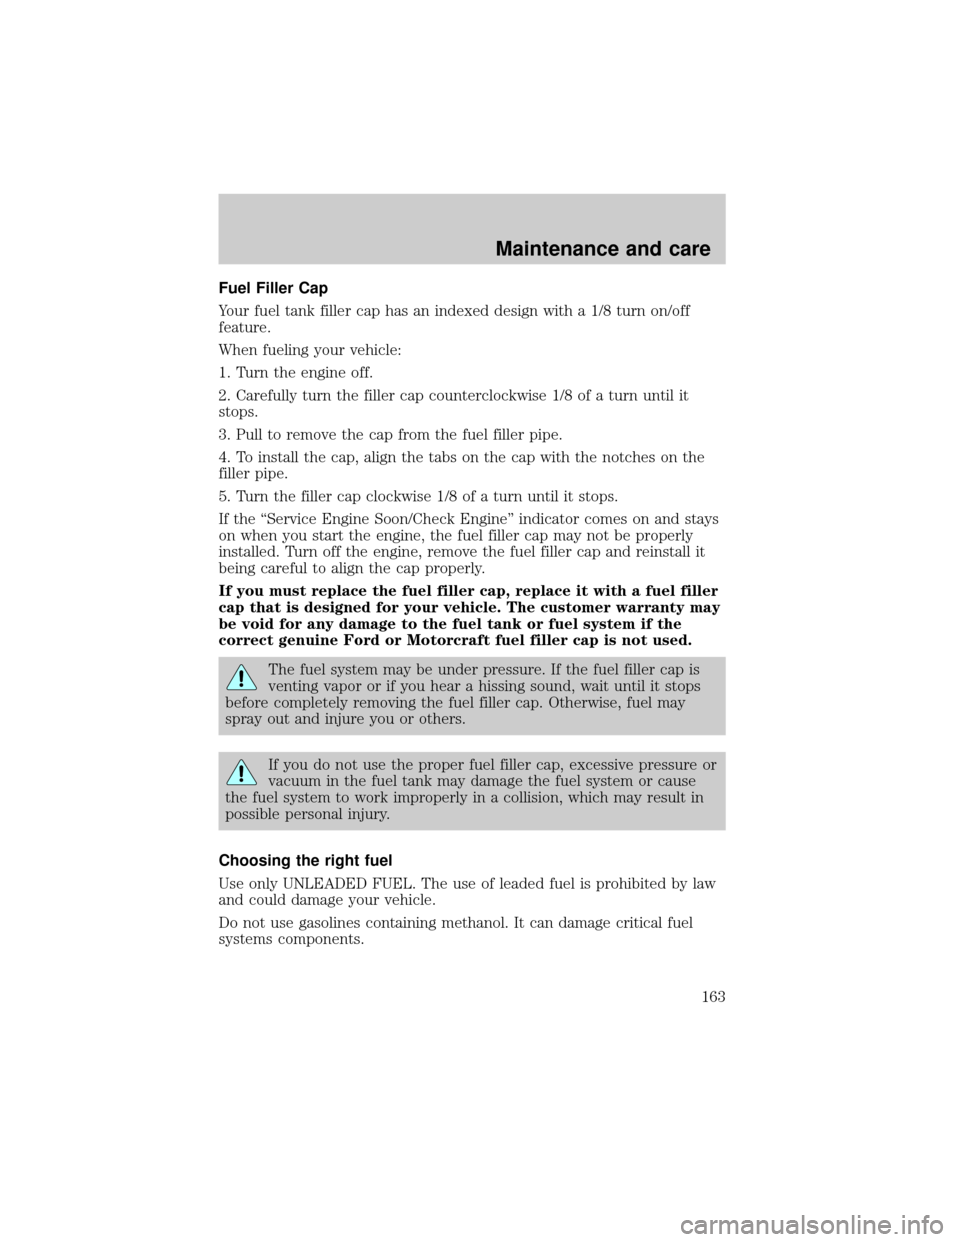
Fuel Filler Cap
Your fuel tank filler cap has an indexed design with a 1/8 turn on/off
feature.
When fueling your vehicle:
1. Turn the engine off.
2. Carefully turn the filler cap counterclockwise 1/8 of a turn until it
stops.
3. Pull to remove the cap from the fuel filler pipe.
4. To install the cap, align the tabs on the cap with the notches on the
filler pipe.
5. Turn the filler cap clockwise 1/8 of a turn until it stops.
If the ªService Engine Soon/Check Engineº indicator comes on and stays
on when you start the engine, the fuel filler cap may not be properly
installed. Turn off the engine, remove the fuel filler cap and reinstall it
being careful to align the cap properly.
If you must replace the fuel filler cap, replace it with a fuel filler
cap that is designed for your vehicle. The customer warranty may
be void for any damage to the fuel tank or fuel system if the
correct genuine Ford or Motorcraft fuel filler cap is not used.
The fuel system may be under pressure. If the fuel filler cap is
venting vapor or if you hear a hissing sound, wait until it stops
before completely removing the fuel filler cap. Otherwise, fuel may
spray out and injure you or others.
If you do not use the proper fuel filler cap, excessive pressure or
vacuum in the fuel tank may damage the fuel system or cause
the fuel system to work improperly in a collision, which may result in
possible personal injury.
Choosing the right fuel
Use only UNLEADED FUEL. The use of leaded fuel is prohibited by law
and could damage your vehicle.
Do not use gasolines containing methanol. It can damage critical fuel
systems components.
Maintenance and care
163
Page 166 of 208
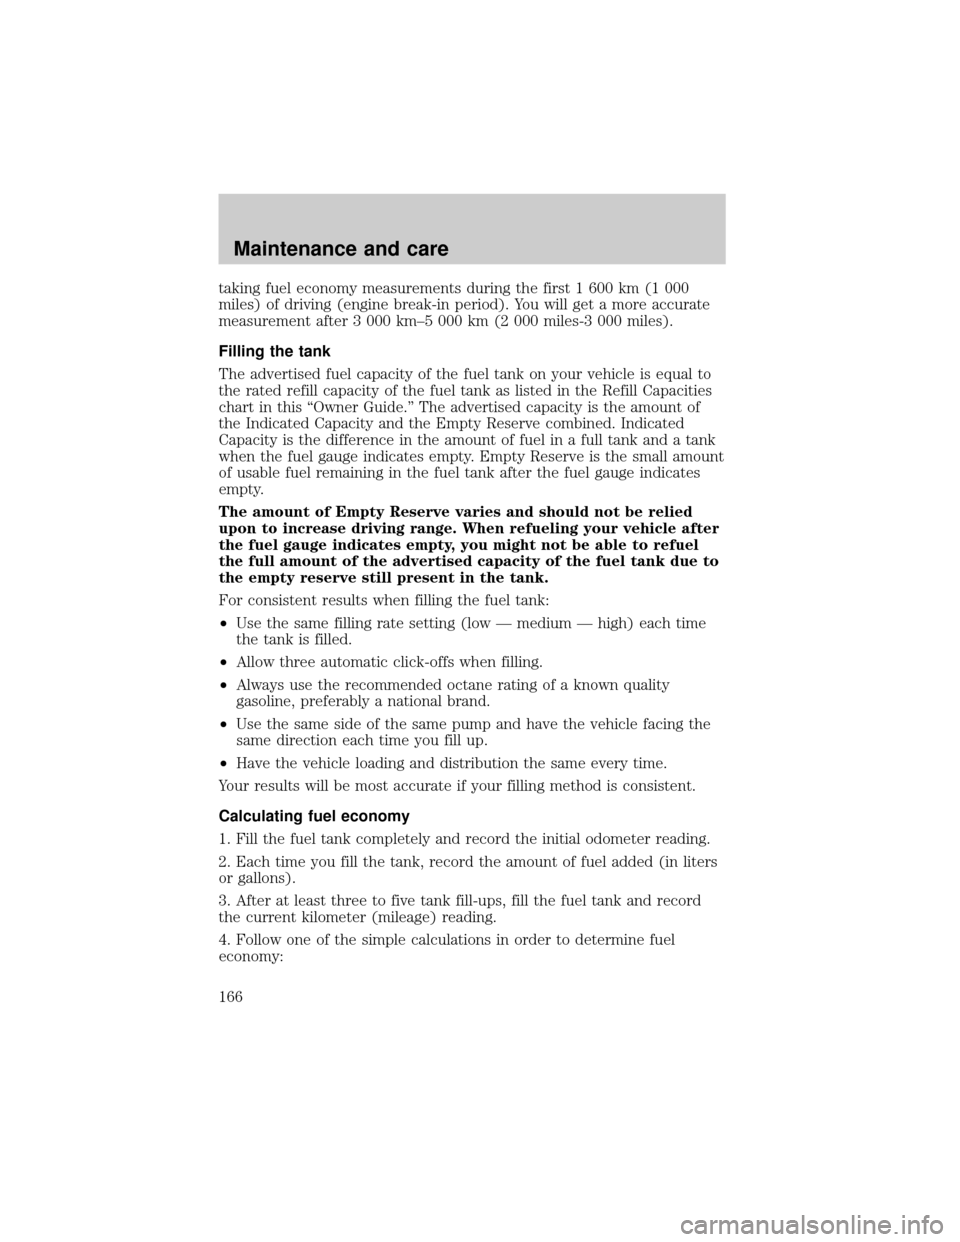
taking fuel economy measurements during the first 1 600 km (1 000
miles) of driving (engine break-in period). You will get a more accurate
measurement after 3 000 km±5 000 km (2 000 miles-3 000 miles).
Filling the tank
The advertised fuel capacity of the fuel tank on your vehicle is equal to
the rated refill capacity of the fuel tank as listed in the Refill Capacities
chart in this ªOwner Guide.º The advertised capacity is the amount of
the Indicated Capacity and the Empty Reserve combined. Indicated
Capacity is the difference in the amount of fuel in a full tank and a tank
when the fuel gauge indicates empty. Empty Reserve is the small amount
of usable fuel remaining in the fuel tank after the fuel gauge indicates
empty.
The amount of Empty Reserve varies and should not be relied
upon to increase driving range. When refueling your vehicle after
the fuel gauge indicates empty, you might not be able to refuel
the full amount of the advertised capacity of the fuel tank due to
the empty reserve still present in the tank.
For consistent results when filling the fuel tank:
²Use the same filling rate setting (low Ð medium Ð high) each time
the tank is filled.
²Allow three automatic click-offs when filling.
²Always use the recommended octane rating of a known quality
gasoline, preferably a national brand.
²Use the same side of the same pump and have the vehicle facing the
same direction each time you fill up.
²Have the vehicle loading and distribution the same every time.
Your results will be most accurate if your filling method is consistent.
Calculating fuel economy
1. Fill the fuel tank completely and record the initial odometer reading.
2. Each time you fill the tank, record the amount of fuel added (in liters
or gallons).
3. After at least three to five tank fill-ups, fill the fuel tank and record
the current kilometer (mileage) reading.
4. Follow one of the simple calculations in order to determine fuel
economy:
Maintenance and care
166
Page 181 of 208
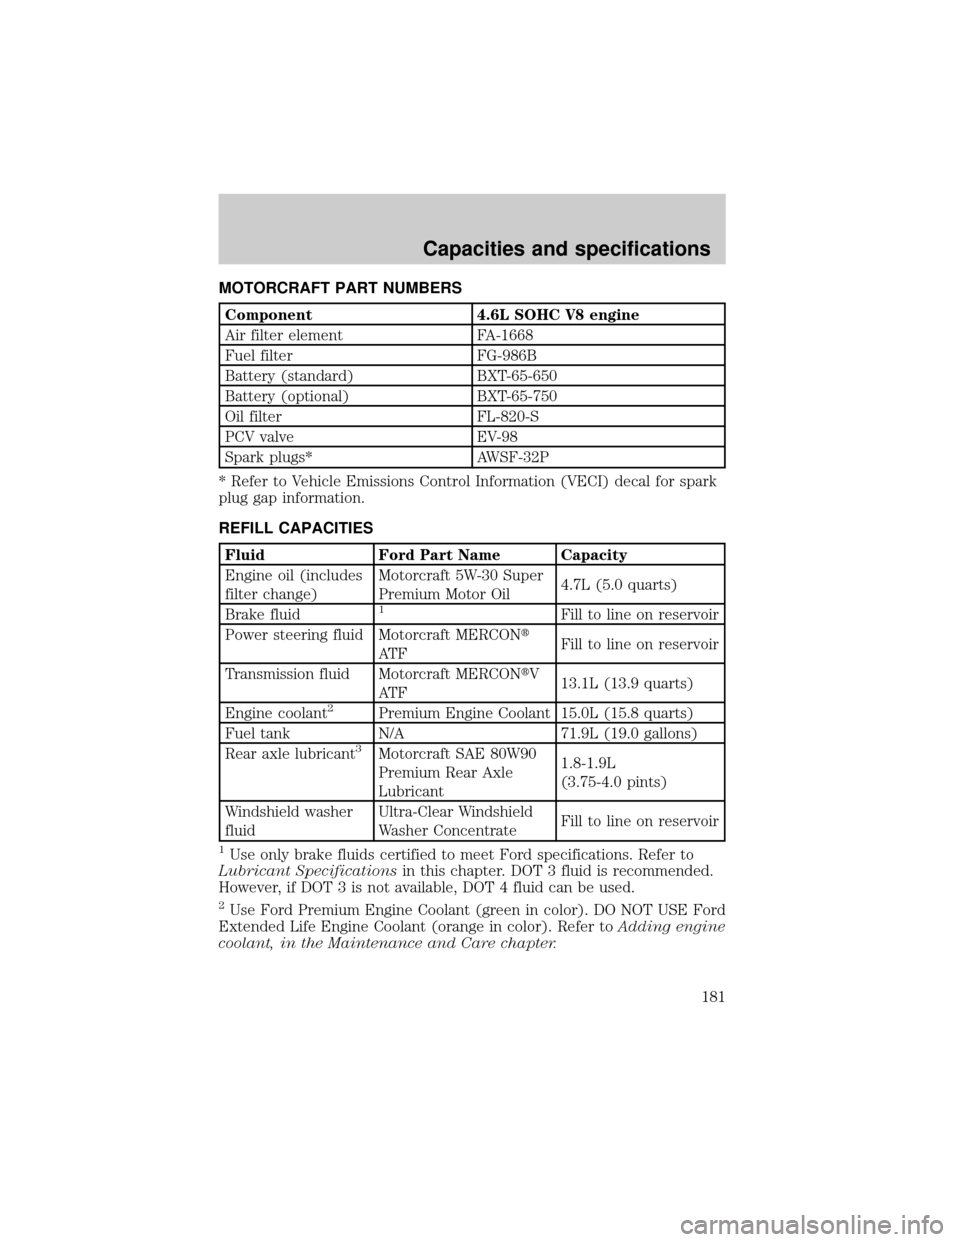
MOTORCRAFT PART NUMBERS
Component 4.6L SOHC V8 engine
Air filter element FA-1668
Fuel filter FG-986B
Battery (standard) BXT-65-650
Battery (optional) BXT-65-750
Oil filter FL-820-S
PCV valve EV-98
Spark plugs* AWSF-32P
* Refer to Vehicle Emissions Control Information (VECI) decal for spark
plug gap information.
REFILL CAPACITIES
Fluid Ford Part Name Capacity
Engine oil (includes
filter change)Motorcraft 5W-30 Super
Premium Motor Oil4.7L (5.0 quarts)
Brake fluid
1Fill to line on reservoir
Power steering fluid Motorcraft MERCONt
AT FFill to line on reservoir
Transmission fluid Motorcraft MERCONtV
AT F13.1L (13.9 quarts)
Engine coolant
2Premium Engine Coolant 15.0L (15.8 quarts)
Fuel tank N/A 71.9L (19.0 gallons)
Rear axle lubricant
3Motorcraft SAE 80W90
Premium Rear Axle
Lubricant1.8-1.9L
(3.75-4.0 pints)
Windshield washer
fluidUltra-Clear Windshield
Washer ConcentrateFill to line on reservoir
1Use only brake fluids certified to meet Ford specifications. Refer to
Lubricant Specificationsin this chapter. DOT 3 fluid is recommended.
However, if DOT 3 is not available, DOT 4 fluid can be used.
2Use Ford Premium Engine Coolant (green in color). DO NOT USE Ford
Extended Life Engine Coolant (orange in color). Refer toAdding engine
coolant, in the Maintenance and Care chapter.
Capacities and specifications
181
Page 183 of 208
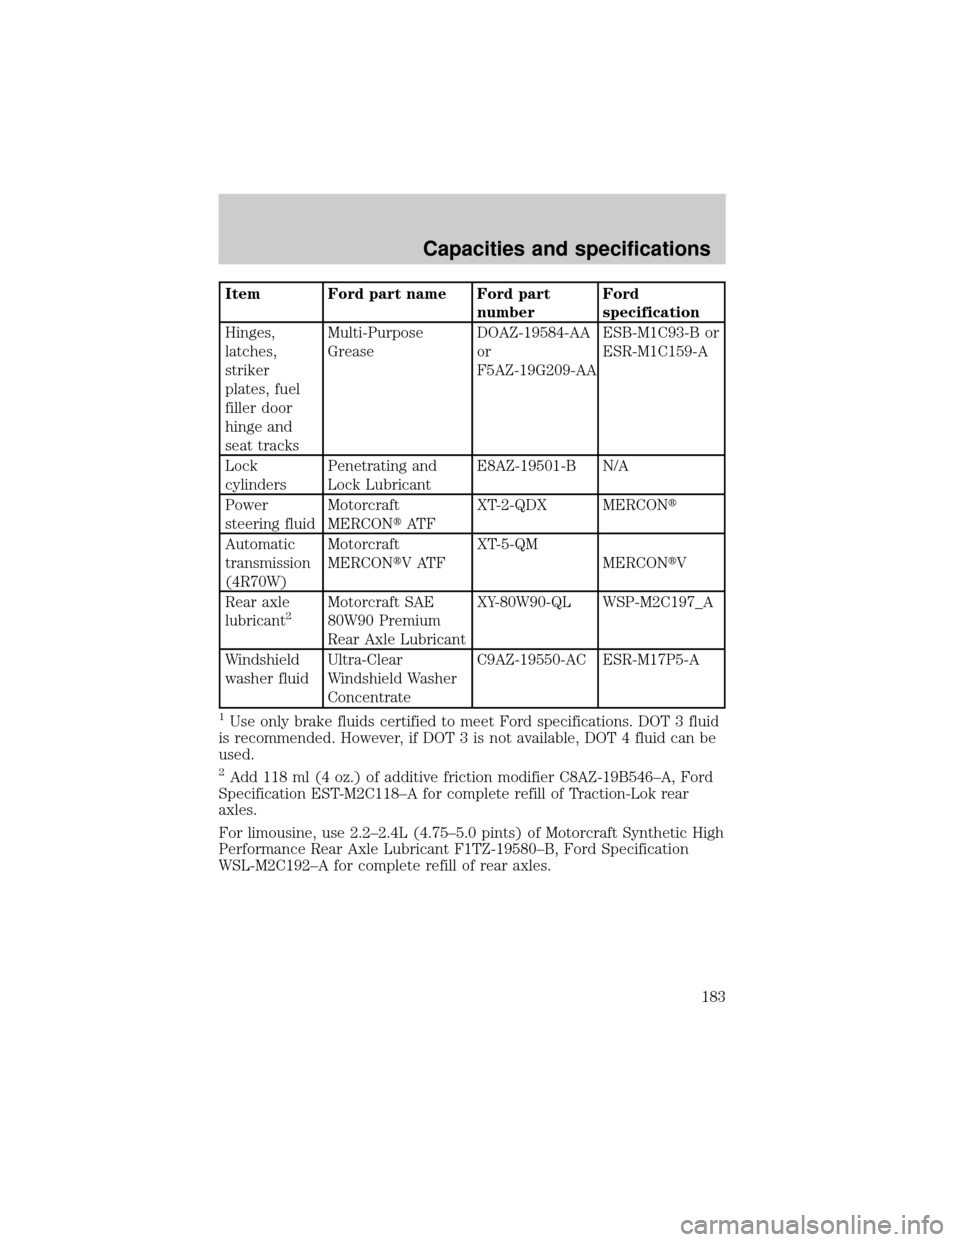
Item Ford part name Ford part
numberFord
specification
Hinges,
latches,
striker
plates, fuel
filler door
hinge and
seat tracksMulti-Purpose
GreaseDOAZ-19584-AA
or
F5AZ-19G209-AAESB-M1C93-B or
ESR-M1C159-A
Lock
cylindersPenetrating and
Lock LubricantE8AZ-19501-B N/A
Power
steering fluidMotorcraft
MERCONtAT FXT-2-QDX MERCONt
Automatic
transmission
(4R70W)Motorcraft
MERCONtVATFXT-5-QM
MERCONtV
Rear axle
lubricant
2Motorcraft SAE
80W90 Premium
Rear Axle LubricantXY-80W90-QL WSP-M2C197_A
Windshield
washer fluidUltra-Clear
Windshield Washer
ConcentrateC9AZ-19550-AC ESR-M17P5-A
1Use only brake fluids certified to meet Ford specifications. DOT 3 fluid
is recommended. However, if DOT 3 is not available, DOT 4 fluid can be
used.
2Add 118 ml (4 oz.) of additive friction modifier C8AZ-19B546±A, Ford
Specification EST-M2C118±A for complete refill of Traction-Lok rear
axles.
For limousine, use 2.2±2.4L (4.75±5.0 pints) of Motorcraft Synthetic High
Performance Rear Axle Lubricant F1TZ-19580±B, Ford Specification
WSL-M2C192±A for complete refill of rear axles.
Capacities and specifications
183