Page 139 of 208
Fuse/Relay
LocationFuse Amp
RatingDescription
12 10A Lighting Control Module
13 15A Lighting Control Module (LCM): RF Turn
Lamp, Right Turn Indicator (VIC), RR Side
Marker Lamps, Tail Lamps, License Lamps,
LR Stop/Turn Lamps, Clock Illumination
14 20A Cigar Lighter
15 10A ABS Evac and Fill Connector
16 30A Moonroof Switch
17 Ð Not Used
18 10A Lighting Control Module
19 10A Lighting Control Module (LCM): Left
Headlamp, DRL
20 15A Multi-Function Switch: Flash to Pass, and
Hazard Warning Input to LCM
21 Ð Not Used
22 ÐÐ Not Used
23 10A Digital Transmission Range Sensor
24 10A Virtual Image Cluster-LF Turn Indicator, LF
Turn Signal
25 10A Lighting Control Module (LCM): Right
Headlamp
26 10A Virtual Image Instrument Cluster, EATC
Module
27 Ð Not Used
28 10A Shift Lock Actuator, Vehicle Dynamic Module,
Virtual Image Instrument Cluster, Rear
Window Defrost, Heated Seat Switch
Assembly, Low Tire Pressure Module, RESCU
29 10A Radio
30 10A Heated Mirrors
Roadside emergencies
139
Page 140 of 208

Fuse/Relay
LocationFuse Amp
RatingDescription
31 15A Lighting Control Module (LCM): FCU,
Electronic Day/Night Mirror, RH and LH
Courtesy Lamp, Door Courtesy Lamps, RH
and LH Map Lamps, RR and LR Reading
Lamps, RH and LH Visor Lamps, Storage Bin
Lamps, Trunk Lid Lamp, Glove Box Lamp,
Light Sensor Amplifier
32 15A Speed Control DEAC. Switch, Brake On/Off
(BOO) Switch
33 Ð Not Used
34 15A Console Shift Illumination, A/C Clutch
Cycling Pressure Switch, A/C Clutch Relay
(DTR) Sensor, Intake Manifold Runner
Control, Backup Lamps
35 Ð Not Used
36 Ð Not Used
37 30A Subwoofer Amplifier, Radio
38 10A Analog Clock, CD Player, Mobile Telephone
Transceiver, RESCU
39 10A Power Door Locks, Power Seats, Power
Mirrors, Keyless Entry, LF Seat Module, LF
Door Module
40 10A Cornering Lamps
41 20A Door Locks
Power distribution box
The power distribution box is located in the engine compartment. The
power distribution box contains high-current fuses that protect your
vehicle's main electrical systems from overloads.
Always disconnect the battery before servicing high current
fuses.
Roadside emergencies
140
Page 141 of 208
Always replace the cover to the Power Distribution Box before
reconnecting the battery or refilling fluid reservoirs.
The high-current fuses are coded as follows:
Fuse/Relay
LocationFuse Amp
RatingDescription
Ð 175 Generator/Voltage Regulator
1 30A** Driver's Seat Module
2 30A** Passenger's Seat Module
3 40A** Ignition Switch
4 40A** Ignition Switch
5 40A** Driver Window
6 30A** Low Speed Cooling Fan
7 30A** Powertrain Control Module
8 40A** Rear Window Defrost Control
9 60A** I/P Fuse Panel
10 60A** Lighting Control Module
11 60A** Compressor Relay
12 60A** Anti-Lock Brake Control Module
13 40A** Blower Motor
14 60A** High Speed Cooling Fan
MEGA
175A
PCM
PWR
RELAY
12 3 4
8
7
6 5
12
4 3
5
7
9
1110
12
14 136
8NOT USED
7BLOWER
MOTOR
RELAY6A/C
CLUTCH
RELAY4NOT
USED2
HORN
RELAY3HIGH
BEAM1STARTER
SOL
RELAY5
12
Roadside emergencies
141
Page 147 of 208
Connecting the jumper cables
1. Connect the positive (+) booster cable to the positive (+) terminal of
the discharged battery.
Note:In the illustrations,lightning boltsare used to designate the
assisting (boosting) battery.
2. Connect the other end of the positive (+) cable to the positive (+)
terminal of the assisting battery.
+–+–
+–+–
Roadside emergencies
147
Page 152 of 208

SERVICE RECOMMENDATIONS
To help you service your vehicle:
²We highlight do-it-yourself items in the engine compartment for easy
location.
²We provide a Scheduled Maintenance Guide which makes tracking
routine service easy.
If your vehicle requires professional service, your dealership can provide
necessary parts and service. Check your ªWarranty Guideº to find out
which parts and services are covered.
Use only recommended fuels, lubricants, fluids and service parts
conforming to specifications. Motorcraft parts are designed and built to
provide the best performance in your vehicle.
PRECAUTIONS WHEN SERVICING YOUR VEHICLE
Be especially careful when inspecting or servicing your vehicle.
²Do not work on a hot engine.
²When the engine is running, keep loose clothing, jewelry or long hair
away from moving parts.
²Do not work on a vehicle with the engine running in an enclosed
space, unless you are sure you have enough ventilation.
²Keep all lit cigarettes, open flames and other lit material away from
the battery and all fuel related parts.
If you disconnect the battery, the engine must ªrelearnº its idle
conditions before your vehicle will drive properly, as explained in
theBatterysection in this chapter.
Working with the engine off
1. Set the parking brake, and ensure the gearshift is securely latched in
park.
2. Turn off the engine and remove the key.
3. Block the wheels to prevent the vehicle from moving unexpectedly.
Working with the engine on
1. Set the parking brake and ensure the gearshift is securely latched in P
(Park).
2. Block the wheels to prevent the vehicle from moving unexpectedly.
Maintenance and care
152
Page 158 of 208
WINDSHIELD WASHER FLUID
Checking and adding washer fluid
Check the washer fluid whenever
you stop for fuel. The reservoir is
highlighted with a
symbol.
If the level is low, add enough fluid
to fill the reservoir. In very cold
weather, do not fill the reservoir all
the way.
Do not put engine coolant in the container for the windshield
washer fluid.
ENGINE COOLANT
Check the level of the engine
coolant in the reservoir. Refer to the
Scheduled Maintenance Guide for
service interval schedules. Be sure
to read and understandPrecautions
when servicing your vehiclein
this chapter.
COLD FILL
LEVEL
Maintenance and care
158
Page 165 of 208

Batteries normally produce explosive gases which can cause
personal injury. Therefore, do not allow flames, sparks or lighted
substances to come near the battery. When working near the battery,
always shield your face and protect your eyes. Always provide proper
ventilation.
When lifting a plastic-cased battery, excessive pressure on the
end walls could cause acid to flow through the vent caps,
resulting in personal injury and/or damage to the vehicle or battery.
Lift the battery with a battery carrier or with your hands on opposite
corners.
Keep batteries out of reach of children. Batteries contain sulfuric
acid. Avoid contact with skin, eyes or clothing. Shield your eyes
when working near the battery to protect against possible splashing of
acid solution. In case of acid contact with skin or eyes, flush
immediately with water for a minimum of 15 minutes and get prompt
medical attention. If acid is swallowed, call a physician immediately.
Because your vehicle's engine is electronically controlled by a computer,
some control conditions are maintained by power from the battery. When
the battery is disconnected or a new battery is installed, the engine must
relearn its idle and fuel trim strategy for optimum driveability and
performance. To begin this process:
1. Set your parking brake.
2. Put the gearshift in P (Park), turn off all accessories and start the
engine.
3. Let the engine idle for at least one minute.
4. The relearning process will automatically complete as you drive the
vehicle.
²The vehicle may need to be driven 16 km (10 miles) or more to
relearn the idle and fuel trim strategy.
²If you do not allow the engine to relearn its idle trim, the idle quality
of your vehicle may be adversely affected until the idle trim is
eventually relearned.
Maintenance and care
165
Page 169 of 208

At zero pressure, the SecuriTires will provide you with a minimum
driving capability of approximately 30 km (20 miles). How you drive and
the actual amount of air pressure left in your tires will determine exactly
how many miles can be driven.
To extend the mileage and help prevent damage to low or deflated tires:
²do not exceed 90 km/h (55 mph). Drive at a reduced rate of speed, if
possible.
²avoid excessive hard steering and braking maneuvers, if possible.
²stop periodically to allow the tires to cool down.
Pressure alert system
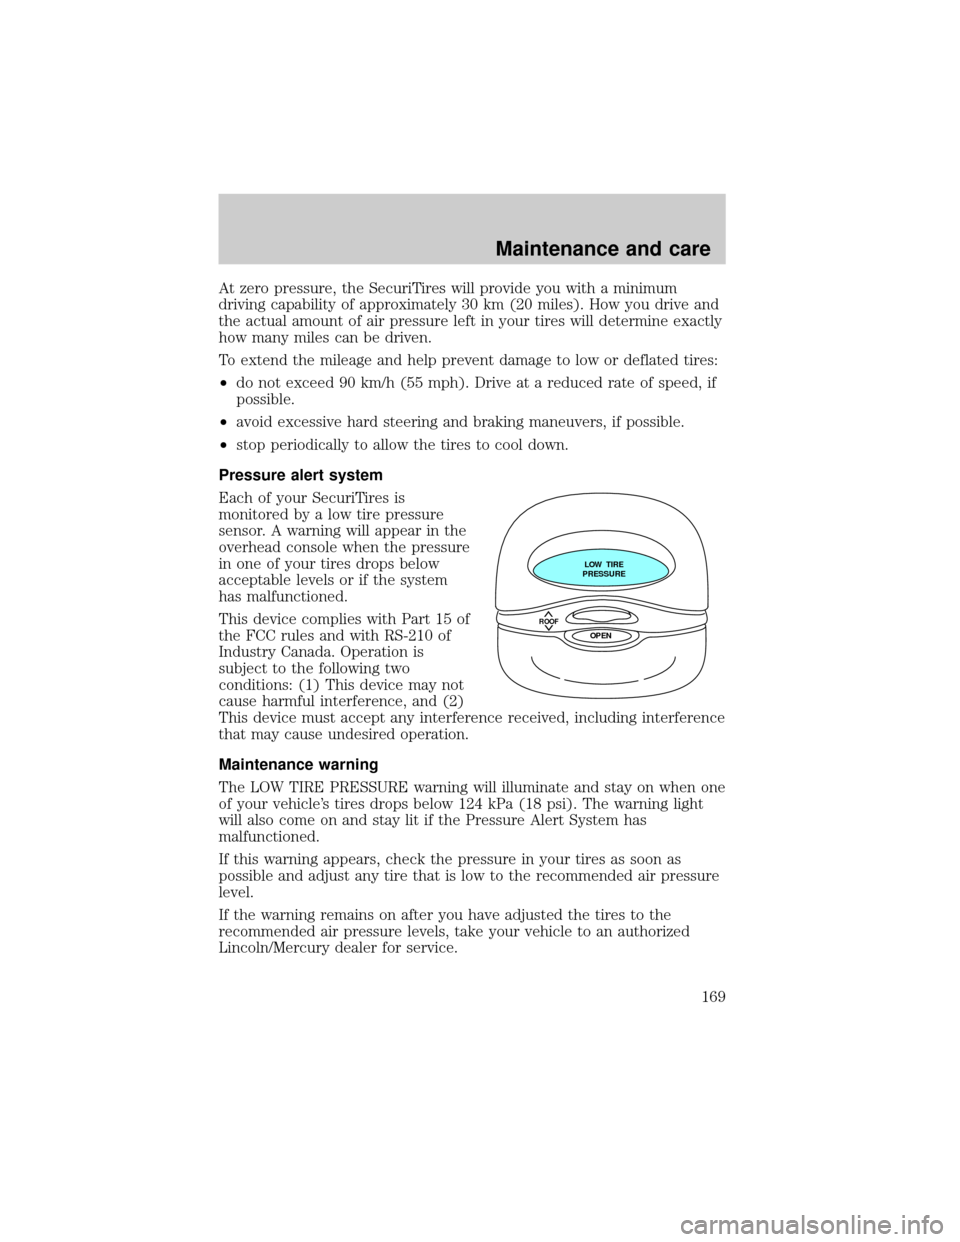
Each of your SecuriTires is
monitored by a low tire pressure
sensor. A warning will appear in the
overhead console when the pressure
in one of your tires drops below
acceptable levels or if the system
has malfunctioned.
This device complies with Part 15 of
the FCC rules and with RS-210 of
Industry Canada. Operation is
subject to the following two
conditions: (1) This device may not
cause harmful interference, and (2)
This device must accept any interference received, including interference
that may cause undesired operation.
Maintenance warning
The LOW TIRE PRESSURE warning will illuminate and stay on when one
of your vehicle's tires drops below 124 kPa (18 psi). The warning light
will also come on and stay lit if the Pressure Alert System has
malfunctioned.
If this warning appears, check the pressure in your tires as soon as
possible and adjust any tire that is low to the recommended air pressure
level.
If the warning remains on after you have adjusted the tires to the
recommended air pressure levels, take your vehicle to an authorized
Lincoln/Mercury dealer for service.
ROOF
LOW TIRE
PRESSURE
OPEN
Maintenance and care
169