Page 52 of 208

²Accelerate with your accelerator pedal, then press and release SET
ACC/SET ACCEL.
When the SET ACCEL control is pressed and released, the message
ªSPEED CONTROL SETº will appear for 5 seconds in your message
center.
You can accelerate with the accelerator pedal at any time during speed
control usage. Releasing the accelerator pedal will return your vehicle to
the previously programmed set speed.
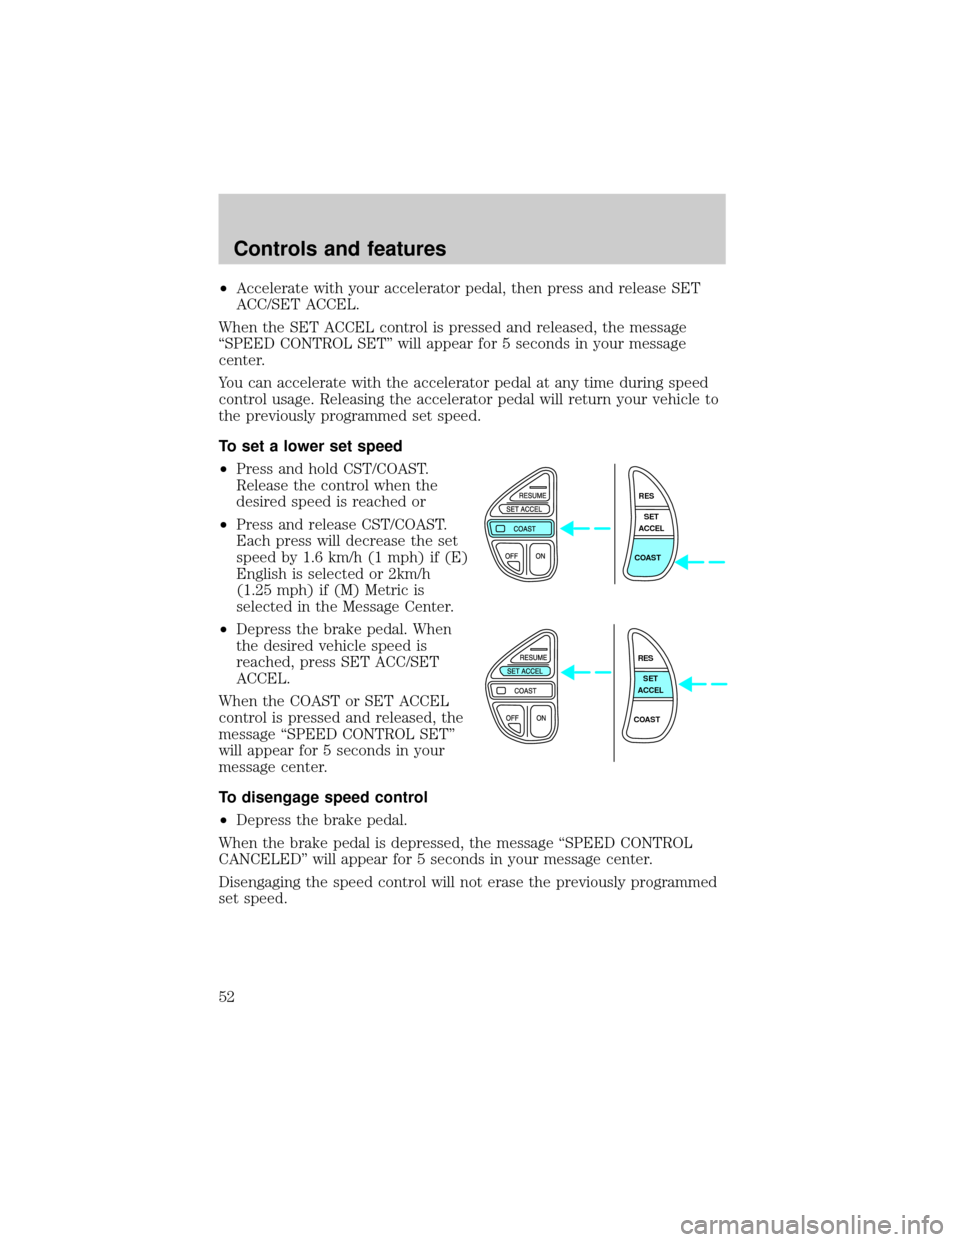
To set a lower set speed
²Press and hold CST/COAST.
Release the control when the
desired speed is reached or
²Press and release CST/COAST.
Each press will decrease the set
speed by 1.6 km/h (1 mph) if (E)
English is selected or 2km/h
(1.25 mph) if (M) Metric is
selected in the Message Center.
²Depress the brake pedal. When
the desired vehicle speed is
reached, press SET ACC/SET
ACCEL.
When the COAST or SET ACCEL
control is pressed and released, the
message ªSPEED CONTROL SETº
will appear for 5 seconds in your
message center.
To disengage speed control
²Depress the brake pedal.
When the brake pedal is depressed, the message ªSPEED CONTROL
CANCELEDº will appear for 5 seconds in your message center.
Disengaging the speed control will not erase the previously programmed
set speed.
RES
SET
ACCEL
COAST
RES
SET
ACCEL
COAST
Controls and features
52
Page 79 of 208
Mini console (if equipped)
The mini console is available in the six passenger vehicle only, and
consists of the:
²cupholder
²compact disc changer
(if equipped)
²ashtray and lighter
Use only soft cups in the cupholder. Hard objects can injure you
in a collision.
POSITIVE RETENTION FLOOR MAT
Position the floor mat so that the
eyelet is over the pointed end of the
retention post and rotate forward to
lock in. Make sure that the mat does
not interfere with the operation of
the accelerator or the brake pedal.
To remove the floor mat, reverse the
installation procedure.
PERIMETER ALARM SYSTEM (IF EQUIPPED)
The perimeter anti-theft system will help prevent your vehicle from
unauthorized entry.
Arming the system
When armed, this system will help protect your vehicle from
unauthorized entry. When unauthorized entry occurs, the system will
flash the headlamps and/or parking lamps and the theft indicator lamp
and will chirp the horn.
Controls and features
79
Page 96 of 208

Each seating position in your vehicle has a specific safety belt
assembly which is made up of one buckle and one tongue that
are designed to be used as a pair. 1) Use the shoulder belt on the
outside shoulder only. Never wear the shoulder belt under the arm. 2)
Never swing the safety belt around your neck over the inside shoulder.
3) Never use a single belt for more than one person.
Combination lap and shoulder belts
1. Insert the belt tongue into the
proper buckle (the buckle closest to
the direction the tongue is coming
from) until you hear a snap and feel
it latch. Make sure the tongue is
securely fastened in the buckle.
2. To unfasten, push the release
button and remove the tongue from
the buckle.
The front outboard and rear safety restraints in the vehicle are
combination lap and shoulder belts. The front and rear seat passenger
safety belts have two types of locking modes described below:
Vehicle sensitive mode
The vehicle sensitive mode is the normal retractor mode, allowing free
shoulder belt length adjustment to your movements and locking in
response to vehicle movement. For example, if the driver brakes
suddenly or turns a corner sharply, or the vehicle receives an impact of
8 km/h (5 mph) or more, the combination safety belts will lock to help
reduce forward movement of the driver and passengers.
Seating and safety restraints
96
Page 101 of 208

AIR BAG SUPPLEMENTAL RESTRAINT SYSTEM (SRS)
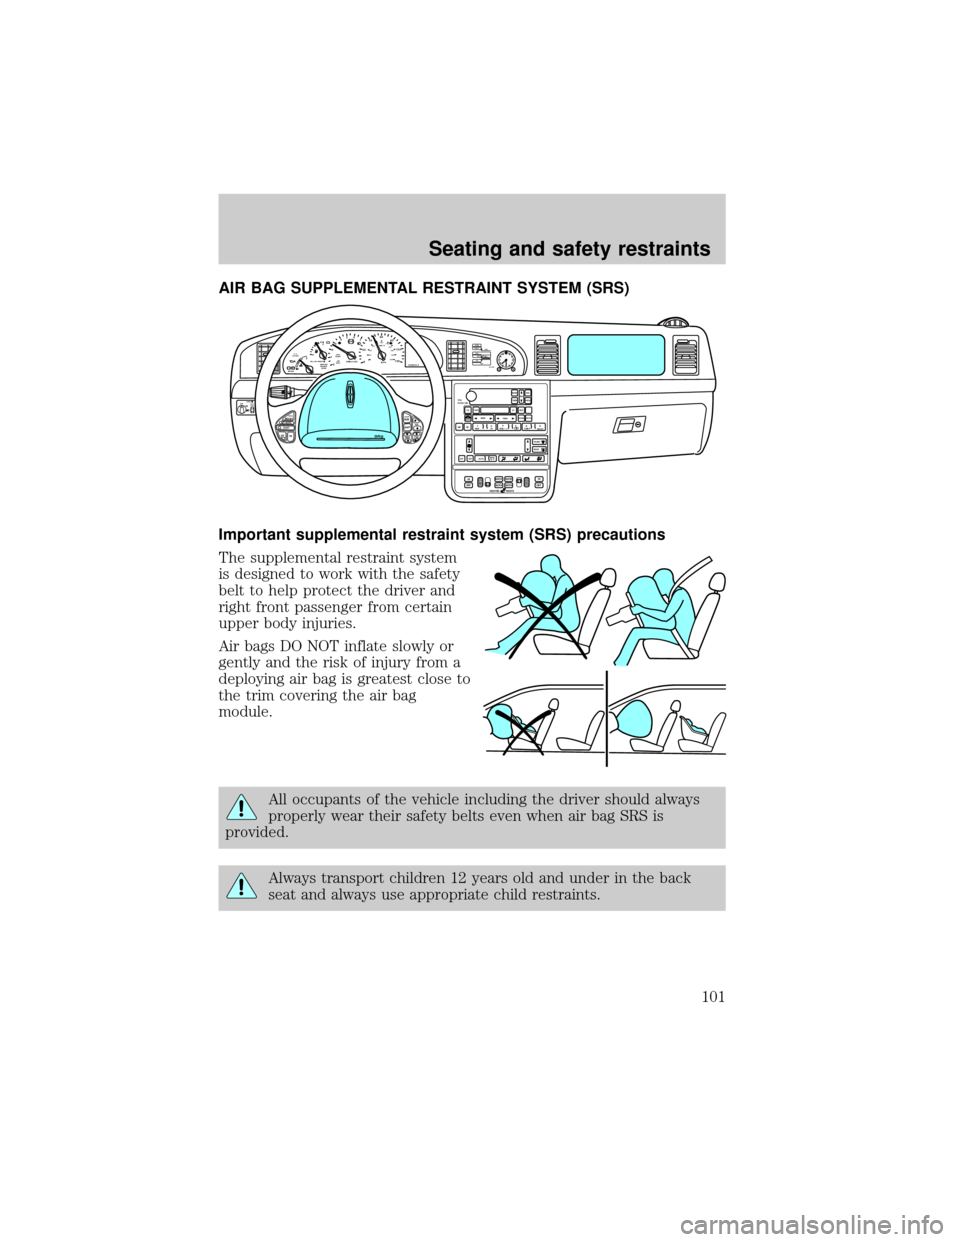
Important supplemental restraint system (SRS) precautions
The supplemental restraint system
is designed to work with the safety
belt to help protect the driver and
right front passenger from certain
upper body injuries.
Air bags DO NOT inflate slowly or
gently and the risk of injury from a
deploying air bag is greatest close to
the trim covering the air bag
module.
All occupants of the vehicle including the driver should always
properly wear their safety belts even when air bag SRS is
provided.
Always transport children 12 years old and under in the back
seat and always use appropriate child restraints.
RESUME
SET ACCEL
COAST
OFF
ONMEM
BANDVOL
TEMP FAN
80
MPH km/h
ABS
P!BRAKE
+ –
RPMx1000NORMT/C
ACTIVECHEFFILL ON RIGHT
SERVICE
ENGINE
SOON AIR
BAG ANTI
THEFT0 123456
7
0 2060
80
100
1200 204060100
120
140
160
180
200
40
000000.0
SYSTEM
DRIVER ID
MENU
TRIP
RESETSELECT
DISPLAY
DTE ECONVEHICLE HANDLINGNITNOCLATNE
OFFHI
LOVOL
PUSH ONTAPE
MUTESEEK
TUNE
AM
FM
REW
FFSIDE 1 2
COMP
SHUFF
EXT
OFFMAX
A/CCDEJ
RDS
SCAN AUTO
AUTO
123
4
56FRONT
REAR
BASS
TREBSELBAL
FADE
HIHI
OFF OFFBACK
BOTH BOTHBACK00
P0FFLIGHTS
AUTO
LAMP
SRS
HEATED SEATS
Seating and safety restraints
101
Page 116 of 208
2. Make sure the headlamps and vehicle accessories are off.
²Make sure the parking brake is
set.
²Make sure the gearshift is in P
(Park).
3. Turn the key to 4 (ON) without
turning the key to 5 (START).
BRAKE RELEASEHOOD
1
2
34
5
Starting
116
Page 117 of 208

Make sure the corresponding lights illuminate briefly. If a light fails to
illuminate, have the vehicle serviced.
²If the driver's safety belt is fastened, the
light will not illuminate.
STARTING THE ENGINE
1. Turn the key to 5 (START)
without pressing the accelerator
pedal and release as soon as the
engine starts. The key will return to
4 (ON).
2. If the temperature is above ±12ÉC (10ÉF) and the engine does not
start within five seconds on the first try, turn the key to OFF, wait ten
seconds and try again.
3. If the temperature is below -12ÉC (10ÉF) and the engine does not
start in fifteen seconds on the first try, turn the key OFF and wait ten
seconds and try again. If the engine does not start in two attempts,
depress the accelerator and start the engine while holding the
accelerator down to the floor. Release the accelerator when the engine
starts.
4. After idling for a few seconds, apply the brake and release the parking
brake.
80
MPH km/h
ABS
P!BRAKE
+ –
RPMx1000NORM
T/C
OFF
CHEF
FILL ON RIGHT
SERVICE
ENGINE
SOON AIR
BAG TURN ON
HEAD
LAMPS0 123456
7
0 2060
80
100
120
0 204060100
120
140
160
180
200
40
000000.0
P R N D 3 1
3
2
1
5
4
Starting
117
Page 120 of 208

BRAKES
Your service brakes are self-adjusting. Refer to the maintenance guide
and or service guide for scheduled maintenance.
Occasional brake noise is normal and often does not indicate a
performance concern with the vehicle's brake system. In normal
operation, automotive brake systems may emit occasional or intermittent
squeal or groan noises when the brakes are applied. Such noises are
usually heard during the first few brake applications in the morning;
however, they may be heard at any time while braking and can be
aggravated by environmental conditions such as cold, heat, moisture,
road dust, salt or mud. If a ªmetal-to-metal,º ªcontinuous grindingº or
ªcontinuous squealº sound is present while braking, the brake linings
may be worn-out and should be inspected by a qualified service
technician.
Anti-lock brake system (ABS)
On vehicles equipped with an anti-lock braking system (ABS), a noise
from the hydraulic pump motor and pulsation in the pedal may be
observed during ABS braking events. Pedal pulsation coupled with noise
while braking under panic conditions or on loose gravel, bumps, wet or
snowy roads is normal and indicates proper functioning of the vehicle's
anti-lock brake system. The ABS performs a self-check at 17 km/h (10
mph) after you start the engine and begin to drive away. A brief
mechanical noise may be heard during this test. This is normal. If a
malfunction is found, the ABS warning light will come on. If the vehicle
has continuous vibration or shudder in the steering wheel while braking,
the vehicle should be inspected by a qualified service technician.
The ABS operates by detecting the
onset of wheel lockup during brake
applications and compensating for
this tendency. The wheels are
prevented from locking even when
the brakes are firmly applied. The
accompanying illustration depicts
the advantage of an ABS equipped
vehicle (on bottom) to a non-ABS
equipped vehicle (on top) during
hard braking with loss of front braking traction.
Driving
120
Page 121 of 208

ABS warning lamp
The
ABSwarning lamp in the instrument cluster momentarily illuminates
when the ignition is turned on and the engine is off. If the light does not
illuminate momentarily at start up, remains on or continues to flash, the
ABS needs to be serviced.
With the ABS light on, the anti-lock
brake system is disabled and normal
braking is still effective unless the
brake warning light also remains
illuminated with parking brake
released. (If your brake warning lamp illuminates, have your vehicle
serviced immediately).
Using ABS
²In an emergency or when maximum efficiency from the ABS is
required, apply continuous full force on the brake. The ABS will be
activated immediately, thus allowing you to retain full steering control
of your vehicle and, providing there is sufficient space, will enable you
to avoid obstacles and bring the vehicle to a controlled stop.
²The Anti-Lock system does not decrease the time necessary to apply
the brakes or always reduce stopping distance. Always leave enough
room between your vehicle and the vehicle in front of you to stop.
²We recommend that you familiarize yourself with this braking
technique. However, avoid taking any unnecessary risks.
Parking brake with auto-release
Apply the parking brake whenever
the vehicle is parked.
To set the parking brake:
1. Move the gearshift to P (Park).
2. Push pedal downward.
The BRAKE warning lamp in the
instrument cluster illuminates and
remains illuminated (when the
ignition is turned ON) until the parking brake is fully released.
P!
BRAKE
BRAKE RELEASEHOOD
Driving
121