1999 HONDA ODYSSEY instrument panel
[x] Cancel search: instrument panelPage 155 of 343
Audio System
Audio System LightingYou can use the instrument panelbrightness control knob to adjust theillumination of the audio system (see
page 67 ). The audio system
illuminates when the parking lightsare on, even if the radio is turned off.
Operating the Cassette Player
Turn the audio system ON. Make sure the tape opening on the cassette
is facing to the right, then insert the
cassette most of the way into the slot.
The system will pull it in the rest of the way, and begin to play.
The tape direction indicator will light to show you which side of the cassette is playing. The indicates
the side you inserted facing upward
is now playing. If you want to play
the other side, press the PROG
button. Dolby B noise reduction turns on
when you insert a cassette. If the
tape was not recorded with Dolby B noise reduction, turn it off by pressing the button.
When the system reaches the end of the tape, it will automatically reversedirection and play the other side. If
you want to remove the cassette from the drive, press the EJECT
button.
Tape Search Functions With a cassette playing, you can usethe FF, REW, SKIP, or REPEAT
function to find a desired program.
FF/REW — Fast Forward and Re-
wind move the tape rapidly. To re-
wind the tape, push the REW button.
You will see REW in the display. To fast forward the tape, push the FF
button. You will see FF displayed.Press the PLAY button to take thesystem out of rewind or fast forward. If the system reaches the end of the
tape while in fast forward or rewind,
it automatically stops that function,
reverses direction, and begins to play.
SKIP — The Skip Function allows
you to find the beginning of a song or passage. To find the beginning of
the song or passage currently
playing, push the SKIP switch down.
You will see REW flashing in the display as the tape rewinds. To find
the beginning of the next song, push
the SKIP switch up. You will see FF
flashing in the display as the tape
fast forwards. When the system
finds the beginning of a song or passage, it goes back to PLAY mode.
Comfort and Convenience FeaturesProCarManuals.comMain Menu Table of Contents s t
Page 168 of 343
Audio System
Audio System Lighting You can use the instrument panel brightness control knob to adjust the
illumination of the audio system (see
page 67). The audio systemilluminates when the parking lights
are on, even if the radio is turned off.
Radio Frequencies
Your Honda's radio can receive the complete AM and FM bands.
Those bands cover these frequen-
cies:
AM band: 530 to 1,710 kilohertz
FM band:
87.7 to 107.9 megahertz
Radio stations on the AM band are
assigned frequencies at least ten
kilohertz apart (530, 540, 550). Stations on the FM band are
assigned frequencies at least 0.2
megahertz apart (87.9, 88.1, 88.3).
Stations must use these exact
frequencies. It is fairly common for stations to round-off the frequency in
their advertising, so your radio could display a frequency of 100.9 even
though the announcer may identify
the station as "FM101."
Radio Reception How well your Honda's radio
receives stations is dependent on
many factors, such as the distance
from the station's transmitter, nearby large objects, and atmos-
pheric conditions.
A radio station's signal gets weaker as you get farther away from its
transmitter. If you are listening to an
AM station, you will notice the sound volume becoming weaker, and the station drifting in and out. If you are
listening to an FM station, you will see the stereo indicator flickering off
and on as the signal weakens. Eventually, the stereo indicator will
go off and the sound will fade completely as you get out of range of
the station's signal.
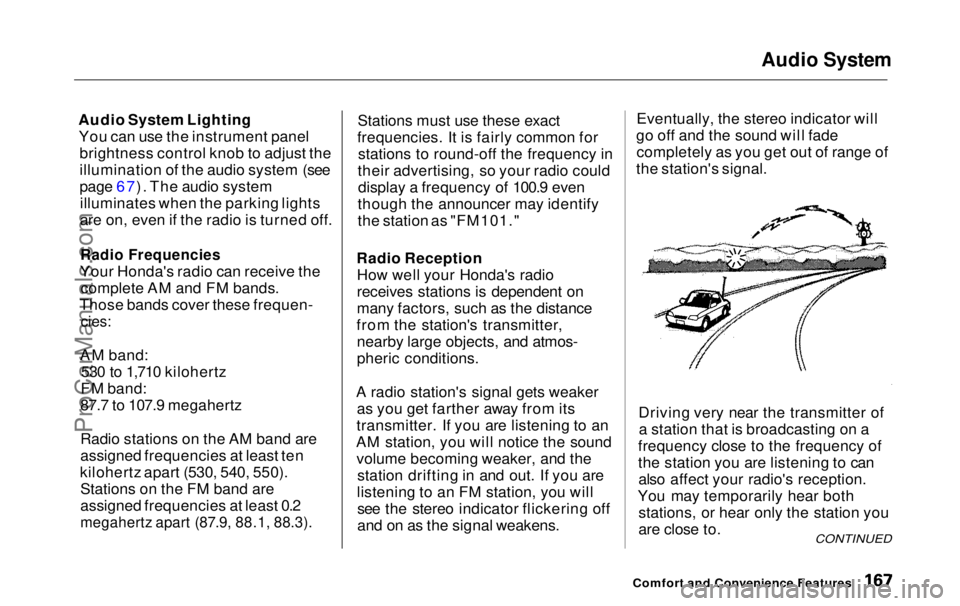
Driving very near the transmitter ofa station that is broadcasting on a
frequency close to the frequency of
the station you are listening to can also affect your radio's reception.
You may temporarily hear both stations, or hear only the station you
are close to.
Comfort and Convenience Features
CONTINUEDProCarManuals.comMain Menu Table of Contents s t
Page 184 of 343
Gasoline, Service Station Procedures
In Canada, some gasolines contain
an octane-enhancing additive called
MMT. If you use such gasolines,
your emission control system performance may deteriorate and
the Malfunction Indicator Lamp on
your instrument panel may turn on. If this happens, contact your
authorized Honda dealer for service.
Filling the Fuel Tank
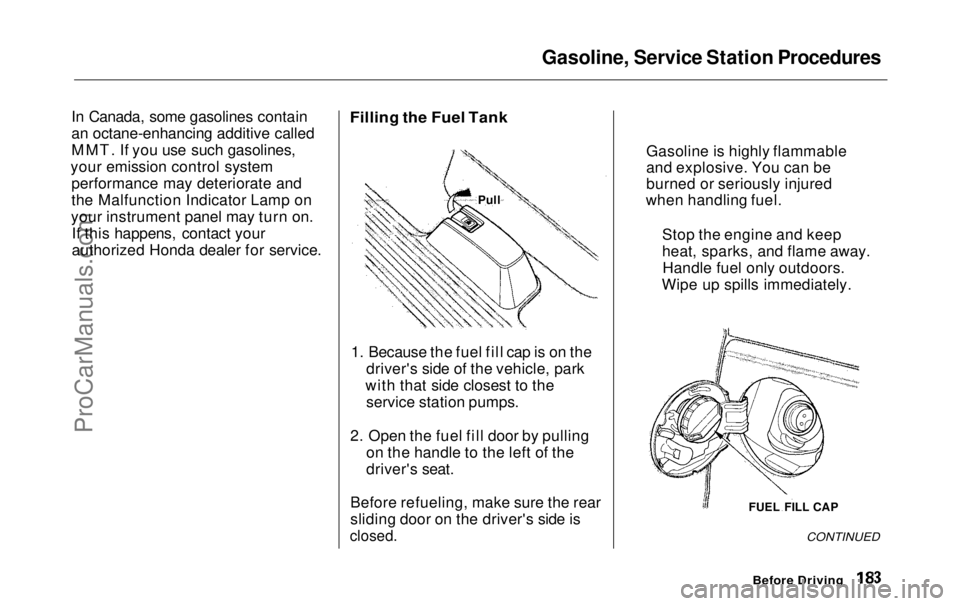
1. Because the fuel fill cap is on the driver's side of the vehicle, park
with that side closest to the service station pumps.
2. Open the fuel fill door by pulling on the handle to the left of the
driver's seat.
Before refueling, make sure the rear
sliding door on the driver's side is
closed.
CONTINUED
Before Driving
FUEL FILL CAP
Gasoline is highly flammable
and explosive. You can be
burned or seriously injured
when handling fuel.
Stop the engine and keep
heat, sparks, and flame away.Handle fuel only outdoors.
Wipe up spills immediately.
PullProCarManuals.comMain Menu Table of Contents s t
Page 197 of 343
Preparing to Drive
You should do the following checks and adjustments every day before
you drive your vehicle.
1. Make sure all windows, mirrors, and outside lights are clean and
unobstructed. Remove frost, snow, or ice.
2. Check that the hood and tailgate are fully closed.
3. Visually check the tires. If a tire looks low, use a gauge to check its
pressure.
4. Check that any items you may be carrying with you inside are storedproperly or fastened downsecurely. 5. Check the adjustment of the seat
(see page 100).
6. Check the adjustment of the inside and outside mirrors (see
page 115).
7. Check the adjustment of the steering wheel (see page 72 ).
8. Make sure the doors and tailgate are securely closed and locked.
9. Fasten your seat belt. Check that your passengers have fastenedtheir seat belts (see page 15). 10.Turn the ignition switch ON (II).
Check the indicator lights in the
instrument panel.
11.Start the engine (see page 197). 12. Check the gauges and indicator lights in the instrument panel (seepage 57).
DrivingProCarManuals.comMain Menu Table of Contents s t
Page 199 of 343
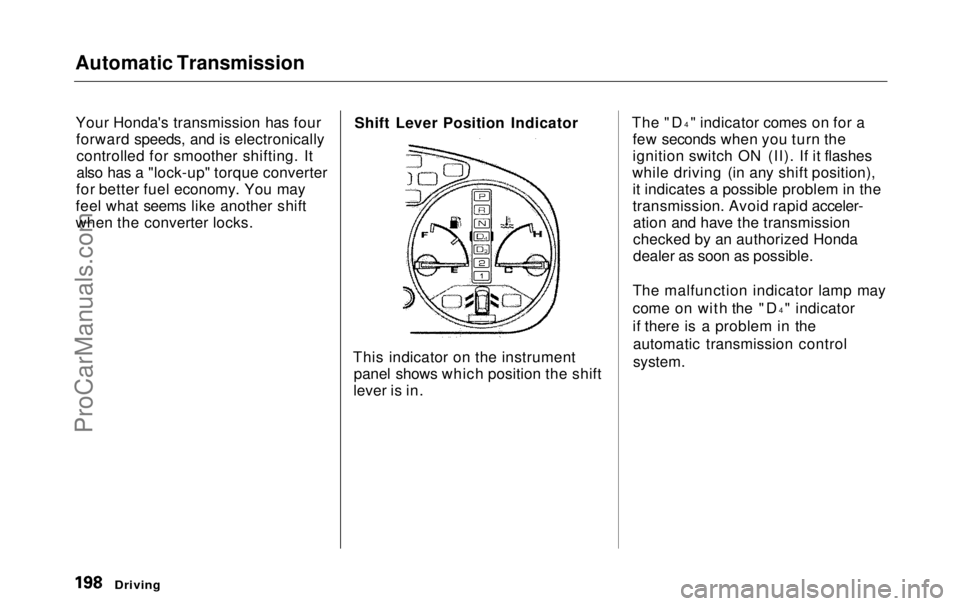
Automatic Transmission
Your Honda's transmission has fourforward speeds, and is electronicallycontrolled for smoother shifting. It
also has a "lock-up" torque converter
for better fuel economy. You may
feel what seems like another shift
when the converter locks. Shift Lever Position Indicator
This indicator on the instrument panel shows which position the shift
lever is in. The "D
4
" indicator comes on for a
few seconds when you turn the
ignition switch ON (II). If it flashes
while driving (in any shift position), it indicates a possible problem in the
transmission. Avoid rapid acceler-ation and have the transmission
checked by an authorized Honda
dealer as soon as possible.
The malfunction indicator lamp may
come on with the "D 4
" indicator
if there is a problem in the automatic transmission control
system.
DrivingProCarManuals.comMain Menu Table of Contents s t
Page 204 of 343

Parking
Always use the parking brake when you park your vehicle. The indicator on the instrument panel shows that
the parking brake is not fully released; it does not indicate that the
parking brake is firmly set. Make sure the parking brake is set firmly
or your vehicle may roll if it is
parked on an incline.
Set the parking brake before you put
the transmission in Park. This keeps
the vehicle from moving and putting
pressure on the parking mechanism
in the transmission — making it easier to move the shift lever out of
Park when you want to drive away. If the vehicle is facing uphill, turn
the front wheels away from the curb.
If the vehicle is facing downhill, turn
the front wheels toward the curb.
Make sure the parking brake is fully
released before driving away.
Driving with the parking brake
partially set can overheat or damage
the rear brakes. Parking Tips
Make sure the windows are closed.
Turn off the lights.
Place any packages, valuables, etc.,
in the cargo area or take them
with you.
Lock the doors with the key or the
remote transmitter.
Never park over dry leaves, tall
grass, or other flammable
materials. The three way catalytic
converter gets very hot, and could
cause these materials to catch on
fire.
DrivingProCarManuals.comMain Menu Table of Contents s t
Page 208 of 343

The Braking System, Traction Control System
If anything goes wrong, the ABS
indicator on the instrument panel
comes on (see page 59 ). This means
the anti-lock function of the braking system has shut down. The brakes
still work like a conventional system
without anti-lock, providing normal stopping ability. You should have the
dealer inspect your vehicle as soon
as possible.
If the ABS indicator and the brake
system indicator come on together,
and the parking brake is fully
released, the front-to-rear braking distribution system may also shut
down.
Test your brakes as instructed on page 304 . If the brakes feel normal,drive slowly and have your vehicle
repaired by your dealer as soon as
possible. Avoid sudden hard braking
which could cause the rear wheels to lock up and possibly lead to a loss of
control.
On EX model
The TCS indicator will come on along with the ABS indicator. Traction Control System
On EX model
Your Honda is equipped with a
Traction Control System (TCS) to assist you in maintaining traction
while driving slowly on loose or slippery surfaces. The TCS assists
only in low-speed, low-traction
conditions; up to approximately 18
mph (30km/h).
The TCS monitors the speed of all four wheels. When it senses a front
wheel losing traction, it applies
braking to that wheel. The TCSindicator flashes when this occurs.
Driving
CONTINUEDProCarManuals.comMain Menu Table of Contents s t
Page 337 of 343

Index
GAWR (Gross Axle Weight
Rating)........................................ 213
GCWR (Gross Combined Weight
Rating)........................................ 213
Gearshift Lever Positions............. 199
Glass Cleaning............................... 281
Glove Box......................................... 87
GVWR (Gross Vehicle Weight
Rating) ........................................ 213
Halogen Headlight Bulbs.............. 266
Hazard Warning Flashers............... 70
Headlights......................................... 66 Aiming......................................... 266
Automatic Lighting Off............... 67
Daytime Running Lights............. 67
High Beam Indicator................... 61
High Beams, Turning on............ 66
Low Beams, Turning on............. 66
Reminder Chime.......................... 66
Replacing Halogen Bulbs ......... 266
Turning on.................................... 66
Head Restraints............................. 104
Heated Mirror................................ 116 Heating and Cooling...................... 130
High Altitude, Starting at.............. 197
High-Low Beam Switch .................. 66
HomeLink Universal
Transmitter.................................. 95
Hood Latch..................................... 248
Hood, Opening the ........................ 184
Horn................................................... 65
Hot Coolant, Warning about........ 237
Hydroplaning.................................. 211
Identification Number, Vehicle.... 314
If Your Vehicle Has to be
Towed......................................... 311
Ignition
Keys...............................................76
Switch............................................78
Timing Control System............. 324
Immobilizer System......................... 77
Important Safety Precautions .......... 6
Indicator Lights, Instrument
Panel.............................................. 57
Individual Map Lights................... 127
Infant Restraint................................ 30
Inflation, Proper Tire .................... 257
Inside Mirror.................................. 115
Inspection,Tire.............................. 259
Instrument Panel........................ 2, 56
Instrument Panel Brightness......... 67
Interior Cleaning............................ 280
Interior Lights................................ 125
Introduction......................................... i
Jacking up the Vehicle.................. 290
Jack, Tire........................................ 288
Jump Starting................................. 297
Keys...................................................76
Label, Certification........................ 314
Lane Change, Signaling.................. 68
Lap/Shoulder Belts.................. 15, 45
CONTINUEDProCarManuals.comMain Menu s t