1999 HONDA CIVIC troubleshooting
[x] Cancel search: troubleshootingPage 2021 of 2189
Moonroof (cont'd)
- How the Circuit Works
Moonroof Open
When you push the moonroof switch to the OPEN
position, the moonroof open switch applies ground
to the moonroof "open" relay through the YEL wire.
The moonroof "open" relay applies battery voltage
to the moonroof motor through the GRN/RED wire.
The moonroof "close" relay supplies ground to the
moonroof motor through its normally closed relay
conlacls. When the moonroof moves out of the fully
closed oosition. the tilvclose switch moves to the
OPEN position; the open/close switch moves to the
OPEN oosition.
Moonrool Tilt
When you push the moonroof switch to the TILT
position, the moonroot tilt switch applies ground to
the moonroof "close" relay through the BLU wire,
tilvclose switch and RED wire. The moonroof"close" relay applies battery voltage to the
GRNff EL wire to the moonroof motor. The
moonroof "open" relay supplies ground to the
moonroof motor through its normally closed relay
contacts. When the moonroof is in the tilt oosition,
the trlvclose switch moves to the TILTED position;
the open/close switch moves to the TILTED
Dosition.
Moonroof Close trom the Open Position
When you push the moonroof switch to the CLOSE
position, the moonroof "close" switch applies ground
to the moonroof "close" relay through the YEURED
wire, tilvclose switch and GRN/RED.wire. The
moonroof "close" relay applies battery voltage to the
GRNI/EL wire to the moonroof motor. The
moonroof "open" relay suppfies ground to the
moonroof motor through its normally closed relay
contacts. When the moonroof is fully closed, the
tilvclose switch moves to the closed position; the
open/close switch moves to the CLOSED position.
122-2
Moonroot Close from the Tilt Position
When you push the moonroof switch to the CLOSE
posilion, the moonroof "open" switch applies ground
to the moonroof "close" relay through the YEURED
wire, open/close switch and moonroof "open" relay.
The moonroof "open" relay applies battery voltage to
the moonroof motor through the GRN/RED wire. The
moonroof "close" relay supplies ground to the
moonroof motor through its normally closed relay
contacts. When the moonroof is fully closed, the
tilvclose switch moves to the closed oosition and the
open/close switch moves to the CLOSED position.
Refer to the Service Manual (Section 23, Electrical)
for specific tests or troubleshooting procedures.
Page 2027 of 2189
Keyless Receiver Unit Troubleshooting
lf a faulty keyless receiver unit has one of the symptoms below, turn to the page listed and follow the
appropriate troubleshooting procedure. lf the symptom seems related to an input problem, or is not covered
by the troubleshooting procedures, do the Input Tests on page 130-6. Refer to the circuit schematic on pages
1 30-2 and 130-3 as needed.
Symptom Index
Keyless Entry Does Not Work In Any Mode
Ceiling Light Does Not Come On When The Doors Are Unlocked
WithTheTransmitter ....
Doors Do Not Unlock Or Lock With The Transmitter . . . .
Horn Does Not Sound With The Transmitter "Beeo" Feature On
Horn Does Not Stop Sounding .......
Input Tests
Page 130-8
Page 130-9
Page 130-1 0
Page 130-11
Page 130-11
Page 130-11
Page 130-6
.1,
Page 2030 of 2189
Power Door Locks (cont'd)
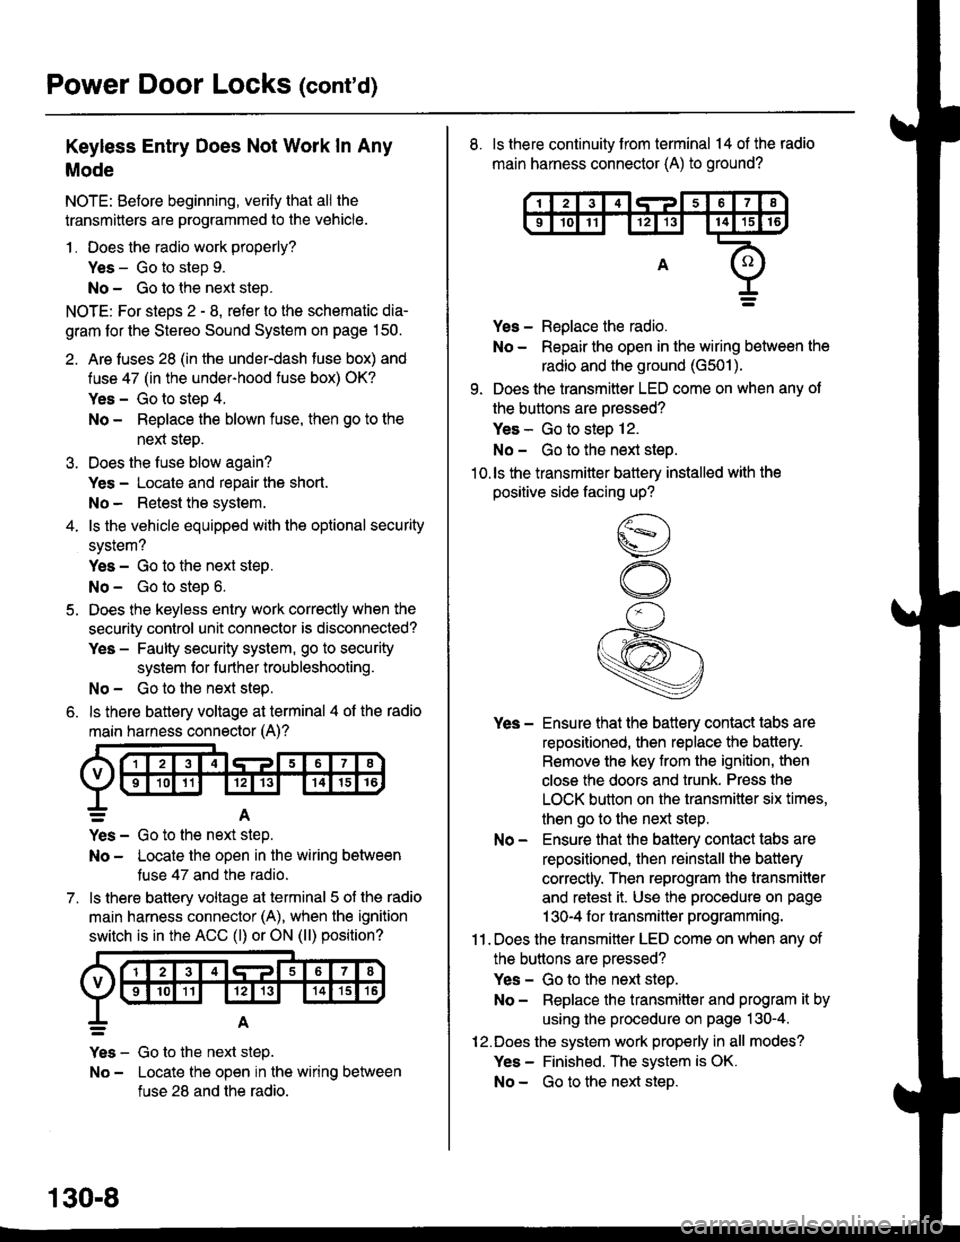
Keyless Entry Does Not Work In Any
Mode
NOTE: Before beginning, verify that all the
transmitters are programmed to the vehicle.
1 . Does the radio work properly?
Yes - Go to step 9.
No - Go to the neld step.
NOTE: For steos 2 - 8. refer to the schematic dia-
gram for the Stereo Sound System on page 150.
2. Are fuses 28 (in the under-dash fuse box) and
fuse 47 (in the under-hood fuse box) OK?
Yes - Go to step 4.
No - Replace the blown fuse, then go to the
nen steo.
3. Does the fuse blow again?
Yes - Locate and repair the short.
No- Retest the system.
4. ls the vehicle equipped with the optional security
system?
Yes - Go to the next steP.
No - Go to steD 6.
5. Does the keyless entry work correctly when the
security control unit connector is disconnected?
Yes - Faulty security system, go to security
system for f urther troubleshooting.
No - Go to the next step.
6. ls there battery voltage at terminal 4 of the radio
main harness connector (A)?
7.
=A
Yes - Go to the nen step.
No - Locate the open in the wiring between
tuse 47 and the radio.
ls there battery voltage at terminal 5 of the radio
main harness connector (A), when the ignition
switch is in the ACC (l) or ON (ll) position?
Yes - Go to the next step.
No - Locate the open in the wiring between
fuse 28 and the radio.
130-8
8. ls there continuity from terminal 14 of the radio
main harness connector (A) to ground?
Yes - Replace the radio.
No - Repair the open in the wiring between the
radio and the ground (G501).
9. Does the transmitter LED come on when any ot
the buttons are oressed?
Yes - Go to steo 12.
No - Go to the next steo.'10.ls the transmitter battery installed with the
positive side facing up?
Yes - Ensure that the battery contact tabs are
repositioned, then replace the battery.
Remove the key from the ignition, then
close the doors and trunk. Press the
LOCK button on the transmitter six times,
then go to the next step.
No - Ensure that the baftery contact tabs are
repositioned, then reinstall the batlery
correctly. Then reprogram the transmitter
and retest it. Use the procedure on page
1 30-4 f or transmitter programming.
11 . Does the transmitter LED come on when any of
the buttons are oressed?
Yes - Go to the next step.
No - Replace the transmitter and program it by
using the procedure on page 130-4.
12.Does the system work properly in all modes?
Yes - Finished. The system is OK.
No - Go to the next steD.
Page 2037 of 2189
Keyless Receiver Unit Troubleshooting
lf a faulty keyless door lock control unit has one of the symptoms below, turn to the page listed and tollow the
appropriate troubleshooting procedure. lf the symptom seems relatod to an input problem, or is not covered
by the troubleshooting procedures, do the Input Tests on page 130-16. Refer to the circuit schematic on
pages 130-12 and 130-13 as needed.
Symptom Index
Keyless Entry Does Not Work In Any Mode
Ceiling Light Does Not Come On When The Doors Are Unlocked
With TheTransmitter ....
Doors Do Not Unlock Or Lock With The Transmitter . .
Horn Does Not Sound With The Transmitter 'Beep" Feature On .........
Horn Does Not Sound In The Panic Mode ..
HornDoes NotStopSounding ...............
Page 1 30-17
Page 130- 18
Page 130-1 I
Page 130-19
Page 130-19
Page 1 30-19
Page 130-16Input Tests
\.
130-15
Page 2056 of 2189
Security System (cont'd)
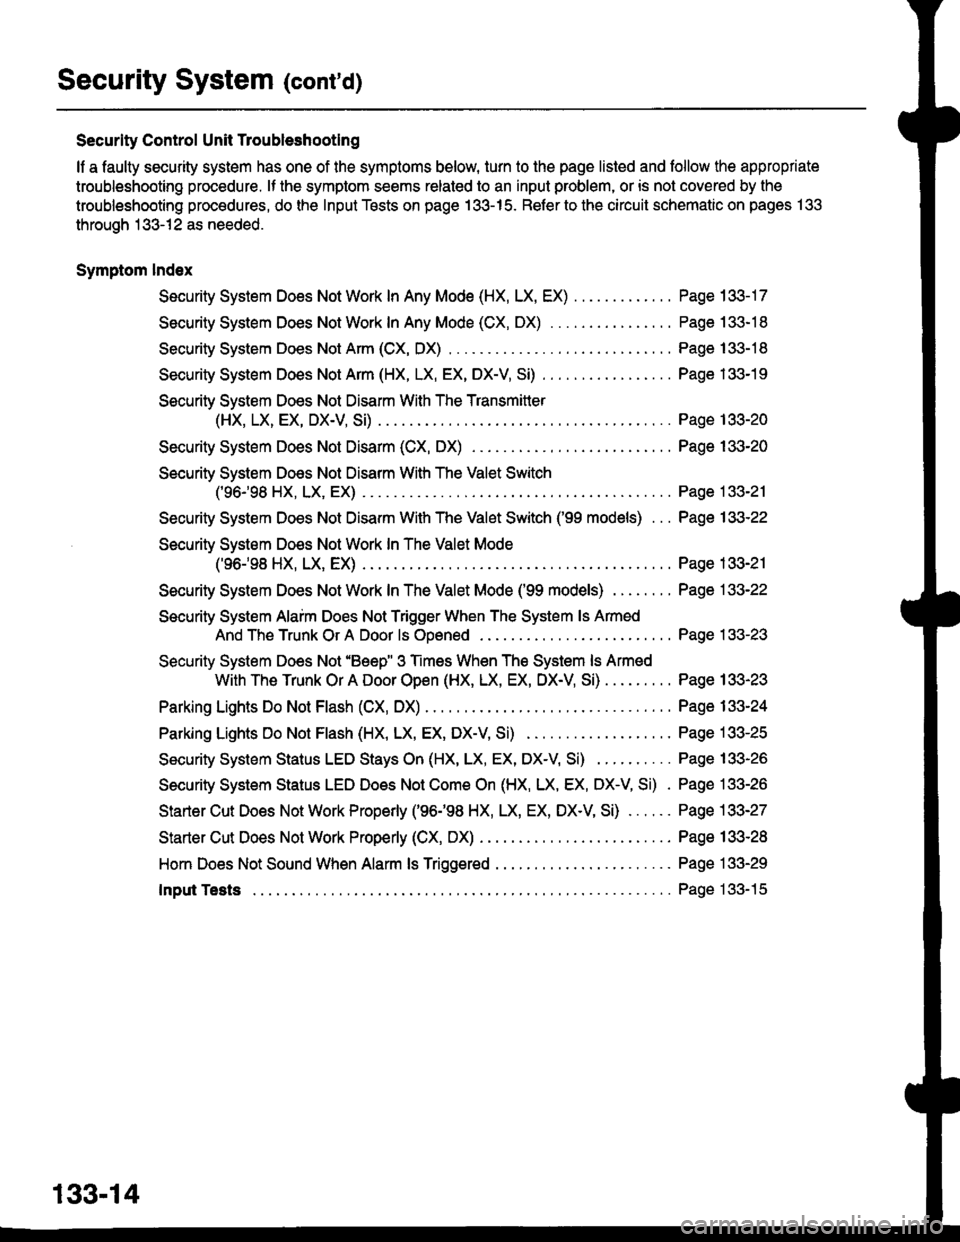
Security Control Unit Troubleshootlng
lf a faulty security system has one of the symptoms below, turn to the page listed and follow the appropriate
troubleshooting procedure. lf the symplom seems related to an input problem, or is not covered by the
troubleshooting procedures, do the Input Tests on page 133-15. Refer to the circuit schematic on pages 133
through 133-12 as needed.
Symptom lndex
Security Sysiem Does Not Work In Any Mode (HX, LX, EX)
Security System Does Not Work In Any Mode (CX, DX)
Security System Does Not Arm (CX, DX)
Security System Does Not Arm (HX, LX, EX, DX-V, SD
Security System Does Not Disarm With The Transmitler
(HX, LX, EX, DX-V, Si)
Security System Does Not Disarm (CX, DX) . . . .
Security System Does Not Disarm With The Valet Switch
c96-'�98 HX, LX, EX) .
Security System Does Not Disarm With The Valet Switch ('99 models) . . .
Security System Do€s Not Work In The Valet Mode
('96.,98 HX, LX, EX) .
Security System Does Not Work InTheValetMode ('99 models) ........
Security System Alaim Does Not Trigger When The System ls Armed
And The Trunk Or A Door ls Ooened
Security System Does Not'Beep" 3 Times When The System ls Armed
With The Trunk Or A Door Open (HX, LX, EX, DX-V Si)
Parking Lights Do Not Flash (CX, DX)
Parking Lights Do Not Flash (HX, LX, EX, DX-V Si)
Security System Status LED Stays On (HX, LX, EX, DX-V Si)
Security System Status LED Does Not Com€ On (HX, LX, EX, DX-V, Si) .
Starter Cut Does Not Work Properly ('96198 HX, LX, EX, DX-V, SD . . . . . .
Starter Cut Does Not Work Properly (CX, DX) . . . . .
Hom Does Not Sound When Alarm ls Triggered
Input Tests
Page 133-17
Page 133-18
Page 133-18
Page 133-19
Page 133-20
Page 133-20
Page 133-21
Page 133-22
Page 133-21
Page 133-22
Page 133-23
Page 133-23
Page 133-24
Page 133-25
Page 133-26
Page 133-26
Page 133-27
Page 133-28
Page 133-29
Page 133- l5
133-14
Page 2075 of 2189
How the Circuit Works
The two outside mirrors are controlled by the power
mirror switch. Each mirror has two reversible
motors: one motor moves the mirror up and down
and the other motor moves the mirror lett and right.
The power mirror switch contains four switches to
control mirror adjustment, and two switches to
select the left or right mirror With the ignition in ON
(ll), battery voltage is supplied to the power mirror
swrtch. The mirror selector switch directs voltage
from two of the direction switches to either the left
or the right mirror.
Mirror Up
When you press the "up" edge of the mirror
adjustment button, ground is supplied from one of
the up/down switch contacts to both mirrors; battery
voltage is supplied from the opposite up/down
switch contact through the mirror select switch. lf
the mirror select switch is in the left or right position,
battery voltage is supplied to the corresponding
mirror uo/down motor which then tilts the selected
mtrror uD.
Mirror Down
When you press the "down" edge of the mirror
adjustment button, battery voltage is supplied Irom
one of the up/down swilch contacts to both mirrors;
a ground is supplied from the opposite up/down
switch contact through the mirror select switch. lf
the mirror select switch is in the left or right position,
battery voltage is supplied to the corresponding
mirror up/down motor which then tilts the selected
mrrror oown.
Mirror Left
When you press the "|eft" edge of the mirror
adjustment button, battery voltage is supplied from
one of the lefuright switch contacts to both mirrors;
a ground is supplied from the opposite lefuright
switch contact through the mirror select switch. lf
the mirror select switch is in the left or right position,
battery voltage is supplied to the corresponding
mirror lefvright motor which then tilts the selected
mirror to the lett.
Mirror Right
When you press the "right" edge of the mirror
adjustment button, ground is supplied from one of
the lefvright switch contacts to both mirrors; battery
voltage is supplied from the opposite left/right switch
contact through the mirror select switch. lf the mirror
select switch is in the left or right position, battery
voltage is supplied to the corresponding mirror
lefuright motor which then tilts the selected mirror to
the right.
Refer to the Service Manual (Section 23, Electrical)
for speclfic tests of troubleshooting procedures
141-1
Page 2077 of 2189
How the Circuit Works
The two outside mirrors are controlled by the power
mirror switch. Each mirror has two reversible
motors: one motor moves lhe mirror uo and down
and the other motor moves the mirror left and right.
The power mirror switch contains four switches to
control mirror adjustment, and a switch lo select
the left or right mirror. With the ignition ON (ll),
battery voltage is supplied to the power mirror
switch. The mirror selector switch directs voltage
Irom the direction switches to either the left or rioht
mtrror.
Mirror Up
When you press the "up" edge of the mirror
adjustment button, voltage is supplied from one of
the UP switch contacts to both mirrors. With the
mirror select switch in the LEFT or RIGHT Dosition.
ground is provjded for the corresponding up/down
motor through the opposite UP switch contact.
Battery voltage is supplied to the mirror up/down
motor which then tilts the selected mirror uo.
Mirror Down
When you press the "down" edge of the mirror
adjustment button, ground is provided through one
of the DOWN switch contacts to both mirrors.
With the mirror select switch in the LEFT or RIGHT
position, voltage is supplied to the corresponding
up/down motor through the opposite DOWN switch
contact. Battery voltage is supplied to the mirror
up/down motor which then tilts the selected
mtrror down.
Mirror Left
When the mirror select switch is in the LEFT or
RIGHT position, and you press the "lett" edge of the
mirror adjustment button, voltage is supplied to both
corresponding mirror motors through one of the
LEFT switch contacts. Ground is provided for the
corresponding lefvright motor through the opposite
LEFT switch contact, 8attery voltage is supplied to
the mirror left /right motor which then tilts the
selected mirror left.
I,J
141-3
Mirror Right
When the mirror select switch is in the LEFT or
RIGHT position, and you press the '?ight" edge of
the mirror adjustment button, ground is provided to
both corresponding mirror motors through one of
the RIGHT switch contacts. Voltage is supplied to
the corresponding leruright motor through the
opposite RIGHT switch contact. Battery voltage is
supplied to the mirror left /right motor which then
tilts the selected mirror right.
Mirror Detoggers
With the ignition switch in ON (ll), battery voltage is
supplied to the mirror defogger switch. When you
press the mirror defogger switch ON, voltage is
supplied to both mirror defoggers, causing them to
heat up and remove any fog from the mirrors. The
opposite side of each defogger grid is connected to
g rou no.
Refer to the Service Manual (Section 23,
Body Electrical) for specific tests and
troubleshooting procedures.