1999 FORD WINDSTAR check transmission fluid
[x] Cancel search: check transmission fluidPage 9 of 248

Brake system warning
Momentarily illuminates when the
ignition is turned to the ON
position, the engine is off and the
parking brake is engaged. If the
brake warning lamp does not
illuminate at this time, seek service immediately. Illumination after
releasing the parking brake indicates low brake fluid level and the brake
system should be inspected immediately.
O/D off
Illuminates when the ignition is
turned to the ON position and
transmission control switch has
been pushed. When the light is on,
the transmission does not shift into
overdrive. If the light does not come on when the transmission control
switch is depressed or if the light flashes when you are driving, have
your vehicle serviced.
Check engine
Your vehicle is equipped with a
computer that monitors the engine's
emission control system. This
system is commonly known as the
On Board Diagnostics System (OBD II). This OBD II system protects the
environment by ensuring that your vehicle continues to meet
government emission standards. The OBD II system also assists the
service technician in properly servicing your vehicle.
TheCheck Engineindicator light illuminates when the ignition is first
turned to the ON position to check the bulb. If it comes on after the
engine is started, one of the engine's emission control systems may be
malfunctioning. The light may illuminate without a driveability concern
being noted. The vehicle will usually be drivable and will not require
towing.
!
BRAKE
O/D
OFF
Instrumentation
9
Page 17 of 248

The message center will display the last selected feature if there are no
more warning messages. This allows you to use the full functionality of
the message center after you acknowledge the warning by pressing the
RESET control and clearing the warning message.
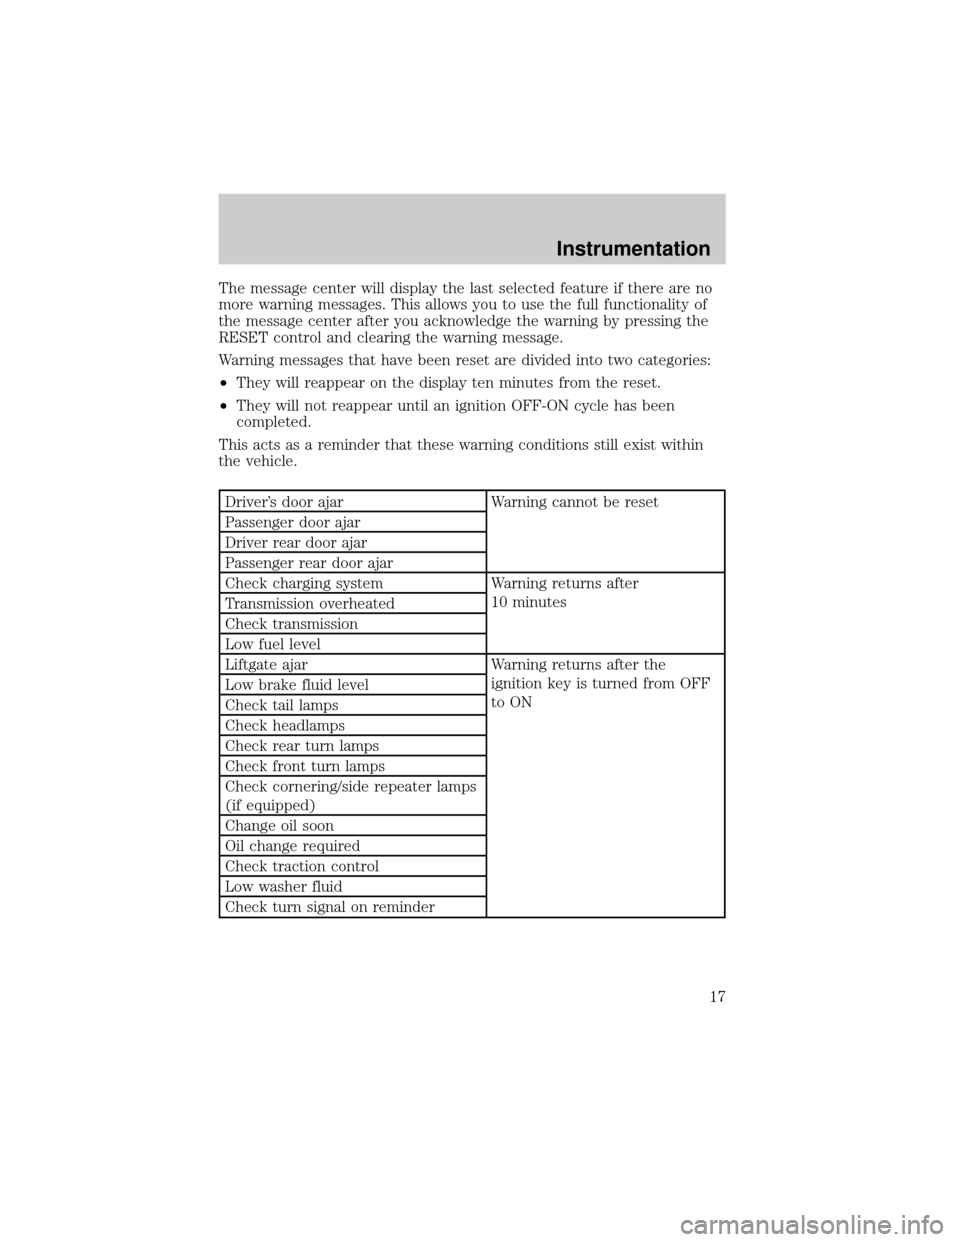
Warning messages that have been reset are divided into two categories:
²They will reappear on the display ten minutes from the reset.
²They will not reappear until an ignition OFF-ON cycle has been
completed.
This acts as a reminder that these warning conditions still exist within
the vehicle.
Driver's door ajar Warning cannot be reset
Passenger door ajar
Driver rear door ajar
Passenger rear door ajar
Check charging system Warning returns after
10 minutes
Transmission overheated
Check transmission
Low fuel level
Liftgate ajar Warning returns after the
ignition key is turned from OFF
to ON Low brake fluid level
Check tail lamps
Check headlamps
Check rear turn lamps
Check front turn lamps
Check cornering/side repeater lamps
(if equipped)
Change oil soon
Oil change required
Check traction control
Low washer fluid
Check turn signal on reminder
Instrumentation
17
Page 18 of 248

DRIVER'S DOOR AJAR.Displayed when the driver's door is not
completely closed.
PASSENGER DOOR AJAR.Displayed when the passenger side door is
not completely closed.
DRIVER'S REAR DOOR AJAR.Displayed when the driver's rear door
is not completely closed.
PASSENGER REAR DOOR AJAR.Displayed when the passenger side
rear door is not completely closed.
LIFTGATE AJAR.Displayed when the liftgate is not completely closed.
CHECK CHARGING SYSTEM.Displayed when the electrical system is
not maintaining proper voltage. If you are operating electrical accessories
when the engine is idling at a low speed, turn off as many of the
electrical loads as soon as possible. If the warning stays on or comes on
when the engine is operating at normal speeds, have the electrical
system checked as soon as possible.
LOW FUEL LEVEL.Displayed when you have approximately 1/16th of
a tank indicated on the fuel gauge.
CHECK TRANSMISSION.Indicates the transmission is not operating
properly. If this warning stays on, contact your dealer as soon as
possible.
TRANSMISSION OVERHEATED.Indicates the transmission is
overheating. This warning may appear when towing heavy loads or when
driving in a low gear at a high speed for an extended period of time.
Stop the vehicle as soon as safely possible, turn off the engine and let it
cool. Check the transmission fluid and level. Refer toTransmission
fluidin theMaintenance and carechapter. If the warning stays on or
continues to come on, contact your dealer for transmission service as
soon as possible.
CHECK BRAKE LAMPS.Displayed when the brake lamps are
activated and at least one is burned out. Check the lamps as soon as
safely possible and have the burned out lamp replaced. The center
high-mount brakelamp is not monitored.
CHECK HEADLAMPS.Displayed when the headlamps are activated
and at least one is burned out. Check the lamps as soon as safely
possible and have the burned out lamp replaced. Refer toReplacing
headlamp bulbsin theMaintenance and carechapter.
Instrumentation
18
Page 201 of 248

1. Start the engine and let it run until it reaches normal operating
temperature (the engine coolant temperature gauge indicator will be
near the center of the normal area between H and C).
2. While the engine idles, turn the steering wheel left and right several
times.
3. Turn the engine off.
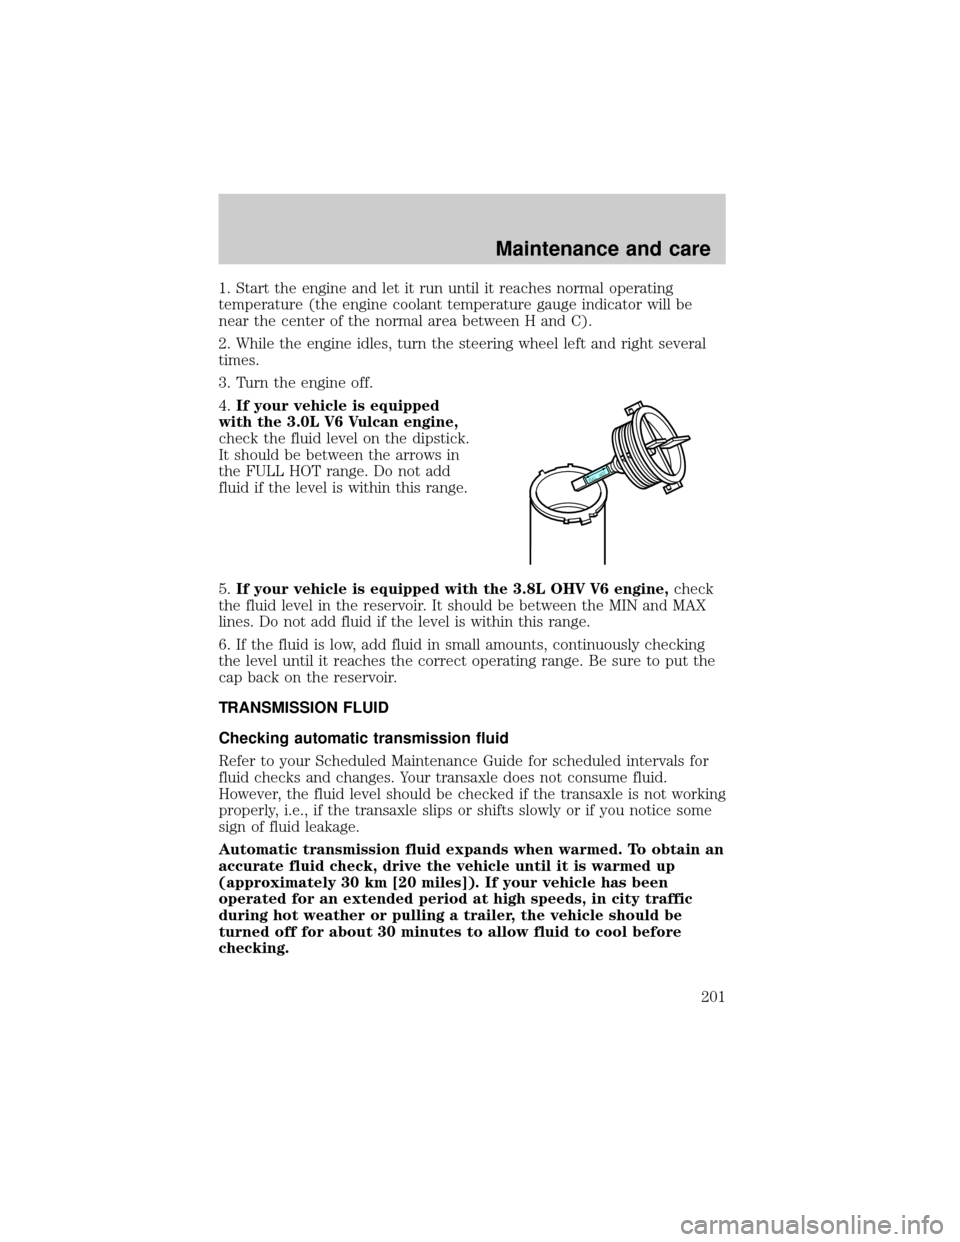
4.If your vehicle is equipped
with the 3.0L V6 Vulcan engine,
check the fluid level on the dipstick.
It should be between the arrows in
the FULL HOT range. Do not add
fluid if the level is within this range.
5.If your vehicle is equipped with the 3.8L OHV V6 engine,check
the fluid level in the reservoir. It should be between the MIN and MAX
lines. Do not add fluid if the level is within this range.
6. If the fluid is low, add fluid in small amounts, continuously checking
the level until it reaches the correct operating range. Be sure to put the
cap back on the reservoir.
TRANSMISSION FLUID
Checking automatic transmission fluid
Refer to your Scheduled Maintenance Guide for scheduled intervals for
fluid checks and changes. Your transaxle does not consume fluid.
However, the fluid level should be checked if the transaxle is not working
properly, i.e., if the transaxle slips or shifts slowly or if you notice some
sign of fluid leakage.
Automatic transmission fluid expands when warmed. To obtain an
accurate fluid check, drive the vehicle until it is warmed up
(approximately 30 km [20 miles]). If your vehicle has been
operated for an extended period at high speeds, in city traffic
during hot weather or pulling a trailer, the vehicle should be
turned off for about 30 minutes to allow fluid to cool before
checking.
FULL HOT
Maintenance and care
201
Page 202 of 248

1. Drive the vehicle 30 km (20 miles) or until it reaches normal operating
temperature.
2. Park the vehicle on a level surface and engage the parking brake.
3. With the parking brake engaged and your foot on the brake pedal,
start the engine and move the gearshift lever through all of the gear
ranges. Allow sufficient time for each gear to engage.
4. Latch the gearshift lever in P (Park) and leave the engine running.
5. Remove the dipstick, wiping it clean with a clean, dry lint free rag.
6. Install the dipstick making sure it is fully seated in the filler tube.
7. Remove the dipstick and inspect the fluid level. The fluid should be in
the designated areas for normal and room temperature.
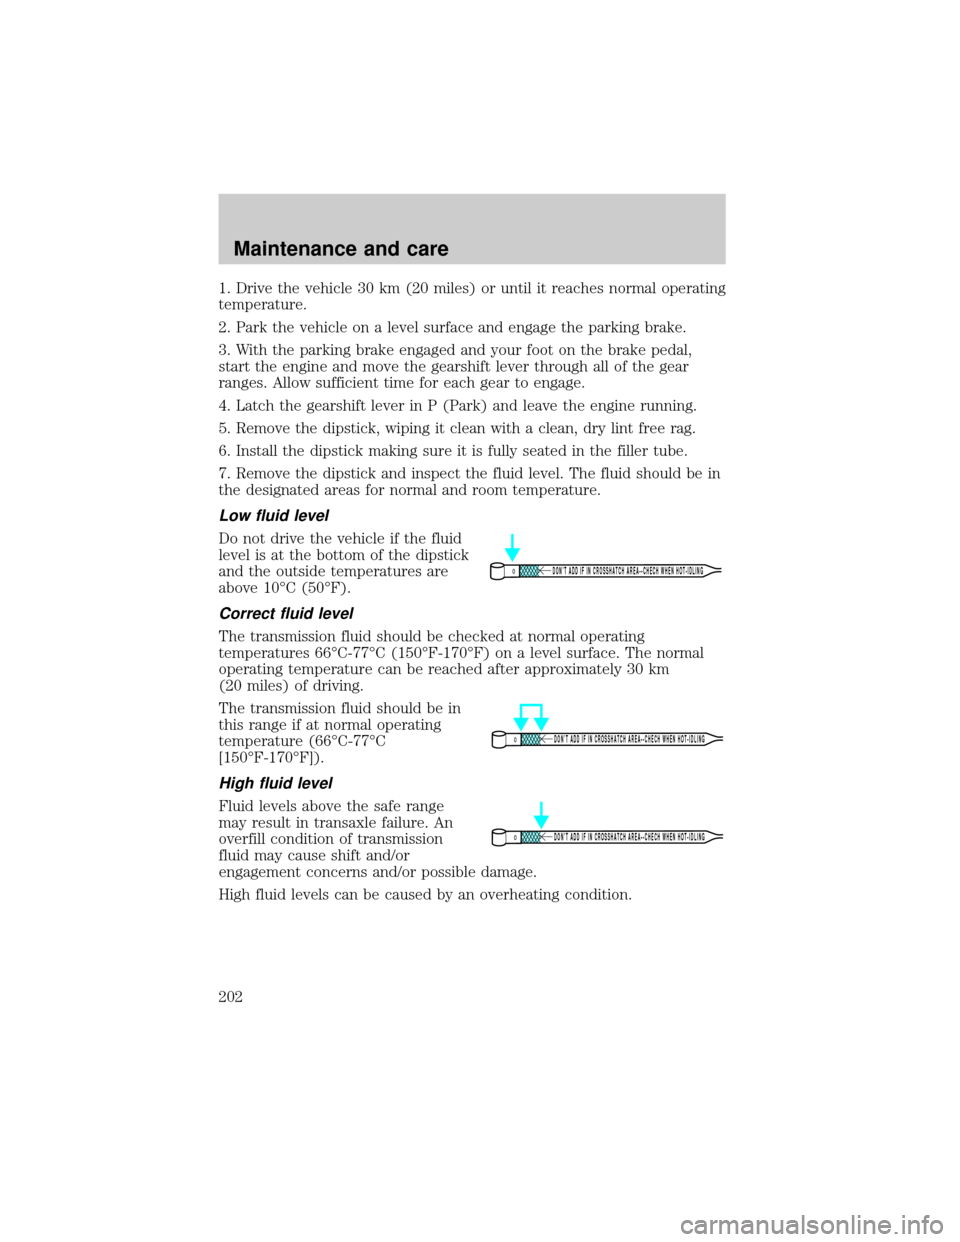
Low fluid level
Do not drive the vehicle if the fluid
level is at the bottom of the dipstick
and the outside temperatures are
above 10ÉC (50ÉF).
Correct fluid level
The transmission fluid should be checked at normal operating
temperatures 66ÉC-77ÉC (150ÉF-170ÉF) on a level surface. The normal
operating temperature can be reached after approximately 30 km
(20 miles) of driving.
The transmission fluid should be in
this range if at normal operating
temperature (66ÉC-77ÉC
[150ÉF-170ÉF]).
High fluid level
Fluid levels above the safe range
may result in transaxle failure. An
overfill condition of transmission
fluid may cause shift and/or
engagement concerns and/or possible damage.
High fluid levels can be caused by an overheating condition.
DON’T ADD IF IN CROSSHATCH AREA--CHECH WHEN HOT-IDLING
DON’T ADD IF IN CROSSHATCH AREA--CHECH WHEN HOT-IDLING
DON’T ADD IF IN CROSSHATCH AREA--CHECH WHEN HOT-IDLING
Maintenance and care
202
Page 245 of 248

Radio ...37,38,39,40,41,42,43,44,45,
46,47,48,49,50,51,52,53,54,
55,56,57,58,59,60,61,62,63
Relays ........................................168
Remote entry system .................91
illuminated entry ............26,96,99
locking/unlocking doors .92,93,94
replacement/additional
transmitters ...............................98
replacing the batteries .............97
Reverse sensing system .............67
Roof rack ...................................166
Safety belts (see Safety
restraints) ....................................11
Safety Compliance
Certification Label ....................241
Safety defects, reporting ..........242
Safety restraints
cleaning the safety belts .......123,
124,235
extension assembly ................122
for children .............................131
lap belt ....................................121
warning light and chime ..11,122,
123
Seat belts (see Safety
restraints) .............118,119,120,122
Seats ..........................................105
child safety seats ....................132
cleaning .....................233,234,235
Seats-easy access/easyout
feature .......................................106
Servicing your vehicle ..............188
Spark plugs, specifications .......236
Specification chart, lubricants .238
Speed control ..............................70
Speedometer ...............................13
Starting your vehicle .........147,149
jump starting ............182,183,185Steering wheel
tilting .........................................76
Tachometer .................................12
Tires .............................209,210,211
changing .............177,178,179,180
checking the pressure ............211
replacing ..................................212
rotating ....................................211
snow tires and chains ............213
tire grades ...............................210
treadwear ................................210
Towing ..................162,163,164,165
wrecker ....................................187
Traction control ...................69,153
active light ..................................6
Transaxle
fluid, refill capacities ..............237
Transmission
fluid, checking and adding
(automatic) ...............201,202,203
Trip odometer .............................14
Turn signal ..................................11
Universal transmitter (see
garage door opener) ....81,82,83,84
Vehicle dimensions ...................239
Vehicle Identification Number
(VIN) ..........................................241
Vehicle loading ..........................159
Ventilating your vehicle ...........150
Warning chimes .............................6
Washer fluid ..............................196
Water, Driving through .............159
Windows ......................................77
rear wiper/washer .....................75
Windshield washer fluid and
wipers
checking and cleaning ............208
operation ...................................74
replacing wiper blades ...........209
Index
245
Page 248 of 248

Item Information
Recommended fuel Unleaded fuel only - 87 octane
Fuel tank capacity 98.4L (26.0 gallons)
Engine oil capacity-3.0L engine
(includes filter change)4.3L (4.5 quarts). Use Motorcraft
5W30 Super Premium Motor Oil, Ford
specification WSS-M2C153-G.
Engine oil capacity-3.8L engine
(includes filter change)4.7L (5.0 quarts). Use Motorcraft
5W30 Super Premium Motor Oil, Ford
specification WSS-M2C153-G.
Tire size and pressure See Safety Compliance Certification
Label on the driver's side B-pillar.
Hood release Pull handle under the left side of the
instrument panel.
Coolant capacity (without rear
heater)
114.0L (14.8 quarts)
Coolant capacity (with rear
heater)
115.0L (15.9 quarts)
Power steering fluid capacity Fill to line on reservoir or dipstick.
Use Motorcraft MERCONtAT F.
Automatic transmission fluid
capacity (AX4S)
211.6L (12.25 quarts). Use Motorcraft
MERCONtV ATF.
1If your engine coolant is green in color, use Ford Premium Cooling
System Fluid. If your engine coolant is orange in color, use Ford
Extended Life Engine Coolant. Refer toAdding engine coolant, in the
Maintenance and Care chapter.
2Ensure correct automatic transmission fluid is used for a specific
application. Check the container to verify the fluid is MERCONtand/or
MERCONtV approved. Some fluids have been approved as meeting both
MERCONtand MERCONtV requirements and will be labeled as such.
Fluids labeled as meeting only MERCONtor only MERCONtV
requirements must not be used interchangeably. DO NOT mix MERCONt
and MERCONtV. Transmission fluid requirements are indicated on the
dipstick or on the dipstick handle. Refer to your Scheduled Maintenance
Guide to determine the correct service interval.
Filling station information
248