Page 52 of 248
Volume/power control
Press the control to turn the audio
system on or off.
Audio power can also be turned on
by pressing the AM/FM select
control or the tape/CD select
control. Audio power is turned off
by using the volume/power control.
Turn control to raise or lower
volume.
If the volume is set above a certain level and the ignition is turned off,
the volume will come back on at a ªnominalº listening level when the
ignition switch is turned back on.
AM/FM select
The AM/FM select control works in
radio, tape and CD modes.
AM/FM select in radio mode
This control allows you to select AM or FM frequency bands. Press the
control to switch between AM, FM1 or FM2 memory preset stations.
AM/FM select in tape mode
Press this control to stop tape play and begin radio play.
AM/FM select in CD or CD changer mode (if equipped)
Press this control to stop CD play and begin radio play.
VOL - PUSH ON
VOL - PUSH ON
AM FM
Controls and features
52
Page 55 of 248

Scan function in tape mode
Press the SCAN control to hear a short sampling of all selections on the
tape. (The tape scans in a forward direction. At the end of the tape's
first side, direction automatically reverses to the opposite side of the
tape.) To stop on a particular selection, press the control again.
Scan function in CD or CD changer mode (if equipped)
Press the SCAN control to hear a short sampling of all selections on the
CD. (The CD scans in a forward direction, wrapping back to the first
track at the end of the CD.) To stop on a particular selection, press the
control again.
Radio station memory preset
The radio is equipped with six station memory preset controls. These
controls can be used to select up to six preset AM stations and twelve
FM stations (six in FM1 and six in FM2).
Setting memory preset stations
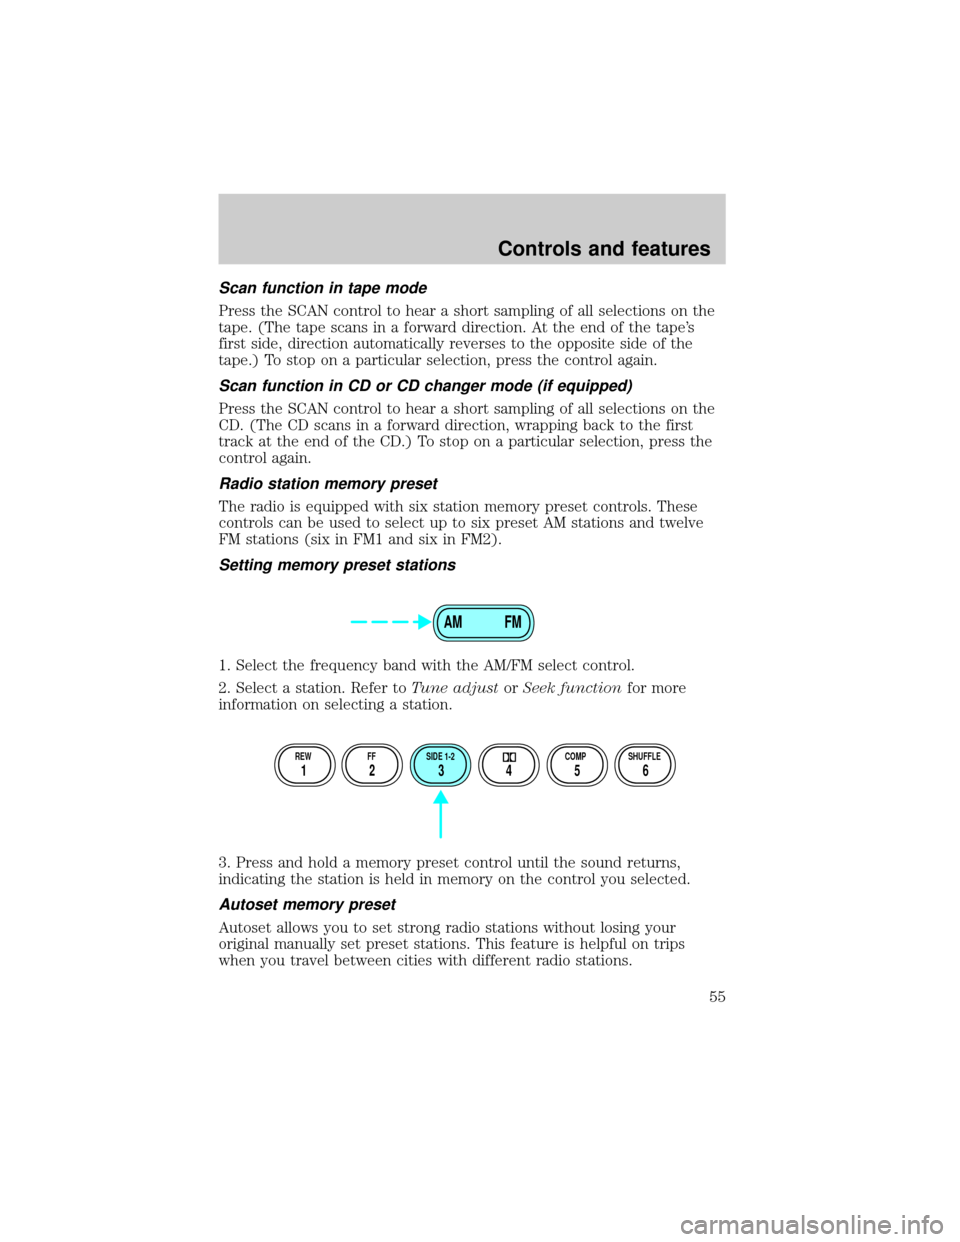
1. Select the frequency band with the AM/FM select control.
2. Select a station. Refer toTune adjustorSeek functionfor more
information on selecting a station.
3. Press and hold a memory preset control until the sound returns,
indicating the station is held in memory on the control you selected.
Autoset memory preset
Autoset allows you to set strong radio stations without losing your
original manually set preset stations. This feature is helpful on trips
when you travel between cities with different radio stations.
AM FM
REW FF SIDE 1-2 COMP SHUFFLE
12 3456
Controls and features
55
Page 56 of 248

Starting autoset memory preset
1. Select a frequency using the AM/FM select controls.
2. Press the AUTO control.
3. When the first six strong stations
are filled, the station stored in
memory preset control 1 will start
playing.
If there are less than six strong
stations available on the frequency
band, the remaining memory preset
controls will all store the last strong station available.
These stations are temporarily stored in the memory preset controls
(until deactivated) and are accessed in the same manner of your original
presets.
To deactivate autoset and return to your audio system's manually set
memory stations, press the AUTO control again.
Bass adjust
The bass adjust control allows you
to increase or decrease the audio
system's bass output.
Press the BASS control then press:
²
to decrease the bass output
and
²
to increase the bass output.
Treble adjust
The treble adjust control allows you
to increase or decrease the audio
system's treble output.
AUTO
CLK
BASS TREB
SEL
BASS TREB
Controls and features
56
Page 62 of 248

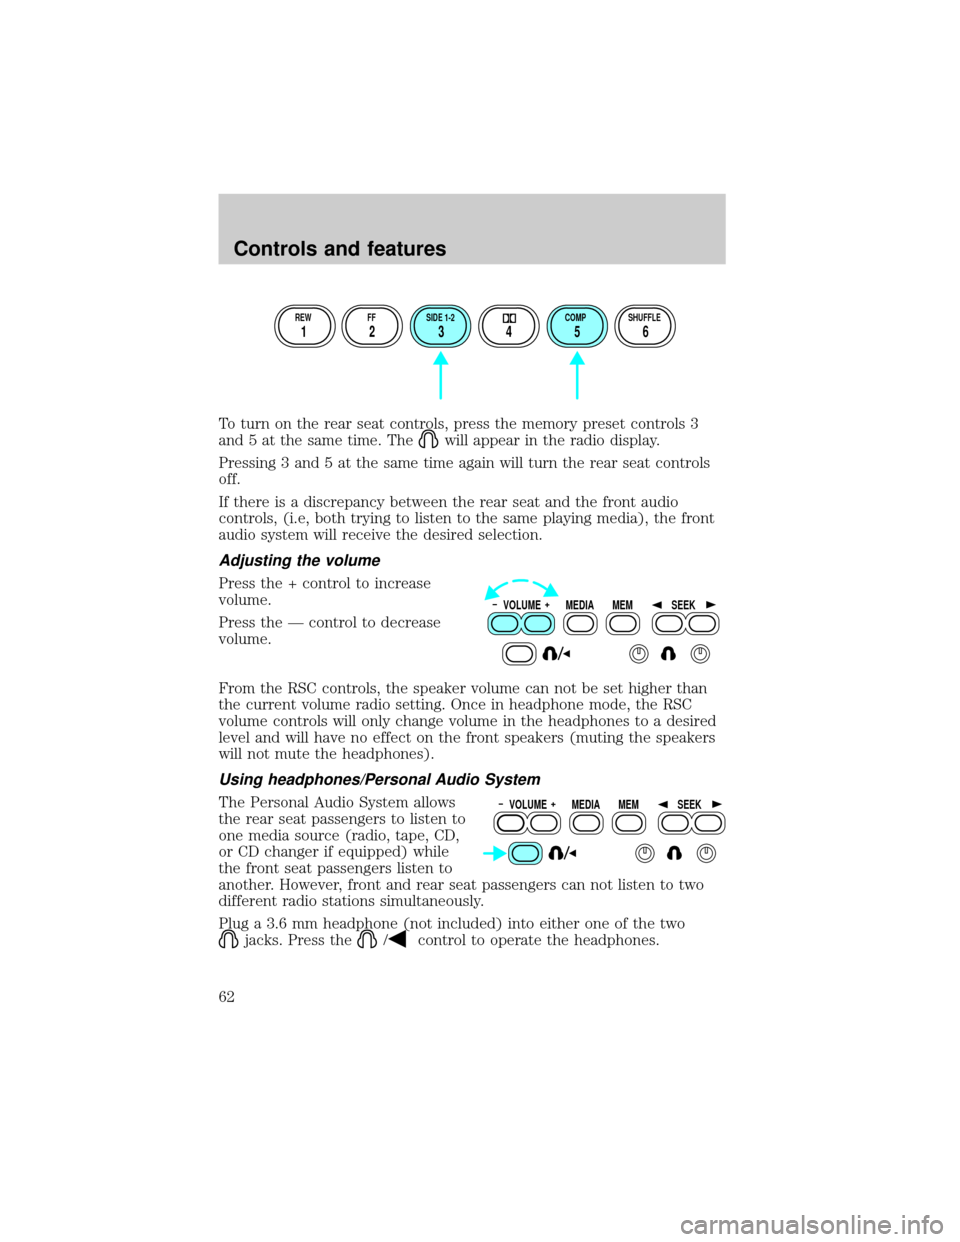
To turn on the rear seat controls, press the memory preset controls 3
and 5 at the same time. The
will appear in the radio display.
Pressing 3 and 5 at the same time again will turn the rear seat controls
off.
If there is a discrepancy between the rear seat and the front audio
controls, (i.e, both trying to listen to the same playing media), the front
audio system will receive the desired selection.
Adjusting the volume
Press the + control to increase
volume.
Press the Ð control to decrease
volume.
From the RSC controls, the speaker volume can not be set higher than
the current volume radio setting. Once in headphone mode, the RSC
volume controls will only change volume in the headphones to a desired
level and will have no effect on the front speakers (muting the speakers
will not mute the headphones).
Using headphones/Personal Audio System
The Personal Audio System allows
the rear seat passengers to listen to
one media source (radio, tape, CD,
or CD changer if equipped) while
the front seat passengers listen to
another. However, front and rear seat passengers can not listen to two
different radio stations simultaneously.
Plug a 3.6 mm headphone (not included) into either one of the two
jacks. Press the/control to operate the headphones.
REW FF SIDE 1-2 COMP SHUFFLE
12 3456
VOLUME MEDIA
MEMSEEK
VOLUME MEDIA
MEMSEEK
Controls and features
62
Page 63 of 248

The rear speakers will cut out once the speaker on/off control is pressed.
A soft audible sound may be heard from the rear speakers. The front
speaker will remain playing for the front passengers. Press the
/
control again to deactivate headphones (Personal Audio System).
Media select
Push the MEDIA control to toggle
between AM, FM1, FM2, tape, CD,
or CD changer (if equipped).
Memory preset control
Push the MEM control successively
to allow rear seat passengers to
scroll through the 6 memory presets
in AM, FM1, or FM2.
Push the MEM control in CD
changer mode (if equipped) to
advance to the next disc.
Seek function
²Pressto find the next
listenable station down the
frequency band.
²Press
to find the next
listenable station up the
frequency band.
In tape mode, use the SEEK function to access the next
or previous
selection.
In CD or CD changer mode (if equipped), use the SEEK function to
access the next
or previousselection.
VOLUME MEDIA
MEMSEEK
VOLUME MEDIA
MEMSEEK
VOLUME MEDIA
MEMSEEK
Controls and features
63
Page 89 of 248

Closing the PSD
With the ON/OFF control in the ON position, either sliding door can be
closed by:
²operating the remote transmitter. Refer toRemote Entry Systemin
this chapter.
²pushing and releasing the overhead console right hand or left hand
control
²pushing and releasing the right hand or left hand second row
passenger control
²manually rolling the door several inches towards the closed position
and release
The door will close completely and latch using these options.
With the ON/OFF control in the OFF position, either sliding door can be
closed by pulling the inside or outside handle and sliding the door all the
way forward to the latched position manually.
Safety/Obstructions
If anything obstructs the Power Sliding Door while it is closing, the door
will automatically reverse to the open position, provided it meets
sufficient resistance.
Resetting the PSD
The power sliding door may operate incorrectly or not at all because of
the following condition:
²a low voltage or dead battery
²disconnecting the battery
²if the PSD fuse (fuse #6) is removed or blown. Refer toFuses and
relaysin theRoadside emergencieschapter.
If any of these conditions occur, reset the PSD by:
1. Check to see if power sliding door is unlocked and securely closed.
2. Make sure vehicle is in (P) Park.
3. Push the power door control on the overhead console to open the
door.
4. Wait five (5) seconds and close the door by pressing the power door
control on the overhead console.
5. Wait five (5) seconds and repeat Steps 3 and 4 and go on to step 6.
Controls and features
89
Page 124 of 248

Replacing the second row bench seat belt assemblies after a
collision
All second row bench seat belt assemblies adjacent to a sliding door have
special energy management retractors designed to further reduce the
risk of injury in the event of a head-on collision. These retractors should
be replaced if they were used in any accident in which the front airbags
deploy. If the safety belt assemblies are not replaced, there may be
increased risk of injury in the event of a subsequent collision.
Failure to inspect and if necessary replace the safety belt
assembly under the above conditions could result in severe
personal injuries in the event of a collision.
AIR BAG SUPPLEMENTAL RESTRAINT SYSTEM (SRS)
mi
FM1STSTAUTOP
12345
6
7RPMX1000 THEFT TRAC
ACTIVE TRAC
OFFFFUEL
E404080
120
1602060
80100 MPHTEMP
Hkm/hBRAKEO/D
OFFO/D
ON/OFFINFOSETUP
RESET
DISC
EJMUTEVOL - PUSH ONOFF
T/CFM1
REW FFSCAN
BASS TREB SEL BALTAPE EJ CD
FADEAUTO
CLK
SIDE 1-2 COMP SHUFFLESEEK
TUNE AM FM12 3456DOLBY B NR
A/CFRONT
REAR
OFFMAX
A/C
REAR
CONT
Seating and safety restraints
124
Page 167 of 248

HAZARD FLASHER
Use only in an emergency to warn traffic of vehicle breakdown,
approaching danger, etc. The hazard flashers can be operated when the
ignition is off.
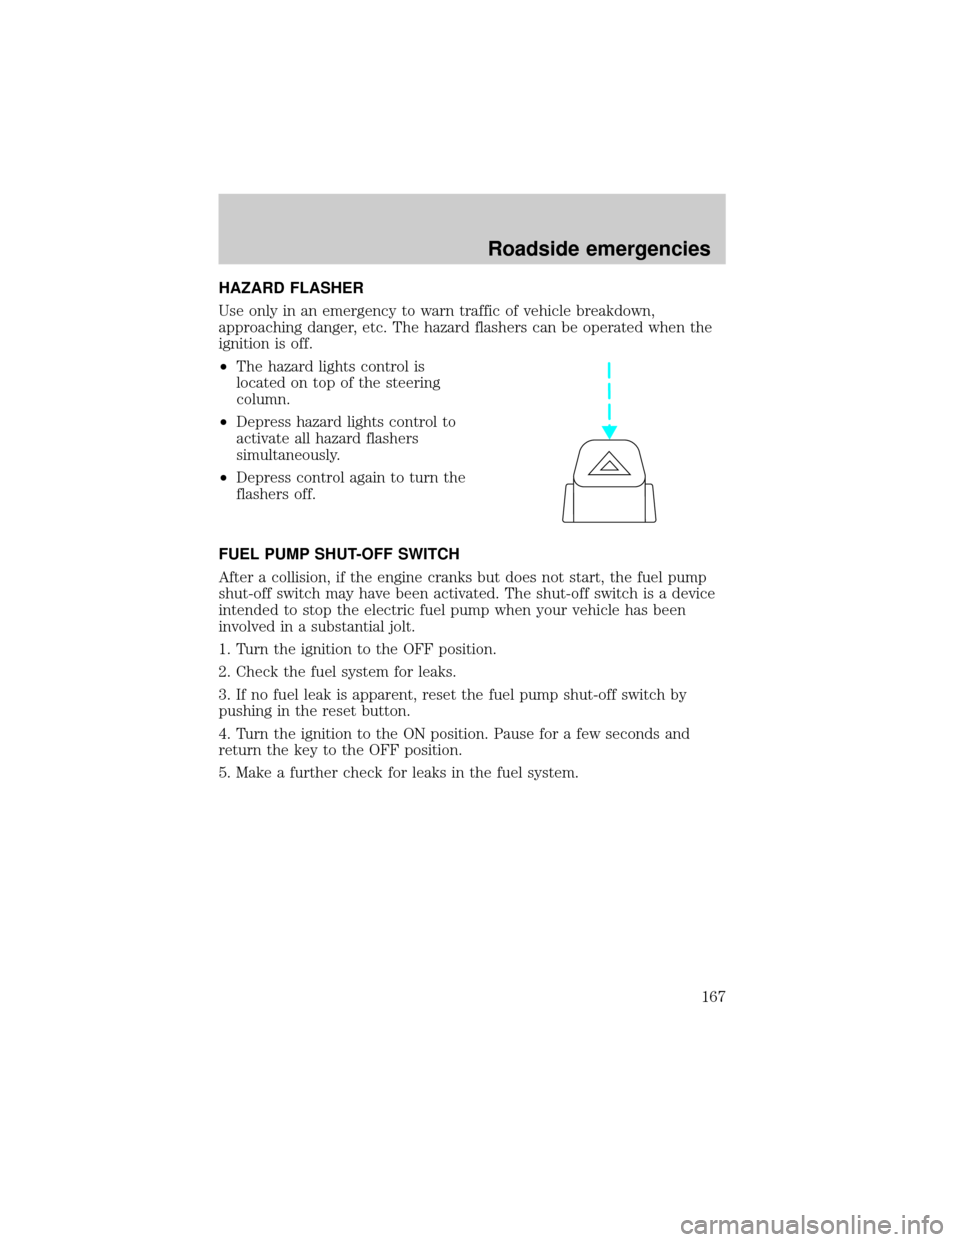
²The hazard lights control is
located on top of the steering
column.
²Depress hazard lights control to
activate all hazard flashers
simultaneously.
²Depress control again to turn the
flashers off.
FUEL PUMP SHUT-OFF SWITCH
After a collision, if the engine cranks but does not start, the fuel pump
shut-off switch may have been activated. The shut-off switch is a device
intended to stop the electric fuel pump when your vehicle has been
involved in a substantial jolt.
1. Turn the ignition to the OFF position.
2. Check the fuel system for leaks.
3. If no fuel leak is apparent, reset the fuel pump shut-off switch by
pushing in the reset button.
4. Turn the ignition to the ON position. Pause for a few seconds and
return the key to the OFF position.
5. Make a further check for leaks in the fuel system.
Roadside emergencies
167