Page 78 of 248
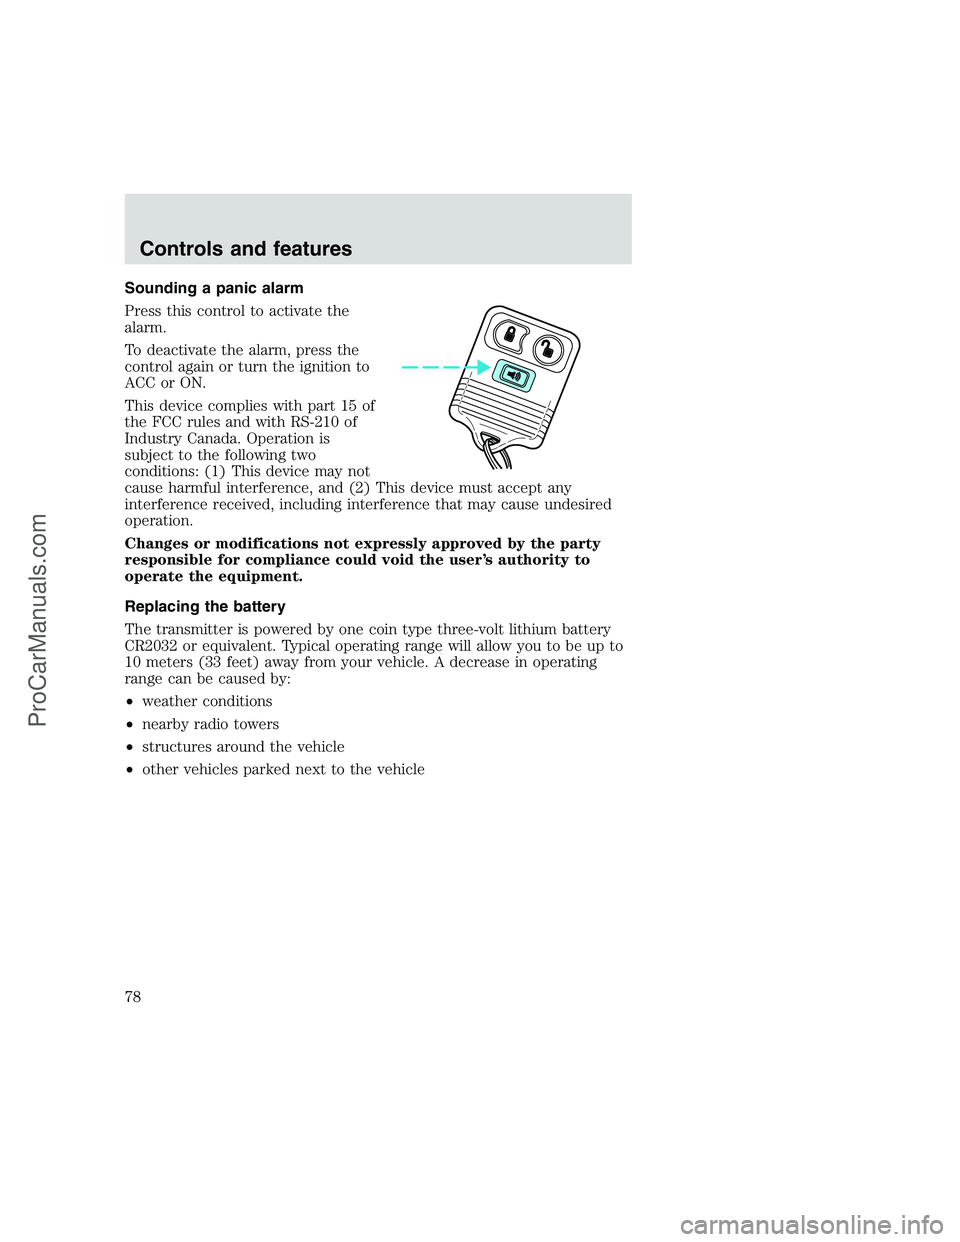
Sounding a panic alarm
Press this control to activate the
alarm.
To deactivate the alarm, press the
control again or turn the ignition to
ACC or ON.
This device complies with part 15 of
the FCC rules and with RS-210 of
Industry Canada. Operation is
subject to the following two
conditions: (1) This device may not
cause harmful interference, and (2) This device must accept any
interference received, including interference that may cause undesired
operation.
Changes or modifications not expressly approved by the party
responsible for compliance could void the user’s authority to
operate the equipment.
Replacing the battery
The transmitter is powered by one coin type three-volt lithium battery
CR2032 or equivalent. Typical operating range will allow you to be up to
10 meters (33 feet) away from your vehicle. A decrease in operating
range can be caused by:
•weather conditions
•nearby radio towers
•structures around the vehicle
•other vehicles parked next to the vehicle
Controls and features
78
ProCarManuals.com
Page 84 of 248
Press to raise or lower the rear
portion of the seat cushion.
Press the control to move the seat
forward, backward, up or down.
Using the manual lumbar support
Turn the lumbar support control
toward the front of vehicle to
increase firmness.
Turn the lumbar support control
toward the rear of vehicle to
increase softness.
Seating and safety restraints
84
ProCarManuals.com
Page 85 of 248
Rear folding bench seat (if equipped)
Folding down the rear seats
All safety belts should be
properly stowed in the seat
pockets before folding down the
rear seat.
Make sure that no objects such as
books, purses or briefcases are on
the floor in front of the second row
seats before folding them down.
1. Locate the strap on the rear of
the lower seat cushion.
2. Lift the strap and rotate the lower
seat cushion toward the front of the
vehicle.
3. Locate the strap below the
seatback.
4. Pull downward on the strap to
release the seatback.
5. Rotate the seatback forward.
Returning the seat to upright
Always latch the vehicle seat to the floor, whether the seat is
occupied or empty. If not latched, the seat may cause injury
during a sudden stop.
Seating and safety restraints
85
ProCarManuals.com
Page 86 of 248
1. Lift/rotate the seatback toward the rear of the vehicle and make sure
it latches securely.
2. Lift/rotate the lower seat cushion to its seating position.
SAFETY RESTRAINTS
Safety restraints precautions
Always drive and ride with your seatback upright and the lap
belt snug and low across the hips.
To reduce the risk of injury, make sure children sit where they
can be properly restrained.
Never let a passenger hold a child on his or her lap while the
vehicle is moving. The passenger cannot protect the child from
injury in a collision.
All occupants of the vehicle, including the driver, should always
properly wear their safety belts, even when an air bag SRS is
provided.
It is extremely dangerous to ride in a cargo area, inside or
outside of a vehicle. In a collision, people riding in these areas
are more likely to be seriously injured or killed. Do not allow people to
ride in any area of your vehicle that is not equipped with seats and
safety belts. Be sure everyone in your vehicle is in a seat and using a
safety belt properly.
Each seating position in your vehicle has a specific safety belt
assembly which is made up of one buckle and one tongue that
are designed to be used as a pair. 1) Use the shoulder belt on the
outside shoulder only. Never wear the shoulder belt under the arm.
2) Never swing the safety belt around your neck over the inside
shoulder. 3) Never use a single belt for more than one person.
Seating and safety restraints
86
ProCarManuals.com
Page 105 of 248
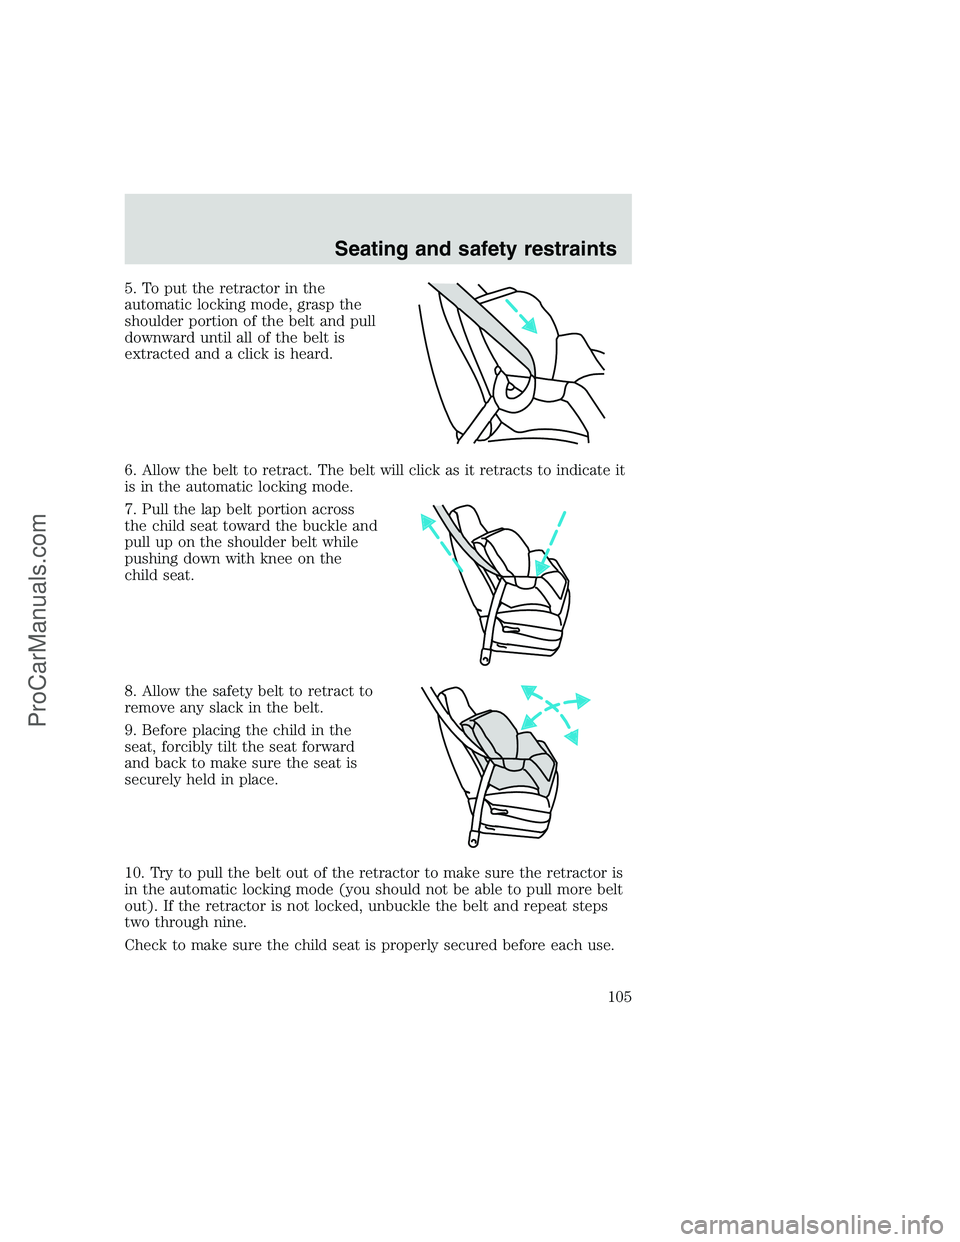
5. To put the retractor in the
automatic locking mode, grasp the
shoulder portion of the belt and pull
downward until all of the belt is
extracted and a click is heard.
6. Allow the belt to retract. The belt will click as it retracts to indicate it
is in the automatic locking mode.
7. Pull the lap belt portion across
the child seat toward the buckle and
pull up on the shoulder belt while
pushing down with knee on the
child seat.
8. Allow the safety belt to retract to
remove any slack in the belt.
9. Before placing the child in the
seat, forcibly tilt the seat forward
and back to make sure the seat is
securely held in place.
10. Try to pull the belt out of the retractor to make sure the retractor is
in the automatic locking mode (you should not be able to pull more belt
out). If the retractor is not locked, unbuckle the belt and repeat steps
two through nine.
Check to make sure the child seat is properly secured before each use.
Seating and safety restraints
105
ProCarManuals.com
Page 117 of 248

Always set the parking brake fully and make sure the gearshift is
latched in P (Park). Turn off the ignition whenever you leave
your vehicle.
If the parking brake is fully released, but the brake warning lamp
remains illuminated, the brakes may not be working properly.
See your dealer or a qualified service technician.
Driving with a 4–speed automatic transmission
Understanding gearshift positions
Pull the gearshift lever towards you and downward to move the
automatic gearshift.
Hold the brake pedal down while you move the gearshift lever
from P (Park) to another position. If you do not hold the brake
pedal down, your vehicle may move unexpectedly and injure someone.
P (Park)
Always come to a complete stop
before shifting into P (Park). Make
sure the gearshift is securely latched
in P (Park). This position locks the
transmission and prevents the rear
wheels from turning.
Always set the parking brake fully and make sure the gearshift is
latched in P (Park). Turn off the ignition whenever you leave
your vehicle.
R (Reverse)
With the gearshift in R (Reverse),
the vehicle will move backward.
Always come to a complete stop
before shifting into and out of R
(Reverse).
Driving
117
ProCarManuals.com
Page 118 of 248
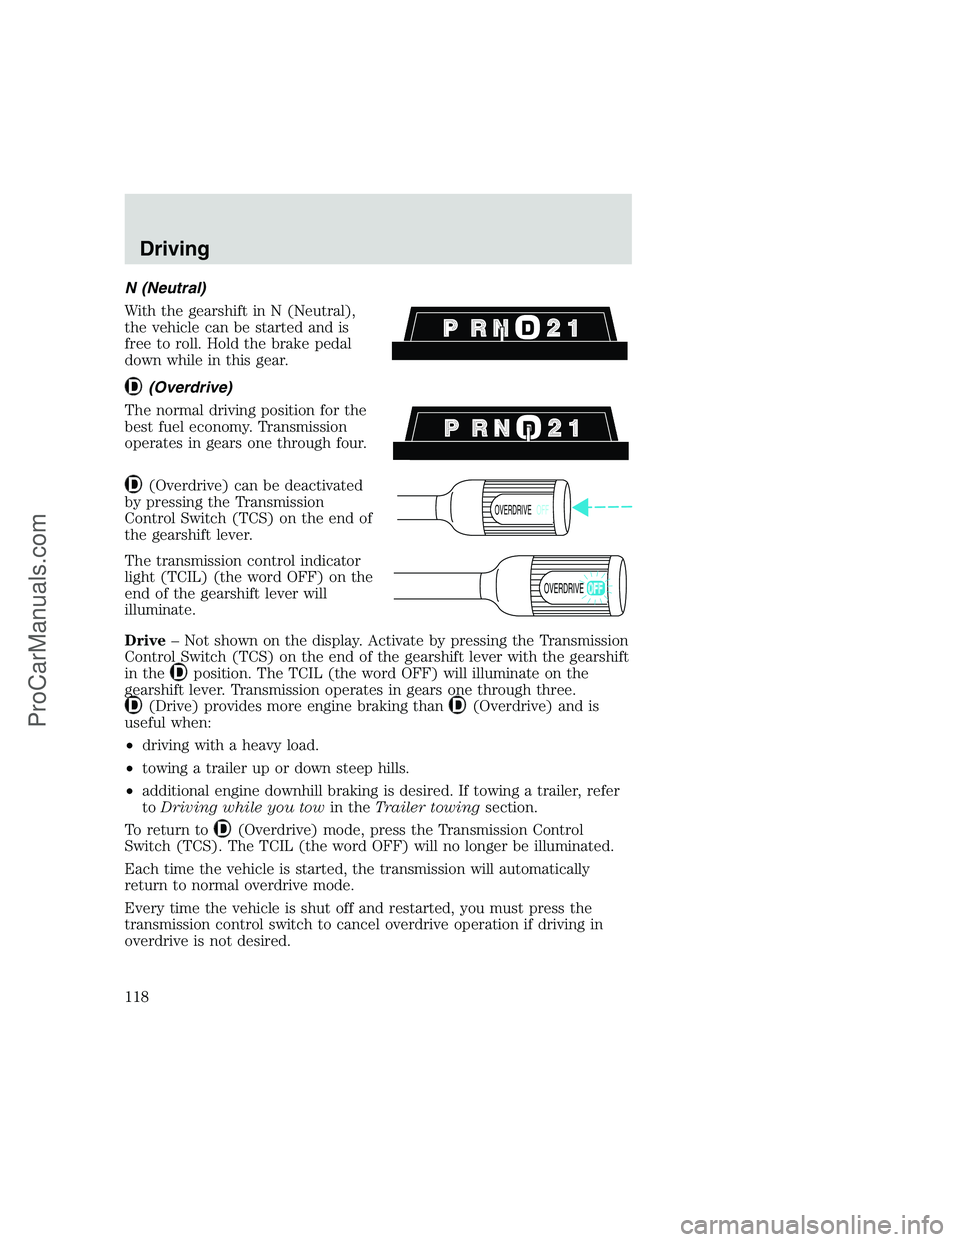
N (Neutral)
With the gearshift in N (Neutral),
the vehicle can be started and is
free to roll. Hold the brake pedal
down while in this gear.
(Overdrive)
The normal driving position for the
best fuel economy. Transmission
operates in gears one through four.
(Overdrive) can be deactivated
by pressing the Transmission
Control Switch (TCS) on the end of
the gearshift lever.
The transmission control indicator
light (TCIL) (the word OFF) on the
end of the gearshift lever will
illuminate.
Drive– Not shown on the display. Activate by pressing the Transmission
Control Switch (TCS) on the end of the gearshift lever with the gearshift
in the
position. The TCIL (the word OFF) will illuminate on the
gearshift lever. Transmission operates in gears one through three.
(Drive) provides more engine braking than(Overdrive) and is
useful when:
•driving with a heavy load.
•towing a trailer up or down steep hills.
•additional engine downhill braking is desired. If towing a trailer, refer
toDriving while you towin theTrailer towingsection.
To return to
(Overdrive) mode, press the Transmission Control
Switch (TCS). The TCIL (the word OFF) will no longer be illuminated.
Each time the vehicle is started, the transmission will automatically
return to normal overdrive mode.
Every time the vehicle is shut off and restarted, you must press the
transmission control switch to cancel overdrive operation if driving in
overdrive is not desired.
OVERDRIVEOFF
OVERDRIVE
Driving
118
ProCarManuals.com
Page 124 of 248
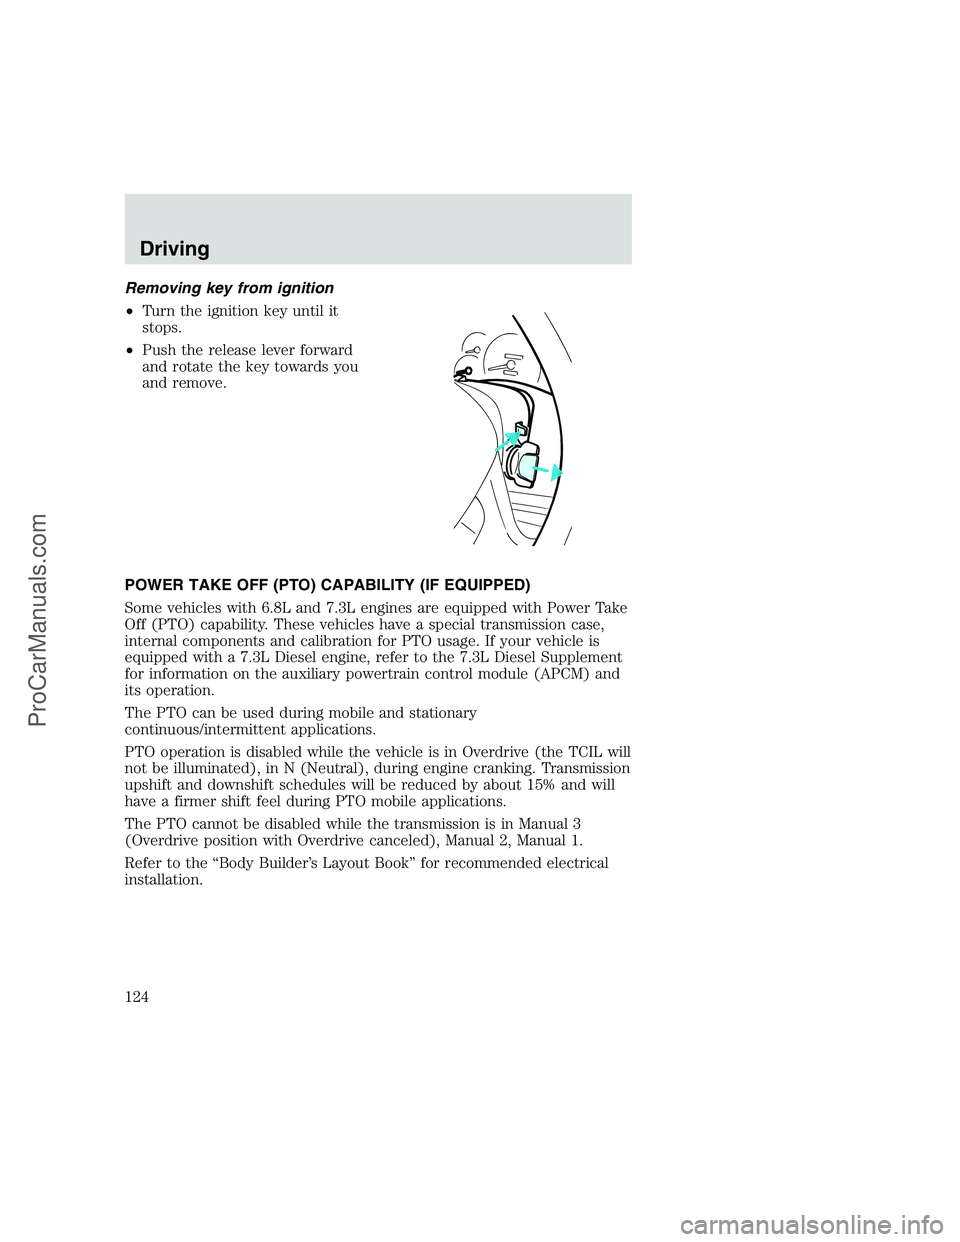
Removing key from ignition
•Turn the ignition key until it
stops.
•Push the release lever forward
and rotate the key towards you
and remove.
POWER TAKE OFF (PTO) CAPABILITY (IF EQUIPPED)
Some vehicles with 6.8L and 7.3L engines are equipped with Power Take
Off (PTO) capability. These vehicles have a special transmission case,
internal components and calibration for PTO usage. If your vehicle is
equipped with a 7.3L Diesel engine, refer to the 7.3L Diesel Supplement
for information on the auxiliary powertrain control module (APCM) and
its operation.
The PTO can be used during mobile and stationary
continuous/intermittent applications.
PTO operation is disabled while the vehicle is in Overdrive (the TCIL will
not be illuminated), in N (Neutral), during engine cranking. Transmission
upshift and downshift schedules will be reduced by about 15% and will
have a firmer shift feel during PTO mobile applications.
The PTO cannot be disabled while the transmission is in Manual 3
(Overdrive position with Overdrive canceled), Manual 2, Manual 1.
Refer to the “Body Builder’s Layout Book” for recommended electrical
installation.
Driving
124
ProCarManuals.com