1999 FORD F150 maintenance
[x] Cancel search: maintenancePage 198 of 232
²Your ªService Engine Soonº light may come on. For more information
on the ªService Engine Soonº light, refer to theInstrumentation
chapter.
Fuel Filler Cap
Your fuel tank filler cap has an indexed design with a one-eighth turn
on/off feature.
When fueling your vehicle:
1. Turn the engine off.
2. Carefully turn the filler cap counterclockwise 1/8 of a turn until it
stops.
3. Pull to remove the cap from the fuel filler pipe.
4. To install the cap, align the tabs on the cap with the notches on the
filler pipe.
5. Turn the filler cap clockwise 1/8 of a turn until it stops.
If the ªService Engine Soon/Check Engineº indicator comes on and stays
on when you start the engine, the fuel filler cap may not be properly
installed. Turn off the engine, remove the fuel filler cap and reinstall it
being careful to align the cap properly.
If you must replace the fuel filler cap, replace it with a genuine
Ford or Motorcraft part. The customer warranty may be void for
any damage to the fuel tank or fuel system if a genuine Ford or
Motorcraft fuel filler cap is not used.
The fuel system may be under pressure. If the fuel filler cap is
venting vapor or if you hear a hissing sound, wait until it stops
before completely removing the fuel filler cap. Otherwise, fuel may
spray out and injure you or others.
If you do not use the proper fuel filler cap, the pressure in the
fuel tank can damage the fuel system or cause it to work
improperly in a collision.
Fuel Filter
Your vehicle is equipped with a fuel filter that is mounted on the
underbody.
Maintenance and care
198
Page 199 of 232

For fuel filter replacement, see your dealer or a qualified service
technician. Refer to the Scheduled Maintenance Guide for the
appropriate intervals for changing the fuel filter.
If you replace the fuel filter, replace it with an authorized
Motorcraft part. The customer warranty may be void for any
damage to the fuel system if an authorized Motorcraft fuel filter
is not used.
ESSENTIALS OF GOOD FUEL ECONOMY
Measuring techniques
Your best source of information about actual fuel economy is you, the
driver. You must gather information as accurately and consistently as
possible. Fuel expense, frequency of fillups or fuel gauge readings are
NOT accurate as a measure of fuel economy. We do not recommend
taking fuel economy measurements during the first 1 600 km (1 000
miles) of driving (engine break-in period). You will get a more accurate
measurement after 3 000 km±5 000 km (2 000 miles-3 000 miles).
The advertised fuel capacity of the fuel tank on your vehicle is equal to
the rated refill capacity of the fuel tank as listed in the Refill Capacities
chart in this ªOwner Guide.º The advertised capacity is the amount of
the Indicated Capacity and the Empty Reserve combined. Indicated
Capacity is the difference in the amount of fuel in a full tank and a tank
when the fuel gauge indicates empty. Empty Reserve is the small amount
of usable fuel remaining in the fuel tank after the fuel gauge indicates
empty.
The amount of Empty Reserve varies and should not be relied
upon to increase driving range. When refueling your vehicle after
the fuel gauge indicates empty, you might not be able to refuel
the full amount of the advertised capacity of the fuel tank due to
the empty reserve still present in the tank.
Filling the tank
For consistent results:
²Use the same filling rate setting (low Ð medium Ð high) each time
the tank is filled.
²Allow three automatic click-offs when filling.
²Always use the recommended octane rating of a known quality
gasoline, preferably a national brand.
Maintenance and care
199
Page 200 of 232

²Use the same side of the same pump and have the vehicle facing the
same direction each time you fill up.
²Have the vehicle loading and distribution the same every time.
Your results will be most accurate if your filling method is consistent.
Calculating fuel economy
1. Fill the fuel tank completely and record the initial odometer reading.
2. Each time you fill the tank, record the amount of fuel added (in liters
or gallons).
3. After at least three to five tank fill-ups, fill the fuel tank and record
the current kilometer (mileage) reading.
4. Follow one of the simple calculations in order to determine fuel
economy:
Multiply liters used by 100, then divide by total kilometers
traveled.
Divide total miles traveled by total gallons used.
Keep a record for at least one month and record the type of driving (city
or highway). This will provide an accurate estimate of the vehicle's fuel
economy. Additionally, keeping records during summer and winter will
show how temperature impacts fuel economy. In general, lower
temperatures give lower fuel economy.
Driving style Ð good driving and fuel economy habits
Give consideration to the lists that follow and you may be able to change
a number of variables and improve your fuel economy.
Habits
²Smooth, moderate operation can yield up to 10% savings in fuel.
²Steady speeds without stopping will usually give the best fuel
economy.
²Idling for long periods of time (greater than one minute) may waste
fuel.
²Anticipate stopping; slowing down may eliminate the need to stop.
²Sudden or hard accelerations may reduce fuel economy.
²Slow down gradually.
Maintenance and care
200
Page 201 of 232

²Drive at reasonable speeds (traveling at 105 km /h [65 mph] uses 15%
more fuel than traveling at 88 km/h [55 mph]).
²Revving the engine before turning it off may reduce fuel economy.
²Use of the air conditioner or defroster may reduce fuel economy.
²Use of speed control (if equipped) may improve fuel economy. Speed
control can help maintain a constant speed and reduce speed changes.
You may want to turn off the speed control in hilly terrain as
unnecessary shifting between third and fourth gears may occur and
could result in reduced fuel economy.
²Warming up a vehicle on cold mornings is not required and may
reduce fuel economy.
²Resting your foot on the brake pedal while driving may reduce fuel
economy.
²Combine errands and minimize stop-and-go driving.
Maintenance
²Keep tires properly inflated and use only recommended size.
²Operating a vehicle with the wheels out of alignment will reduce fuel
economy.
²Use recommended engine oil. Refer toLubricant Specifications.
²Perform all regularly scheduled maintenance items. Follow the
recommended maintenance schedule and owner maintenance checks
found in your vehicle Scheduled Maintenance Guide.
Conditions
²Heavily loading a vehicle or towing a trailer may reduce fuel economy
at any speed.
²Carrying unnecessary weight may reduce fuel economy (approximately
2 km/h [1 mpg] is lost for every 180 kg [400 lb] of weight carried).
²Adding certain accessories to your vehicle (for example bug
deflectors, rollover/light bars, running boards, ski/luggage racks) may
reduce fuel economy.
²To maximize the fuel economy, drive with the tonneau cover installed
(if equipped).
²Use of fuel blended with alcohol may lower fuel economy.
Maintenance and care
201
Page 202 of 232
²Fuel economy may decrease with lower temperatures during the first
12±16 km (8±10 miles) of driving.
²Flat terrain driving improves fuel economy over hilly roads.
²Transmissions give their best fuel economy when operated in the top
cruise gear and with steady pressure on the gas pedal.
²Four-wheel-drive operation (if equipped) is less fuel efficient than
two-wheel-drive operation.
²Close windows for high speed driving.
EPA window sticker
Every new vehicle should have the EPA window sticker. Contact your
dealer if the window sticker is not supplied with your vehicle. The EPA
window sticker should be your guide for the fuel economy comparisons
with other vehicles.
It is important to note the box in the lower left corner of the window sticker.
These numbers represent the Range of Km/L (MPG) expected on the
vehicle, depending upon the driver's method of operation and conditions.
EMISSION CONTROL SYSTEM
Your vehicle is equipped with various emission control components and a
catalytic converter which will enable your vehicle to comply with
applicable exhaust emission standards. To make sure that the catalytic
converter and other emission control components continue to work
properly:
²Use only unleaded fuel.
²Avoid running out of fuel.
²Do not turn off the ignition while your vehicle is moving, especially at
high speeds.
²Have the items listed in your Scheduled Maintenance Guide performed
according to the specified schedule.
The scheduled maintenance items listed in the Scheduled Maintenance
Guide are essential to the life and performance of your vehicle and to its
emissions system.
If other than Ford, Motorcraft or Ford-authorized parts are used for
maintenance replacements or for service of components affecting
emission control, such non-Ford parts should be equivalent to genuine
Ford Motor Company parts in performance and durability.
Maintenance and care
202
Page 203 of 232
Do not park, idle, or drive your vehicle in dry grass or other dry
ground cover. The emission system heats up the engine
compartment and exhaust system, which can start a fire.
Illumination of the charging system warning light,Check Engine
indicator light or the temperature warning light, fluid leaks, strange
odors, smoke or loss of oil pressure, could indicate that the emission
control system is not working properly.
Exhaust leaks may result in entry of harmful and potentially
lethal fumes into the passenger compartment.
Do not make any unauthorized changes to your vehicle or engine. By law,
vehicle owners and anyone who manufactures, repairs, services, sells, leases,
trades vehicles, or supervises a fleet of vehicles are not permitted to
intentionally remove an emission control device or prevent it from working.
Information about your vehicle's emission system is on the Vehicle Emission
Control Information Decal located on or near the engine. This decal
identifies engine displacement and gives some tune up specifications.
Please consult your ªWarranty Guideº for complete emission warranty
information.
Readiness for Inspection/Maintenance (I/M) testing
In some localities, it may be a legal requirement to pass an I/M test of the
on-board diagnostic (OBD-II) system. If your ªCheck Engine/Service Engine
Soonº light is on, refer to the description in theWarning Lights and
Chimessection of theInstrumentationchapter. Your vehicle may not pass
the I/M test with the ªCheck Engine/Service Engine Soonº light on.
If the vehicle's powertrain system or its battery has just been serviced,
the OBD-II system is reset to a ªnot ready for I/M testº condition. To
ready the OBD-II system for I/M testing, a minimum of 30 minutes of city
and highway driving is necessary as described below:
²First, at least 10 minutes of driving on an expressway or highway.
²Next, at least 20 minutes driving in stop-and-go, city-type traffic with
at least four idle periods.
Allow the vehicle to sit for at least eight hours without starting the
engine. Then, start the engine and complete the above driving cycle. The
engine must warm up to its normal operating temperature. Once started,
do not turn off the engine until the above driving cycle is complete.
Maintenance and care
203
Page 204 of 232
EXTERIOR BULBS
Replacing exterior bulbs
Check the operation of the following lamps frequently:
²Headlamps
²Foglamps (if equipped)
²High-mount brakelamp
²Brakelamps
²Turn signals
²License plate lamp
²Tail lamps
²Back-up lamps
Do not remove lamp bulbs unless they can be replaced immediately with
new ones. If a bulb is removed for an extended period of time,
contaminants may enter the lamp housings and affect lamp performance.
Replacing headlamp bulbs
Handle a halogen headlamp bulb carefully and keep out of
children's reach. Grasp the bulb only by its plastic base and do
not touch the glass. The oil from your hand could cause the bulb to
break the next time the headlamps are operated.
1. Make sure that the headlamp control is in the OFF position.
2. Open the hood.
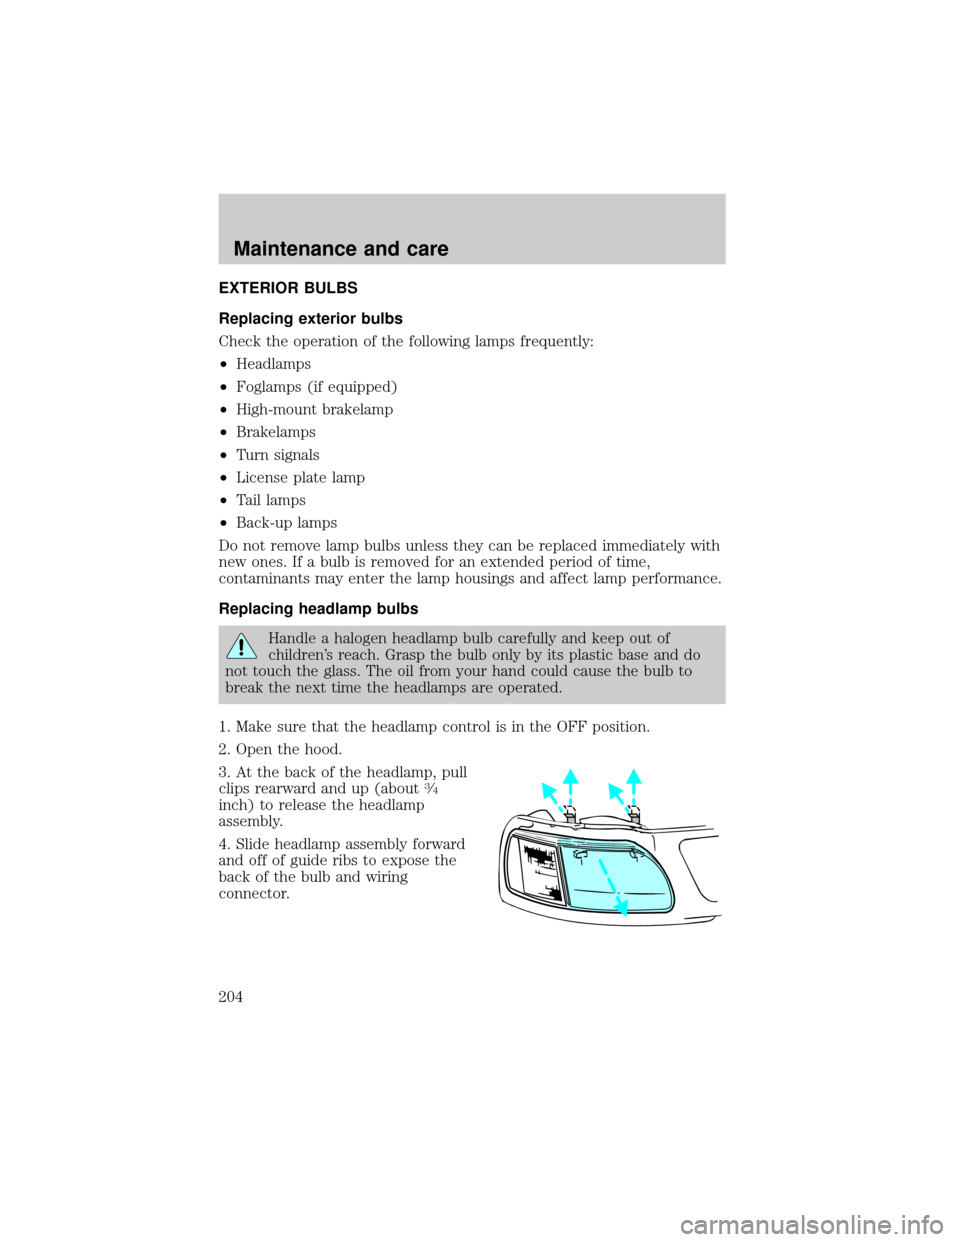
3. At the back of the headlamp, pull
clips rearward and up (about
3¤4
inch) to release the headlamp
assembly.
4. Slide headlamp assembly forward
and off of guide ribs to expose the
back of the bulb and wiring
connector.
Maintenance and care
204
Page 205 of 232
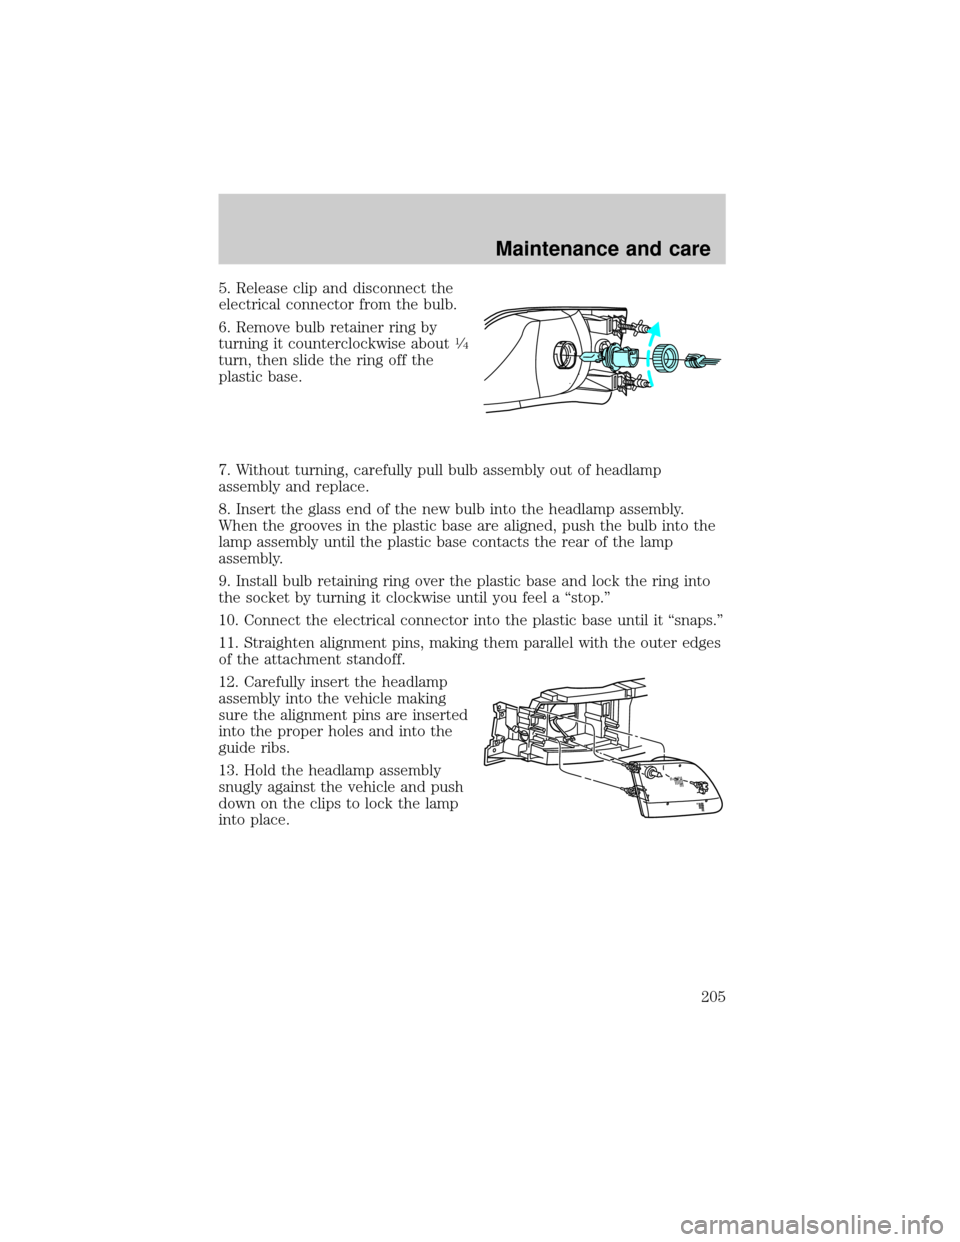
5. Release clip and disconnect the
electrical connector from the bulb.
6. Remove bulb retainer ring by
turning it counterclockwise about
1¤4
turn, then slide the ring off the
plastic base.
7. Without turning, carefully pull bulb assembly out of headlamp
assembly and replace.
8. Insert the glass end of the new bulb into the headlamp assembly.
When the grooves in the plastic base are aligned, push the bulb into the
lamp assembly until the plastic base contacts the rear of the lamp
assembly.
9. Install bulb retaining ring over the plastic base and lock the ring into
the socket by turning it clockwise until you feel a ªstop.º
10. Connect the electrical connector into the plastic base until it ªsnaps.º
11. Straighten alignment pins, making them parallel with the outer edges
of the attachment standoff.
12. Carefully insert the headlamp
assembly into the vehicle making
sure the alignment pins are inserted
into the proper holes and into the
guide ribs.
13. Hold the headlamp assembly
snugly against the vehicle and push
down on the clips to lock the lamp
into place.
Maintenance and care
205