Page 33 of 96
 is permitted to tow. It is
determined by subtracting the weight of the loaded trailer towing")
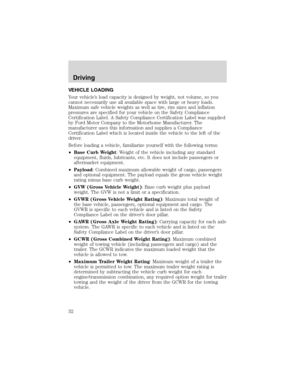
•Maximum Trailer Weight: maximum weight of a trailer the loaded
vehicle (including passengers and cargo) is permitted to tow. It is
determined by subtracting the weight of the loaded trailer towing
vehicle from the GCWR for the towing vehicle.
•Trailer Weight Range: Specified weight range that the trailer must
fall within that ranges from zero to the maximum trailer weight rating.
Remember to figure in the tongue load of your loaded trailer when
figuring the total weight.
Do not exceed the GVWR or the GAWR specified on the
certification label.
Do not use replacement tires with lower weight capacities than the
originals because they may lower the vehicle’s GVWR and GAWR
limitations. Replacement tires with a higher weight limit than the
originals do not increase the GVWR and GAWR limitations.
Calculating the load your vehicle can carry/tow
1. Use the appropriate maximum gross combined weight rating (GCWR)
chart to find the maximum GCWR for your type engine and rear axle
ratio.
2. Weigh your vehicle as you customarily operate the vehicle without
cargo. To obtain correct weights, try taking your vehicle to a shipping
company or an inspection station for trucks.
3. Subtract your loaded vehicle weight from the maximum GCWR on the
following charts. This is the maximum combined cargo and trailer weight
your vehicle can carry/tow and must fall below the maximum shown
under maximum trailer weight on the chart. Refer to the definition of
Maximum Trailer Weight below Vehicle Loading in this chapter to
determine the maximum trailer weight permitted for a loaded vehicle.
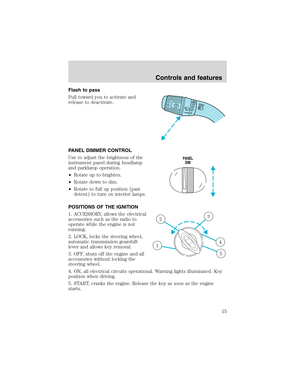
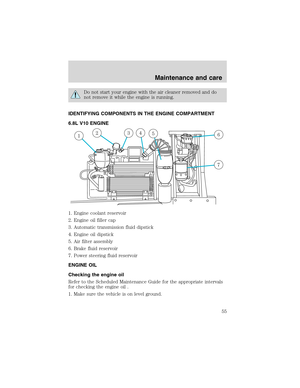
DRIVING THROUGH WATER
Do not drive quickly through standing water, especially if the depth is
unknown. Traction or brake capability may be limited and if the ignition
system gets wet, your engine may stall. Water may also enter your
engine’s air intake and severely damage your engine.
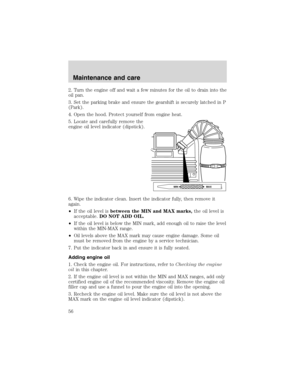
If driving through deep or standing water is unavoidable, proceed very
slowly. Never drive through water that is higher than the bottom of the
hubs.
Driving
33
Page 34 of 96

Once through the water, always try the brakes. Wet brakes do not stop
the vehicle as effectively as dry brakes. Drying can be improved by
moving your vehicle slowly while applying light pressure on the brake
pedal.
Driving through deep water where the transmission is submerged
may allow water into the transmission and cause internal
transmission damage.
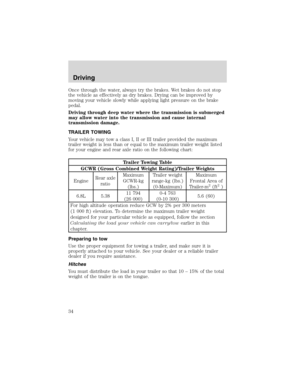
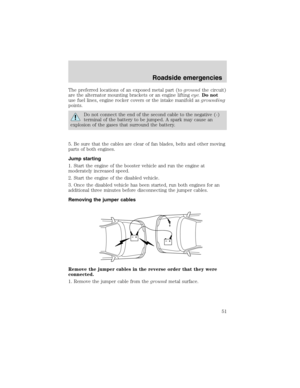
TRAILER TOWING
Your vehicle may tow a class I, II or III trailer provided the maximum
trailer weight is less than or equal to the maximum trailer weight listed
for your engine and rear axle ratio on the following chart:
Trailer Towing Table
GCWR (Gross Combined Weight Rating)/Trailer Weights
EngineRear axle
ratioMaximum
GCWR-kg
(lbs.)Trailer weight
range-kg (lbs.)
(0-Maximum)Maximum
Frontal Area of
Trailer-m
2(ft2)
6.8L 5.3811 794
(26 000)0-4 763
(0-10 300)5.6 (60)
For high altitude operation reduce GCW by 2% per 300 meters
(1 000 ft) elevation. To determine the maximum trailer weight
designed for your particular vehicle as equipped, follow the section
Calculating the load your vehicle can carry/towearlier in this
chapter.
Preparing to tow
Use the proper equipment for towing a trailer, and make sure it is
properly attached to your vehicle. See your dealer or a reliable trailer
dealer if you require assistance.
Hitches
You must distribute the load in your trailer so that 10 – 15% of the total
weight of the trailer is on the tongue.
Driving
34
Page 35 of 96

Load equalizing hitch
When hooking up a trailer using a load equalizing hitch, always use the
following procedure:
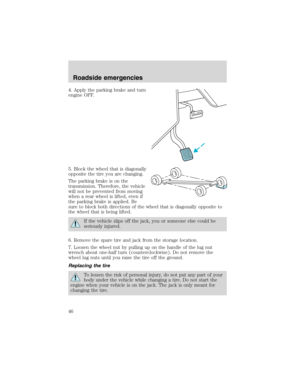
1. Park the unloaded vehicle on a level surface. With the ignition on and
all doors closed, allow the vehicle to stand for several minutes so that it
can level.
2. Measure the height of a reference point on the front and rear bumpers
at the center of the vehicle.
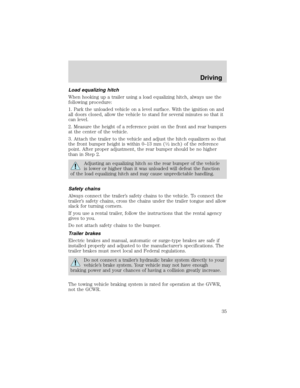
3. Attach the trailer to the vehicle and adjust the hitch equalizers so that
the front bumper height is within 0–13 mm (
1�2inch) of the reference
point. After proper adjustment, the rear bumper should be no higher
than in Step 2.
Adjusting an equalizing hitch so the rear bumper of the vehicle
is lower or higher than it was unloaded will defeat the function
of the load equalizing hitch and may cause unpredictable handling.
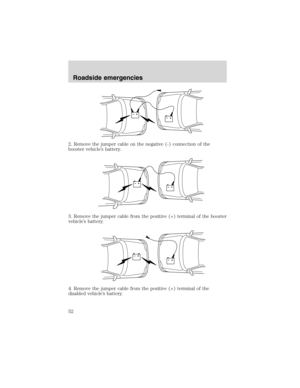
Safety chains
Always connect the trailer’s safety chains to the vehicle. To connect the
trailer’s safety chains, cross the chains under the trailer tongue and allow
slack for turning corners.
If you use a rental trailer, follow the instructions that the rental agency
gives to you.
Do not attach safety chains to the bumper.
Trailer brakes
Electric brakes and manual, automatic or surge-type brakes are safe if
installed properly and adjusted to the manufacturer’s specifications. The
trailer brakes must meet local and Federal regulations.
Do not connect a trailer’s hydraulic brake system directly to your
vehicle’s brake system. Your vehicle may not have enough
braking power and your chances of having a collision greatly increase.
The towing vehicle braking system is rated for operation at the GVWR,
not the GCWR.
Driving
35
Page 36 of 96
 when
loaded.
Trailer lamps
Trailer lamps are required on most towe")
Separate functioning brake systems are required for safe control of
towed vehicles and trailers weighing more than 680 kg (1 500 lbs) when
loaded.
Trailer lamps
Trailer lamps are required on most towed vehicles. Make sure your
trailer lamps conform to local and Federal regulations. See your dealer or
trailer rental agency for proper instructions and equipment for hooking
up trailer lamps.
Driving while you tow
Do not drive faster than 88 km/h (55 mph) when towing a trailer.
Speed control may shut off if you are towing on long, steep grades.
When towing a trailer:
•Use a lower gear when towing up or down steep hills. This will
eliminate excessive downshifting and upshifting for optimum fuel
economy and transmission cooling.
•Anticipate stops and brake gradually.
Servicing after towing
If you tow a trailer for long distances, your vehicle will require more
frequent service intervals. Refer to your maintenance guide and or
service guide for more information.
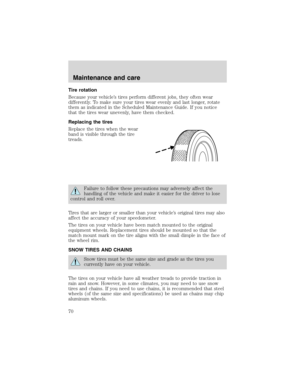
Trailer towing tips
•Practice turning, stopping and backing up in an area before starting on
a trip to get the feel of the vehicle trailer combination. When turning,
make wider turns so the trailer wheels will clear curbs and other
obstacles.
•Allow more distance for stopping with a trailer attached.
•The trailer tongue weight should be 10% of the loaded trailer weight.
•After you have traveled 80 km (50 miles), thoroughly check your
hitch, electrical connections and trailer wheel lug nuts.
•When stopped in traffic for long periods of time in hot weather, place
the gearshift in P (Park) and increase idle speed. This aids engine
cooling and air conditioner efficiency.
•Vehicles with trailers should not be parked on a grade. If you must
park on a grade, place wheel chocks under the trailer’s wheels.
Driving
36
Page 37 of 96

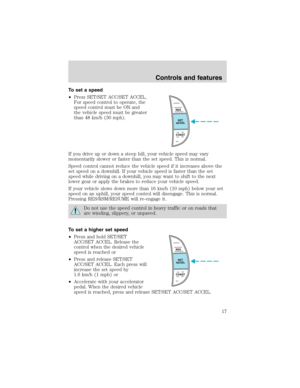
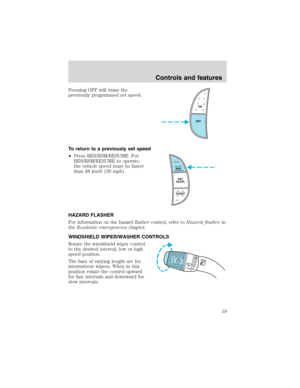
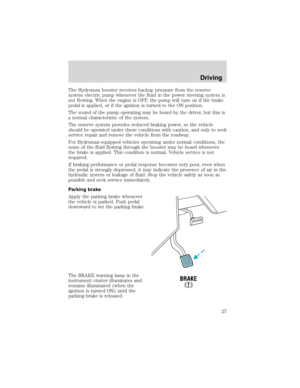
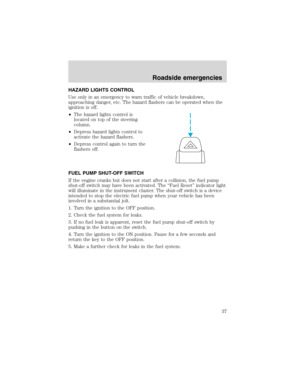
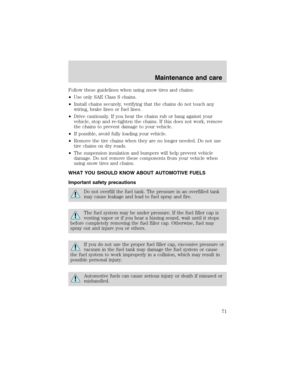
HAZARD LIGHTS CONTROL
Use only in an emergency to warn traffic of vehicle breakdown,
approaching danger, etc. The hazard flashers can be operated when the
ignition is off.
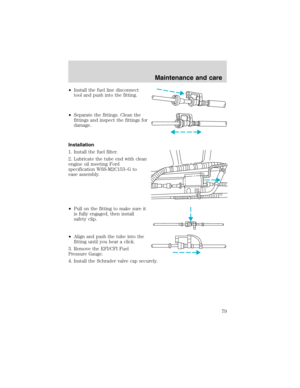
•The hazard lights control is
located on top of the steering
column.
•Depress hazard lights control to
activate the hazard flashers.
•Depress control again to turn the
flashers off.
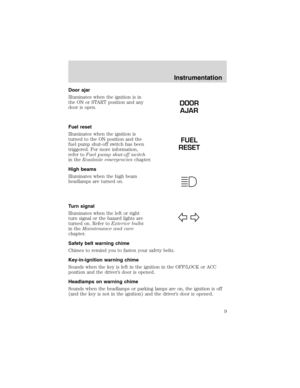
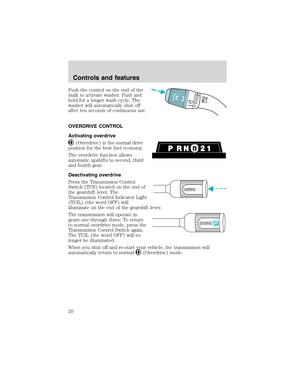
FUEL PUMP SHUT-OFF SWITCH
If the engine cranks but does not start after a collision, the fuel pump
shut-off switch may have been activated. The “Fuel Reset” indicator light
will illuminate in the instrument cluster. The shut-off switch is a device
intended to stop the electric fuel pump when your vehicle has been
involved in a substantial jolt.
1. Turn the ignition to the OFF position.
2. Check the fuel system for leaks.
3. If no fuel leak is apparent, reset the fuel pump shut-off switch by
pushing in the button on the switch.
4. Turn the ignition to the ON position. Pause for a few seconds and
return the key to the OFF position.
5. Make a further check for leaks in the fuel system.
Roadside emergencies
37
Page 38 of 96
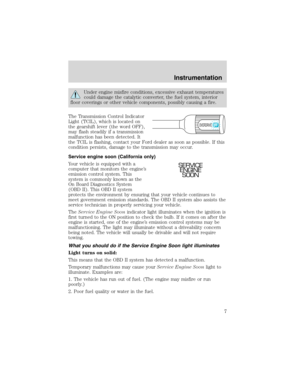
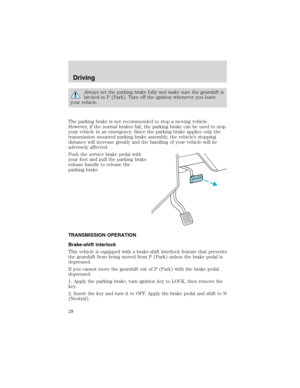
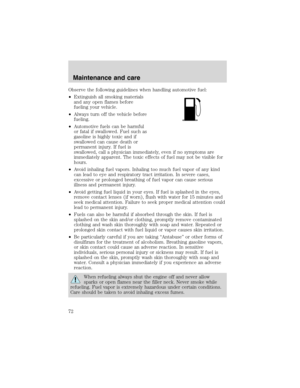
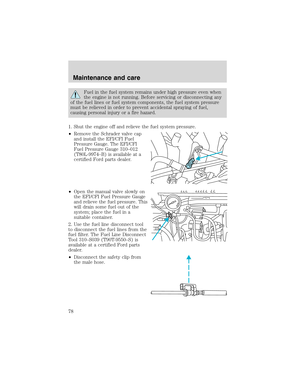
The fuel pump shut-off switch is
located on a bracket above the
brake pedal.
Use the following procedure to reset the fuel pump shut-off switch.
1. Turn the ignition to the OFF position.
2. Check the fuel system for leaks.
3. If no fuel leak is apparent, reset the fuel pump shut-off switch by
pushing in on the reset button.
4. Turn the ignition to the ON position. Pause for a few seconds and
return the key to the OFF position.
5. Make a further check for leaks in the fuel system.
Roadside emergencies
38
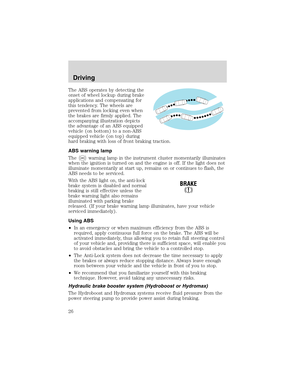
Page 39 of 96
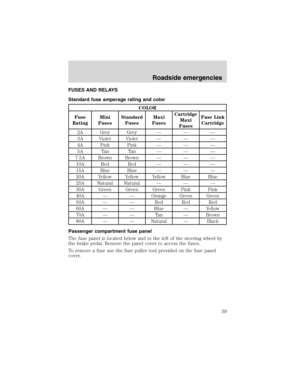
FUSES AND RELAYS
Standard fuse amperage rating and color
COLOR
Fuse
RatingMini
FusesStandard
FusesMaxi
FusesCartridge
Maxi
FusesFuse Link
Cartridge
2A Grey Grey — — —
3A Violet Violet — — —
4A Pink Pink — — —
5A Tan Tan — — —
7.5A Brown Brown — — —
10A Red Red — — —
15A Blue Blue — — —
20A Yellow Yellow Yellow Blue Blue
25A Natural Natural — — —
30A Green Green Green Pink Pink
40A — — Orange Green Green
50A — — Red Red Red
60A — — Blue — Yellow
70A — — Tan — Brown
80A — — Natural — Black
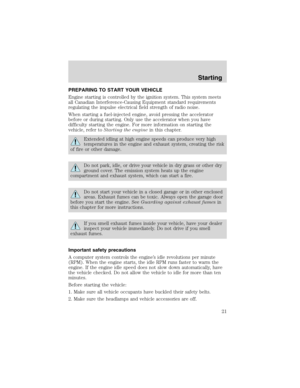
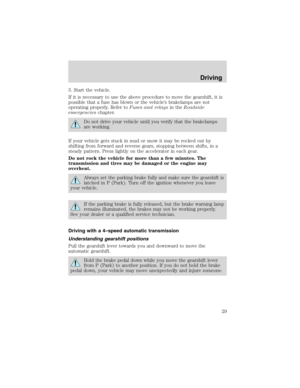
Passenger compartment fuse panel
The fuse panel is located below and to the left of the steering wheel by
the brake pedal. Remove the panel cover to access the fuses.
To remove a fuse use the fuse puller tool provided on the fuse panel
cover.
Roadside emergencies
39
Page 40 of 96
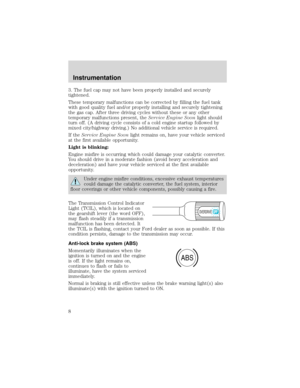
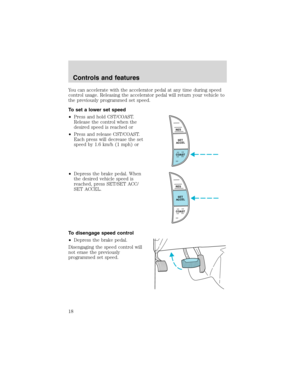
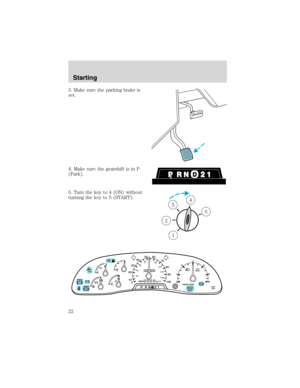
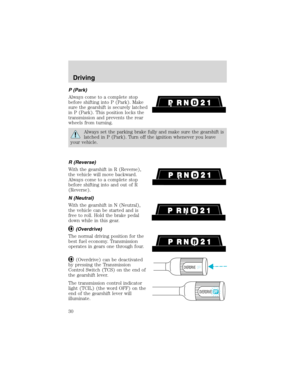
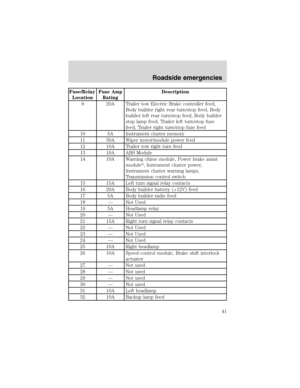
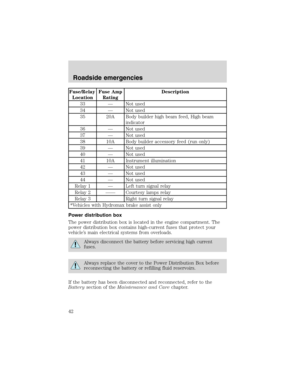
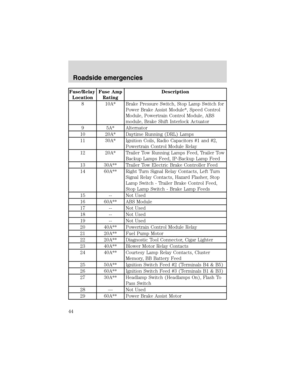
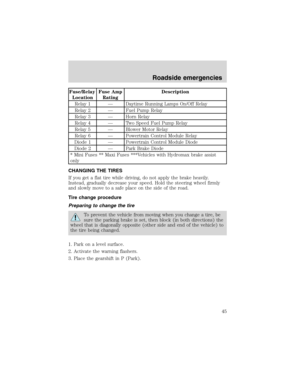
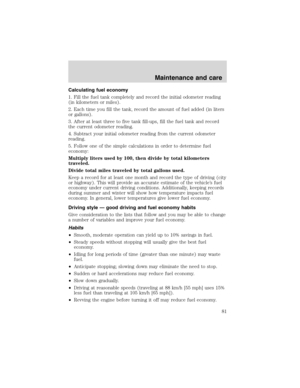
The fuses are coded as follows.
Fuse/Relay
LocationFuse Amp
RatingDescription
1 20A Right turn signal relay coil, Left turn signal
relay coil, Right turn indicator, Left turn
indicator, Body builder right rear turn/stop
feed, Body builder left rear turn/stop feed
2 — Not used
3 — Not used
4 15A Courtesy lamp relay, Interior lamp feed
5 10A Body builder accessory feed (accessory and
run)
6 10A Trailer tow left turn feed
7 15A Blower motor relay coil
8 — Not used
1234
5
7
689101142
43
44 13 12 14
15 16 17
19 18
2021 22 23
25 24
26 27 28 29
31 30 32 33 3435
37
3638 3940
41
RELAY 1RELAY 2 RELAY 3
Roadside emergencies
40