Page 69 of 208

Replacement of the battery willnotcause the remote transmitter to
become deprogrammed from your vehicle. The remote transmitter should
operate normally after battery replacement.
Replacing lost transmitters
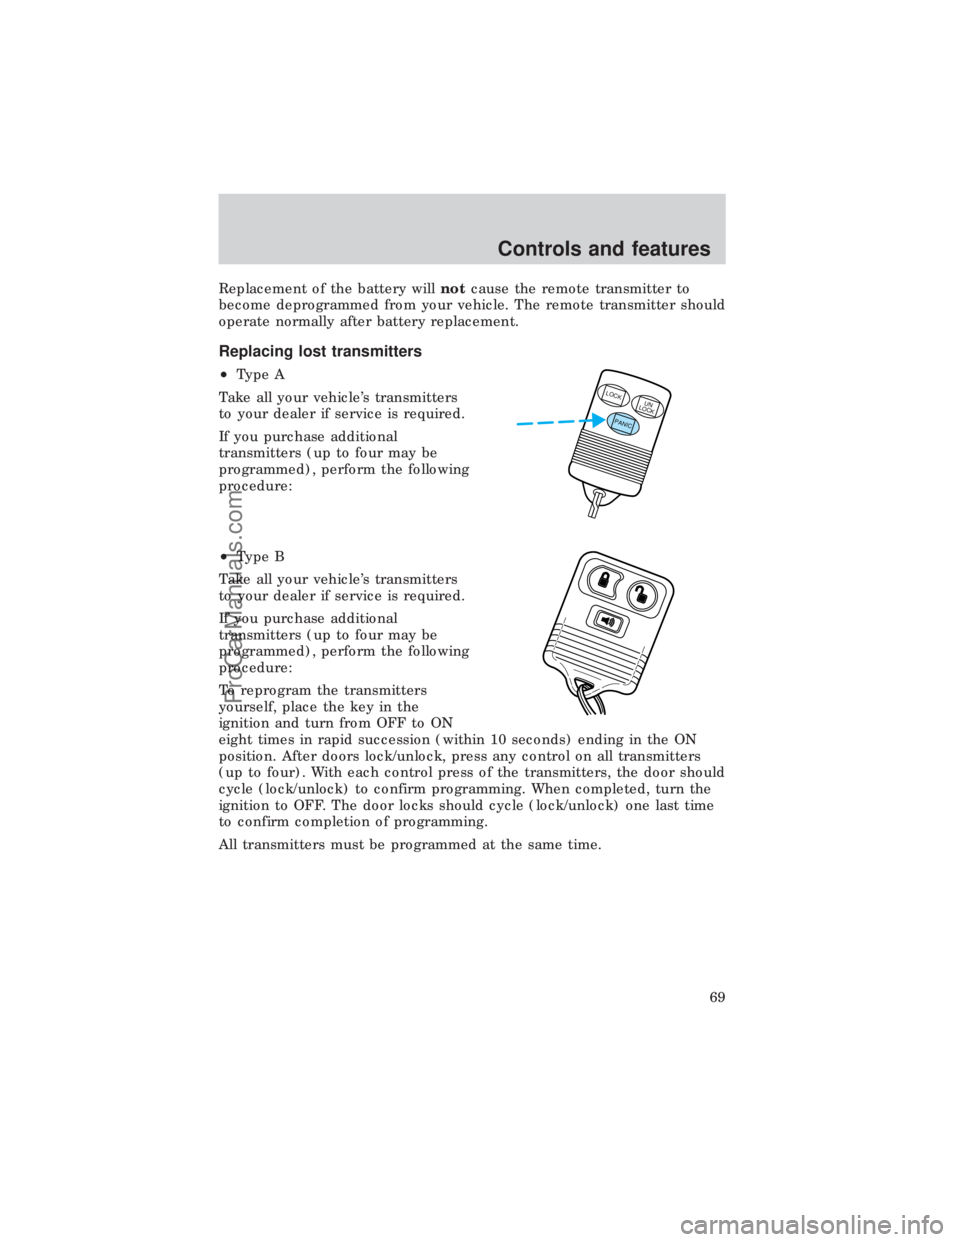
²Type A
Take all your vehicle's transmitters
to your dealer if service is required.
If you purchase additional
transmitters (up to four may be
programmed), perform the following
procedure:
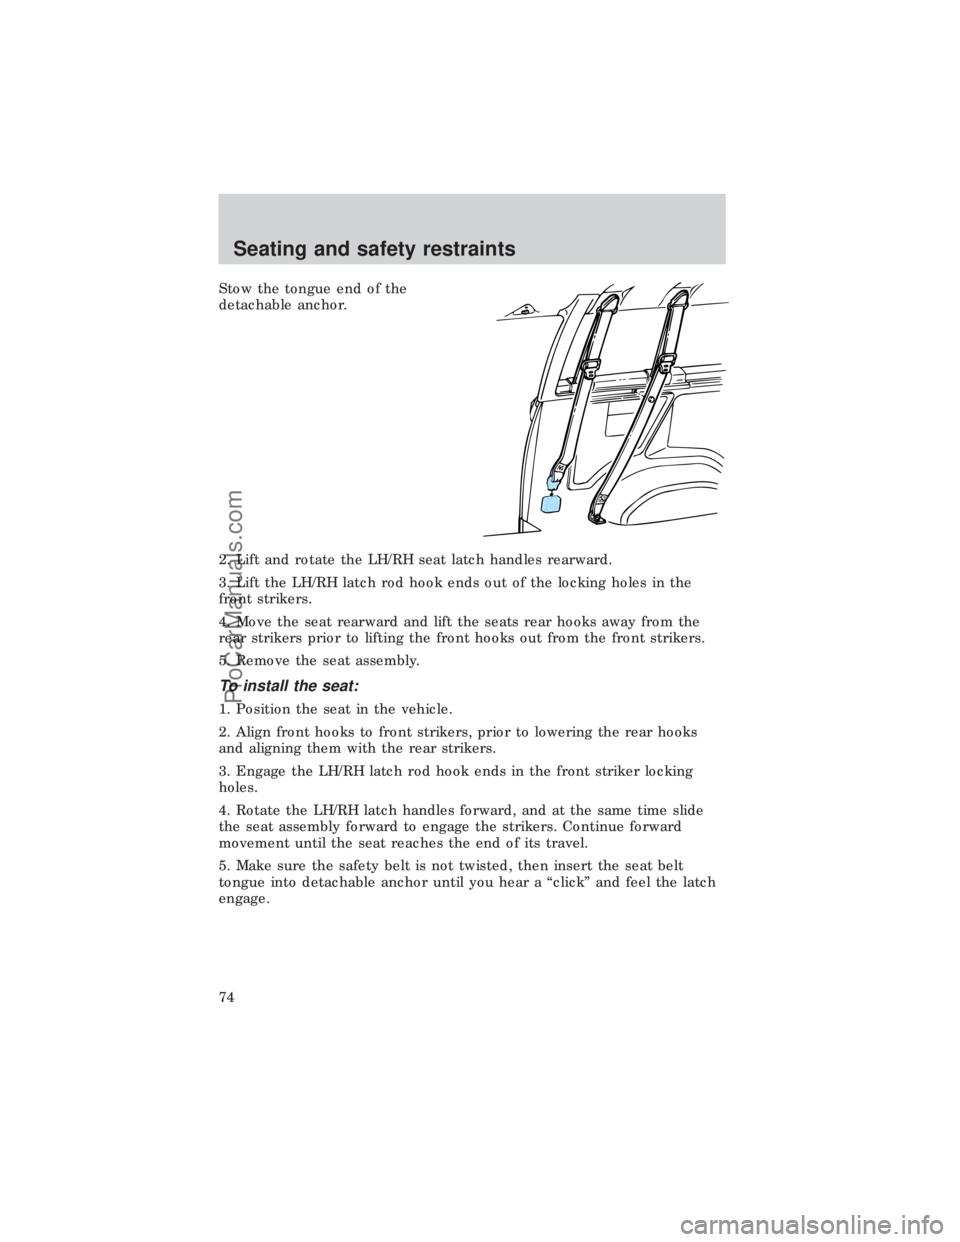
²Type B
Take all your vehicle's transmitters
to your dealer if service is required.
If you purchase additional
transmitters (up to four may be
programmed), perform the following
procedure:
To reprogram the transmitters
yourself, place the key in the
ignition and turn from OFF to ON
eight times in rapid succession (within 10 seconds) ending in the ON
position. After doors lock/unlock, press any control on all transmitters
(up to four). With each control press of the transmitters, the door should
cycle (lock/unlock) to confirm programming. When completed, turn the
ignition to OFF. The door locks should cycle (lock/unlock) one last time
to confirm completion of programming.
All transmitters must be programmed at the same time.
LOCKUN
LOCK
PANIC
Controls and features
69
ProCarManuals.com
Page 70 of 208
Illuminated entry
The interior lamps illuminate when the remote entry system is used to
unlock the door(s) or sound the personal alarm.
The system automatically turns off after 25 seconds or when the ignition
is turned to the RUN or ACC position. The dome lamp control
(if equipped) mustnotbe set to the OFF position for the illuminated
entry system to operate.
The inside lights will not turn off if:
²they have been turned on with the dimmer control or
²any door is open.
Controls and features
70
ProCarManuals.com
Page 73 of 208
Using the manual lumbar support
Turn the lumbar support control
clockwise to increase firmness.
Turn the lumbar support control
counterclockwise to increase
softness.
Rear bench seat
To remove the seats:
1. Disengage the lap/shoulder belt
from the seat by inserting a key or
small screwdriver into the slot in the
detachable anchor and lifting
upward.
Seating and safety restraints
73
ProCarManuals.com
Page 74 of 208

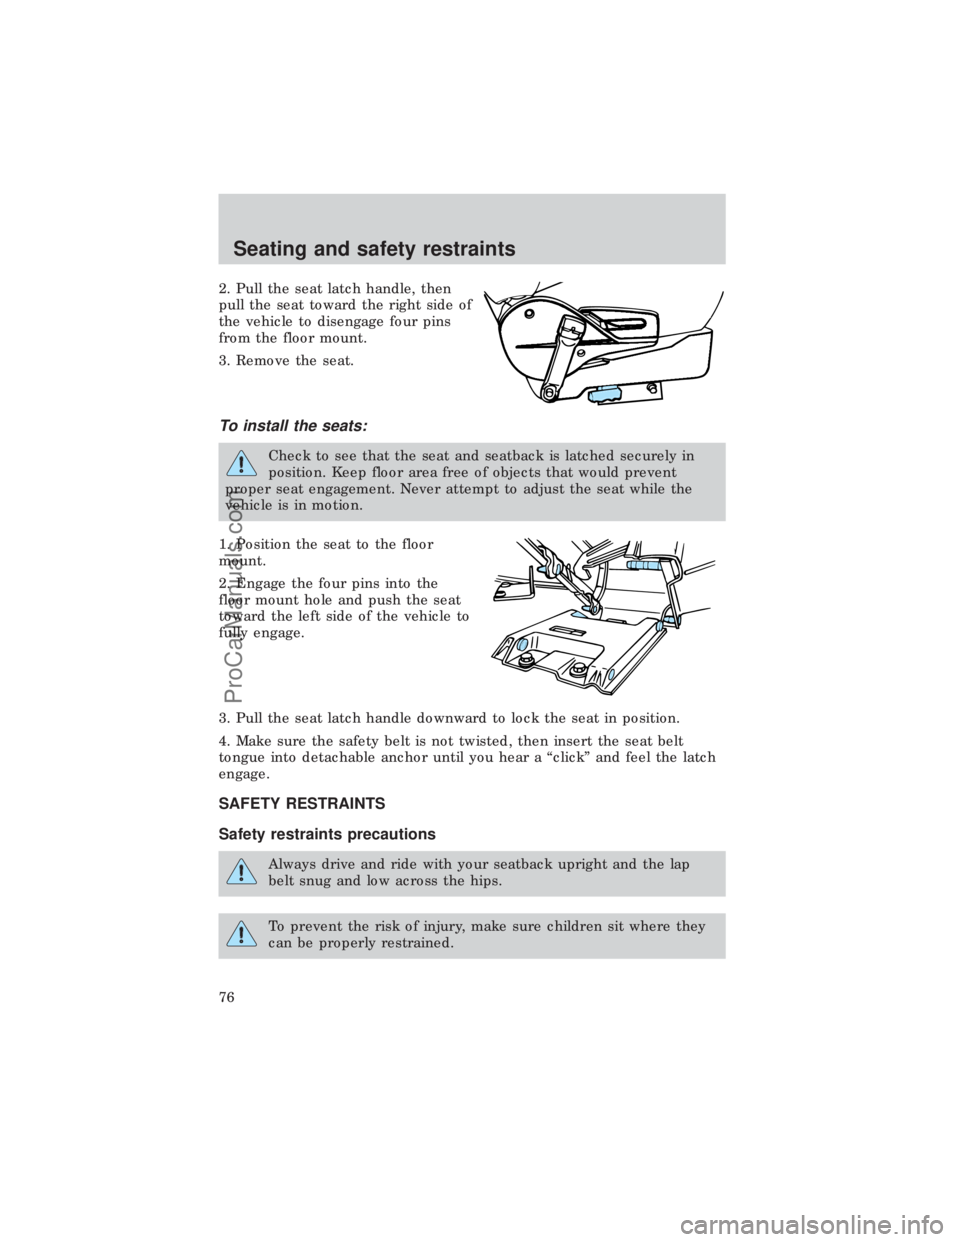
Stow the tongue end of the
detachable anchor.
2. Lift and rotate the LH/RH seat latch handles rearward.
3. Lift the LH/RH latch rod hook ends out of the locking holes in the
front strikers.
4. Move the seat rearward and lift the seats rear hooks away from the
rear strikers prior to lifting the front hooks out from the front strikers.
5. Remove the seat assembly.
To install the seat:
1. Position the seat in the vehicle.
2. Align front hooks to front strikers, prior to lowering the rear hooks
and aligning them with the rear strikers.
3. Engage the LH/RH latch rod hook ends in the front striker locking
holes.
4. Rotate the LH/RH latch handles forward, and at the same time slide
the seat assembly forward to engage the strikers. Continue forward
movement until the seat reaches the end of its travel.
5. Make sure the safety belt is not twisted, then insert the seat belt
tongue into detachable anchor until you hear a ªclickº and feel the latch
engage.
Seating and safety restraints
74
ProCarManuals.com
Page 76 of 208

2. Pull the seat latch handle, then
pull the seat toward the right side of
the vehicle to disengage four pins
from the floor mount.
3. Remove the seat.
To install the seats:
Check to see that the seat and seatback is latched securely in
position. Keep floor area free of objects that would prevent
proper seat engagement. Never attempt to adjust the seat while the
vehicle is in motion.
1. Position the seat to the floor
mount.
2. Engage the four pins into the
floor mount hole and push the seat
toward the left side of the vehicle to
fully engage.
3. Pull the seat latch handle downward to lock the seat in position.
4. Make sure the safety belt is not twisted, then insert the seat belt
tongue into detachable anchor until you hear a ªclickº and feel the latch
engage.
SAFETY RESTRAINTS
Safety restraints precautions
Always drive and ride with your seatback upright and the lap
belt snug and low across the hips.
To prevent the risk of injury, make sure children sit where they
can be properly restrained.
Seating and safety restraints
76
ProCarManuals.com
Page 78 of 208

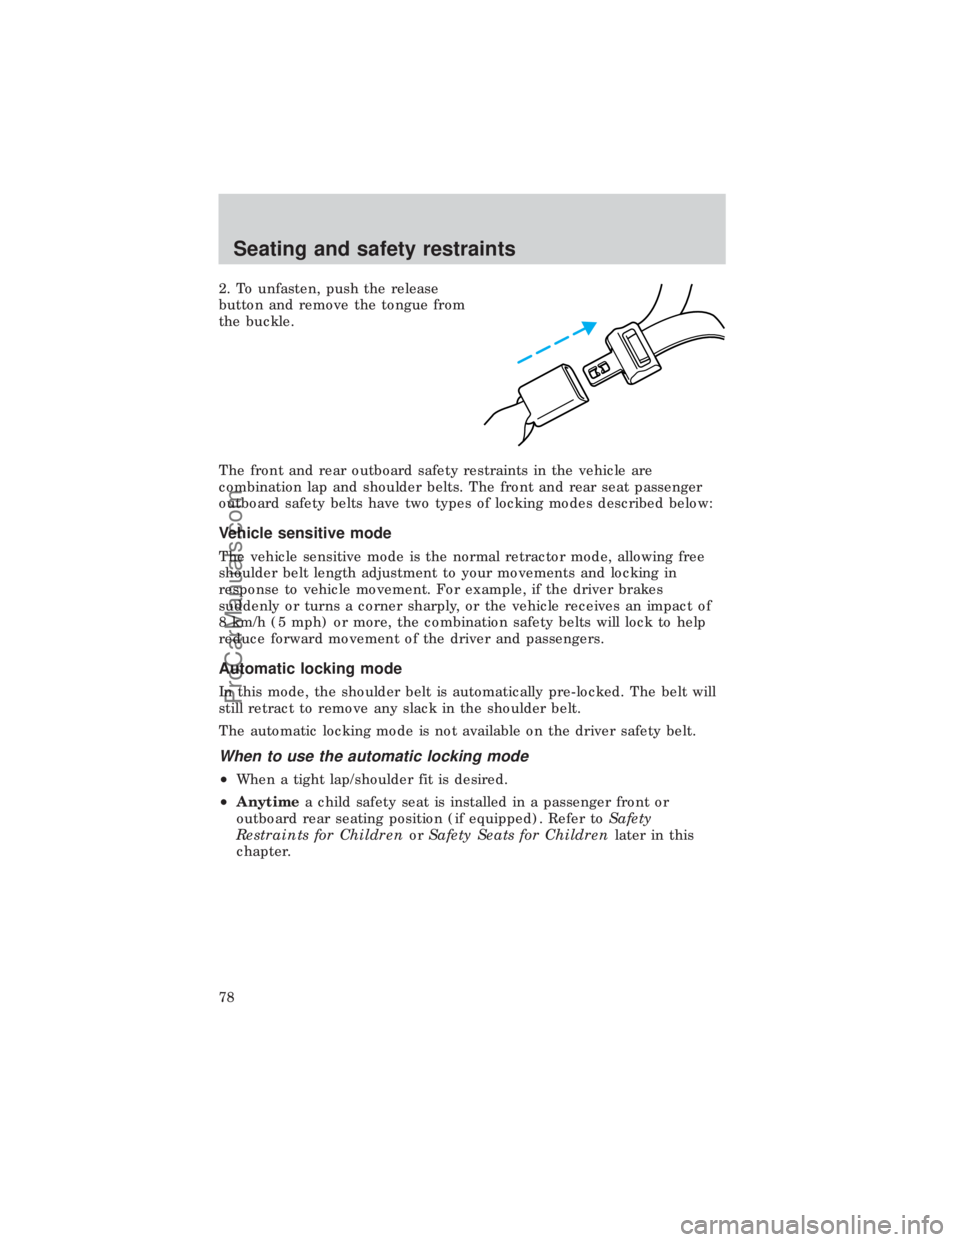
2. To unfasten, push the release
button and remove the tongue from
the buckle.
The front and rear outboard safety restraints in the vehicle are
combination lap and shoulder belts. The front and rear seat passenger
outboard safety belts have two types of locking modes described below:
Vehicle sensitive mode
The vehicle sensitive mode is the normal retractor mode, allowing free
shoulder belt length adjustment to your movements and locking in
response to vehicle movement. For example, if the driver brakes
suddenly or turns a corner sharply, or the vehicle receives an impact of
8 km/h (5 mph) or more, the combination safety belts will lock to help
reduce forward movement of the driver and passengers.
Automatic locking mode
In this mode, the shoulder belt is automatically pre-locked. The belt will
still retract to remove any slack in the shoulder belt.
The automatic locking mode is not available on the driver safety belt.
When to use the automatic locking mode
²When a tight lap/shoulder fit is desired.
²Anytimea child safety seat is installed in a passenger front or
outboard rear seating position (if equipped). Refer toSafety
Restraints for ChildrenorSafety Seats for Childrenlater in this
chapter.
Seating and safety restraints
78
ProCarManuals.com
Page 79 of 208
How to use the automatic locking mode
²Buckle the combination lap and
shoulder belt.
²Grasp the shoulder portion and
pull downward until the entire
belt is extracted.
²Allow the belt to retract. As the belt retracts, you will hear a clicking
sound. This indicates the safety belt is now in the automatic locking
mode.
How to disengage the automatic locking mode
Disconnect the combination lap/shoulder belt and allow it to retract
completely to disengage the automatic locking mode and activate the
vehicle sensitive (emergency) locking mode.
Safety belt buckle pretensioner
Your vehicle is equipped with safety belt buckle pretensioners at the
driver and front passenger seating positions.
Seating and safety restraints
79
ProCarManuals.com
Page 80 of 208

The safety belt pretensioner uses the same crash sensor system as the
air bag supplemental restraint system (SRS). When the safety belt
pretensioner deploys, webbing from the lap and shoulder safety belt is
tightened.
Front safety belt height adjustment
Your vehicle has safety belt height
adjustments for the driver and front
passenger. Adjust the height of the
shoulder belt so the belt rests
across the middle of your shoulder.
To lower the shoulder belt height,
push the button and slide the height
control down. To raise the height of
the shoulder belt, slide the height
adjuster up. Pull down on the height
adjustment assembly to make sure it
is locked in place.
Position the shoulder belt height adjuster so that the belt rests
across the middle of your shoulder. Failure to adjust the safety
belt properly could reduce the effectiveness of the safety belt and
increase the risk of injury in a collision.
Lap belts
Adjusting the lap belt
The lap belt does not adjust automatically.
The lap belts should fit snugly and as low as possible around the
hips, not around the waist.
Seating and safety restraints
80
ProCarManuals.com