Page 346 of 440
yellowblue
6-36 Front Sidemarker
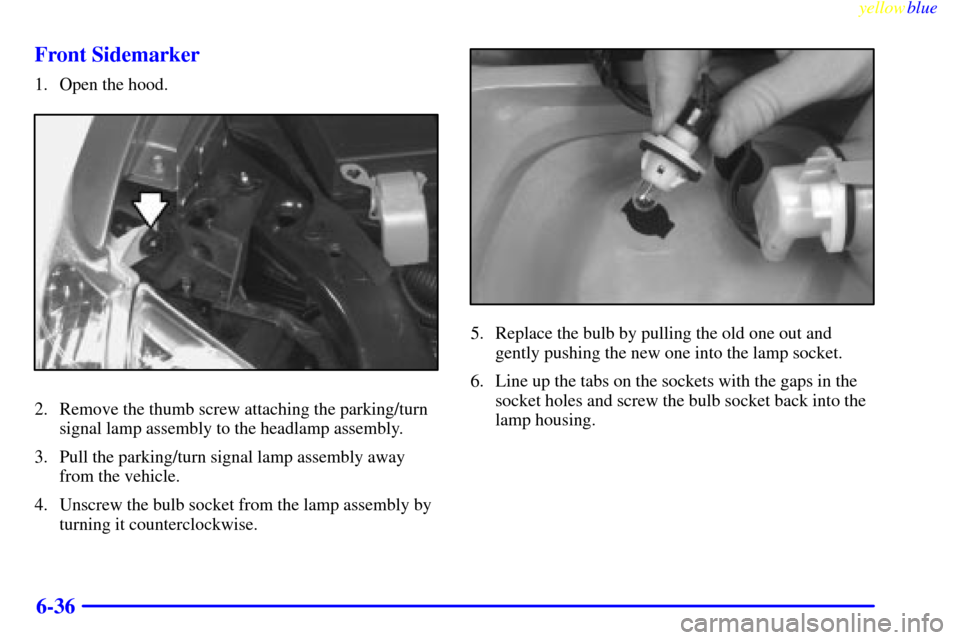
1. Open the hood.
2. Remove the thumb screw attaching the parking/turn
signal lamp assembly to the headlamp assembly.
3. Pull the parking/turn signal lamp assembly away
from the vehicle.
4. Unscrew the bulb socket from the lamp assembly by
turning it counterclockwise.
5. Replace the bulb by pulling the old one out and
gently pushing the new one into the lamp socket.
6. Line up the tabs on the sockets with the gaps in the
socket holes and screw the bulb socket back into the
lamp housing.
Page 347 of 440
yellowblue
6-37
7. To replace the lamp assembly, line up and insert the
tabs on the back of the assembly with the slots in the
fender. Engage the lower clip on the front of the
lamp assembly, keeping the upper tab on the
parking/turn signal lamp assembly inboard of the
headlamp bracket tab.
8. To align the parking/turn signal lamp assembly with
the headlamp assembly, lift up the parking/turn
signal lamp assembly until the upper edge is
contacting the fender.
9. Fasten the parking/turn signal lamp assembly to the
headlamp assembly with the thumb screw removed
in Step 2.
Taillamps
1. Open the liftgate.
2. Remove the two screws from the taillamp housing
on the inboard side.
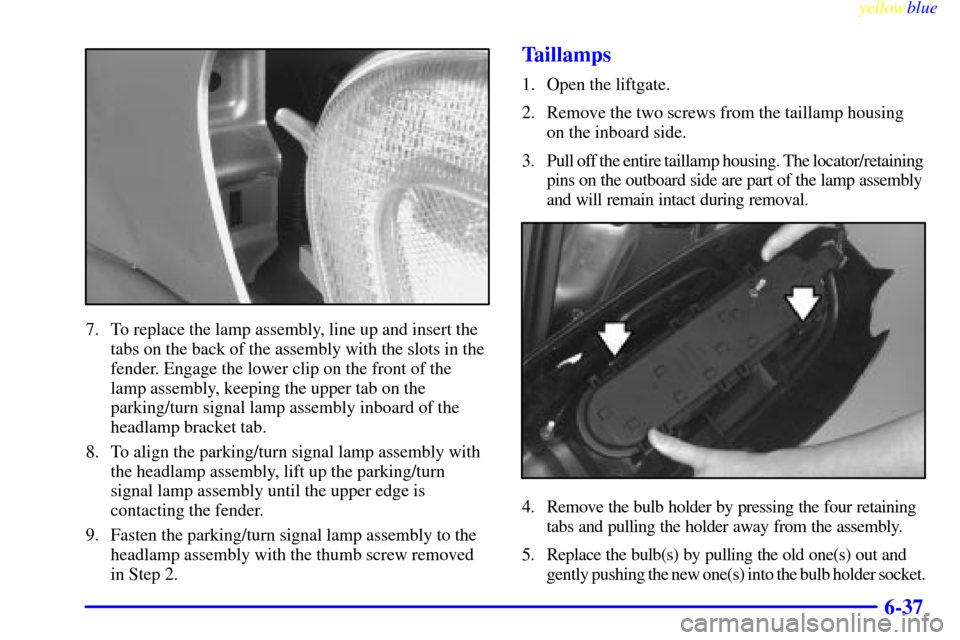
3. Pull off the entire taillamp housing. The locator/retaining
pins on the outboard side are part of the lamp assembly
and will remain intact during removal.
4. Remove the bulb holder by pressing the four retaining
tabs and pulling the holder away from the assembly.
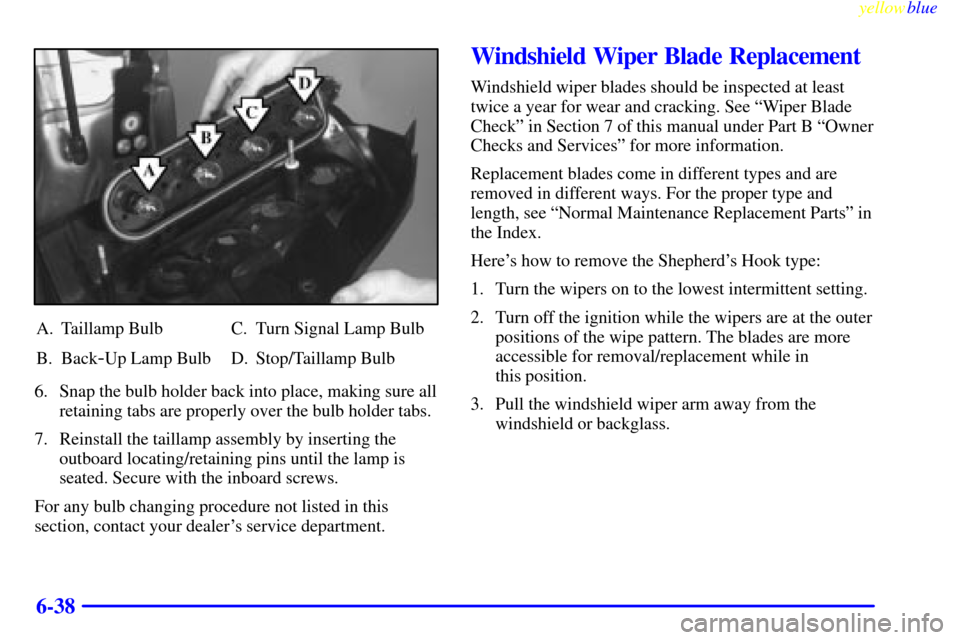
5. Replace the bulb(s) by pulling the old one(s) out and
gently pushing the new one(s) into the bulb holder socket.
Page 348 of 440
yellowblue
6-38
A. Taillamp Bulb
B. Back
-Up Lamp BulbC. Turn Signal Lamp Bulb
D. Stop/Taillamp Bulb
6. Snap the bulb holder back into place, making sure all
retaining tabs are properly over the bulb holder tabs.
7. Reinstall the taillamp assembly by inserting the
outboard locating/retaining pins until the lamp is
seated. Secure with the inboard screws.
For any bulb changing procedure not listed in this
section, contact your dealer's service department.
Windshield Wiper Blade Replacement
Windshield wiper blades should be inspected at least
twice a year for wear and cracking. See ªWiper Blade
Checkº in Section 7 of this manual under Part B ªOwner
Checks and Servicesº for more information.
Replacement blades come in different types and are
removed in different ways. For the proper type and
length, see ªNormal Maintenance Replacement Partsº in
the Index.
Here's how to remove the Shepherd's Hook type:
1. Turn the wipers on to the lowest intermittent setting.
2. Turn off the ignition while the wipers are at the outer
positions of the wipe pattern. The blades are more
accessible for removal/replacement while in
this position.
3. Pull the windshield wiper arm away from the
windshield or backglass.
Page 365 of 440

yellowblue
6-55
GM Vehicle Care/Appearance Materials
PART NUMBERSIZEDESCRIPTIONUSAGE
99495423 in. x 25 in.Polishing Cloth ± Wax TreatedExterior polishing cloth
105017216 oz. (0.473 L)Tar and Road Oil RemoverRemoves tar, road oil and asphalt
105017316 oz. (0.473 L)Chrome Cleaner and PolishUse on chrome, stainless steel, nickel, copper and brass
105017416 oz. (0.473 L)White Sidewall Tire CleanerRemoves soil and black marks from whitewalls
105021432 oz. (0.946 L)Vinyl CleanerCleans vinyl tops, upholstery and convertible tops
105042723 oz. (0.680 L)Glass CleanerRemoves dirt, grime, smoke and fingerprints
1052918**8 oz. (0.237 L)Armor All� ProtectantProtects leather, wood, acrylics, Plexiglas�, plastic,
rubber and vinyl
105292516 oz. (0.473 L)Multi-Purpose Interior
CleanerCleans carpets, seats, interior trim, door panels
and floor mats
105292916 oz. (0.473 L)Wheel CleanerSpray on and rinse with water
10529308 oz. (0.237 L)Capture Dry Spot RemoverAttracts, absorbs and removes soils on fabric
123457212.5 sq. ft.Synthetic ChamoisShines vehicle without scratching
1234572512 oz. (0.354 L)Silicone Tire ShineSpray on tire shine
12377964*16 oz. (0.473 L)Finish EnhancerRemoves dust, fingerprints and surface contaminants
12377966*16 oz. (0.473 L)Cleaner WaxRemoves light scratches and oxidation and protects finish
12377984*16 oz. (0.473 L)Surface CleanerRemoves contaminants, blemishes and swirl marks
See your General Motors Parts Department for these products. * For exterior use only.
See ªRecommended Fluids and Lubricantsº in the Index. ** Not recommended for use on instrument panels.
Page 370 of 440

yellowblue
6-60
Fuses Usage
SWC ACCY Steering Wheel Radio
Control Switches
HAZARD Turn Signal Switch
RR PWR SCKT Rear Electric Accessory
Plug Housing
DRL Daytime Running Lamps (DRL)
Control Module
LH T/LP Not Used
RR DEFOG Rear Window Defogger Relay,
Heated Mirrors
FRT PWR SCKT Front Electric Accessory Plug
Housing
SIR Inflatable Restraint
Control Module
FRT HVAC
LOW/MED
BLWRHeater
-A/C Control
MALL/RADIO/
DICBCM, Driver Information Display,
Rear Seat Audio, ELC Sensor
and Relay
STOP LAMP Stoplamp SwitchFuses Usage
ABS MOD
BATTElectronic Brake Control
Module/Electronic Brake Traction
Control Module (EBCM/EBTCM)
CAN VENT
SOLEvaporative Emissions (EVAP)
Canister Vent Solonoid Valve
ELC Electronic Level Control (ELC)
Air Compressor and ELC Relay,
Trailer Harness
CTSY LAMP BCM
IGN 1 BCM, Electronic Brake Control
Indicator Lamp Driver Module,
Instrument Panel Cluster, Rear
Side Door Actuator Control
Module, Rear Window
Wiper/Washer and Multifunction
Switch (Fog Lamp
Switch/Traction Control Switch)
and Stoplamp/Torque Converter
Clutch (TCC) Switch
RR WPR WSHR Rear Window Wiper Motor, Rear
Window Wiper/Washer and
Multifunction Switch (Rear
Window Wiper/Washer Switch)
Page 371 of 440
yellowblue
6-61
Fuses Usage
LH HEADLP
LOWNot Used
LH HEADLP
HIGHNot Used
ABS/TCS IGN Electronic Brake Control
Module/Electronic Brake Traction
Control Module (EBCM/EBTCM)
ABS SOL LH and RH Front Brake
Solenoid Valve
HVAC/DRL Air Inlet Actuator, DRL Control
Module, Heater
-A/C Control,
Temperature Door Actuator
(Front) and Rear Window
Defogger Relay
BCM PRGRM Body Control Module (BCM)
RH HEADLP
LOWNot Used
RH HEADLP
HIGHNot Used
PCM IGN MAIN Relay and PCMUnderhood Fuse and Relay Center
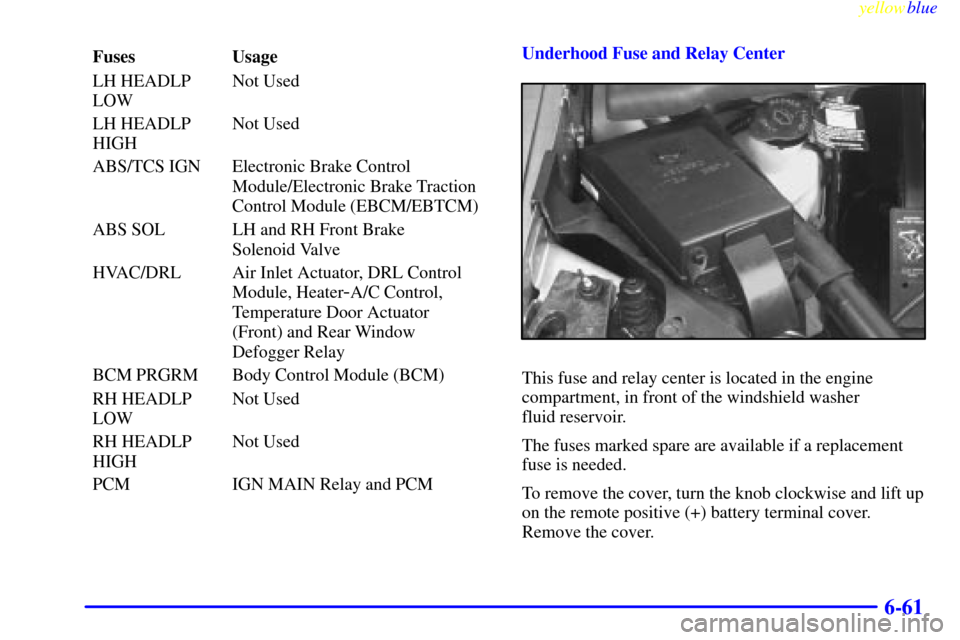
This fuse and relay center is located in the engine
compartment, in front of the windshield washer
fluid reservoir.
The fuses marked spare are available if a replacement
fuse is needed.
To remove the cover, turn the knob clockwise and lift up
on the remote positive (+) battery terminal cover.
Remove the cover.
Page 372 of 440
yellowblue
6-62
Maxi Fuse Usage
1
-COOL FAN 2 Coolant Fans
2 Not Used
3
-HEADLAMPS Circuit Breakers: FRT HVAC HI
BLWR, and HEADLAMP Fuses
(Instrument Panel): HAZARD
and STOPLAMP
4
-BATT MAIN 2 Circuit Breaker: PWR
SEAT/PSD. Fuses (Instrument
Panel): ELC and RR DEFOGMaxi Fuse Usage
5
-IGN MAIN 1 Ignition Switch to Fuses
(Instrument Panel): ABS/TCS
IGN, CRUISE, DRL, ELEC
PRNDL, IGN 1, PSD, SIR, T/SIG
and PCM [IGN MAIN Relay
(Underhood Electrical Center
Fuses: A/C CLU, ELEK IGN,
IGN 1
-U/H, INJ, TCC)]
6
-COOL FAN 1 Coolant Fans
7
-BATT MAIN 1 Fuses (Instrument Panel): ABS
MOD BATT, CIGAR/DLC,
CTSY LAMP, FRT PWR SCKT,
PWR LOCK, PWR MIRROR and
RR PWR SCKT
8
-IGN MAIN 2 Ignition Switch to Fuses (I/P):
BCM PRGRM, FRT HVAC
LOW/MED BLWR, FRT
WPR/WSHR, HVAC/DRL,
MALL/RADIO/DIC, PWR QRT
VENT, RR HVAC, RR
WPR/WSHR, SWC ACCY and
PWR WDO Circuit Breaker
Page:
< prev 1-8 9-16 17-24