Page 73 of 344
yellowblue
2-11
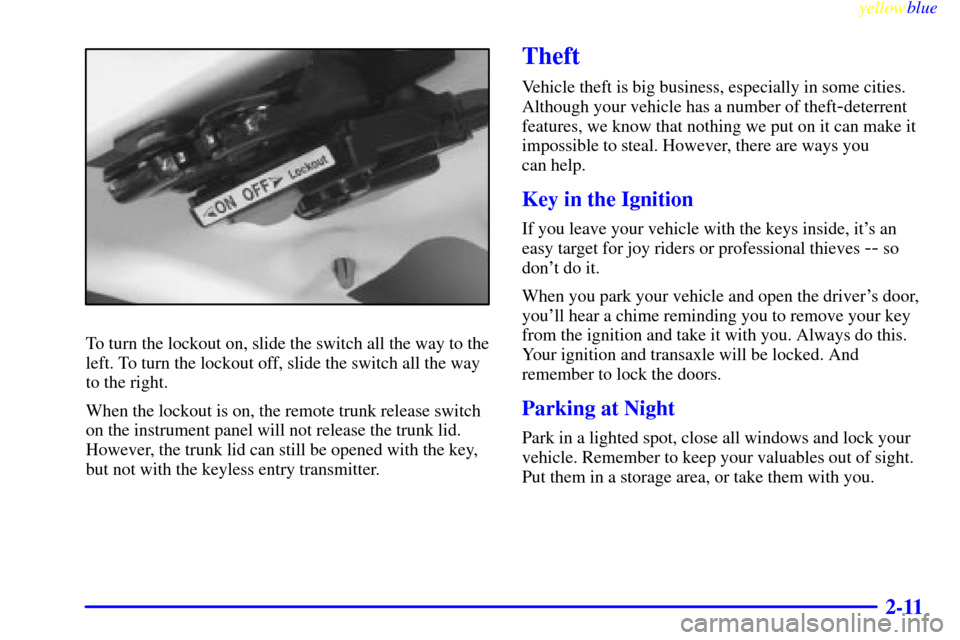
To turn the lockout on, slide the switch all the way to the
left. To turn the lockout off, slide the switch all the way
to the right.
When the lockout is on, the remote trunk release switch
on the instrument panel will not release the trunk lid.
However, the trunk lid can still be opened with the key,
but not with the keyless entry transmitter.
Theft
Vehicle theft is big business, especially in some cities.
Although your vehicle has a number of theft
-deterrent
features, we know that nothing we put on it can make it
impossible to steal. However, there are ways you
can help.
Key in the Ignition
If you leave your vehicle with the keys inside, it's an
easy target for joy riders or professional thieves
-- so
don't do it.
When you park your vehicle and open the driver's door,
you'll hear a chime reminding you to remove your key
from the ignition and take it with you. Always do this.
Your ignition and transaxle will be locked. And
remember to lock the doors.
Parking at Night
Park in a lighted spot, close all windows and lock your
vehicle. Remember to keep your valuables out of sight.
Put them in a storage area, or take them with you.
Page 74 of 344

yellowblue
2-12 Parking Lots
If you park in a lot where someone will be watching
your vehicle, it's best to lock it up and take your keys.
But what if you have to leave your key?
�If possible, park in a busy, well lit area.
�Put your valuables in a storage area, like your
trunk or glove box. Be sure to close and lock the
storage area.
�Close all windows.
�Move the trunk release lockout switch to the
ON position.
�Lock the glove box.
�Lock all the doors except the driver's.
�If your vehicle has a remote keyless entry system,
take the transmitter with you.
Passlock�
Your vehicle is equipped with the Passlock
theft
-deterrent system.
Passlock is a passive theft
-deterrent system. Passlock
enables fuel if the ignition lock cylinder is turned with a
valid key. If a correct key is not used or the ignition lock
cylinder is tampered with, fuel is disabled.
During normal operation, the THEFT SYSTEM light
will go off approximately five seconds after the key is
turned to the ON ignition position.
If the THEFT SYSTEM light flashes, wait until the light
stops flashing before starting the engine.
In an emergency, call the Chevrolet Roadside Assistance
Center at 1
-800-CHEV-USA� (1-800-243-8872).
(In Canada, call 1
-800-268-6800.)
Page 76 of 344
yellowblue
2-14
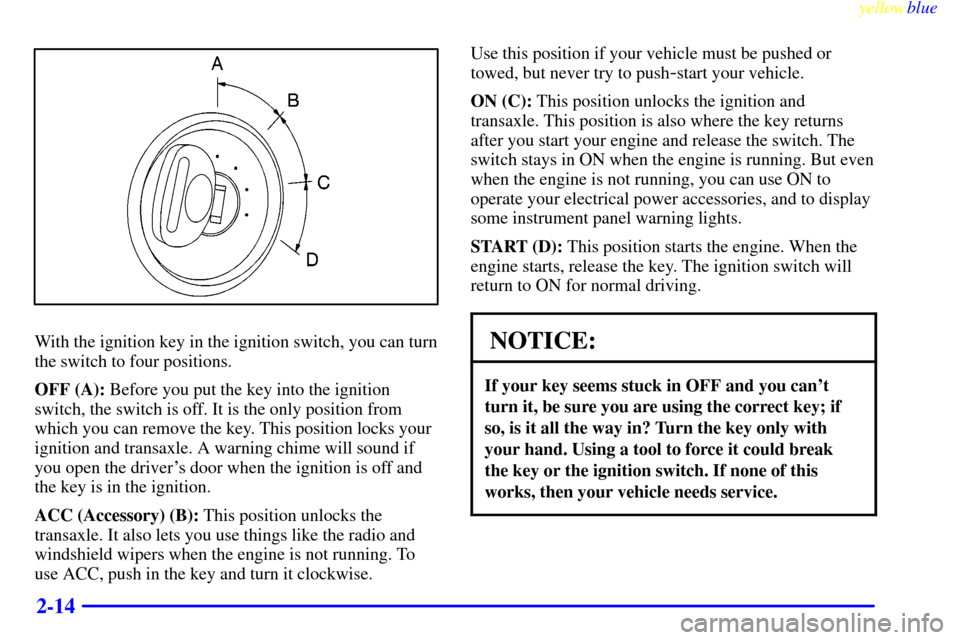
With the ignition key in the ignition switch, you can turn
the switch to four positions.
OFF (A): Before you put the key into the ignition
switch, the switch is off. It is the only position from
which you can remove the key. This position locks your
ignition and transaxle. A warning chime will sound if
you open the driver's door when the ignition is off and
the key is in the ignition.
ACC (Accessory) (B): This position unlocks the
transaxle. It also lets you use things like the radio and
windshield wipers when the engine is not running. To
use ACC, push in the key and turn it clockwise. Use this position if your vehicle must be pushed or
towed, but never try to push
-start your vehicle.
ON (C): This position unlocks the ignition and
transaxle. This position is also where the key returns
after you start your engine and release the switch. The
switch stays in ON when the engine is running. But even
when the engine is not running, you can use ON to
operate your electrical power accessories, and to display
some instrument panel warning lights.
START (D): This position starts the engine. When the
engine starts, release the key. The ignition switch will
return to ON for normal driving.
NOTICE:
If your key seems stuck in OFF and you can't
turn it, be sure you are using the correct key; if
so, is it all the way in? Turn the key only with
your hand. Using a tool to force it could break
the key or the ignition switch. If none of this
works, then your vehicle needs service.
Page 91 of 344
yellowblue
2-29
Windows
Manual Windows
On a vehicle with manual windows, use the window
crank to open and close each window.
Power Windows (If Equipped)
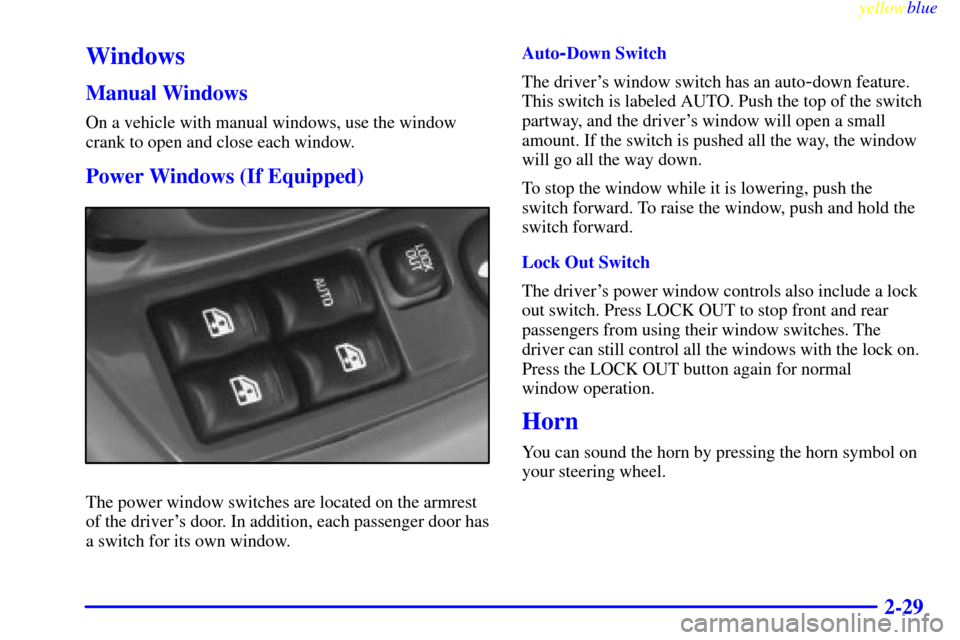
The power window switches are located on the armrest
of the driver's door. In addition, each passenger door has
a switch for its own window.Auto
-Down Switch
The driver's window switch has an auto
-down feature.
This switch is labeled AUTO. Push the top of the switch
partway, and the driver's window will open a small
amount. If the switch is pushed all the way, the window
will go all the way down.
To stop the window while it is lowering, push the
switch forward. To raise the window, push and hold the
switch forward.
Lock Out Switch
The driver's power window controls also include a lock
out switch. Press LOCK OUT to stop front and rear
passengers from using their window switches. The
driver can still control all the windows with the lock on.
Press the LOCK OUT button again for normal
window operation.
Horn
You can sound the horn by pressing the horn symbol on
your steering wheel.
Page 101 of 344
yellowblue
2-39
Interior Lamps
Instrument Panel Intensity Control
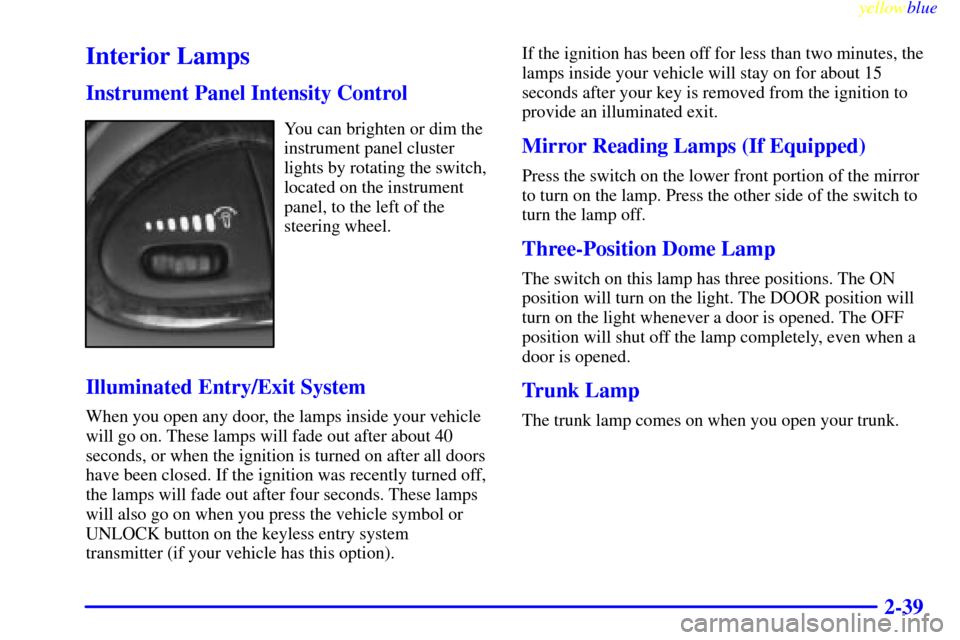
You can brighten or dim the
instrument panel cluster
lights by rotating the switch,
located on the instrument
panel, to the left of the
steering wheel.
Illuminated Entry/Exit System
When you open any door, the lamps inside your vehicle
will go on. These lamps will fade out after about 40
seconds, or when the ignition is turned on after all doors
have been closed. If the ignition was recently turned off,
the lamps will fade out after four seconds. These lamps
will also go on when you press the vehicle symbol or
UNLOCK button on the keyless entry system
transmitter (if your vehicle has this option).If the ignition has been off for less than two minutes, the
lamps inside your vehicle will stay on for about 15
seconds after your key is removed from the ignition to
provide an illuminated exit.
Mirror Reading Lamps (If Equipped)
Press the switch on the lower front portion of the mirror
to turn on the lamp. Press the other side of the switch to
turn the lamp off.
Three-Position Dome Lamp
The switch on this lamp has three positions. The ON
position will turn on the light. The DOOR position will
turn on the light whenever a door is opened. The OFF
position will shut off the lamp completely, even when a
door is opened.
Trunk Lamp
The trunk lamp comes on when you open your trunk.
Page 186 of 344
yellowblue
4-36 Total Weight on Your Vehicle's Tires
Be sure your vehicle's tires are inflated to the upper
limit for cold tires. You'll find these numbers on the
Certification label at the rear edge of the driver's door or
see ªLoading Your Vehicleº in the Index. Then be sure
you don't go over the GVW limit for your vehicle,
including the weight of the trailer tongue.
Hitches
It's important to have the correct hitch equipment.
Crosswinds, large trucks going by and rough roads are a
few reasons why you'll need the right hitch. Here are
some rules to follow:
�The rear bumper on your vehicle is not intended for
hitches. Do not attach rental hitches or other
bumper
-type hitches to it. Use only a frame-mounted
hitch that does not attach to the bumper.
�Will you have to make any holes in the body of your
vehicle when you install a trailer hitch? If you do,
then be sure to seal the holes later when you remove
the hitch. If you don't seal them, deadly carbon
monoxide (CO) from your exhaust can get into your
vehicle (see ªCarbon Monoxideº in the Index). Dirt
and water can, too.
Safety Chains
You should always attach chains between your vehicle
and your trailer. Cross the safety chains under the tongue
of the trailer so that the tongue will not drop to the road
if it becomes separated from the hitch. Instructions
about safety chains may be provided by the hitch
manufacturer or by the trailer manufacturer. Follow the
manufacturer's recommendation for attaching safety
chains and do not attach them to the bumper. Always
leave just enough slack so you can turn with your rig.
And, never allow safety chains to drag on the ground.
Trailer Brakes
Does your trailer have its own brakes?
Be sure to read and follow the instructions for the trailer
brakes so you'll be able to install, adjust and maintain
them properly. And because you have anti
-lock brakes,
do not try to tap into your vehicle's brake system. If you
do, both systems won't work well, or at all.
Page 226 of 344
yellowblue
6-6
The cap is behind a hinged door on the right side of your
vehicle. To open the door, insert your finger into the
finger depression next to the fuel door.
While refueling, hang the tethered cap inside the
fuel door.
To remove the cap, turn it slowly to the left
(counterclockwise). The cap has a spring in it; if you let
go of the cap too soon, it will spring back to the right.
CAUTION:
If you get gasoline on yourself and then
something ignites it, you could be badly burned.
Gasoline can spray out on you if you open the
fuel filler cap too quickly. This spray can happen
if your tank is nearly full, and is more likely in
hot weather. Open the fuel filler cap slowly and
wait for any ªhissº noise to stop. Then unscrew
the cap all the way.
Page 276 of 344
yellowblue
6-56
If you ever have a problem on the road and don't have a spare
fuse, you can borrow one that has the same amperage. Just
pick a feature of your vehicle that you can get along
without
-- like the radio or cigarette lighter -- and use its fuse,
if it is the correct amperage. Replace it as soon as you can.
There are three fuse blocks in your vehicle: two
instrument panel fuse blocks and the engine
compartment fuse block.
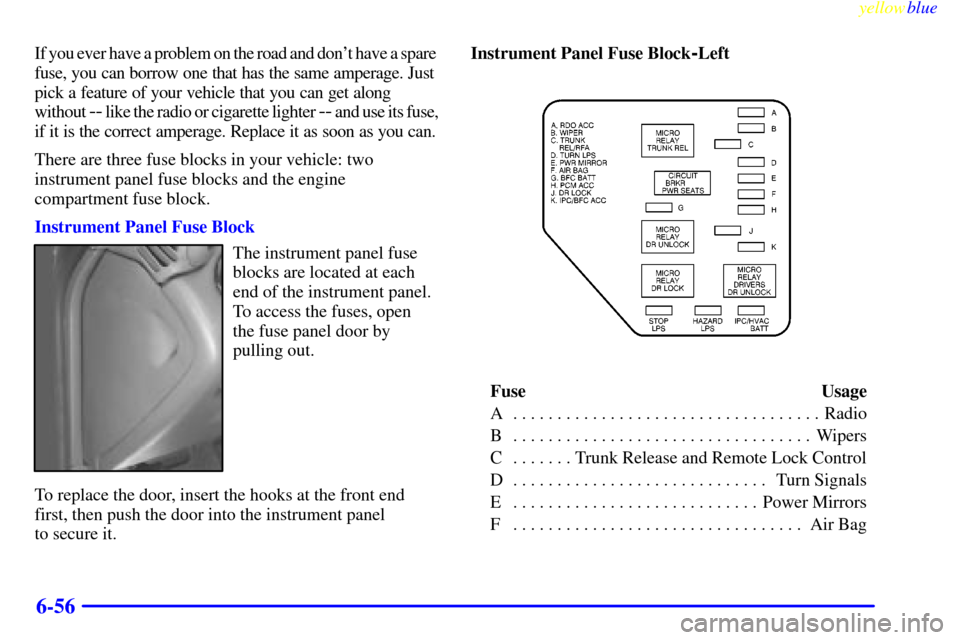
Instrument Panel Fuse Block
The instrument panel fuse
blocks are located at each
end of the instrument panel.
To access the fuses, open
the fuse panel door by
pulling out.
To replace the door, insert the hooks at the front end
first, then push the door into the instrument panel
to secure it.Instrument Panel Fuse Block
-Left
Fuse Usage
A Radio. . . . . . . . . . . . . . . . . . . . . . . . . . . . . . . . . . .
B Wipers. . . . . . . . . . . . . . . . . . . . . . . . . . . . . . . . . .
C Trunk Release and Remote Lock Control. . . . . . .
D Turn Signals. . . . . . . . . . . . . . . . . . . . . . . . . . . . .
E Power Mirrors. . . . . . . . . . . . . . . . . . . . . . . . . . . .
F Air Bag. . . . . . . . . . . . . . . . . . . . . . . . . . . . . . . . .