Page 94 of 376
yellowblue
2-42
Tilt Wheel
A tilt wheel allows you to adjust the steering wheel.
You can also raise it to the highest level to give your
legs more room when you exit and enter the vehicle.
To tilt the wheel, hold the steering wheel and pull the
lever toward you. Move the steering wheel to a
comfortable level, then release the lever to lock the
steering wheel into place.
Telescopic Steering Wheel (Option)
The switch to operate the
telescopic steering wheel is
located on the right-hand
side of the steering column.
To operate the telescopic wheel, push the switch forward
and the wheel moves away from the driver. Pull the
switch rearward and the wheel moves toward the driver.
The telescopic steering wheel position can be stored
with your memory settings. See ªMemoryº in the Index
for more information.
Page 97 of 376
yellowblue
2-45
Headlamp Doors
The headlamp doors are designed to open when you turn
the headlamps on, and close when you turn the
headlamps and parking lamps off. If you turn the
headlamps on, then turn the headlamp switch back to
the parking lamps setting, the headlamp doors will
stay open.You can open the doors manually using the knob next to
the headlamp assembly. Turn the knob counterclockwise
until the doors are open.
The headlamp doors should be open when driving in icy
or snowy conditions to prevent the doors from freezing
closed and when washing the vehicle to help clean
the headlamps.
NOTICE:
In order to avoid possible contact of the hood to
the headlamp doors, care should be taken in
raising the hood with the headlamps up, or shut
off the headlamps prior to opening the hood.
Page 99 of 376

yellowblue
2-47
You can set the wiper speed for a long or short delay
between wipes. This can be very useful in light rain or
snow. Push the lever up to INT (intermittent), then turn
the band, located on the lever, to adjust the delay time.
Rotate the band up for a shorter delay, down for a longer
delay. The wiper speed can only be adjusted when the
lever is in the INT position, not in HI or LO.
For steady wiping at low speed, move the lever up to the
LO position. For steady high
-speed wiping, move the
lever up further, to HI. To stop the wipers, move the
lever down to OFF.
Be sure to clear ice and snow from the wiper blades
before using them. If they're frozen to the windshield,
carefully loosen or thaw them. If the blades do become
damaged, get new blades or blade inserts.
Heavy snow or ice can overload the wipers. A circuit
breaker will stop them until the motor cools. Clear away
snow or ice to prevent an overload.
Windshield Washer
The lever on the right side of the steering column also
controls the windshield washer. There is a push button at
the end of the lever. To spray washer fluid on the
windshield, push the button and hold it. The washer will
spray until you release the button. The wipers will
continue to clear the window for about six seconds after
the button is released and then stop or return to your
preset speed.
CAUTION:
In freezing weather, don't use your washer until
the windshield is warmed. Otherwise the washer
fluid can form ice on the windshield, blocking
your vision.
If the fluid in the windshield washer fluid reservoir is low,
the message LOW WASHER FLUID will appear on the
Driver Information Center (DIC) display. It will take
60 seconds after the bottle is refilled for this message to
turn off. For information on the correct washer fluid
mixture to use, see ªWindshield Washer Fluidº and
ªRecommended Fluids and Lubricantsº in the Index.
Page 103 of 376

yellowblue
2-51
Exterior Lamps
Daytime Running Lamps / Automatic
Headlamp Control (Optional)
Daytime Running Lamps (DRL) can make it easier for
others to see the front of your vehicle during the day.
DRL can be helpful in many different driving
conditions, but they can be especially helpful in the
short periods after dawn and before sunset.
A light sensor on top of the instrument panel makes the
Automatic Headlamp Control (if equipped) work, so be
sure it isn't covered.
The DRL/Automatic Headlamp Control system will
make the front turn signal lamps come on when:
�the ignition is on,
�the headlamp switch is off and
�the parking brake is released.
When the DRL are on, only the front turn signal lamps
will be on. The headlamps, taillamps, sidemarker and
other lamps won't be on. Your instrument panel won't
be lit up either.When it's dark enough outside, the front turn signal
lamps will turn off and the headlamps and parking
lamps will turn on. The other lamps that come on with
the headlamps will also come on.
When it's bright enough outside, the headlamps will go
off and the front turn signal lamps will come on.
To idle the vehicle with the DRL off, set the parking
brake while the ignition is in OFF or LOCK. Then start
the vehicle. The DRL, headlamps and parking lamps
will stay off until you release the parking brake.
The Automatic Headlamp Control feature can be turned
on or off except for vehicles first sold in Canada. See
ªDriver Information Center (DIC)º in the Index to turn
this feature on or off (if equipped with the Automatic
Headlamp Control feature).
As with any vehicle, you should turn on the regular
headlamp system when you need it.
Page 105 of 376

yellowblue
2-53
Interior Lamps
Instrument Panel Brightness Control
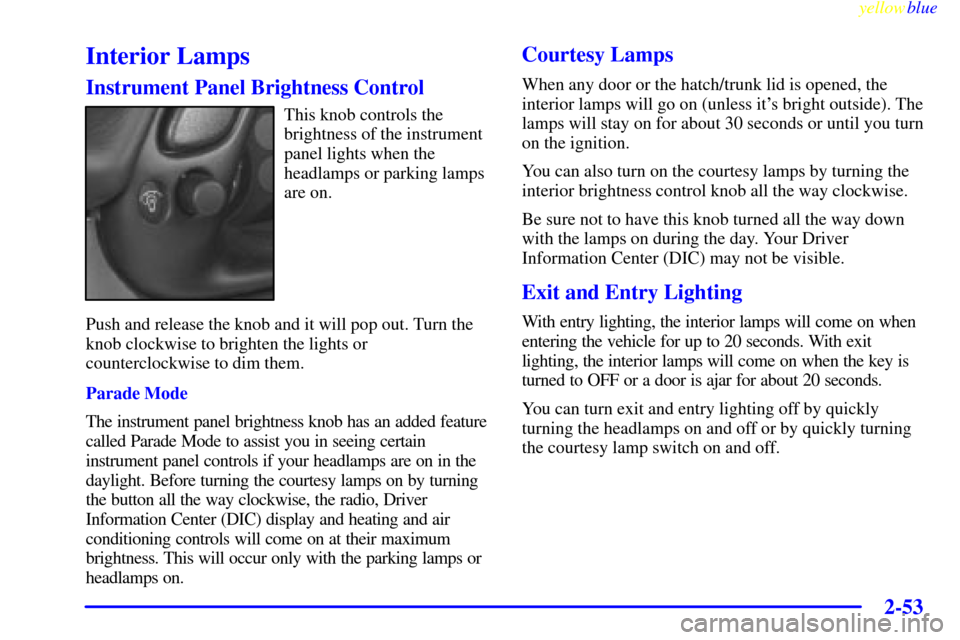
This knob controls the
brightness of the instrument
panel lights when the
headlamps or parking lamps
are on.
Push and release the knob and it will pop out. Turn the
knob clockwise to brighten the lights or
counterclockwise to dim them.
Parade Mode
The instrument panel brightness knob has an added feature
called Parade Mode to assist you in seeing certain
instrument panel controls if your headlamps are on in the
daylight. Before turning the courtesy lamps on by turning
the button all the way clockwise, the radio, Driver
Information Center (DIC) display and heating and air
conditioning controls will come on at their maximum
brightness. This will occur only with the parking lamps or
headlamps on.
Courtesy Lamps
When any door or the hatch/trunk lid is opened, the
interior lamps will go on (unless it's bright outside). The
lamps will stay on for about 30 seconds or until you turn
on the ignition.
You can also turn on the courtesy lamps by turning the
interior brightness control knob all the way clockwise.
Be sure not to have this knob turned all the way down
with the lamps on during the day. Your Driver
Information Center (DIC) may not be visible.
Exit and Entry Lighting
With entry lighting, the interior lamps will come on when
entering the vehicle for up to 20 seconds. With exit
lighting, the interior lamps will come on when the key is
turned to OFF or a door is ajar for about 20 seconds.
You can turn exit and entry lighting off by quickly
turning the headlamps on and off or by quickly turning
the courtesy lamp switch on and off.
Page 108 of 376

yellowblue
2-56
Convex Outside Mirror
Your passenger's side mirror is convex. A convex
mirror's surface is curved so you can see more from the
driver's seat.
CAUTION:
A convex mirror can make things (like other
vehicles) look farther away than they really are.
If you cut too sharply into the right lane, you
could hit a vehicle on your right. Check your
inside mirror or glance over your shoulder before
changing lanes.
Storage Compartments
Instrument Panel Cupholder
The cupholder is located on the center console in front of
the ashtray. To open it, place your thumb on the left side
of the lid and raise the right side with your index finger.
Center Console Storage
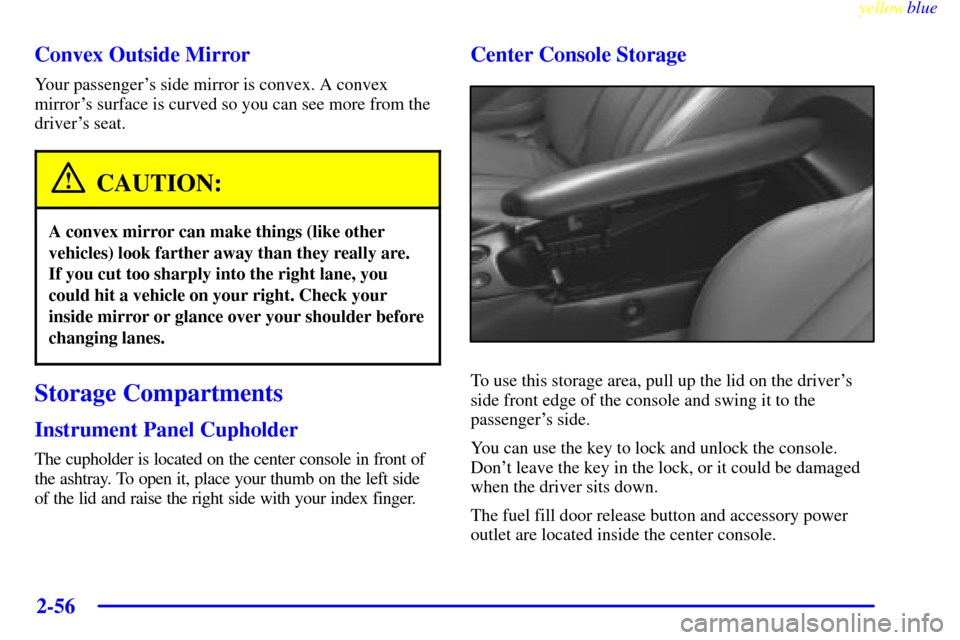
To use this storage area, pull up the lid on the driver's
side front edge of the console and swing it to the
passenger's side.
You can use the key to lock and unlock the console.
Don't leave the key in the lock, or it could be damaged
when the driver sits down.
The fuel fill door release button and accessory power
outlet are located inside the center console.
Page 109 of 376
yellowblue
2-57 Security Shade (Option)
The security shade can provide hidden storage in the
rear area of the vehicle. The shade is also helpful in
blocking the glare from the removeable roof when it is
stored in the rear compartment.
Using the Security Shade
1. Hook the elastic loops
on the front corners (A)
of the shade to the
T
-nuts located on the
front corners of the rear
hatch frame.
2. Hook the elastic loops on the rear corners (B) of the
shade to the hooks recessed inside the rear hatch
frame, near the rear corners.
Rear Storage Compartments
There are three rear storage compartments in the floor of the
rear hatch/trunk area on the passenger's and driver's side.
If you have a coupe or convertible model, your vehicle
will be equipped three storage compartment lids. If you
have a hardtop, your vehicle will only have a center
storage compartment lid.
Page 110 of 376
yellowblue
2-58
To access a storage compartment, pull up on the latch to
release the lid. Remove the storage compartment lid.
When replacing a storage compartment lid, make sure
the latch is in the correct location so the latch locks
securely into place.
NOTICE:
If your vehicle is equipped with the optional
trunk
-mounted CD changer, it is stored in the
center rear storage compartment. To help avoid
damage to the compact disc player, do not store
items such as liquids or sharp objects that could
damage, puncture or cut the trunk
-mounted CD
changer or wiring.
NOTICE:
Do not store heavy or sharp objects in the storage
compartments located in the hatch/trunk area. If
you do, the objects could damage the underbody.