Page 105 of 376

yellowblue
2-53
Interior Lamps
Instrument Panel Brightness Control
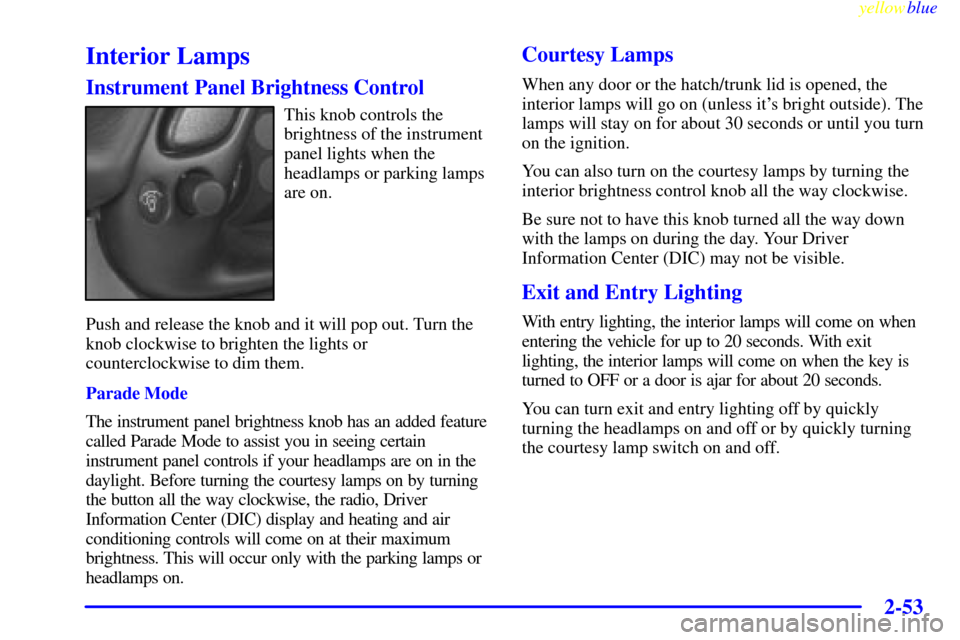
This knob controls the
brightness of the instrument
panel lights when the
headlamps or parking lamps
are on.
Push and release the knob and it will pop out. Turn the
knob clockwise to brighten the lights or
counterclockwise to dim them.
Parade Mode
The instrument panel brightness knob has an added feature
called Parade Mode to assist you in seeing certain
instrument panel controls if your headlamps are on in the
daylight. Before turning the courtesy lamps on by turning
the button all the way clockwise, the radio, Driver
Information Center (DIC) display and heating and air
conditioning controls will come on at their maximum
brightness. This will occur only with the parking lamps or
headlamps on.
Courtesy Lamps
When any door or the hatch/trunk lid is opened, the
interior lamps will go on (unless it's bright outside). The
lamps will stay on for about 30 seconds or until you turn
on the ignition.
You can also turn on the courtesy lamps by turning the
interior brightness control knob all the way clockwise.
Be sure not to have this knob turned all the way down
with the lamps on during the day. Your Driver
Information Center (DIC) may not be visible.
Exit and Entry Lighting
With entry lighting, the interior lamps will come on when
entering the vehicle for up to 20 seconds. With exit
lighting, the interior lamps will come on when the key is
turned to OFF or a door is ajar for about 20 seconds.
You can turn exit and entry lighting off by quickly
turning the headlamps on and off or by quickly turning
the courtesy lamp switch on and off.
Page 108 of 376

yellowblue
2-56
Convex Outside Mirror
Your passenger's side mirror is convex. A convex
mirror's surface is curved so you can see more from the
driver's seat.
CAUTION:
A convex mirror can make things (like other
vehicles) look farther away than they really are.
If you cut too sharply into the right lane, you
could hit a vehicle on your right. Check your
inside mirror or glance over your shoulder before
changing lanes.
Storage Compartments
Instrument Panel Cupholder
The cupholder is located on the center console in front of
the ashtray. To open it, place your thumb on the left side
of the lid and raise the right side with your index finger.
Center Console Storage
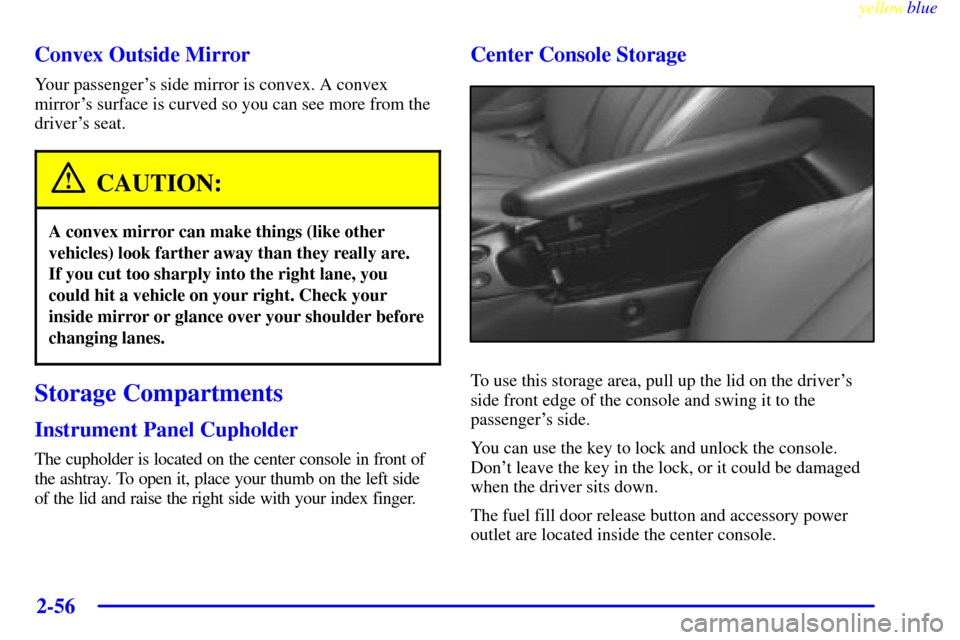
To use this storage area, pull up the lid on the driver's
side front edge of the console and swing it to the
passenger's side.
You can use the key to lock and unlock the console.
Don't leave the key in the lock, or it could be damaged
when the driver sits down.
The fuel fill door release button and accessory power
outlet are located inside the center console.
Page 114 of 376
yellowblue
2-62
NOTICE:
To avoid damage to the roof panel, paint and
weatherstripping, do not drop or rest it on its
edges. Place the roof panel in the egg
-shaped
stowage receivers after removing it from
the vehicle.
1. Park on a level surface, set the parking brake firmly
and shift an automatic transmission into PARK (P).
Shift a manual transmission into REVERSE (R).
Turn the ignition key to OFF. Lower both sunshades
and rotate them toward the door glass.
2. Open the rear liftgate and remove any items that may
interfere with proper storage of the roof panel.
Also install the two egg
-shaped stowage receivers
into the floor of the rear storage compartment.
Secure both receivers into their proper positions by
turning them counterclockwise.
3. Lower the windows and open the doors.
Page 115 of 376
yellowblue
2-63
There are two latches on the front of the roof panel
near each door (A), and one rear latch (B).
4. To unlock the front of the roof panel, pull down each
of the front handles. Grasp the handles with your
fingers and pull each toward you. Complete a 180�
rotation toward the center of the vehicle. Then push
up on each of the handles.
Page 119 of 376

yellowblue
2-67
1. Check to be sure that the front handles and rear latch
on the ceiling are in their opened positions before
attempting to install the roof panel.
2. If the roof panel is stored in the rear area, grasp it
with your right hand at the middle edge near the
seatbacks, and with your left hand at the middle of
the edge closest to you. Reverse the steps described
previously under ªStoring the Roof Panel.º
3. Remove the roof panel from the
storage compartment.
4. In most cases, it is easier to install the removable
roof with two people rather than one. Place the roof
panel over the vehicle.
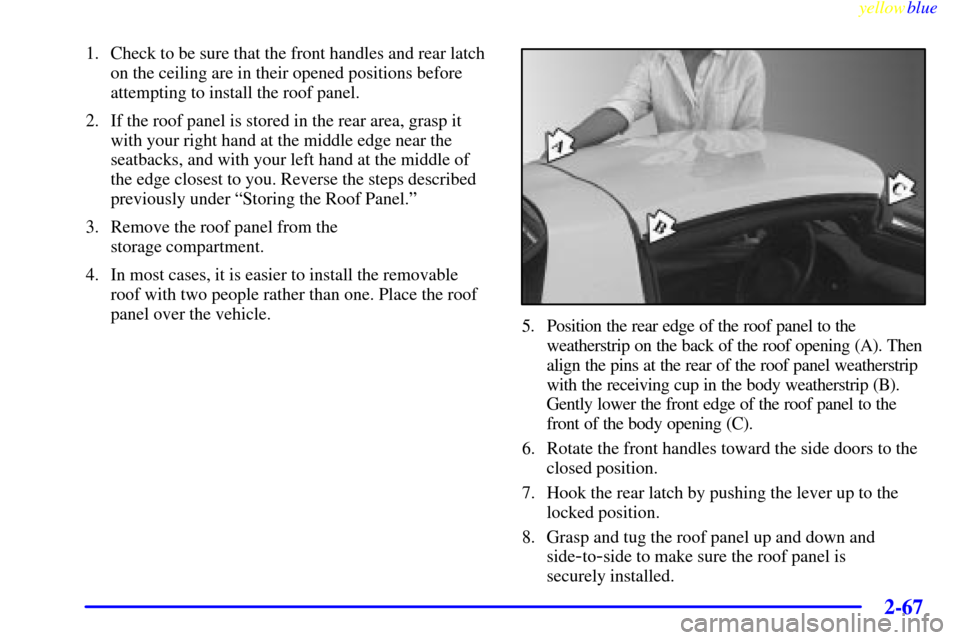
5. Position the rear edge of the roof panel to the
weatherstrip on the back of the roof opening (A). Then
align the pins at the rear of the roof panel weatherstrip
with the receiving cup in the body weatherstrip (B).
Gently lower the front edge of the roof panel to the
front of the body opening (C).
6. Rotate the front handles toward the side doors to the
closed position.
7. Hook the rear latch by pushing the lever up to the
locked position.
8. Grasp and tug the roof panel up and down and
side
-to-side to make sure the roof panel is
securely installed.
Page 121 of 376
yellowblue
2-69 Lowering the Convertible Top
NOTICE:
Don't leave the convertible out with the top down
for any long periods of time. The sun and rain
can damage the seat material and other things
inside the vehicle.
1. Set the parking brake firmly. Shift an automatic
transmission into PARK (P). Shift a manual
transmission into REVERSE (R). Turn the ignition
key to OFF. Lower both sunshades and rotate them
toward the door glass.
NOTICE:
Before lowering the convertible top into the
storage area, be sure there are no objects in the
way of the folded, stored top. The weight of a
stored top on items in the storage area may cause
the convertible top back glass to break.
2. Unlock the front of the convertible top by lowering
the latch handles and turning them inward. Push the
latch handles back to the up position.
Page 127 of 376
yellowblue
2-75
The main components of your instrument panel are:
A. HUD Controls (Option)
B. Turn Signal/Multifunction Lever
C. Driver Information Center (DIC)
(Located in the Instrument Cluster)
D. Instrument Panel Cluster
E. Windshield Wiper/Washer Lever
F. Driver Information Center (DIC) Buttons
G. Hazard Warning Flasher Button
H. Center Air Vent
I. Audio System
J. Comfort Controls
K. Fog Lamp Button (Option)
L. Remote Hatch Release Button (Coupe) or Remote
Trunk Release Button (Convertible/Hardtop)M. Ignition Switch
N. Shift Lever (Automatic Shown)
O. Traction Control System (TCS) Switch/Active
Handling Switch (Option)
P. Accessory Power Outlet
(Located in the Center Console)
Q. Selective Real Time Damping (SRTD) (Option)
R. Instrument Panel Cupholder
S. Remote Fuel Door Release Button
(Located in the Center Console)
T. Ashtray and Cigarette Lighter
U. Parking Brake
V. Glove Box
W. Instrument Panel Fuse Block
Page 144 of 376

yellowblue
2-92
Driver Information Center (DIC)
The Driver Information Center (DIC) will display
information about how your vehicle is functioning, as well
as warning messages if a system problem is detected. The
DIC display area is located in the instrument cluster below
the speedometer and tachometer, directly above the
steering column.
The following buttons are on the DIC control panel which
is located to the right of the instrument panel cluster.
1 FUEL: Press this button to display fuel information
such as fuel economy and range.
2 GAGES: Use this button to display gage information
like oil pressure and temperature, coolant temperature,
transmission fluid temperature, battery voltage and
front/rear tire pressures.
3 TRIP: Use this button to display your total and trip
miles, the elapsed time function, your average speed and
the engine oil life.
4 OPTIONS: This button allows you to choose personal
options that are available on your vehicle, depending on
the options your vehicle is equipped with, such as
security, door locks, easy entry seats and language.
5 E/M: Use this button to change the display between
English and metric units.
RESET: This button, used along with the other buttons,
will reset system functions and turn off or acknowledge
messages on the Driver Information Center (DIC).
At the top of the DIC control buttons is a light sensor.
Be sure not to block the sensor or your lighting
functions may be disrupted.