Page 194 of 368
yellowblue
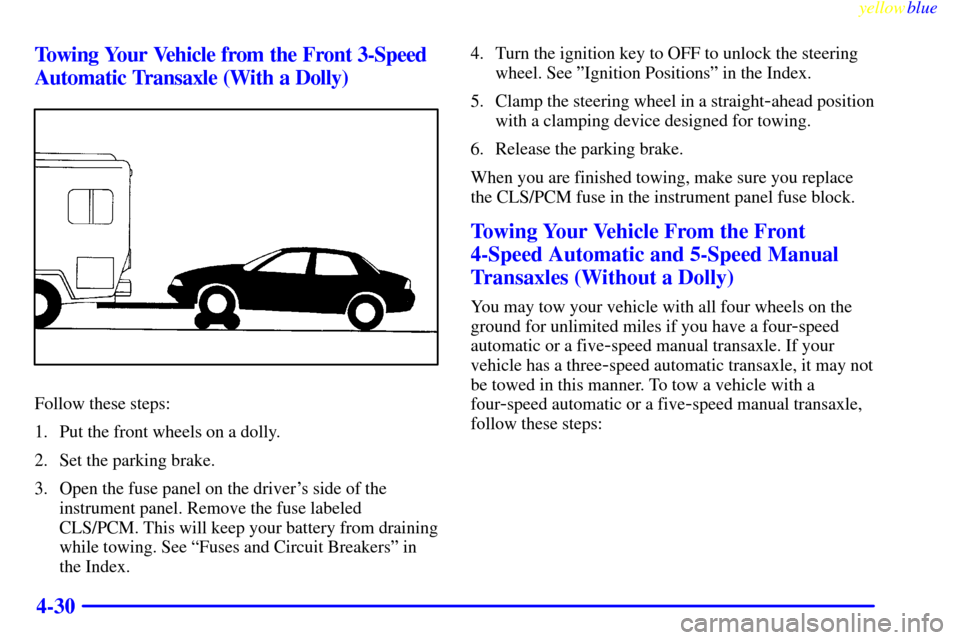
4-30 Towing Your Vehicle from the Front 3-Speed
Automatic Transaxle (With a Dolly)
Follow these steps:
1. Put the front wheels on a dolly.
2. Set the parking brake.
3. Open the fuse panel on the driver's side of the
instrument panel. Remove the fuse labeled
CLS/PCM. This will keep your battery from draining
while towing. See ªFuses and Circuit Breakersº in
the Index.4. Turn the ignition key to OFF to unlock the steering
wheel. See ºIgnition Positionsº in the Index.
5. Clamp the steering wheel in a straight
-ahead position
with a clamping device designed for towing.
6. Release the parking brake.
When you are finished towing, make sure you replace
the CLS/PCM fuse in the instrument panel fuse block.
Towing Your Vehicle From the Front
4-Speed Automatic and 5-Speed Manual
Transaxles (Without a Dolly)
You may tow your vehicle with all four wheels on the
ground for unlimited miles if you have a four
-speed
automatic or a five
-speed manual transaxle. If your
vehicle has a three
-speed automatic transaxle, it may not
be towed in this manner. To tow a vehicle with a
four
-speed automatic or a five-speed manual transaxle,
follow these steps:
Page 195 of 368
yellowblue
4-31
1. Set the parking brake.
2. Open the fuse panel on the driver's side of the
instrument panel. Remove the fuse labeled
CLS/PCM. This will keep your battery from draining
while towing. See ªFuses and Circuit Breakersº in
the Index.3. Turn the ignition key to OFF to unlock the
steering wheel.
4. Shift your transaxle to NEUTRAL (N).
5. Release the parking brake.
When you are finished towing, make sure you replace
the CLS/PCM fuse in the instrument panel fuse block.
NOTICE:
Make sure that the towing speed does not exceed
65 mph (110 km/h), or your vehicle could be
badly damaged.
Page 208 of 368
yellowblue
5-2
Hazard Warning Flashers
Your hazard warning flashers let you warn others. They
also let police know you have a problem. Your front and
rear turn signal lamps will flash on and off.
Move the switch to the right
to make your front and rear
turn signal lamps flash on
and off.
Your hazard warning flashers work no matter what
position your key is in, and even if the key isn't in.
To turn off the flashers, move the switch to the left.
When the hazard warning flashers are on, your turn
signals won't work.
Page 298 of 368

yellowblue
6-60
Fuse Usage
O
2 HTR Rear O2 Sensor Heater
WIPER Windshield Wipers,
Windshield Washers
ERLS Automatic Transaxle, Brake
Transaxle Shift Interlock (BTSI),
A/C Compressor, Cruise Control,
Multiport Fuel Injection
AIR BAG Supplemental Inflatable Restraint
(SIR) System
PWR ACC Power Door Locks, Convertible
Top (Convertible Model Only)
EXT LAMP Exterior Lamps, Instrument
Panel Lights
HVAC Heater and A/C Control, Engine
Cooling Fan
RADIO Radio, Remote Keyless Entry
ALARM Alarm Module, Interior Lamps,
Warning Chimes
CRUISE Cruise Control
STOP HAZ Exterior Lamps, Anti
-Lock Brake
System, Cruise Control,
Turn SignalsFuse Usage
CIG Cigarette Lighter
INST LPS Instrument Panel Lights,
Warning Chimes
PCM/IGN Powertrain Control Module
L HDLP Left Headlamp, Fog Lamp
(Z
-24 Model Only)
INT LAMP Alarm Module: Illuminated Entry,
Warning Chimes, Overhead
Lamps, Map/Reading Lamps,
Glove Box Lamp, Trunk Lamp,
Radio, Power Mirrors, Remote
Keyless Entry
IGN Engine Ignition
R HDLP Right Headlamp, Fog Lamp
(Z
-24 Model Only)
HORN Horn, Diagnostic Connector
PWR WDO/SRF Power Windows, Power Sunroof,
Convertible Top Controls
(Convertible Model Only)
(Circuit Breaker)
DRL Daytime Running Lamps (Relay)
Page 334 of 368
yellowblue
7-32 At Least Once a Year
Key Lock Cylinders Service
Lubricate the key lock cylinders with the lubricant
specified in Part D.
Body Lubrication Service
Lubricate all hood latch assemblies, secondary latch, pivots,
spring anchor, release pawl, hood and body door hinges, rear
compartment and any folding seat hardware. Part D tells you
what to use. More frequent lubrication may be required when
exposed to a corrosive environment.Starter Switch Check
CAUTION:
When you are doing this check, the vehicle could
move suddenly. If it does, you or others could be
injured. Follow the steps below.
1. Before you start, be sure you have enough room
around the vehicle.
2. Firmly apply both the parking brake (see ªParking
Brakeº in the Index if necessary) and the regular brake.
NOTE: Do not use the accelerator pedal, and be
ready to turn off the engine immediately if it starts.
3. On automatic transaxle vehicles, try to start the
engine in each gear. The starter should work only in
PARK (P) or NEUTRAL (N). If the starter works in
any other position, your vehicle needs service.
On manual transaxle vehicles, put the shift lever in
NEUTRAL (N), push the clutch down halfway and
try to start the engine. The starter should work only
when the clutch is pushed down all the way to the
floor. If the starter works when the clutch isn't
pushed all the way down, your vehicle needs service.
Page 335 of 368
yellowblue
7-33
Brake-Transaxle Shift Interlock (BTSI) Check
(Automatic Transaxle)
CAUTION:
When you are doing this check, the vehicle could
move suddenly. If it does, you or others could be
injured. Follow the steps below.
1. Before you start, be sure you have enough
room around the vehicle. It should be parked on a
level surface.
2. Firmly apply the parking brake
(see ªParking Brakeº in the Index if necessary).
NOTE: Be ready to apply the regular brake
immediately if the vehicle begins to move.
3. With the engine off, turn the key to the RUN
position, but don't start the engine. Without applying
the regular brake, try to move the shift lever out of
PARK (P) with normal effort. If the shift lever
moves out of PARK (P), your vehicle's BTSI
needs service.Ignition Transaxle Lock Check
While parked, and with the parking brake set, try to turn
the ignition key to LOCK in each shift lever position.
�With an automatic transaxle, the key should turn to
LOCK only when the shift lever is in PARK (P).
�With a manual transaxle, the key should turn
to LOCK only when you press the key release
the button.
On all vehicles, the key should come out only in LOCK.
Turn the steering wheel to the left and to the right. It
should only lock when turned to the right.
Page 339 of 368
yellowblue
7-37
Part D: Recommended Fluids
and Lubricants
NOTE: Fluids and lubricants identified below by name,
part number or specification may be obtained from
your dealer.
USAGE
FLUID/LUBRICANT
Engine OilEngine Oil with the American
Petroleum Institute Certified For
Gasoline Engines ªStarburstº
symbol of the proper viscosity. To
determine the preferred viscosity
for your vehicle's engine, see
ªEngine Oilº in the Index.
Engine Coolant50/50 mixture of clean, drinkable
water and use only GM
Goodwrench
� DEX-COOL� or
Havoline� DEX-COOL�
Coolant. See ªEngine Coolantº in
the Index.
Hydraulic Brake
SystemDelco Supreme 11� Brake Fluid
(GM Part No. 12377967 or
equivalent DOT
-3 Brake Fluid).
USAGEFLUID/LUBRICANT
Windshield
Washer SolventGM Optikleen� Washer Solvent
(GM Part No. 1051515)
or equivalent.
Hydraulic Clutch
SystemHydraulic Clutch Fluid (GM Part
No. 12345347 or equivalent
DOT
-3 Brake Fluid).
Power Steering
SystemGM Power Steering Fluid (GM
Part No. 1052884
- 1 pint,
1050017
- 1 quart, or equivalent).
Manual
TransaxleSynchromesh Transmission Fluid
(GM Part No. 12345349
or equivalent).
Automatic
TransaxleDEXRON�-III Automatic
Transmission Fluid.
Key Lock
CylindersMulti-Purpose Lubricant,
Superlube� (GM Part
No. 12346241 or equivalent).
Manual
Transaxle Shift
LinkageChassis Lubricant (GM Part
No. 12377985 or equivalent) or
lubricant meeting requirements of
NLGI # 2, Category LB or
GC
-LB.
Page 348 of 368
yellowblue
8-6
Chevrolet Roadside Assistance Program
To enhance Chevrolet's strong commitment to customer
satisfaction, Chevrolet is excited to announce the
establishment of the Chevrolet Roadside Assistance
Center. As the owner of a 1999 Chevrolet, membership
in Roadside Assistance is free.
Roadside Assistance is available 24 hours a day,
365 days a year, by calling 1
-800-CHEV-USA
(1
-800-243-8872). This toll-free number will provide you
over
-the-phone roadside assistance with minor mechanical problems. If your problem cannot be resolved over the
phone, our advisors have access to a nationwide network of
dealer recommended service providers. Roadside
membership is free; however some services may incur costs.
Roadside offers two levels of service to the customer,
Basic Care and Courtesy Care:
�Toll
-free number, 1-800-CHEV-USA
�Free towing for warranty repairs
�Basic over
-the-phone technical advice
�Available dealer services at reasonable costs (i.e.,
wrecker services, locksmith/key service, glass
repair, etc.)
ROADSIDE Courtesy Care PROVIDES:
�Roadside Basic Care services (as outlined previously)
Plus:
�FREE Non
-Warranty Towing (to the closest dealer
from a legal roadway)
�FREE Locksmith/Key Service (when keys are lost
on the road or locked inside)
�FREE Flat Tire Service (spare installed on the road)
�FREE Jump Start (at home or on the road)
�FREE Fuel Delivery ($5 of fuel delivered on
the road)