Page 64 of 362
yellowblue
2-12 Trunk Storage System (Option)
The trunk storage system can be used to organize many
different items inside the trunk. The storage
compartment (A) is located on top of the spare tire
cover (B).To install the storage system:
1. Remove the mat from the floor of the trunk. Remove
the handle from the spare tire panel and store it with
the spare tire.
2. Place the trunk storage system on the center of the
trunk floor (the cut
-out portion of the storage system
should be facing the front of the vehicle). Slide the
storage system fully forward.
3. Center the storage system access hole over the area
where the spare tire panel handle was located.
Position the storage system as needed and then
secure it with the retainer.
4. Attach the removable net to the slots located on the
side and front of the divider walls.
Once in place, the storage system can be moved forward
or rearward for convenience and easy accessing of
stored items.
Page 65 of 362

yellowblue
2-13
The following steps explain how to remove the trunk
storage system for cleaning or in case you need to access
the spare tire. Follow all of these steps if the storage
system is in the open position. Begin with Step 2 if the
system is already closed.
1. Fully close the trunk storage system.
2. Slide the storage system fully forward.
3. Remove the retainer by turning it counterclockwise.
4. Remove the trunk storage system from the trunk.
5. Replace the spare tire panel handle.
6. Replace the mat on the floor of the trunk.
There is also a small storage compartment located on the
right of the trunk in the side trim panel. You can access
the compartment by lifting the panel door.Rear Seat Pass-Through Door
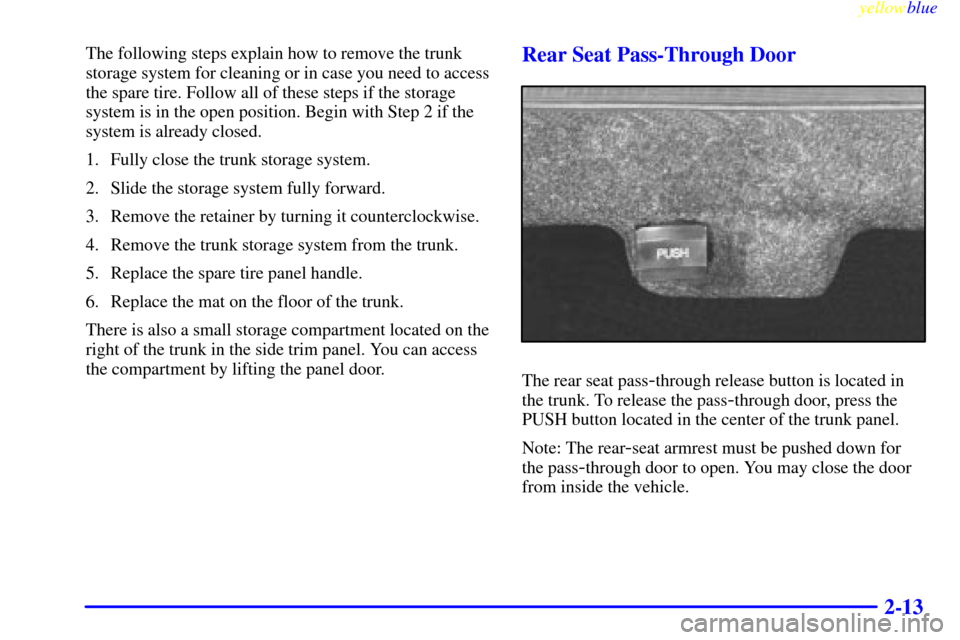
The rear seat pass-through release button is located in
the trunk. To release the pass
-through door, press the
PUSH button located in the center of the trunk panel.
Note: The rear
-seat armrest must be pushed down for
the pass
-through door to open. You may close the door
from inside the vehicle.
Page 233 of 362
5-
yellowblue
5-1
Section 5 Problems on the Road
Here you'll find what to do about some problems that can occur on the road.
5
-2 Hazard Warning Flashers
5
-3 Other Warning Devices
5
-3 Jump Starting
5
-8 Towing Your Vehicle
5
-8 Engine Overheating5
-11 Cooling System
5
-17 If a Tire Goes Flat
5
-18 Changing a Flat Tire
5
-28 Compact Spare Tire
5
-29 If You're Stuck: In Sand, Mud, Ice or Snow
Page 251 of 362
yellowblue
5-19 Removing the Spare Tire and Tools
The equipment you'll need is in the trunk.
Instructions for changing your tires are on the inside of
the tire cover.
To lift the tire cover to gain access to the spare tire and
jacking equipment, do the following:
1. Press the area at
the front of the
handle so that
the back edge
swings upward.
2. Grab the handle
and remove
the cover.
Page 252 of 362
yellowblue
5-20
Unscrew the wing nuts to remove the container that
holds the wrench and jack.
Remove the wheel wrench, jack and the spare tire from
the trunk.The tools you'll be using include the jack (A) and the
wheel wrench (B).
Page 253 of 362
yellowblue
5-21 Removing the Wheel Cover
SLS Wheel Shown
On the SLS, there is a center wheel cover on the
aluminum wheel. Using the flat end of the wheel
wrench, gently pry the wheel cover off. Be careful not to
scratch the aluminum wheel edge and don't try to
remove it with your hands.
On the STS, the wheel nuts and wheel nut covers are
exposed. Use the wheel wrench to remove the wheel
nut covers.
Removing the Flat Tire and Installing the
Spare Tire
STS Wheel Shown
1. Using the wheel wrench, loosen all the wheel nuts.
Don't remove them yet.
Page 255 of 362
yellowblue
5-23
CAUTION:
Raising your vehicle with the jack improperly
positioned can damage the vehicle and even make
the vehicle fall. To help avoid personal injury and
vehicle damage, be sure to fit the jack lift head
into the proper location before raising
the vehicle.
3. Turn the jack handle counterclockwise to lower the
jack lift head until the jack fits under the car.
4. Raise the jack until the metal flange fits firmly into
the channel of the jack head.
5. Put the compact spare near you.
6. Raise the vehicle by turning the jack handle
clockwise. Raise the vehicle far enough off the
ground for the spare tire to fit under the vehicle.
7. Remove all wheel nuts and take off the flat tire.
Page 258 of 362

yellowblue
5-26
CAUTION:
Incorrect wheel nuts or improperly tightened
wheel nuts can cause the wheel to become loose
and even come off. This could lead to an accident.
Be sure to use the correct wheel nuts. If you have
to replace them, be sure to get new GM original
equipment wheel nuts.
Stop somewhere as soon as you can and have
the nuts tightened with a torque wrench to
100 lb
-ft (140 N´m).
NOTICE:
Improperly tightened wheel nuts can lead to
brake pulsation and rotor damage. To avoid
expensive brake repairs, evenly tighten the wheel
nuts in the proper sequence and to the proper
torque specification.
Don't try to put a wheel cover on your compact spare
tire. It won't fit. Store the wheel cover and lug nut
caps in the trunk until you have the flat tire repaired
or replaced.
NOTICE:
Wheel covers won't fit on your compact spare. If
you try to put a wheel cover on your compact
spare, you could damage the cover or the spare.
Storing the Flat Tire and Tools
CAUTION:
Storing a jack, a tire or other equipment in the
passenger compartment of the vehicle could
cause injury. In a sudden stop or collision, loose
equipment could strike someone. Store all these
in the proper place.
After you've put the compact spare tire on your vehicle,
you'll need to store the flat tire in your trunk.