Page 236 of 362

yellowblue
5-4
2. Get the vehicles close enough so the jumper cables
can reach, but be sure the vehicles aren't touching
each other. If they are, it could cause a ground
connection you don't want. You wouldn't be able to
start your vehicle and the bad grounding could
damage the electrical systems.
3. Turn off the ignition on both vehicles. Unplug
unnecessary accessories plugged into the cigarette
lighter. Turn off all lamps that aren't needed as well
as radios. This will avoid sparks and help save both
batteries. In addition, it could save your radio!
4. Open the hoods and locate the battery on the other
vehicle and the remote positive (+) terminal, located
on the passenger's side of the engine, on your
vehicle. (You will not see the battery under the hood
of your vehicle, since it is located under the rear seat
on the passenger's side.) Find the positive (+) and
negative (
-) terminals on the battery in the
other vehicle.
You do not need to access your battery for jump
starting. The remote positive (+) terminal is for
this purpose.
CAUTION:
An electric fan can start up even when the engine
is not running and can injure you. Keep hands,
clothing and tools away from any underhood
electric fan.
5. Start by lifting and
moving the red
positive (+) remote
terminal away
cover from the
relay center.
Page 290 of 362
yellowblue
6-26
Adding Coolant
If you need more coolant, add the proper DEX
-COOL�
coolant mixture at the surge tank, but only when the
engine is cool.
CAUTION:
You can be burned if you spill coolant on hot
engine parts. Coolant contains ethylene glycol,
and it will burn if the engine parts are hot
enough. Don't spill coolant on a hot engine.
When replacing the pressure cap, make sure it is
hand
-tight.
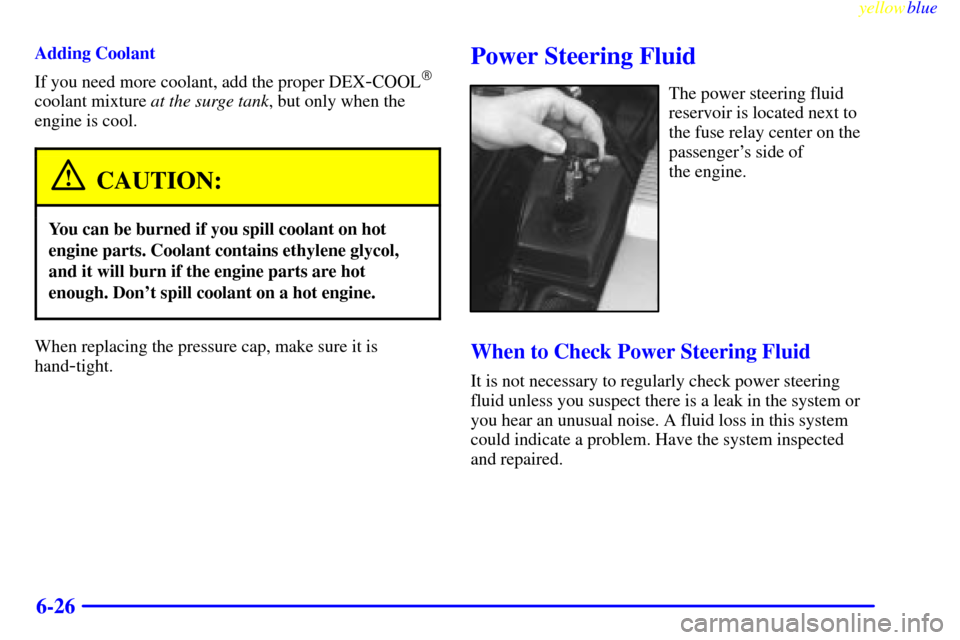
Power Steering Fluid
The power steering fluid
reservoir is located next to
the fuse relay center on the
passenger's side of
the engine.
When to Check Power Steering Fluid
It is not necessary to regularly check power steering
fluid unless you suspect there is a leak in the system or
you hear an unusual noise. A fluid loss in this system
could indicate a problem. Have the system inspected
and repaired.
Page 291 of 362

yellowblue
6-27 How to Check Power Steering Fluid
When the engine compartment is cool, wipe the cap and
the top of the reservoir clean, then unscrew the cap and
wipe the dipstick with a clean rag. Replace the cap and
completely tighten it. Then remove the cap again and
look at the fluid level on the dipstick.
The level should be at the FULL COLD mark. If
necessary, add only enough fluid to bring the level
up to the mark.
What to Use
To determine what kind of fluid to use, see
ªRecommended Fluids and Lubricantsº in the
Maintenance Schedule booklet. Always use the proper
fluid. Failure to use the proper fluid can cause leaks and
damage hoses and seals.
Windshield Washer Fluid
What to Use
When you need windshield washer fluid, be sure to read
the manufacturer's instructions before use. If you will be
operating your vehicle in an area where the temperature
may fall below freezing, use a fluid that has sufficient
protection against freezing.
Adding Washer Fluid
When your vehicle's windshield washer fluid level
becomes low, a CHECK WASHER FLUID message will
appear on the Driver Information Center (DIC). You will
need to add fluid soon.
The windshield washer fluid reservoir is located next to
the fuse relay center on the passenger's side of
the engine.
Open the cap labeled WASHER FLUID. Add washer
fluid until the tank is full.
Page 326 of 362
yellowblue
6-62
Micro Relays
Relay Usage
27 Headlamp High Beam
28 Headlamp Low Beam
29 Fog Lamps
30 Daytime Running Lamps
31 Horn
32 Air Conditioner Clutch
Mini Relays
Relay Usage
33 Not Used
34 Accessory
35 Starter 2
36 Starter 1
37 Cooling Fan Secondary
38 Ignition 1
39 Cooling Fan Series/Parallel
40 Cooling Fan PrimaryMaxibreaker
Circuit
BreakerUsage
41 Starter
MaxiFuses
Fuse Usage
42 Not Used
43 Export Brake
44 Antilock Brake System Solenoid
45 Antilock Brake System Motor
46 Cooling Fan Secondary
47 Cooling Fan Primary
The spare fuses are located in numbers 48 through 52.
The fuse puller is located in number 53.
Page 329 of 362
yellowblue
6-65
Micro Relays
Relay Usage
39 Fuel Pump
40 Parking Lamps
41 Ignition 1
42 Park Brake A
43 Park Brake B
44 Park Shift Interlock
45 Reverse Lamps
46 Retained Accessory Power for Sunroof
47 Rear HVAC Blower
48 CVRSS Dampers
49 Ignition 3
50 Fuel Tank Door Release
51 Interior Lamps
52 Trunk Release
53 Front Courtesy Lamps
54 Rear Courtesy Lamps
55 Electronic Level Control CompressorCircuit Breakers
Relay Usage
56 Power Seats
57 Power Windows
Mini Relays
Relay Usage
58 Cigarette Lighter
59 Rear Defog
MaxiFuses
Fuse Usage
60 Park Brake
61 Rear Defog
62 Not Used
63 Audio Amplifier
64 ELC Compressor/Exhaust
65 Cigar Lighter
66 Not Used
The spare fuses are located in numbers 67 through 74.
The fuse puller is located in number 75.
Page 330 of 362
yellowblue
6-66
Removing the Rear Seat Cushion
NOTICE:
The battery and main fuse boxes are located
under the rear seat cushion. The battery's ground
terminal and some relay wires are exposed. To
help avoid damage to the battery and wires, be
careful when removing or reinstalling the seat
cushion. Do not remove covers from covered
parts. Do not store anything under the seat, as
objects could touch exposed wires and cause a
short.
To Remove the Rear Seat Cushion
1. Pull up on the front of the cushion to release the
front hooks.
2. Pull the cushion up and out toward the front of
the vehicle.To Reinstall the Rear Seat Cushion