1999 CADILLAC SEVILLE buttons
[x] Cancel search: buttonsPage 62 of 362

yellowblue
2-10
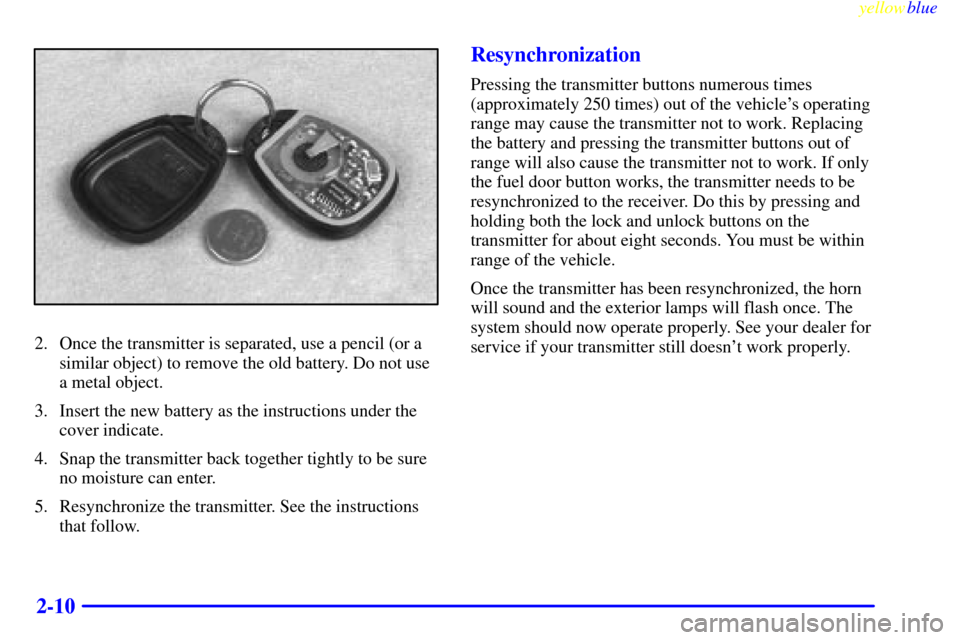
2. Once the transmitter is separated, use a pencil (or a
similar object) to remove the old battery. Do not use
a metal object.
3. Insert the new battery as the instructions under the
cover indicate.
4. Snap the transmitter back together tightly to be sure
no moisture can enter.
5. Resynchronize the transmitter. See the instructions
that follow.
Resynchronization
Pressing the transmitter buttons numerous times
(approximately 250 times) out of the vehicle's operating
range may cause the transmitter not to work. Replacing
the battery and pressing the transmitter buttons out of
range will also cause the transmitter not to work. If only
the fuel door button works, the transmitter needs to be
resynchronized to the receiver. Do this by pressing and
holding both the lock and unlock buttons on the
transmitter for about eight seconds. You must be within
range of the vehicle.
Once the transmitter has been resynchronized, the horn
will sound and the exterior lamps will flash once. The
system should now operate properly. See your dealer for
service if your transmitter still doesn't work properly.
Page 111 of 362

yellowblue
2-59
This device complies with RSS-210 of Industry Canada.
Operation is subject to the following two conditions: (1)
this device may not cause interference, and (2) this device
must accept any interference, including interference that
may cause undesired operation of the device.
Changes and modifications to this system by other than
an authorized service facility could void authorization to
use this equipment.
Programming the Universal Transmitter
Do not use the Universal Transmitter with any garage
door opener that does not have the ªstop and reverseº
safety feature. This includes any garage door opener
model manufactured before April 1, 1982.
Be sure that people and objects are clear of the garage
door you are programming.
Your vehicle's engine should be turned off while
programming the transmitter. Follow these steps to
program up to three channels:
1. If you have previously programmed a transmitter
channel, proceed to Step 2. Otherwise, hold down
the two outside buttons on the Universal Transmitter
until the indicator light begins to flash rapidly (after
20 seconds). Then release the buttons. This
procedure initializes the memory and erases any
previous settings for all three channels.2. Decide which one of the three channels you want to
program. Hold the end of the hand
-held transmitter
about 2 to 5 inches (5 to 13 cm) away from the
surface of the Universal Transmitter so that you can
still see the indicator light.
3. Using both hands, press the hand
-held transmitter
button and the desired button on the Universal
Transmitter. Continue to press both buttons
through Step 4.
4. Hold down both buttons until you see the indicator
light on the Universal Transmitter flash slowly and
then rapidly. The rapid flashing indicates that the
Universal Transmitter has been programmed.
Release both buttons once the indicator light starts
to flash rapidly.
If you have trouble programming the Universal
Transmitter, make sure that you have followed the
directions exactly as described. The Universal
Transmitter may not work with older garage door
openers that do not meet current Federal Consumer
Safety Standards. If you cannot program the transmitter
after repeated attempts, refer to ªRolling Code
Programmingº later in this section or contact the
Universal Transmitter manufacturer at 1
-800-355-3515.
Page 112 of 362

yellowblue
2-60
Be sure to keep the original hand-held transmitter
in case you need to erase and reprogram the
Universal Transmitter.
Note to Canadian Owners: During programming, the
hand
-held transmitter may automatically stop
transmitting after one or two seconds. In this case, you
should press and re
-press the button on the hand-held
transmitter every two seconds without ever releasing the
button on the Universal Transmitter. Release both
buttons when the indicator light on the Universal
Transmitter begins to flash rapidly.
Operating the Universal Transmitter
Press and release the appropriate button on the Universal
Transmitter. The indicator light comes on while the
signal is being transmitted.
The Universal Transmitter is disabled when the valet
lock switch inside the glove box is activated. For more
information, see ªValet Lockº in the Index.
If the hand
-held transmitter appears to program the
Universal Transmitter but does not open your garage
door, and if the garage door opener was manufactured
after 1996, the garage door opener may have a ªrolling
codeº system. A rolling code system changes the code
of the garage door opener every time you open or close
the garage door.To determine if you have this system, press the button
on the Universal Transmitter that you have programmed
already. If the indicator light on the Universal
Transmitter flashes rapidly for two seconds and then
turns solid, the garage door opener has a rolling code
system. In a rolling code system, the garage door motor
head unit must be trained to the Universal Transmitter.
ªRolling Codeº Programming (If Equipped)
If you have not previously programmed the hand-held
transmitter to the Universal Transmitter, see
ªProgramming the Universal Transmitterº listed
previously. If you have completed this programming
already, you now need to train the garage door opener
motor head unit to recognize the Universal Transmitter.
Refer to your garage door opener owner's manual for
the proper transmitter training procedure for your garage
door opener brand.
1. Find the training button on the garage door opener
motor head unit. The exact location and color of the
button may vary by garage door opener brand. If you
have difficulty finding the training button, refer to
your garage door opener owner's manual.
Page 113 of 362

yellowblue
2-61
2. Press the training button on the garage door opener
motor head unit.
Note: Following this step, you have 30 seconds to
start Step 3.
3. Return to the Universal Transmitter in your vehicle
and firmly press and release the Universal
Transmitter button you have already programmed for
two to three seconds. Press and release the button
again (you may need to do this step up to three
times) to make sure that the Universal Transmitter
has been trained to the garage door opener motor
head unit. Check that the training was successful.
The garage door opener should now recognize the
Universal Transmitter. You may either use the Universal
Transmitter or the hand
-held transmitter to open the
garage door.If after following these instructions, you still have
problems training the garage door opener, contact the
Universal Transmitter manufacturer at 1
-800-355-3515.
Erasing Channels
To erase all three programmed channels, hold down the
two outside buttons until the indicator light begins to
flash (after 20 seconds). Release both buttons.
Accessories
Accessories for the Universal Transmitter are available
from the manufacturer of the unit. If you would like
additional information, please call 1
-800-355-3515.
Page 115 of 362

yellowblue
2-63
The main components of the instrument panel are:
1. Air Outlets
2. Driver Information Center Control Buttons
3. Turn Signal/Multifunction Lever
4. Instrument Panel Cluster
5. Windshield Wiper/Washer Lever
6. Cruise Control Lever
7. Ignition Switch
8. Air Vent Control Dial
9. Hazard Warning Button
10. Radio
11. Lamp Controls
12. Hood Release13. Fuel Door Release
14. Trunk Release
15. HVAC Steering Wheel Controls
16. Horn
17. Audio Steering Wheel Controls
18. Heated Seat Controls
19. Traction Control Switch
20. Console Shift Lever
21. Convenience Storage/Optional Ashtray
22. Electronic Climate Controls
23. Glove Box
Page 139 of 362

yellowblue
2-87 Key in Recall (If Equipped)
Press the down arrow on the INFO button one or more
times until the KEY IN RECALL prompt appears on the
DIC display. To turn the feature on, press the ON/OFF
button until ON appears. The seat and mirror memory
settings that have been previously programmed will be
recalled when the key is inserted in the ignition. The
steering column will move when the key is turned to
ON. To turn the feature off, press the ON/OFF button
until OFF appears.
Auto Exit Seat (If Equipped)
Press the down arrow on the INFO button one or more
times until the AUTO EXIT SEAT prompt shows on the
DIC display. This feature will move the seat to the
driver's exit position when the key is turned out of ON
(away from START) and the driver's door is opened. To
turn this feature on, press the ON/OFF button until ON
appears on the DIC. To turn this feature off, press the
ON/OFF button until OFF shows.
Auto Exit Steering Wheel (If Equipped)
Press the down arrow on the INFO button one or more
times until the AUTO EXIT STRG WHEEL prompt
appears on the DIC display. This feature will move the
column to the driver's exit position when the key is
turned out of ON (away from START) and the driver's
door is opened.
Remote Confirmation
This personalization feature allows the driver to
program the parking lamps to flash or to remain off
when the lock or unlock buttons on the RKE transmitter
are pressed and the horn to sound when the lock button
on the RKE transmitter is pressed. Press the INFO
button one or more times until the FEATURE
PROGRAMMING prompt appears on the DIC display.
Press the ON/OFF button to enter FEATURE
PROGRAMMING. To exit, press the
INFO RESET button.
Note: This feature will not work if any door is open.
Lights Flash at Unlock
Press the down arrow on the INFO button one or more
times until the LIGHTS FLASH AT UNLOCK prompt
appears. To turn this feature on, press the ON/OFF
button until ON is displayed on the DIC. If all the doors
are closed, the parking lamps will flash twice when the
unlock button on the RKE transmitter is pressed. The
lamps will not flash if the manual parking lamps or
headlamps are active. To turn the feature off, press the
ON/OFF button until the OFF prompt appears.
Page 142 of 362

yellowblue
2-90 Curb View Assist Mirror Programming
(If Equipped)
Press the down arrow on the INFO button one or more
times until the MIRROR TO CURB IN REV prompts
appears on the DIC display. This feature will move the
passenger's outside rearview mirror to a curb view
position when the console shifter is placed in
REVERSE (R) and it will return the mirror to the last
known driving position when the console shifter is
moved out of REVERSE (R). To turn this feature on,
press the ON/OFF button until ON is displayed on the
DIC. To turn the feature off, press the ON/OFF button
until OFF is displayed. For more information, see ªCurb
View Assist Mirrorº in the Index.
Driver's Names Set/Recall (If Equipped)
After the FEATURE PROGRAMMING prompt is
displayed on the DIC and the ON/OFF button is pressed,
the prompts DRIVER NO 1 or DRIVER NO 2 will
appear. These prompts correspond to which RKE
transmitter button or memory recall button has been
pressed on the driver's door armrest. You may have your
name and a second driver's name displayed here,
replacing the prompts DRIVER NO 1 and DRIVER
NO 2. A dealership can program your vehicle to display
the names you want. The names will appear whenever
the key is turned to ON only if RKE transmitters 1 or 2
are used to enter the vehicle or buttons 1 or 2 on the
driver's door are pressed.
Page 154 of 362

yellowblue
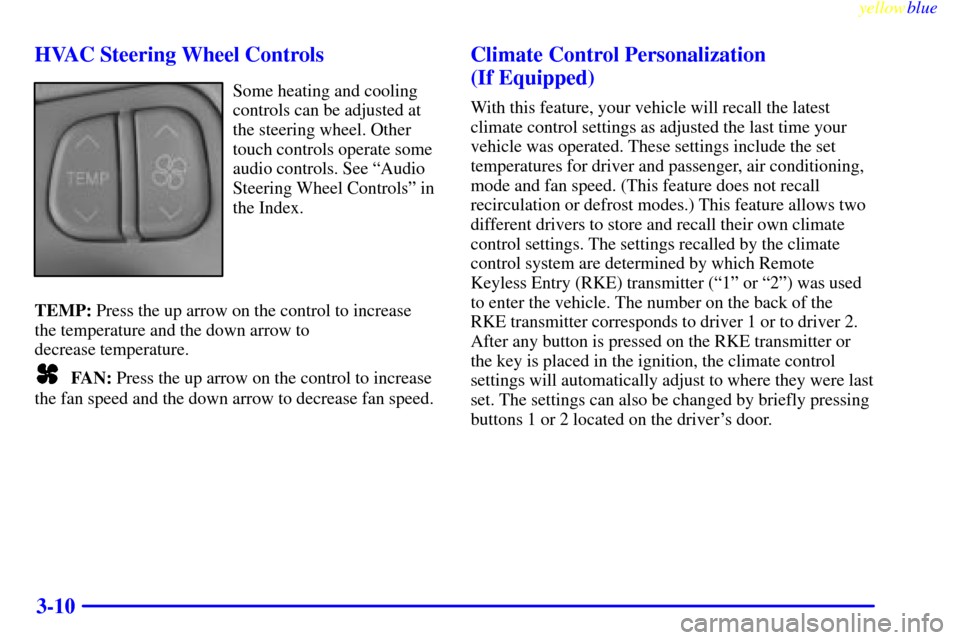
3-10 HVAC Steering Wheel Controls
Some heating and cooling
controls can be adjusted at
the steering wheel. Other
touch controls operate some
audio controls. See ªAudio
Steering Wheel Controlsº in
the Index.
TEMP: Press the up arrow on the control to increase
the temperature and the down arrow to
decrease temperature.
FAN: Press the up arrow on the control to increase
the fan speed and the down arrow to decrease fan speed.
Climate Control Personalization
(If Equipped)
With this feature, your vehicle will recall the latest
climate control settings as adjusted the last time your
vehicle was operated. These settings include the set
temperatures for driver and passenger, air conditioning,
mode and fan speed. (This feature does not recall
recirculation or defrost modes.) This feature allows two
different drivers to store and recall their own climate
control settings. The settings recalled by the climate
control system are determined by which Remote
Keyless Entry (RKE) transmitter (ª1º or ª2º) was used
to enter the vehicle. The number on the back of the
RKE transmitter corresponds to driver 1 or to driver 2.
After any button is pressed on the RKE transmitter or
the key is placed in the ignition, the climate control
settings will automatically adjust to where they were last
set. The settings can also be changed by briefly pressing
buttons 1 or 2 located on the driver's door.