1999 CADILLAC SEVILLE oil reset
[x] Cancel search: oil resetPage 130 of 362
yellowblue
2-78
Driver Information Center (DIC)
This display gives you the status of many of your
vehicle's systems. The DIC is also used to display driver
personalization features and warning/status messages.
DIC Controls and Displays
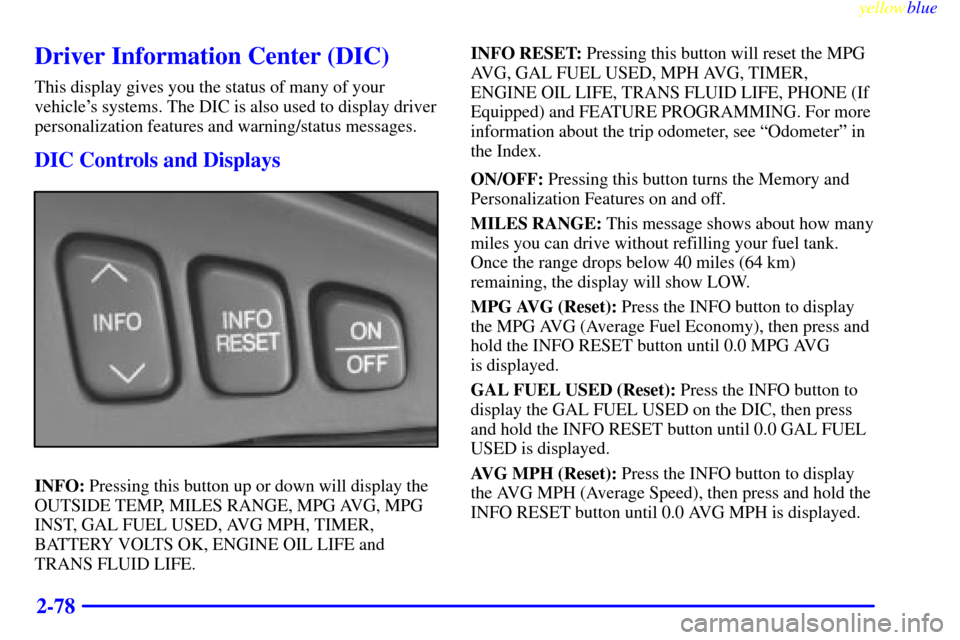
INFO: Pressing this button up or down will display the
OUTSIDE TEMP, MILES RANGE, MPG AVG, MPG
INST, GAL FUEL USED, AVG MPH, TIMER,
BATTERY VOLTS OK, ENGINE OIL LIFE and
TRANS FLUID LIFE.INFO RESET: Pressing this button will reset the MPG
AVG, GAL FUEL USED, MPH AVG, TIMER,
ENGINE OIL LIFE, TRANS FLUID LIFE, PHONE (If
Equipped) and FEATURE PROGRAMMING. For more
information about the trip odometer, see ªOdometerº in
the Index.
ON/OFF: Pressing this button turns the Memory and
Personalization Features on and off.
MILES RANGE: This message shows about how many
miles you can drive without refilling your fuel tank.
Once the range drops below 40 miles (64 km)
remaining, the display will show LOW.
MPG AVG (Reset): Press the INFO button to display
the MPG AVG (Average Fuel Economy), then press and
hold the INFO RESET button until 0.0 MPG AVG
is displayed.
GAL FUEL USED (Reset): Press the INFO button to
display the GAL FUEL USED on the DIC, then press
and hold the INFO RESET button until 0.0 GAL FUEL
USED is displayed.
AVG MPH (Reset): Press the INFO button to display
the AVG MPH (Average Speed), then press and hold the
INFO RESET button until 0.0 AVG MPH is displayed.
Page 131 of 362
yellowblue
2-79
TIMER: This feature is like a stopwatch, in that you can
clock the time it takes to get from one point to another.
To operate, press the INFO button to display TIMER.
Each of the fields for the hours, minutes and seconds are
two numeric digits.
Once TIMER 00:00:00 is displayed, press the ON/OFF
button to start the timing feature. Press the ON/OFF button
again to stop it. If you will be starting and stopping your
vehicle, during a trip for instance, the TIMER feature will
automatically start timing where it left off when you last
stopped. To reset it, press and hold the INFO RESET
button until the display reads TIMER 00:00:00. Press the
INFO button to exit from the TIMER function.
ENGINE OIL LIFE (Reset): Press the INFO button to
display ENGINE OIL LIFE, then press and hold the
INFO RESET button until 100% ENGINE OIL LIFE is
displayed. (This only needs to be reset after you have
had the oil changed.)
TRANSMISSION FLUID LIFE MONITOR: Under
normal conditions, the rate of deterioration of the
transmission fluid is slow. See the Maintenance
Schedule booklet for proper fluid and change intervals.
Press the INFO button to display TRANS FLUID LEFT,
then press and hold the INFO RESET button until 100%
TRANS FLUID LEFT is displayed. (This only needs to
be reset after you have had the fluid changed.)ENG/MET: Press this button to display information in
the English (miles) or metric (kilometers) system.
DIC Messages
These messages will appear if there is a problem sensed
in one of your vehicle's systems. Vehicles that are first
sold in Canada will have a number after each message.
This number helps to identify the message, which is
only displayed in English.
BATTERY NOT CHARGING
- 7: This message will
appear if the battery is not being charged. Have the
electrical system checked by your dealership at your
earliest convenience.
BATTERY SAVER ACTIVE
- 27: This message is
displayed when the vehicle has detected that the battery
voltage is dropping beyond a reasonable point. The
battery saver system will start reducing certain features
of the vehicle that you may not be able to notice. At the
point that features are disabled, this message is
displayed. It means that the vehicle is trying to save the
charge in the battery. Turn off unnecessary accessories
to allow the battery to recharge.
Page 132 of 362

yellowblue
2-80
BATTERY VOLTAGE HIGH - 8: This message
shows that the electrical charging system is
overcharging (more than 16 volts). To avoid being
stranded, have the electrical system checked by your
dealership. You can reduce the charging overload by
using the accessories. Turn on the lamps and radio, set
the climate control on AUTO and the fan speed on HI,
and turn the rear window defogger on. You can monitor
battery voltage on the DIC by pressing the INFO button.
The normal range is 11.5 to 15.5 volts when the engine
is running.
BATTERY VOLTAGE LOW
- 6: This message will
appear when the electrical system is charging less than 9
volts or if the battery has been drained. If this message
appears immediately after starting, it is possible that the
generator can still recharge the battery. The battery should
recharge while driving but may take a few hours to do so.
Consider using an auxiliary charger (be sure to follow the
manufacturer's instructions) to boost the battery after
returning home or to a final destination. If this message
appears while driving or after starting your vehicle and
stays on, have it checked immediately to determine the
cause of this problem. To help the generator recharge the
battery quickly, you can reduce the load on the electrical
system by turning off the accessories. You can monitor
battery voltage on the DIC by pressing the INFO button.
The normal range is 11.5 to 15.5 volts.CHANGE BRAKE PADS
- 125: This message is used
to notify you that the brake pads may have worn down.
A sensor is connected to the brake pads and is triggered
when they wear to a certain point. Have the front and
rear brakes serviced by your dealer as soon as possible.
CHANGE ENGINE OIL
- 82: This means that the life
of the engine oil has expired and it should be changed
within 200 miles. See ªEngine Oilº and ªFilter
Recommendationsº in the Maintenance Schedule
booklet. After an oil change, the Oil Life Indicator must
be reset. See ªOil Life Indicator, How to Resetº in
the Index.
CHANGE TRANS FLUID
- 47: This message will
appear when it is time to replace the transaxle fluid. See
the Maintenance Schedule booklet for the proper fluid
and change intervals.
CHECK BRAKE FLUID
- 37: This message will
display if the ignition is in ON to inform the driver that
the brake fluid level is low. Have the brake system
serviced by a technician as soon as possible. See ªBrake
System Warning Lightº in the Index.
CHECK COOLANT LEVEL
- 2: This message will
appear when there is a low level of engine coolant. Have
the cooling system serviced by a technician as soon
as possible.
Page 144 of 362

yellowblue
2-92 Oil Life Indicator
This feature lets you know when to change the engine
oil. It's based on the engine oil temperatures and your
driving patterns. To see the display, press the INFO
button several times until ENGINE OIL LIFE appears.
If you see 99% ENGINE OIL LIFE, 99 percent of your
current oil life remains.
The DIC may display a CHANGE ENGINE OIL
message. Always keep a written record of the mileage
and date when you changed your oil. For more
information, see the Maintenance Schedule booklet. If
you see CHANGE ENGINE OIL, it means the oil life is
gone and you should change the oil right away. The
system doesn't check how much oil you have, so you'll
still have to check for that. To see how, see ªEngine Oilº
in the Index.The system should indicate changing the oil between
3,000 miles (5 000 km) and 7,500 miles (12 500 km).
It may indicate changing the oil before 3,000 miles
(5 000 km) depending on your driving habits. If the
vehicle has been driven 7,500 miles (12 500 km), it will
indicate to change the oil. If you drive in a dusty area,
you should change your oil every 3,000 miles
(5 000 km) or three months (whichever comes first)
unless the display indicates changing it sooner. See
ªEngine Oil, When to Changeº in the Index.
When the oil is changed, you'll need to reset the system.
See ªOil Life Indicator, How to Resetº in the Index.
Page 178 of 362
yellowblue
3-34
When using a scrubbing action, non-abrasive cleaning
cassette, it is normal for the cassette to eject because
your unit is equipped with a cut tape detection feature
and a cleaning cassette may appear as a broken tape.
To prevent the cleaning cassette from being ejected,
use the following steps.
1. Turn the ignition to ON or ACC.
2. Turn the radio off.
3. Press and hold the SOURCE button for two seconds.
The tape symbol on the display will flash
three times.
4. Turn the radio on and insert the scrubbing action
cleaning cassette.
5. Eject the cleaning cassette after the manufacturer's
recommended cleaning time.
When the cleaning cassette has been ejected, the cut tape
detection feature is active again.
You may also choose a non
-scrubbing action, wet-type
cleaner which uses a cassette with a fabric belt to clean
the tape head. This type of cleaning cassette will not
eject on its own. A non
-scrubbing action cleaner may
not clean as thoroughly as the scrubbing type cleaner.The use of a non
-scrubbing action, dry-type cleaning
cassette is not recommended.
After you clean the player, press and hold the eject
button for three seconds to reset the CLEAN TAPE
indicator. The radio will display CLEAN TAPE MSG
CLEARED to show the indicator was reset.
Cassettes are subject to wear and the sound quality may
degrade over time. Always make sure the cassette tape
is in good condition before you have your tape
player serviced.
Care of Your Compact Discs
Handle discs carefully. Store them in their original cases
or other protective cases and away from direct sunlight
and dust. If the surface of a disc is soiled, dampen a
clean, soft cloth in a mild, neutral detergent solution and
clean it, wiping from the center to the edge.
Be sure never to touch the signal surface when handling
discs. Pick up discs by grasping the outer edges or the
edge of the hole and the outer edge.
Page 188 of 362
yellowblue
3-44
The use of a non-scrubbing action, dry-type cleaning
cassette is not recommended.
After you clean the player, press and hold the eject
button for three seconds to reset the CLEAN TAPE
indicator. The radio will display CLEAN TAPE MSG
CLEARED to show the indicator was reset.
Cassettes are subject to wear and the sound quality may
degrade over time. Always make sure the cassette tape
is in good condition before you have your tape
player serviced.
Care of Your Compact Discs
Handle discs carefully. Store them in their original cases
or other protective cases and away from direct sunlight
and dust. If the surface of a disc is soiled, dampen a
clean, soft cloth in a mild, neutral detergent solution and
clean it, wiping from the center to the edge.
Be sure never to touch the signal surface when handling
discs. Pick up discs by grasping the outer edges or the
edge of the hole and the outer edge.
Care of Your Compact Disc Player
The use of CD lens cleaner discs is not advised, due to
the risk of contaminating the lens of the CD optics with
lubricants internal to the CD mechanism.
Diversity Antenna System
Your AM-FM antennas are located in the front windshield
and rear window. Be sure that the inside surfaces of the front
windshield and rear window are not scratched and that the
lines on the glass are not damaged. If the inside surfaces are
damaged, they could interfere with radio reception.
NOTICE:
Do not try to clear frost or other material from
the inside of the rear window with a razor blade
or anything else that is sharp. This may damage
the rear defogger grid and affect your radio's
ability to pick up stations clearly. The repairs
wouldn't be covered by your warranty.
If, when you turn on your rear window defogger, you
hear static on your radio station, it could mean that a
defogger grid line has been damaged. If this is true, the
grid line must be repaired.
If you choose to add an aftermarket cellular telephone to
your vehicle, and the antenna needs to be attached to the
glass, be sure that you do not damage the grid lines for
the AM
-FM antennas or place the cellular telephone
antenna over the grid lines.
Page 241 of 362
yellowblue
5-9 Overheated Engine Protection
Operating Mode
Should an overheated engine condition exist and the
message ENGINE OVERHEATED, STOP ENGINE is
displayed, an overheat protection mode which alternates
firing groups of cylinders helps prevent engine damage.
In this mode, you will notice a loss in power and engine
performance. This operating mode allows your vehicle
to be driven to a safe place in an emergency; you may
drive up to 50 miles (80 km). Towing a trailer in the
overheat protection mode should be avoided.
NOTICE:
After driving in the overheated engine protection
operating mode, to avoid engine damage, allow
the engine to cool before attempting any repair.
The engine oil will be severely degraded. Repair
the cause of coolant loss, change the oil and reset
the oil life indicator. See ªEngine Oilº in
the Index.
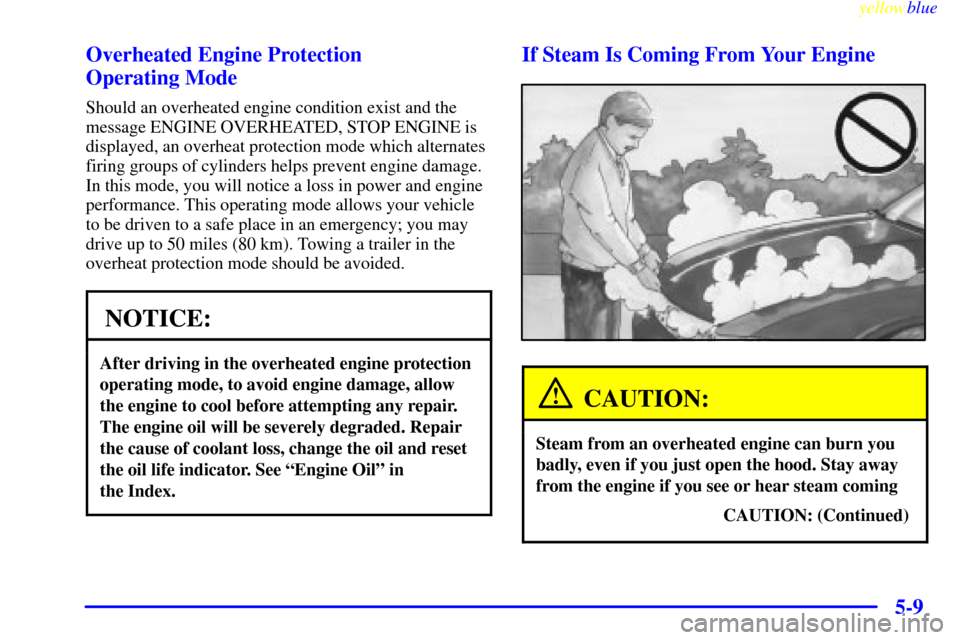
If Steam Is Coming From Your Engine
CAUTION:
Steam from an overheated engine can burn you
badly, even if you just open the hood. Stay away
from the engine if you see or hear steam coming
CAUTION: (Continued)
Page 279 of 362
yellowblue
6-15
The system won't detect dust in the oil. So, if you
drive in a dusty area, be sure to change your oil every
3,000 miles (5 000 km) or sooner. Remember to reset
the Oil Life Indicator whenever the oil is changed.
How to Reset the Oil Life Indicator
After the oil has been changed, display the ENGINE
OIL LIFE message by pressing the INFO button. Then
press and hold the INFO RESET button until the display
shows 100% ENGINE OIL LIFE. This resets the oil life
index. The message will remain off until the next oil
change is needed. The percentage of oil life remaining
may be checked at any time by pressing the INFO
button several times until the ENGINE OIL LIFE
message appears. For more information on the Oil Life
feature, see ªOil Life Indicatorº in the Index.What to Do with Used Oil
Did you know that used engine oil contains certain
elements that may be unhealthy for your skin and could
even cause cancer? Don't let used oil stay on your skin
for very long. Clean your skin and nails with soap and
water, or a good hand cleaner. Wash or properly throw
away clothing or rags containing used engine oil. (See
the manufacturer's warnings about the use and disposal
of oil products.)
Used oil can be a real threat to the environment. If you
change your own oil, be sure to drain all free
-flowing oil
from the filter before disposal. Don't ever dispose of oil
by putting it in the trash, pouring it on the ground, into
sewers, or into streams or bodies of water. Instead,
recycle it by taking it to a place that collects used oil. If
you have a problem properly disposing of your used oil,
ask your dealer, a service station or a local recycling
center for help.